Irresistible Homemade Orange Creamsicle Ice Cream Delight

The sun dipped low in the evening sky, casting a warm, golden glow as laughter filled the air, and the sweet, citrusy scent of fresh oranges wafted from my kitchen.
This comforting aroma served as a delightful reminder that summer had truly arrived, and with it, the perfect excuse to indulge in a timeless, refreshing treat.
Why You Will Love This Recipe
- Nostalgic Flavor: Close your eyes with every spoonful and be instantly transported back to carefree childhood summers, reliving cherished memories of chasing after ice cream trucks.
- Simple Preparation: Whether you opt for the traditional churned method or the convenient no-churn approach, this recipe offers an accessible way to satisfy your deepest ice cream cravings with ease.
- Natural Ingredients: Enjoy the unparalleled peace of mind that comes from using fresh, vibrant oranges and omitting any artificial flavors, making it a truly wholesome and delightful homemade creation.
- Versatile Customization: Feel empowered to experiment by mixing in delightful additions like rich chocolate chips or vibrant fruit chunks, allowing you to tailor each batch to perfectly suit individual preferences.
- Guaranteed Crowd-Pleaser: This incredibly vibrant and delicious dessert is guaranteed to impress at any gathering, leaving your guests not only delighted but also wonderfully satisfied.
Ingredients You Need
Crafting this homemade Orange Creamsicle Ice Cream begins with selecting high-quality ingredients that will come together to create a symphony of flavor and texture. The secret to its incredible creaminess lies in the richness of the dairy, while the bright, zesty character comes from the freshest oranges you can find.
Homemade Orange Creamsicle Ice Cream
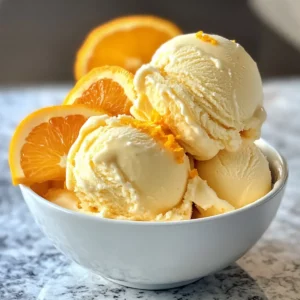
Delight in the nostalgic taste of homemade Orange Creamsicle Ice Cream, perfect for summer with fresh oranges and rich creaminess. This recipe offers both churned and no-churn options, using natural ingredients for a guilt-free indulgence.
- 2 cups Heavy Whipping Cream
- 1 cup Whole Milk
- 1 cup Fresh Orange Juice
- 3/4 cup Sugar
- 1 tablespoon Vanilla Extract
- 1/4 teaspoon Salt
- 1 teaspoon Orange Extract (optional)
- 1 tablespoon Fresh Orange Zest (optional)
- 1 drop Food Coloring (optional)
- 1In a large mixing bowl, combine heavy whipping cream, sugar, fresh orange juice, whole milk, orange extract, vanilla extract, and a pinch of salt. Whisk until smooth, about 2-3 minutes.
- 2If desired, add food coloring and stir until evenly distributed.
- 3Pour the mixture into your ice cream maker and churn for about 20-25 minutes or until it thickens to soft-serve consistency.
- 4Transfer churned ice cream to an airtight container, smoothing the top. Cover tightly and freeze for 4-6 hours.
- 5Allow the ice cream to sit at room temperature for 5-10 minutes before serving for easy scooping.
Keywords: ice cream, orange, creamsicle, summer, dessert, homemade, no-churn, vegetarian, custard
The specific quantities for each ingredient are readily available in the recipe card, ensuring you have everything precisely measured for perfect results every time.
Variations
For those seeking a dairy-free delight, a fantastic alternative involves substituting the heavy cream and whole milk with rich coconut milk and full-fat coconut cream. This swap not only caters to dietary needs but also introduces a subtle, tropical undertone that beautifully complements the orange flavor, resulting in a lusciously creamy, dairy-free indulgence perfect for everyone to enjoy. You can find more delicious dessert ideas on our site.
To embrace a lower-sugar lifestyle without sacrificing flavor, consider replacing granulated sugar with natural liquid sweeteners like pure honey or agave nectar. These alternatives lend a unique depth and a slightly different sweetness profile to the ice cream, making it a lighter yet equally satisfying treat. The subtle notes from honey or agave can even enhance the overall complexity of the orange essence.
If you’re looking to elevate the citrus experience even further, consider a delightful fruit fusion by adding finely diced berries, sweet peaches, or chunks of tropical mango directly into the mixture just before the final churning stage. This addition creates pockets of fruity goodness, offering delightful bursts of contrasting flavor and texture with every single bite. The interplay of creamy orange and sweet fruit creates a wonderfully refreshing sensation.
How to Prepare Homemade Orange Creamsicle Ice Cream
Step 1: Whisk the Base
Begin by gathering a large, clean mixing bowl. Into this, you will carefully pour the heavy whipping cream, ensuring a rich and decadent foundation for your ice cream. Next, add the granulated sugar, which will provide the sweetness that perfectly balances the tartness of the oranges.
Following that, pour in the freshly squeezed orange juice, which is the star of this flavor profile, bringing that unmistakable bright and zesty essence. Incorporate the whole milk to further enhance the creamy texture, and then add the vanilla extract for its comforting aromatic notes. Don’t forget a crucial pinch of salt; it plays a vital role in balancing the sweetness and deepening all the other flavors present.
Using a whisk, vigorously mix all these components together until the sugar is completely dissolved and the entire mixture achieves a smooth, homogeneous consistency. This thorough whisking should take about two to three minutes. The resulting liquid should be noticeably creamy and slightly thickened, displaying a beautiful, inviting orange hue that hints at the delightful flavor to come.
Step 2: Add Food Coloring (Optional)
For those who wish to amplify the visual allure of their homemade Orange Creamsicle Ice Cream, this step offers the perfect opportunity to introduce a pop of vibrant color. If you desire a more intense and playful appearance, now is the opportune moment to carefully add a few drops of your preferred food coloring. The goal is to achieve that iconic, cheerful orange shade that immediately evokes nostalgic summer memories.
Gently stir the coloring into the creamy base, ensuring that it is thoroughly blended until the color is uniformly distributed throughout the entire mixture. You can add more drops incrementally until you achieve the exact shade of orange that appeals most to you. The mixture should consistently maintain a bright, appealing orange color, powerfully reminiscent of the classic creamsicle you remember, making it an especially fun and festive dessert for any summer gathering or celebration. This visual enhancement truly elevates the entire experience.
If you prefer a more natural aesthetic, you can simply omit this step altogether. The ice cream will still possess a beautiful, natural orange tint derived from the fresh orange juice, offering a more subdued yet equally appealing visual presentation. The choice is yours to make the ice cream as visually striking or as naturally understated as you desire. Either way, the flavor will be absolutely delightful.
Step 3: Churn the Ice Cream
Once your vibrant orange mixture is perfectly blended and beautifully colored, it’s time to introduce it to your trusty ice cream maker. Carefully pour the entire combined mixture into the frozen bowl of your ice cream maker, ensuring you follow the specific instructions provided by the manufacturer for your particular model. Different machines have slightly varying operational procedures, so adherence to those guidelines is key for optimal results and to ensure the machine operates efficiently and safely.
Allow the ice cream maker to work its magic as it churns the mixture. This process typically takes about 20 to 25 minutes, depending on the power and efficiency of your machine, and the ambient temperature. During this churning phase, the mixture will gradually thicken and increase in volume as air is incorporated, transforming from a liquid into a wonderfully soft-serve consistency. You will observe the mixture becoming progressively more fluffy and airy, visually doubling in volume, which is a clear indicator that it is transforming into the delightful ice cream you’ve been anticipating and is ready for the next crucial stage of the preparation process.
The texture at this point should be similar to that of a thick, soft-serve ice cream, easily scoopable but not yet firm enough to hold its shape perfectly. This consistency is ideal because it means the ice cream has been properly aerated and has reached the perfect point for freezing to achieve its final, delightful texture. You can often see the distinct swirls from the churning paddles, a sign that air is being evenly distributed, contributing to the final smooth and creamy mouthfeel that is so characteristic of well-made ice cream.
Step 4: Freeze for Firmness
After the ice cream has reached that ideal soft-serve consistency in the churner, it’s time to move it to its final resting place for solidification. Carefully transfer your beautifully churned Orange Creamsicle Ice Cream from the ice cream maker into a freezer-safe, airtight container. A loaf pan or a shallow, wide container works exceptionally well for this purpose, allowing for even freezing.
Once the ice cream is in the container, use a spatula or the back of a spoon to smooth the top surface. This creates an even layer, which aids in consistent freezing and makes for a more aesthetically pleasing final product. The smoother the surface, the easier it will be to scoop later on, and it also contributes to a more uniform texture throughout the entire batch.
To further ensure the best possible texture and prevent the dreaded formation of ice crystals, which can compromise the creaminess, cover the surface of the ice cream directly with a layer of plastic wrap or parchment paper before sealing the container lid. Press the wrap down gently to eliminate any air pockets. Then, place the tightly covered container into the freezer. Allow it to freeze undisturbed for a minimum of 4 to 6 hours, or until the ice cream has firmed up considerably and is ready to be scooped into delightful portions. Patience here is key to achieving that perfect, scoopable consistency.
Step 5: Soften and Serve
The moment of truth has arrived! Once your homemade Orange Creamsicle Ice Cream has achieved its desired firmness from its time in the freezer, it’s ready to be enjoyed. However, directly scooping rock-hard ice cream can be a challenge and can sometimes lead to a less enjoyable texture.
To ensure the easiest scooping experience and to allow the flavors to truly shine, take the container out of the freezer and let it sit at room temperature for approximately 5 to 10 minutes before you plan to serve it. This brief tempering period will slightly soften the ice cream just enough to make scooping a breeze, without letting it melt into a soupy mess. You’ll notice the texture becoming wonderfully creamy and yielding as it warms slightly.
As you dig in with your ice cream scoop, you’ll appreciate the perfectly creamy texture that melts lusciously in your mouth, capturing that quintessentially nostalgic summer flavor in every delightful bite. Serve your glorious homemade Orange Creamsicle Ice Cream in chilled bowls, waffle cones, or even in glasses for an elegant presentation. For an extra touch of visual appeal and flavor, consider garnishing each serving with a fresh slice of orange or a sprig of mint, adding a final flourish to this delightful homemade treat that transports you straight back to those carefree summer days.
Pro Tips for Homemade Orange Creamsicle Ice Cream
- Perfect Creaminess: Always opt for heavy whipping cream; its higher fat content is crucial for achieving that signature rich, decadent, and exceptionally creamy texture that defines a truly superb ice cream. Using lighter creams will inevitably result in a less luscious and satisfying final product, lacking the desired smoothness.
- Zesty Flavor Blast: Don’t underestimate the power of fresh orange zest! Grating the zest from your oranges and incorporating it into the mixture is a simple yet incredibly effective technique that dramatically boosts the natural, bright orange flavor without relying on any artificial enhancers, providing a truly authentic citrus punch.
- Avoid Ice Crystals: If you’re making the no-churn version, whipping the cream to stiff peaks *before* folding it into the other ingredients is absolutely paramount. This step incorporates air and creates a stable base, which is vital for preventing the formation of unwelcome ice crystals and ensuring a consistently smooth, velvety ice cream texture.
- Chill Out: Before you serve your magnificent creation, remember to let the ice cream soften slightly at room temperature for about 5-10 minutes. This crucial step not only makes it significantly easier to scoop but also allows the flavors to meld and bloom, enhancing the overall taste experience and improving the perceived texture.
- Seal It Right: Proper storage is key to maintaining freshness and texture. Always store your homemade ice cream in a truly airtight container. For an extra layer of protection against freezer burn, which can degrade the quality over time, consider pressing a piece of plastic wrap or aluminum foil directly onto the surface of the ice cream before sealing the lid.
Serving Suggestions for Homemade Orange Creamsicle Ice Cream
Decoration
Elevate the visual appeal of your Orange Creamsicle Ice Cream with simple yet elegant garnishes that enhance its summery charm. A thin slice of fresh orange, perhaps with a small slit to perch it on the rim of the bowl or cone, adds a bright pop of color and a hint of extra citrus aroma. Consider adding a delicate sprig of fresh mint for a contrasting green hue and a refreshing scent that complements the orange beautifully.
For a touch of indulgence, a light drizzle of white chocolate ganache or a scattering of toasted coconut flakes can add both visual interest and a complementary flavor profile. If you’re feeling particularly festive, small, edible orange-colored sprinkles or even a dusting of powdered sugar can make each serving look like a miniature work of art, perfect for special occasions.
The goal is to enhance the existing appeal of the ice cream without overwhelming its delightful, classic flavor. Each garnish should ideally add a small touch of texture, color, or aroma that harmonizes with the creamy, citrusy notes of the Orange Creamsicle Ice Cream. Experiment with what you have on hand to find your favorite decorative finishing touch.
Side Dishes
While Orange Creamsicle Ice Cream is a stellar dessert on its own, pairing it with certain complementary side dishes can create truly memorable culinary experiences. Light and airy waffles, with their satisfying crispness, offer a wonderful textural contrast to the creamy ice cream, especially when topped with fresh berries. Consider serving alongside German pancakes, offering a slightly different yet equally comforting baked element that pairs well with the chilled sweetness.
Shortcake biscuits, with their buttery richness and tender crumb, provide a classic and utterly delicious foundation for scooping generous portions of the orange-infused ice cream. Their gentle sweetness doesn’t compete with the ice cream, allowing both elements to shine. Another delightful option is a vibrant frozen fruit salad; a medley of seasonal berries, melon, and perhaps even kiwi slices offers a refreshing, healthy counterpoint to the creamy dessert.
For those who enjoy a bolder flavor combination, consider serving scoops alongside perfectly baked funfetti cookies or even a rich, chocolatey treat. The cool mint from mint chocolate chip cookies, for instance, creates a surprisingly refreshing and complex pairing with the orange and cream. The key is to choose side dishes that either offer a pleasing textural contrast or a complementary flavor that enhances, rather than overpowers, the star of the show.
Creative Serving Ideas
Beyond the traditional bowl or cone, think outside the box for truly unique serving presentations that will impress your guests. Imagine serving individual portions in hollowed-out orange halves, creating a visually stunning and themed presentation that ties directly back to the primary flavor. You can also layer the ice cream with crumbled shortbread cookies or granola in parfait glasses for a delightful textural and visual medley.
For a fun twist, consider making Orange Creamsicle Ice Cream sandwiches. Simply spread a generous scoop between two soft, homemade sugar cookies or even light vanilla wafers. This transforms the classic treat into a portable, handheld delight that’s perfect for picnics or outdoor gatherings. Another innovative idea is to use it as a filling for homemade éclairs or cream puffs, offering a surprising and refreshing alternative to traditional pastry creams.
You could also blend the slightly softened ice cream with a splash of milk or orange juice to create a luxurious, thick milkshake or a vibrant smoothie. This versatile frozen dessert can be enjoyed in countless ways, making it a perfect addition to any drink menu or as a star of any dessert spread. The possibilities are as endless as your imagination.
Preparation & Storage
Storing Leftovers
Should you be fortunate enough to have any Orange Creamsicle Ice Cream remaining, proper storage is crucial for maintaining its delightful texture and flavor. The best practice is to store any leftovers in an airtight container designed for freezer use, ensuring that minimal air can penetrate the ice cream itself. This is the most effective method for preventing the dreaded formation of ice crystals.
For an added layer of protection against freezer burn and to preserve the quality of the ice cream for as long as possible, consider pressing a piece of plastic wrap or parchment paper directly onto the surface of the ice cream before sealing the container lid. This creates a barrier that significantly reduces exposure to the dry freezer air. While homemade ice cream is always best enjoyed fresh, properly stored leftovers can remain delicious for a reasonable period.
Ideally, consume homemade ice cream within two weeks of its initial preparation for the most optimal flavor and texture. Beyond this timeframe, while still safe to eat, you might notice a slight decline in its creaminess and a more pronounced ice crystal formation. Always aim to enjoy this summery treat at its peak for the ultimate experience. You can find more tips on storing food on our website.
Freezing
The process of freezing your homemade Orange Creamsicle Ice Cream is paramount to achieving that perfect, scoopable consistency. After churning, transfer the ice cream to a freezer-safe container, ensuring it is well-sealed to minimize air exposure. As mentioned, pressing plastic wrap directly onto the surface before sealing the lid is a highly recommended step to prevent freezer burn and the development of ice crystals, which can alter the smooth texture.
Allow ample time for the ice cream to freeze thoroughly. A minimum of 4 to 6 hours is generally recommended for it to reach a firm, scoopable state. However, for the firmest texture, especially if you plan to scoop it directly from the container, freezing it overnight is often ideal. Ensure your freezer is set to a consistent, cold temperature (around 0°F or -18°C) to facilitate proper and efficient freezing.
It’s important to note that homemade ice cream, due to its natural ingredients and often higher cream content, might freeze harder than commercially produced varieties that contain stabilizers. This is why the short softening period before serving is so crucial. Proper freezing techniques contribute significantly to the overall quality and enjoyment of your homemade treat, ensuring each scoop is as delightful as the first.
Reheating
When it comes to homemade ice cream like this Orange Creamsicle delight, the term “reheating” isn’t quite accurate; it’s more about gentle softening. If your ice cream has frozen too hard, perhaps because it was in the freezer for an extended period or the freezer temperature is particularly low, the goal is to bring it back to a perfectly scoopable consistency without melting it.
The most effective method is to simply let the container sit at room temperature for a short duration. A window of 5 to 10 minutes is usually sufficient. This allows the frozen components to loosen up just enough, making it easy to insert your ice cream scoop and serve perfect portions. Avoid the temptation to place it in a microwave or under warm water, as this will cause it to melt too rapidly, ruining the texture.
Observe the ice cream’s texture; you’re looking for it to yield slightly to the pressure of a spoon or scoop. The exact time will vary depending on the ambient temperature of your kitchen and how hard the ice cream is frozen. This simple tempering process ensures that every serving is effortlessly scoopable and enjoys its intended creamy mouthfeel. This gentle approach preserves the integrity of the ice cream.
Frequently Asked Questions
-
What type of oranges should I use for the best flavor in my Orange Creamsicle Ice Cream?
For the most vibrant, refreshing, and authentic orange flavor that truly captures the essence of a creamsicle, it is highly recommended to use sweet, juicy navel oranges. These varieties are known for their excellent juice content and a pleasant, balanced sweetness that doesn’t overwhelm the other components of the ice cream. When selecting your oranges, opt for ones that feel heavy for their size, indicating they are full of juice, and have smooth, unblemished skin. Avoid using oranges that are overly ripe, as they can sometimes develop a slightly bitter taste that might negatively impact the final flavor of your ice cream. Similarly, steer clear of any oranges that show signs of bruising or spoilage, as these undesirable characteristics can easily transfer to the finished product, compromising its delightful taste and overall quality. By choosing the right oranges, you lay the foundation for a truly exceptional and delicious homemade treat.
-
How should I store my homemade Orange Creamsicle Ice Cream to maintain its quality and texture?
To ensure your delicious homemade Orange Creamsicle Ice Cream retains its delightful creaminess and prevents the undesirable formation of ice crystals, proper storage is absolutely essential. The most effective method involves transferring any leftover ice cream into an airtight container specifically designed for freezer use. Before sealing the container, it is highly beneficial to press a piece of plastic wrap directly onto the surface of the ice cream. This acts as a protective barrier, minimizing its exposure to the dry air within the freezer, which is the primary culprit behind freezer burn. This simple step significantly helps to preserve the smooth texture and vibrant flavor. While homemade ice cream is at its absolute best when consumed within two weeks of preparation, this careful storage method will help maintain its quality for up to a month, allowing you to enjoy its summery bliss over a longer period.
-
Can I freeze any leftover Orange Creamsicle Ice Cream, and if so, how should I do it to prevent freezer burn?
Absolutely, you can freeze any leftover Orange Creamsicle Ice Cream! Freezing is the best way to preserve it for future enjoyment. To effectively prevent freezer burn, which can lead to an unpleasant icy texture and diminished flavor, take a few preventative measures. First, ensure you are using a high-quality, freezer-safe container with a tightly fitting lid to minimize air exposure. Once the ice cream is transferred into this container, press a sheet of plastic wrap directly onto the surface of the ice cream. This creates a seal that directly contacts the ice cream, preventing ice crystals from forming on the exposed surface. After applying the plastic wrap, secure the lid firmly. Properly stored this way, your homemade Orange Creamsicle Ice Cream should remain delicious and maintain a desirable texture for approximately one month, allowing you to savor this delightful treat whenever the craving strikes.
-
Why does my homemade ice cream often develop ice crystals, and how can I prevent this issue with my Orange Creamsicle Ice Cream?
The formation of ice crystals in homemade ice cream is a common challenge, typically stemming from exposure to air or inconsistent freezing temperatures. This leads to the growth of larger ice crystals, which compromise the smooth, creamy texture. To combat this, ensure your ice cream is thoroughly churned during preparation, as this incorporates air and helps break up initial ice formation. Immediately after churning, transfer the ice cream to a freezer-safe container. Crucially, press a piece of plastic wrap directly onto the surface of the ice cream before sealing the lid; this barrier significantly reduces air contact and moisture evaporation. If you are using the no-churn method, whipping the heavy cream to stiff peaks before folding it into the base is vital, as the incorporated air helps create a stable structure that resists ice crystal formation, leading to a much smoother final product.
-
Is this Orange Creamsicle Ice Cream recipe safe for people with dairy allergies or lactose intolerance?
This particular recipe for Orange Creamsicle Ice Cream, as written, does contain dairy products, specifically heavy whipping cream and whole milk. Therefore, it is not suitable for individuals with dairy allergies or lactose intolerance. However, this does not mean you cannot enjoy a creamsicle-inspired treat! You can successfully adapt this recipe by making simple substitutions. For the heavy cream, opt for full-fat coconut cream, which provides a similar richness and texture. For the whole milk, use a dairy-free alternative such as almond milk, soy milk, or oat milk. Ensure that any other ingredients, like sugar and flavor extracts, are also free from allergens that might be a concern for your specific dietary needs. With these adjustments, you can create a delicious dairy-free version of this classic flavor.
-
Can I successfully make this Orange Creamsicle Ice Cream without using an ice cream maker?
Absolutely! You can achieve a wonderfully creamy Orange Creamsicle Ice Cream without the need for a dedicated ice cream maker by employing the no-churn method. Begin by blending your ice cream base ingredients thoroughly. Then, pour this mixture into ice cube trays and freeze them overnight until completely solid. Once frozen, break the ice cubes into smaller pieces and process them in a food processor or a high-speed blender. Continue to blend until the mixture transforms into a smooth, silky, and creamy consistency, much like soft-serve ice cream. This technique effectively aerates the mixture and creates a delightful texture that is surprisingly similar to traditionally churned ice cream, proving that you don’t need special equipment to enjoy this frozen treat.