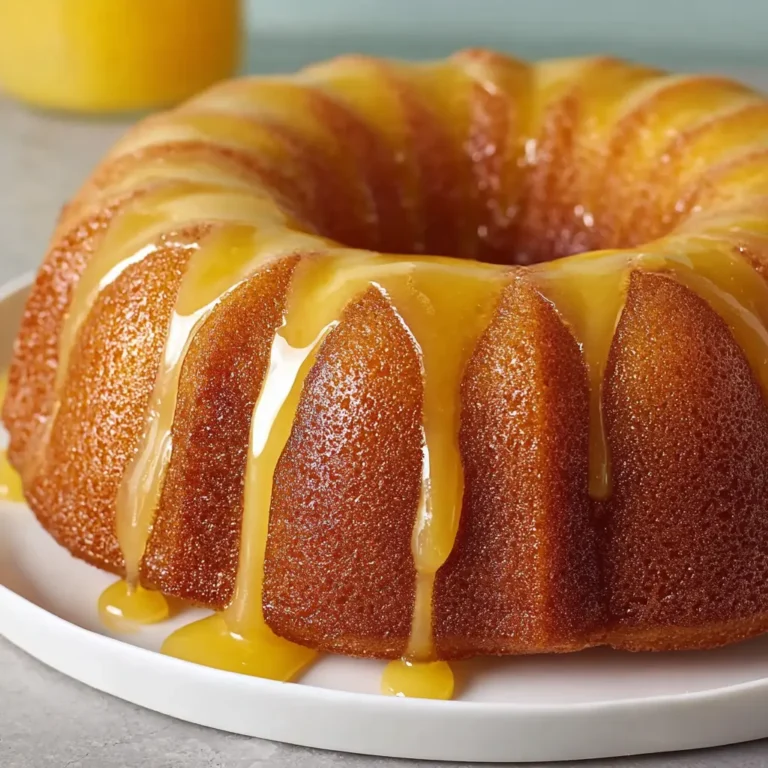
Golden Pineapple Dump Cake
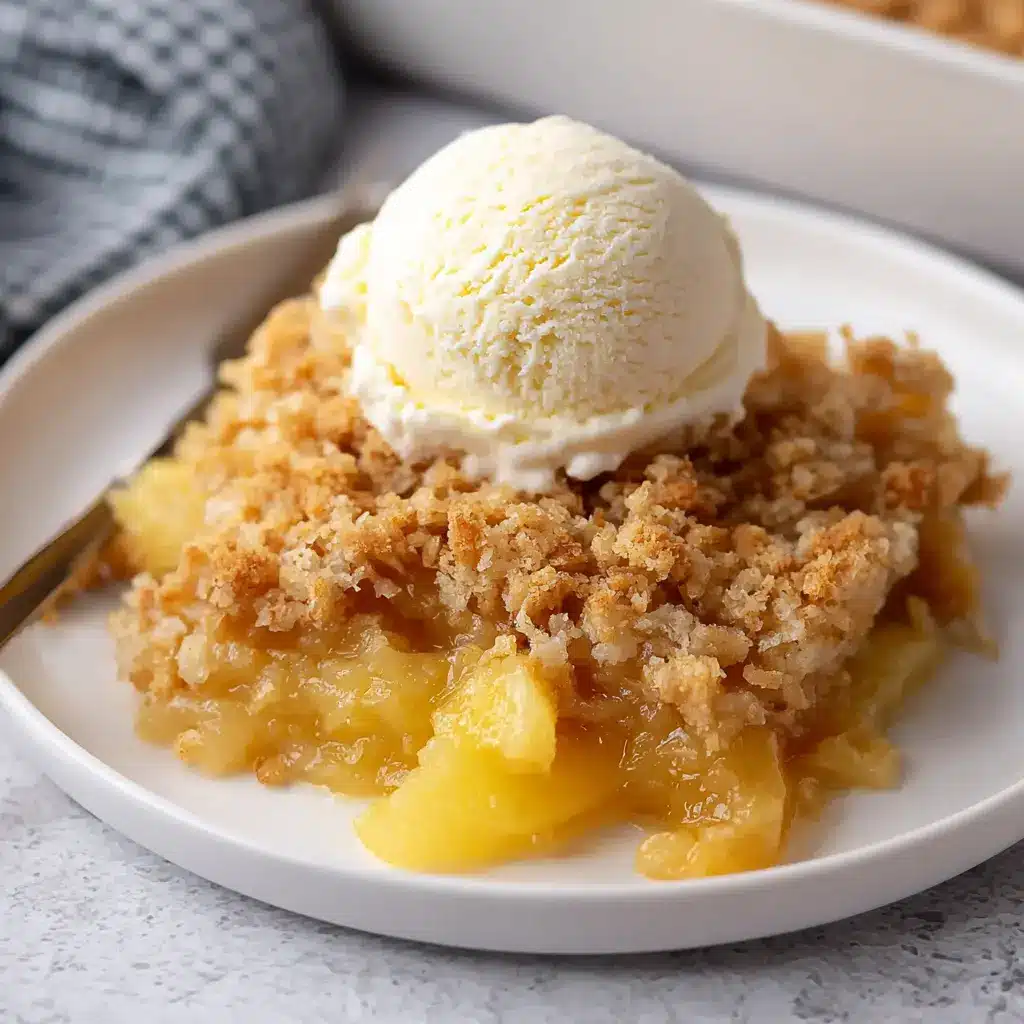
Pineapple Dump Cake is a quick, crowd-friendly dessert with a buttery golden topping, juicy pineapple filling, and almost no hands-on prep. It bakes in one dish, serves easily for gatherings, and tastes especially good warm with vanilla ice cream.
This is the kind of dessert you make when you want something comforting without pulling out extra bowls, mixers, or fancy tools. Everything goes straight into the baking dish in simple layers, and the oven does the hard work for you.
Why You Will Love This Recipe
- Effortless Assembly: This dump cake requires no complex mixing or precise techniques, making it perfect for bakers of all skill levels. You literally dump the ingredients in layers, hence the name.
- Incredible Texture Contrast: Experience the delightful interplay between the warm, syrupy pineapple base and the crisp, buttery cake topping. Each bite offers a satisfying combination of soft, chewy, and slightly crunchy elements.
- Minimal Cleanup: With everything baked in a single dish, you significantly reduce the number of bowls and utensils you need to wash. This makes it an ideal choice for busy weeknights or when entertaining.
- Adaptable Flavor Profile: While pineapple is the star, this recipe is wonderfully versatile, allowing for easy substitutions and additions to suit your personal taste preferences. It’s a forgiving recipe that welcomes experimentation.
- Crowd-Pleasing Appeal: The sweet, fruity, and comforting nature of this dump cake makes it a guaranteed hit at any gathering, from casual potlucks to festive holiday events. It evokes a sense of nostalgic comfort for many.
Ingredients You Need
The beauty of this pineapple dump cake lies in its simplicity and the use of readily available pantry staples. Choosing good quality ingredients, like sweet, ripe pineapple and a reliable yellow cake mix, will elevate the final taste and texture. Ensuring you have fresh pecans will add a delightful nutty crunch that complements the sweetness beautifully.
Pineapple Dump Cake
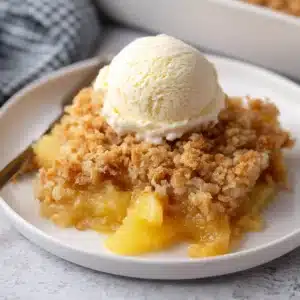
A quick, crowd-friendly dessert with a buttery golden topping, juicy pineapple filling, and almost no hands-on prep. It bakes in one dish, serves easily for gatherings, and tastes especially good warm with vanilla ice cream.
- 1 package yellow cake mix (dry, about 1 box)
- 1 cup pecans, roughly chopped
- 2 cans crushed pineapple in juice (20 ounces each, undrained)
- 1/2 cup packed brown sugar (either light or dark)
- 8 ounces butter, melted and allowed to cool slightly
- Vanilla ice cream, for serving if desired
- 1Preheat your oven to 350°F (175°C).
- 2Spoon the crushed pineapple, including all of its juice, into a 9 x 13-inch baking dish. Spread it into an even layer across the bottom of the dish.
- 3Sprinkle the dry yellow cake mix evenly over the pineapple layer, ensuring the fruit is fully covered from edge to edge.
- 4Distribute the chopped pecans over the cake mix in an even layer.
- 5Sprinkle the brown sugar evenly across the top.
- 6Pour the melted butter over the entire dish as evenly as possible.
- 7Place the baking dish in the oven and bake for about 1 hour, or until the filling is bubbling around the edges and the top is deeply golden and lightly crisp.
- 8Remove the cake from the oven and let it rest for approximately 20 minutes before serving.
- 9Serve warm, with vanilla ice cream if desired.
- yellow cake mix (dry): the foundation for your sweet, buttery topping, creating a moist crumb without any actual mixing.
- pecans (chopped): these nuts provide a crucial element of texture, adding a satisfying crunch and a wonderfully nutty flavor that pairs perfectly with the pineapple.
- crushed pineapple in juice (undrained): this is the juicy, sweet heart of the dessert, providing essential moisture and a bright, tropical fruitiness that bakes into a luscious filling.
- packed brown sugar: this sweetener not only adds a deep caramel-like sweetness but also helps the topping develop a beautiful golden-brown crust with delightful crisp edges.
- butter (melted): this essential ingredient melts down to create pockets of richness and helps bind the cake mix, contributing to the golden color and irresistible texture of the topping.
- vanilla ice cream (for serving): while entirely optional, a scoop of cold vanilla ice cream is the quintessential accompaniment, melting into the warm cake and creating a dreamy, complementary flavor and temperature contrast.
Refer to the recipe card for precise quantities.
Variations
The classic Pineapple Dump Cake is wonderfully satisfying on its own, but its simple structure makes it an excellent canvas for creative variations. Experimenting with different fruit combinations or flavor enhancers can lead to exciting new dessert experiences. The forgiving nature of a dump cake means that most additions will meld beautifully with the established base.
For a delightful dessert twist, consider a tropical fusion by adding a can of drained Mandarin oranges alongside the pineapple. The citrusy sweetness of the oranges will mingle with the pineapple, creating a more complex fruity profile. You could also sprinkle a layer of shredded coconut over the cake mix before adding the butter for an extra hint of the tropics.
If you’re looking for a low-carb adaptation, you might explore using a sugar-free yellow cake mix designed for keto diets. While this will alter the texture slightly, it can still yield a delicious outcome. You would want to ensure your pineapple is packed in its own juice and not syrup, or consider using a sugar-free pineapple substitute if available. A sprinkle of erythritol could also be added to the topping for extra sweetness.
Another exciting variation involves adding spices to the dry cake mix or the topping layers. A generous pinch of cinnamon, nutmeg, or even a touch of ginger can transform the cake into a spiced pineapple delight, perfect for cooler weather or holidays. You could even consider adding a swirl of cream cheese frosting or a drizzle of caramel sauce after baking for added richness and indulgence.
How to Prepare Pineapple Dump Cake
Step 1: Prepare the Fruity Base
Begin by preheating your oven to a consistent 350°F (175°C). This ensures that the cake bakes evenly from the moment it enters the oven, allowing the flavors to meld and the textures to develop properly. Select a sturdy 9×13-inch baking dish; this size is ideal for distributing the ingredients into relatively thin layers, which is crucial for achieving the perfect cake-to-fruit ratio.
Carefully spoon the entire contents of two 20-ounce cans of crushed pineapple, along with all of their juice, directly into the prepared baking dish. Do not drain the pineapple; the juice is absolutely vital for moistening the dry cake mix and creating that wonderfully soft, syrupy filling. Use a spatula or the back of a spoon to spread the pineapple mixture into an even layer, ensuring it covers the entire bottom of the dish. This uniformity in the pineapple layer guarantees that every bite will have that delightful fruity sweetness and moisture, preventing any dry spots from forming.
The pineapple layer serves as the foundation for the entire dessert, acting as a tender, slightly tart base that will bubble up as it bakes. Its inherent moisture helps to steam and cook the cake mix from below, creating a remarkably soft and spoonable consistency. This initial step is deceptively simple but critically important for the overall success and texture of your dump cake. Pay attention to spreading it evenly to avoid any areas where the cake mix might settle too deeply or too thinly.
Step 2: Layer the Dry Cake Mix
Once the pineapple is evenly spread, it’s time to introduce the cake layer. Take one package of dry yellow cake mix, typically about 15.25 to 18.25 ounces depending on the brand, and sprinkle it evenly over the entire surface of the crushed pineapple. The goal here is to create a complete, unbroken layer of dry cake mix that will absorb the pineapple’s juices and the melted butter. Avoid the temptation to press down or pat the cake mix into the pineapple; keeping it light and fluffy is key for its eventual texture.
Use a sieve or a gentle shaking motion from the box to ensure the cake mix is distributed as uniformly as possible. Aim to cover every single bit of the pineapple, leaving no visible fruit peeking through. This even distribution is crucial for consistent baking and to prevent any patches of undercooked or overly dense cake. If you notice any small gaps, you can gently shift the cake mix with the back of a spoon, but again, no pressing is required.
The dry cake mix will act like a sponge, soaking up the moisture from the pineapple and caramelizing as it bakes. This simple layering technique is what makes a dump cake so easy; there’s no need for creaming butter and sugar or folding in eggs. The residual starches and leavening agents in the dry mix will do all the work, transforming into a tender, buttery cake topping. The success of this layer depends on its uniform coverage and light application.
Step 3: Add Texture with Pecans and Sweetness with Brown Sugar
Now, it’s time to add some delightful crunch and depth of flavor to your dump cake. Take your roughly chopped pecans, typically about 1 cup, and scatter them evenly over the dry cake mix layer. Pecans are a classic pairing with pineapple, offering a rich, slightly earthy flavor and a satisfying textural contrast to the soft cake and fruit. Ensure the pecans are spread out to cover a good portion of the cake mix surface, so their crunch is present in most bites.
Following the pecans, take your packed brown sugar, usually around 1/2 cup, and sprinkle it evenly over the entire top of the cake mix and pecan layer. Whether you use light or dark brown sugar, it will contribute a wonderful caramel-like sweetness and aid in developing a beautiful golden-brown crust. The brown sugar crystals will partially dissolve and melt during baking, contributing to the glossy, slightly crisp finish of the dump cake’s topping.
This combination of nuts and brown sugar is what truly elevates the dump cake from simple to sensational. It creates a more complex flavor profile and a more visually appealing dessert. The nuts add a rustic charm, while the brown sugar ensures that the topping bakes up with an irresistible sweetness and a slightly chewy, caramelized edge. This step is about layering flavors and textures that will meld together harmoniously during baking.
Step 4: The Golden Finish with Melted Butter
The final crucial element to achieving that iconic golden, slightly crisp topping is the melted butter. Take 8 ounces (1 cup or two sticks) of butter and melt it completely, either in a saucepan on the stovetop or in the microwave. Allow the melted butter to cool slightly so it doesn’t cook the dry cake mix too aggressively upon contact.
Slowly and deliberately, drizzle the melted butter evenly over the entire surface of the cake mix, pecans, and brown sugar. It’s important to try and achieve as even a coverage as possible. The butter will seep down into the dry cake mix, helping to create those desirable moist pockets and golden-brown patches. Don’t worry if it looks a little patchy; the butter will naturally distribute itself as it bakes.
This step is paramount in transforming the dry cake mix into a tender, buttery cake layer with delightfully crisp edges. The butter not only adds richness but also facilitates the browning and caramelization process. The evenness of this butter layer directly impacts how uniformly golden and delicious your dump cake’s topping will be. Ensure you cover as much of the surface as you can for the best results, making sure to get into any corners or edges.
Step 5: Bake to Golden Perfection
With all the layers in place and the oven preheated to 350°F (175°C), it’s time to bake your Pineapple Dump Cake. Carefully place the prepared baking dish into the center of the oven. This central placement ensures that heat circulates evenly around the dish, promoting consistent cooking and browning of all the layers.
Bake for approximately 1 hour. During this time, the magic happens: the pineapple will bubble and soften, the cake mix will absorb moisture and bake into a tender cake, and the butter and brown sugar will work together to create a beautifully golden and slightly crisp topping. You’re looking for the edges of the pineapple filling to be actively bubbling, and the top of the cake layer to be a deep, rich golden-brown color. Some areas might appear darker and crisper than others, which is perfectly normal and adds to the rustic charm.
The cake is done when the topping is golden and the filling is bubbling. You can gently insert a toothpick into the cake layer (avoiding the pineapple filling) to check for doneness; it should come out clean or with a few moist crumbs attached, but not wet batter. If the top is browning too quickly before the center is cooked, you can loosely tent the dish with aluminum foil for the remaining baking time. The aroma filling your kitchen at this stage will be incredibly enticing, a sweet and fruity promise of the deliciousness to come.
Step 6: Allow for a Crucial Rest
Once the Pineapple Dump Cake is removed from the oven, resist the urge to serve it immediately. While the bubbling and golden topping are incredibly tempting, allowing the cake to rest for about 20 minutes is a critical step for achieving the best texture and serving ease. This resting period allows the molten pineapple filling to settle and slightly thicken, making it easier to scoop out neat portions.
During this short cooling time, the intense heat dissipates, making the cake safer to handle and serve. More importantly, it allows the distinct layers to firm up just enough. The molten pineapple filling, which is quite liquid when hot, will become a luscious, spoonable consistency. This prevents the dessert from falling apart when you try to serve it and ensures you get a good balance of fruit and cake in every spoonful.
This brief pause transforms the dessert from a potentially messy, overly hot concoction into a perfectly textured, comforting treat. It’s during this resting phase that the flavors truly meld and the contrasting textures become more pronounced. The warm, comforting essence of the cake remains, but it becomes much more enjoyable to eat and serve. This patient wait is a small but significant step that enhances the overall dessert experience considerably.
Pro Tips for Pineapple Dump Cake
Achieving dump cake perfection is about understanding a few key details that elevate it from simply “easy” to “exceptionally delicious.” One of the most impactful tips is to ensure your butter is distributed as evenly as possible in the final step before baking. This prevents dry patches in the cake topping and promotes uniform golden-brown crispiness across the entire surface.
Another crucial piece of advice is to never drain the crushed pineapple. The liquid is not just water; it’s juice that contains sugars and flavor compounds essential for moistening the cake mix and creating that signature luscious filling. Without that juice, your dump cake risks being dry and crumbly rather than moist and spoonable. Embrace the juiciness!
When it comes to serving, let the cake rest for at least 15-20 minutes after it comes out of the oven. This short period allows the filling to thicken slightly, making it easier to serve neat portions and preventing a watery mess. It also gives the dessert a chance to cool to a perfect eating temperature, allowing the rich flavors to fully develop and be appreciated without being scalding.
Don’t be afraid of slight variations in browning on the top. A dump cake is meant to be rustic and comforting, not perfectly uniform. Those darker, crispier edges are often the most sought-after part of the dessert. Embrace the charming imperfections that come with this wonderfully forgiving recipe, and you’ll be rewarded with a truly delightful treat. If your oven tends to run hot, consider loosely tenting the cake with foil during the last 10-15 minutes of baking to prevent the top from getting too dark.
Serving Suggestions for Pineapple Dump Cake
Decoration
For a simple yet elegant touch, a light dusting of powdered sugar over the warm cake can provide a beautiful contrast and a touch of extra sweetness. This is especially effective if you’re serving the cake directly from the baking dish. Another quick decorative option is a sprinkle of toasted coconut flakes over the top, which complements the tropical pineapple flavor wonderfully and adds a delicate crunch. A few reserved pecan halves, artfully placed after baking, can also enhance the visual appeal and signal the delicious nutty element within.
Side Dishes
While Pineapple Dump Cake is a complete dessert on its own, it pairs exceptionally well with a classic scoop of vanilla ice cream. The cold, creamy ice cream melting into the warm, buttery cake creates a delightful temperature and textural contrast. Freshly whipped cream, lightly sweetened, offers a lighter alternative that still provides a creamy counterpoint to the rich cake topping. For a more elaborate presentation, a small dollop of lemon or lime sorbet can offer a bright, zesty finish that cuts through the sweetness.
Creative Serving Ideas
Consider serving individual portions in small ramekins or mason jars for a charming, single-serving presentation that’s perfect for parties or when you want to offer a more refined look. For a brunch setting, a smaller dump cake could be served alongside fresh fruit salad and coffee. You could also incorporate a drizzle of caramel sauce or a berry coulis over the top of each serving for an added layer of flavor and visual interest. This dessert is also fantastic when prepared in smaller, individual baking dishes for easier portion control and elegant presentation.
Preparation & Storage
Storing Leftovers
Once your delicious Pineapple Dump Cake has cooled completely, it’s important to store any leftovers properly to maintain their quality. Cover the baking dish tightly with plastic wrap or aluminum foil. Alternatively, you can transfer the leftover cake into an airtight container. Stored in the refrigerator, the cake should remain delicious for up to 3 to 4 days. The topping may soften slightly over time, but the overall flavor and comforting qualities will persist.
Freezing
For longer-term storage, Pineapple Dump Cake freezes remarkably well. You can freeze the entire baked cake, ensuring it’s cooled completely first, or opt to freeze individual portions for easier thawing and reheating. Wrap the cooled cake or portions tightly in plastic wrap, followed by a layer of aluminum foil, or place them in freezer-safe containers. Properly frozen, the dump cake can maintain its quality for up to 2 months, making it a great make-ahead dessert option.
Reheating
When you’re ready to enjoy your leftover dump cake, reheating is straightforward. For individual portions, the microwave is an excellent option; heat in short bursts until warmed through, being careful not to overheat. If you want to restore some of the crispness to the topping, it’s best to reheat larger portions in a moderate oven, around 325°F (160°C), for about 10-15 minutes, or until heated through and the topping looks refreshed. Thaw frozen portions overnight in the refrigerator before reheating for optimal results and texture.
Frequently Asked Questions
-
Can I use a different type of cake mix besides yellow?
Absolutely! While yellow cake mix is traditional for its classic flavor and texture, other varieties can work beautifully with pineapple. A white cake mix will offer a similar result, perhaps slightly lighter in color. Spice cake mix can add a wonderful warming dimension, especially if you enjoy cinnamon and nutmeg notes alongside the fruit. Angel food cake mix might also be an option, though it can create a lighter, airier texture that might be less dense than a traditional dump cake. Always ensure you are using the dry mix directly from the package, without any preparation, as the recipe relies on the ingredients as they are packaged.
-
What can I do if my dump cake topping isn’t getting golden brown and crispy?
Several factors could contribute to a less-than-golden topping. Ensure your oven temperature is accurate; an oven thermometer can help verify this. The evenness of the melted butter application is also key; if some areas didn’t receive enough butter, they won’t brown as well. Make sure you didn’t press the dry cake mix down too firmly, as this can hinder the butter’s ability to penetrate and crisp the layers. If the cake is baking through but the topping isn’t browning to your liking, you can always finish it under the broiler for a minute or two, watching it very closely to prevent burning, or loosely tent the cake with foil to allow the inside to cook while browning the top more intensely.
-
Is it possible to make Pineapple Dump Cake healthier or modify it for dietary restrictions?
Yes, with a few adjustments, you can make this dessert more health-conscious. For a lower-sugar option, look for sugar-free yellow cake mixes and ensure your crushed pineapple is packed in its own juice, not syrup. You can reduce the amount of brown sugar slightly or opt for a sugar substitute. For a dairy-free version, use a plant-based butter substitute. While a gluten-free cake mix can be used, the texture may differ, as gluten-free mixes often behave differently in baking. Experimenting with added fruits like berries or apples can also increase the fiber content. Remember that any modifications may subtly alter the final texture and taste, but it’s a very forgiving recipe for experimentation.