Sheet Pan Chicken Dinner – Easy Meal Prep Idea!
Embark on a culinary adventure that promises flavor, convenience, and a symphony of textures all in one glorious pan. This sheet pan chicken recipe is more than just a meal; it’s a testament to how simple ingredients, expertly combined and roasted, can create a truly memorable dining experience right in your own home. Get ready to transform your weeknights and impress your guests with minimal effort and maximum deliciousness.
Imagine a single pan, glistening with perfectly roasted chicken and an orchestra of vibrant vegetables, each bite bursting with savory goodness. This dish is designed for modern living, where time is precious but the desire for wholesome, home-cooked meals remains strong. Let’s dive into a recipe that’s as delightful to make as it is to devour.
Why You Will Love This Recipe
- Effortless Preparation: With minimal chopping and no complicated steps, this recipe is designed for busy cooks who want a delicious meal without the fuss.
- One-Pan Wonder: Everything cooks together on a single sheet pan, drastically reducing cleanup time and making this an ideal choice for weeknight dinners.
- Customizable Vegetables: The flexibility to swap in your favorite seasonal produce means you can enjoy this dish year-round with endless delicious variations.
- Juicy, Flavorful Chicken: The combination of simple seasonings and oven roasting ensures that the chicken breasts remain incredibly moist and packed with savory flavor.
- Meal Prep Friendly: This recipe is a champion for meal prepping, yielding fantastic leftovers that are perfect for lunches or quick dinners throughout the week.
Ingredients You Need
The foundation of any exceptional dish lies in the quality of its ingredients. For this sheet pan chicken, we’re focusing on fresh, vibrant produce and lean chicken breasts that will soak up all the wonderful flavors. Using good quality olive oil and fresh garlic will elevate the overall taste profile, ensuring a depth of flavor that is truly satisfying. Remember, the magic happens when simple, wholesome ingredients are treated with care and allowed to roast to perfection.
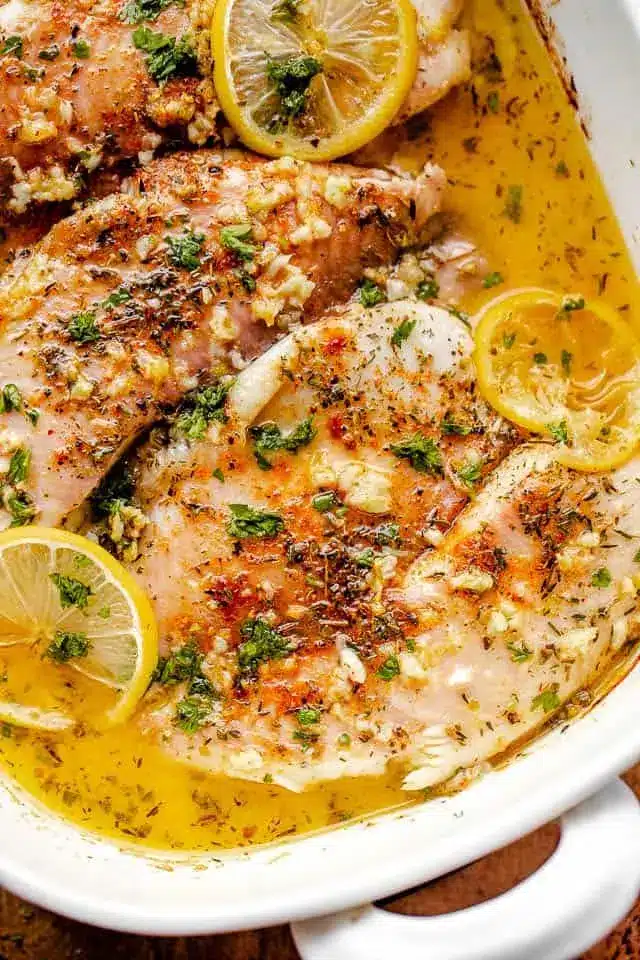
Sheet Pan Chicken with Vegetables

This flavorful sheet pan chicken recipe is ready in under an hour, with juicy seasoned chicken breasts, tender potatoes, and vegetables all baked together. It's perfect for an easy weeknight chicken dinner, and I love it as a meal prep idea!
- 4 boneless, skinless chicken breasts (about 1 to 1½ pounds total)
- 3 cups diced potatoes
- 1 pound asparagus, ends trimmed
- 2 large carrots, diced or thinly sliced
- 1 large red onion, quartered
- 2 cups cherry tomatoes (optional)
- 2 tablespoons olive oil, divided
- 2 cloves garlic, minced, divided
- 1 teaspoon garlic powder
- 1½ teaspoons dried rosemary, divided
- 1½ teaspoons dried thyme, divided
- salt and freshly ground black pepper, to taste
- 1 tablespoon butter, cut into 4 pats
- 1Preheat oven to 425°F. Line a large sheet pan with parchment paper or foil; set aside.
- 2Cut up the potatoes, Brussels sprouts, asparagus, carrots, and red onion. Place each in a separate corner of the prepared sheet pan. Do not add the cherry tomatoes yet.
- 3Drizzle olive oil over the vegetables. Season with garlic powder, ½ teaspoon dried rosemary, ½ teaspoon dried thyme, salt, and pepper.
- 4Place 2 chicken breasts over a large piece of parchment paper. Rub both sides of the chicken with a bit of olive oil, and season with salt, pepper, ½ teaspoon rosemary, ½ teaspoon thyme, and half of the minced garlic.
- 5Place a pat of butter on top of each chicken breast and tightly seal the parchment paper around the chicken breasts. Repeat the same process with the remaining 2 chicken breasts.
- 6Bake for 30 minutes, or until the chicken is cooked through. Chicken is done when its internal temperature reaches 165°F.
- 7Optionally, 10 minutes before it's done cooking, add cherry tomatoes to the sheet pan.
- 8Remove from oven and let stand 5 minutes. Unwrap the chicken and serve.
Keywords: Sheet Pan Chicken, Chicken Breast Recipe, Easy Chicken Dinner, Weeknight Dinner, Meal Prep Chicken, Roasted Vegetables, One-Pan Meal, German Cuisine
The exact quantities for each ingredient are detailed in the recipe card above, ensuring you have everything you need for a perfectly balanced and delicious meal. Don’t hesitate to adjust seasonings to your personal preference.
Variations
Elevate your sheet pan chicken experience by exploring a world of exciting variations. Consider a vibrant Mediterranean twist by incorporating Kalamata olives, sun-dried tomatoes, and a sprinkle of feta cheese in the final minutes of roasting. The salty tang of olives and the intense sweetness of sun-dried tomatoes will beautifully complement the chicken and vegetables.
For those seeking a spicier kick, a Tex-Mex inspired version could include diced jalapeños, corn, and black beans added towards the end of the cooking time. A generous sprinkle of chili powder and cumin will further enhance the Southwestern flair, creating a dish that’s both hearty and zesty.
Embrace a taste of Asia with a teriyaki glaze. Marinate the chicken in a mixture of soy sauce, honey, ginger, and garlic before adding it to the pan with broccoli florets and red bell peppers. This sweet and savory combination offers a delightful departure from the classic herb-infused profile.
How to Prepare sheet pan chicken
The preparation of this sheet pan chicken is designed for ultimate simplicity, ensuring that a delicious and wholesome meal is within reach even on the busiest of evenings. We’ll break down each step to ensure clarity and success, allowing you to confidently create this flavorful dish time and time again.
Step 1: Preheat Oven and Prepare the Pan
The initial step in creating our sheet pan chicken marvel involves preparing your oven and baking sheet. Preheat your oven to a precise 425°F (220°C). This higher temperature is crucial for achieving that desirable caramelization on the vegetables and ensuring the chicken cooks through perfectly without becoming dry. Simultaneously, line a large, sturdy baking sheet with parchment paper or aluminum foil. This not only aids in easy cleanup but also prevents sticking, ensuring your ingredients cook evenly without adhering to the pan.
The choice between parchment paper and foil is often a matter of personal preference, though parchment paper generally provides a more non-stick surface and can impart a slightly more even roast. Ensure the liner covers the entire surface of the pan, extending up the sides slightly if possible, to catch any drips and further simplify the post-meal cleanup process. Having your pan prepared and ready before you begin chopping your ingredients means you can move seamlessly through the cooking process, minimizing any downtime and keeping everything on track for a timely meal.
The Importance of Oven Temperature: Maintaining the correct oven temperature is paramount for this recipe. A temperature that is too low will result in steamed vegetables rather than roasted ones, lacking the crucial depth of flavor and texture that roasting imparts. Conversely, an excessively high temperature without proper monitoring might lead to burnt edges before the interior is cooked. The 425°F target strikes a perfect balance, encouraging browning and tenderness for both the chicken and the accompanying vegetables.
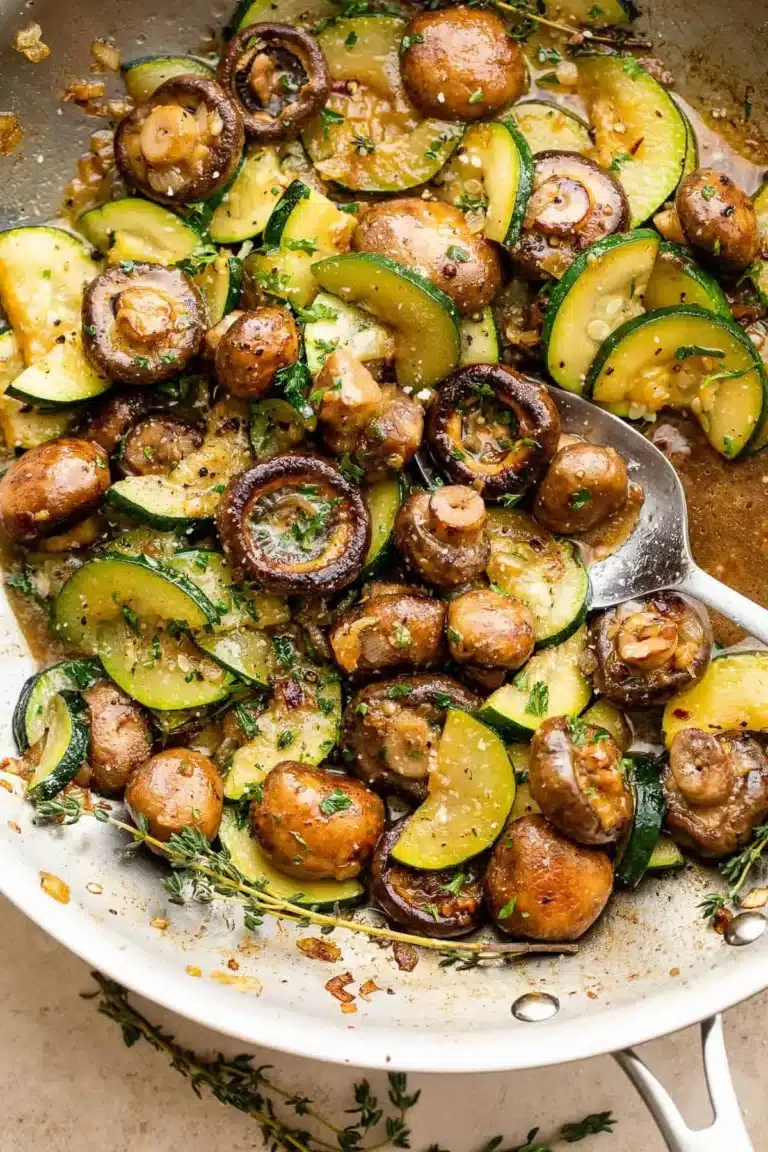
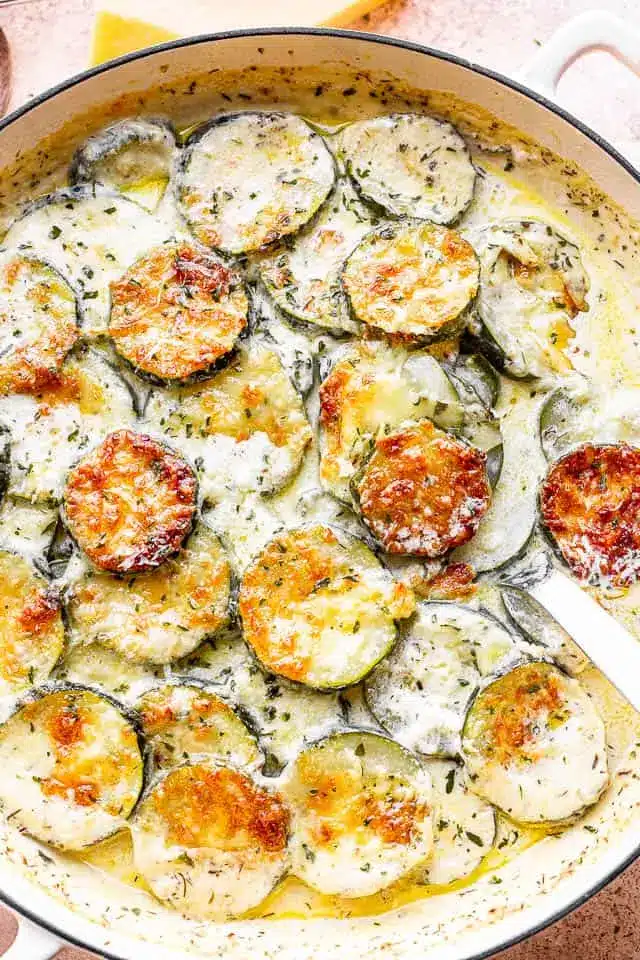
Step 2: Vegetable Preparation and Seasoning
Now, let’s focus on the vibrant array of vegetables that will join our chicken on the sheet pan. Begin by thoroughly washing and preparing your chosen vegetables. For this recipe, we typically include ingredients like diced potatoes, halved Brussels sprouts, trimmed asparagus, diced carrots, and quartered red onions. The key is to cut these vegetables into roughly uniform, bite-sized pieces. This ensures that they cook at a similar rate, preventing some from becoming mushy while others remain undercooked. For instance, potatoes and carrots might benefit from being cut slightly smaller than Brussels sprouts or asparagus to ensure even cooking.
Once chopped, place each type of vegetable in separate sections on your prepared baking sheet. This initial separation allows for more even seasoning and roasting. Drizzle a generous amount of olive oil over all the vegetables, ensuring each piece is lightly coated. This oil is essential for facilitating the roasting process, helping to crisp up the edges and distribute the seasonings evenly. Follow this with your dry seasonings: garlic powder, dried rosemary, dried thyme, salt, and freshly ground black pepper. Use your hands or a spatula to toss the vegetables gently, ensuring they are thoroughly coated with the oil and seasoning mixture. It’s important not to overcrowd the pan at this stage; give the vegetables ample space to breathe and roast, rather than steam.
Achieving Perfect Vegetable Texture: The goal here is tender-crisp vegetables with lovely caramelized edges. By cutting them into similar sizes and giving them enough space on the pan, you promote air circulation, which is key to roasting. If your pan is too crowded, the vegetables will steam, resulting in a less desirable texture and flavor. Consider using two pans if necessary to ensure proper roasting conditions for all your vegetables. The slight charring and browning that occurs during roasting are what develop the deep, rich flavors that make sheet pan dinners so appealing.
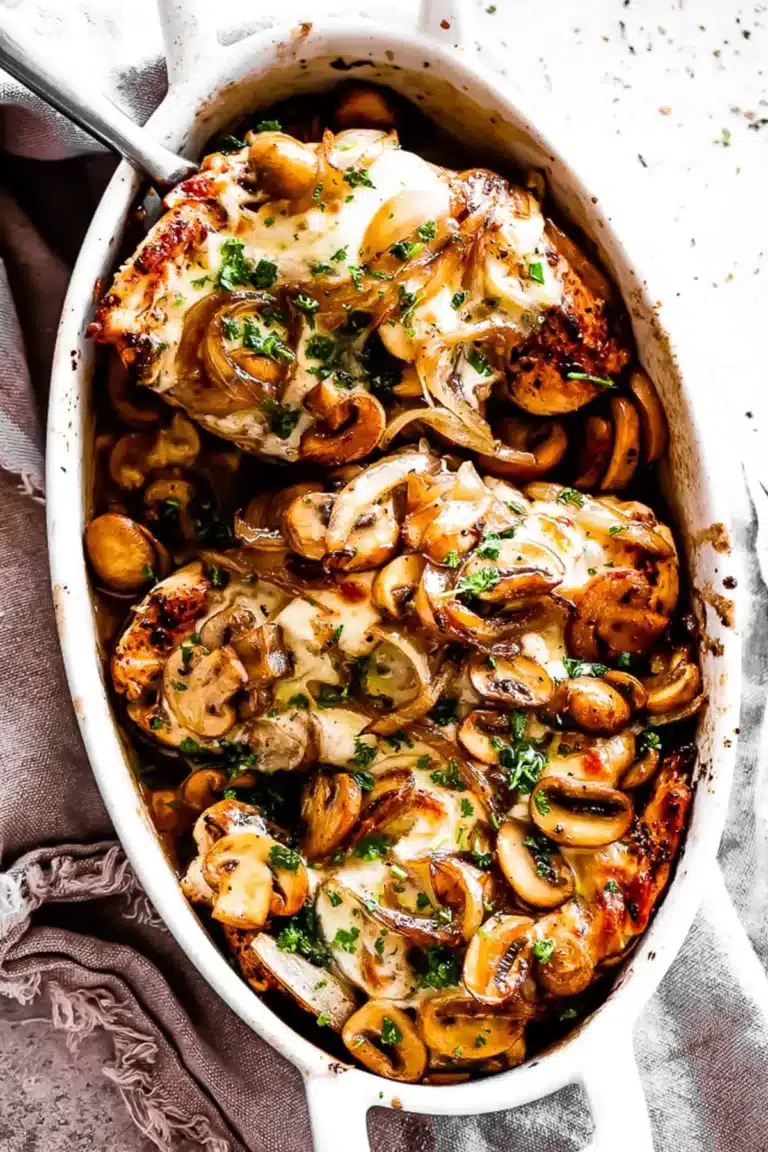
Step 3: Preparing and Seasoning the Chicken
The star of our sheet pan creation, the chicken, requires careful preparation to ensure it remains incredibly moist and flavorful throughout the roasting process. Take your boneless, skinless chicken breasts and place them on a large piece of parchment paper, ideally separate from where you’ll be wrapping the final chicken. Lightly brush or rub both sides of each chicken breast with a small amount of olive oil. This oil acts as a barrier, helping to lock in moisture and ensuring a better surface for the seasonings to adhere to.
Next, season the chicken generously. Use salt, freshly ground black pepper, and a portion of the dried rosemary and thyme you set aside. Ensure the seasonings are distributed evenly across the surface of the chicken. Following this, mince your fresh garlic cloves finely. Take about half of the minced garlic and rub it gently over the seasoned chicken breasts. The aroma alone will begin to hint at the deliciousness to come. For an extra layer of richness and moisture, place a small pat of butter on top of each chicken breast after it has been seasoned and rubbed with garlic. This butter will melt as the chicken roasts, basting it from within and adding a luxurious mouthfeel.
The En Papillote Technique: For an added touch of moisture and concentrated flavor, we’re going to wrap the chicken. Place two chicken breasts onto a large piece of parchment paper. Carefully fold the parchment paper over the chicken breasts, then crimp and fold the edges tightly to create a sealed packet. This technique, known as “en papillote,” traps the steam and juices released during cooking, essentially steaming the chicken in its own flavorful essence. Repeat this process with the remaining two chicken breasts, ensuring each packet is securely sealed. This method guarantees that even lean chicken breasts remain wonderfully succulent.
Step 4: Arranging and Roasting
With all components prepped and seasoned, it’s time to bring them together on the baking sheet for the magic of roasting. Carefully place the sealed parchment paper packets containing the seasoned chicken breasts in the center of the prepared baking sheet. Arrange the seasoned vegetables around the chicken packets, ensuring they are spread out in a single layer. It is crucial that the vegetables have ample space and are not piled on top of each other; this allows for optimal air circulation, which is key to achieving those desirable roasted textures and flavors. If your baking sheet is too crowded, consider using two sheets to prevent the vegetables from steaming instead of roasting.
Once everything is arranged, carefully transfer the baking sheet to the preheated oven. Bake at 425°F (220°C) for approximately 30 minutes. The exact cooking time can vary slightly depending on the thickness of your chicken breasts and the size of your vegetable pieces. During this time, the oven’s heat will work its magic, cooking the chicken through while simultaneously caramelizing the vegetables to a delightful tenderness. The sealed parchment packets will help the chicken cook evenly and retain its juices, resulting in a remarkably tender and flavorful final product.
Monitoring Doneness: While the timer is a helpful guide, it’s always best to check for doneness. The most reliable way to ensure your chicken is safely cooked is by using an instant-read meat thermometer. Insert it into the thickest part of a chicken breast, avoiding any bone or fat. The chicken is perfectly cooked when it reaches an internal temperature of 165°F (74°C). The vegetables should be tender when pierced with a fork, with some nice browning on the edges. If the chicken is cooked but the vegetables need more browning, you can carefully remove the chicken packets and continue roasting the vegetables for a few extra minutes.
Step 5: Adding Optional Tomatoes and Resting
For those who enjoy a burst of freshness and a touch of sweetness, this step introduces an optional but highly recommended addition: cherry tomatoes. If you are including cherry tomatoes, add them to the baking sheet during the last 10 minutes of the cooking time. Scatter them amongst the other vegetables. They will soften and slightly burst, releasing their sweet, tangy juices, which mingle beautifully with the other roasted flavors. This timed addition ensures the tomatoes are cooked to perfection without becoming mushy or burnt.
Once the 30 minutes of roasting are complete, carefully remove the baking sheet from the oven. Before unwrapping the chicken or serving, it’s essential to let the chicken rest. Leave the parchment packets on the hot baking sheet for about 5 to 10 minutes. This resting period is critical for allowing the juices within the chicken to redistribute throughout the meat. If you were to cut into the chicken immediately after removing it from the oven, all those delicious juices would run out, leaving the chicken drier than desired. Patience here truly pays off in terms of moisture and flavor.
The Science of Resting Meat: Resting allows the muscle fibers in the chicken to relax after the intense heat of the oven. As meat cooks, the fibers contract, squeezing out moisture. By letting it rest, the fibers reabsorb much of this moisture, resulting in a more succulent and tender piece of chicken. Think of it as allowing the chicken to rehydrate itself after its cooking journey, ensuring every bite is as juicy as the last.
Step 6: Serving and Enjoyment
The moment of truth has arrived – it’s time to serve and savor your beautifully roasted sheet pan chicken and vegetables. Carefully unseal the parchment packets. Be cautious as hot steam will escape; a common characteristic of the “en papillote” cooking method that ensures maximum moisture retention. You can serve the chicken breasts whole, or for easier eating, slice them into thick strips or dice them into bite-sized pieces. The aroma filling your kitchen will be incredible, a testament to the simple yet profound flavors achieved.
Present the chicken alongside the colorful medley of roasted vegetables directly from the baking sheet, or plate them attractively. You can garnish with a sprinkle of fresh parsley or chives for an added touch of freshness and visual appeal. This dish is a complete meal in itself, offering a balanced combination of protein, carbohydrates, and essential nutrients. Its rustic charm and straightforward presentation make it perfect for both casual family dinners and more elegant gatherings where the focus is on delicious, honest food.
The Joy of Sharing: This sheet pan chicken is designed for sharing and enjoyment. Its ease of preparation means you can spend less time in the kitchen and more time connecting with loved ones. The vibrant colors and delicious aromas are sure to spark conversation and delight. Serve it with a smile and prepare for compliments on this simple yet spectacular meal.
Pro Tips for sheet pan chicken
Uniformity is Key: For even cooking, ensure all your vegetables are cut into roughly the same size pieces. This applies especially to root vegetables like potatoes and carrots, which take longer to cook than softer vegetables like asparagus or bell peppers. If you have a mix of fast and slow-cooking vegetables, consider adding the slower-cooking ones to the pan a few minutes earlier.
Don’t Crowd the Pan: Overcrowding your baking sheet is a common mistake that leads to steaming rather than roasting. Give your chicken and vegetables ample space so that air can circulate freely around them. This promotes browning, caramelization, and that coveted crispy texture. If your pan is too full, use two pans.
Season Generously: Chicken and vegetables can absorb a lot of seasoning. Don’t be shy with your herbs, spices, salt, and pepper. A good coating of olive oil helps distribute these flavors evenly and aids in browning. Consider adding a pinch of red pepper flakes for a subtle kick or a dash of smoked paprika for added depth.
Embrace the Parchment: While not strictly necessary, cooking the chicken in parchment packets (en papillote) is a game-changer for moisture and flavor. It traps the chicken’s juices, resulting in incredibly tender and succulent meat. It also makes for incredibly easy cleanup, as the chicken cooks in its own little flavorful pouch.
Rest is Best: Always allow your chicken to rest for at least 5-10 minutes after removing it from the oven before slicing. This crucial step allows the juices to redistribute throughout the meat, ensuring a moist and tender final product. Cutting too soon will result in all those delicious juices running out onto the pan.
Serving Suggestions for sheet pan chicken
Decoration
Elevate the visual appeal of your sheet pan chicken with simple yet impactful garnishes. A scattering of fresh, vibrant herbs like chopped parsley, chives, or even a few sprigs of fresh rosemary or thyme can add a pop of color and a burst of fresh aroma. For a touch of brightness, a squeeze of fresh lemon juice just before serving can make all the flavors sing. A sprinkle of toasted sesame seeds can add both texture and a nutty undertone, especially if you’re leaning into a more Asian-inspired flavor profile.
Side Dishes
While the sheet pan chicken is a complete meal on its own, it pairs wonderfully with a variety of complementary sides. For a classic comfort food feel, serve it alongside fluffy rice or creamy mashed potatoes. Garlic butter noodles offer a rich and satisfying carbohydrate pairing that soaks up any extra pan juices beautifully. A simple green salad with a light vinaigrette provides a refreshing contrast to the richness of the roasted components.
Consider a side of crusty bread for dipping into any delicious pan sauces or juices. If you’re aiming for a lighter meal, steamed green beans or a quick quinoa salad can offer additional fiber and nutrients without weighing down the plate. The versatility of this dish means it can adapt to numerous side dish pairings, making it a staple for any occasion.
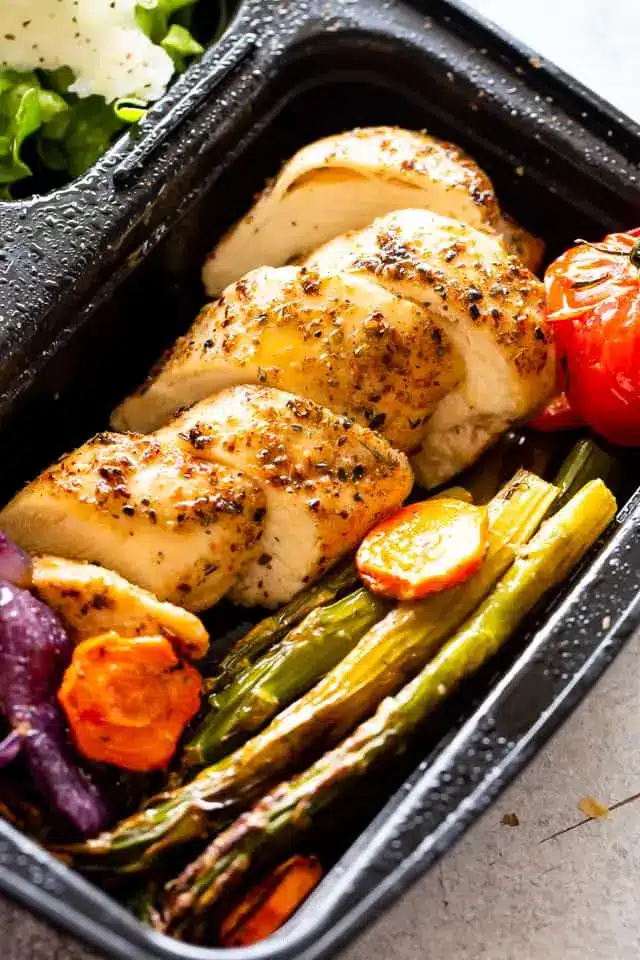
Creative Serving Ideas
Transform your sheet pan chicken into a delightful wrap or bowl. Shred the cooked chicken and mix it with the roasted vegetables, then stuff the mixture into warm cottage cheese flatbreads or whole wheat tortillas for a hearty lunch. Alternatively, serve the chicken and vegetables over a bed of fluffy quinoa or brown rice, drizzled with a light dressing or a dollop of Greek yogurt for a healthy and satisfying power bowl. You can also deconstruct the meal and serve the chicken and vegetables in individual ramekins, topped with a sprinkle of crumbled feta cheese or a drizzle of balsamic glaze for an elegant presentation.
Preparation & Storage
Storing Leftovers
Should you be fortunate enough to have any leftovers of this delightful sheet pan chicken and vegetables, storing them is a straightforward process. Once the dish has cooled to room temperature, transfer the chicken and vegetables into an airtight container. This prevents the food from drying out and protects it from absorbing any unwanted odors from other items in your refrigerator. Properly stored, these leftovers will remain fresh and flavorful for up to 5 days, making them perfect for convenient lunches or quick dinners throughout the week.
Freezing
For longer-term storage, this sheet pan chicken recipe is an excellent candidate for freezing. After the meal has cooled completely, portion the chicken and vegetables into freezer-safe containers or heavy-duty freezer bags. Ensure to remove as much air as possible from the packaging before sealing to prevent freezer burn. Properly frozen leftovers can maintain their quality for up to 2 months. When you’re ready to enjoy them, allow them to thaw overnight in the refrigerator before reheating.
Reheating
Reheating your leftover sheet pan chicken and vegetables is a simple affair, ensuring you can enjoy the delicious flavors again with minimal effort. The most convenient method is often the microwave; simply place the leftovers in a microwave-safe dish, cover loosely, and heat until thoroughly warmed through. For a slightly crispier texture, you can reheat the dish in a skillet on the stovetop over medium heat, stirring occasionally, or spread it on a baking sheet and warm it in a preheated oven at around 350°F (175°C) until hot.
Frequently Asked Questions
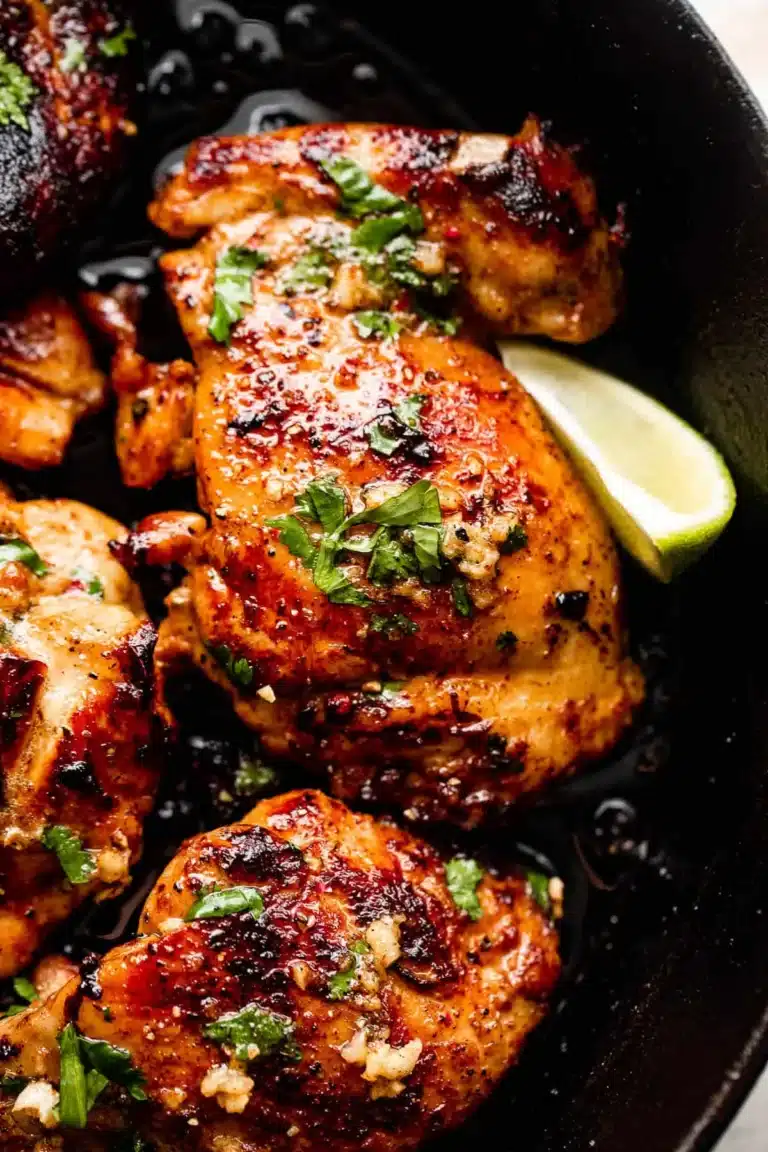
- Can I use chicken thighs instead of breasts for this sheet pan chicken recipe?
Absolutely! Chicken thighs are a fantastic alternative and can often yield even more moist and flavorful results due to their higher fat content. However, bone-in or skin-on chicken thighs will require a longer cooking time than boneless, skinless breasts. Generally, you’ll want to increase the roasting time by an additional 10-15 minutes, or until the internal temperature of the thighs reaches 165°F (74°C) at their thickest point. It’s always best to use a meat thermometer to ensure accuracy. The vegetables might require slight adjustments in cooking time as well, so keep an eye on them as the chicken cooks.
- What are the best vegetables to use if I want to make this recipe ahead of time for meal prep?
For optimal meal prep, it’s wise to choose vegetables that hold up well when stored and reheated. Root vegetables like potatoes, carrots, and sweet potatoes are excellent choices as they remain tender and flavorful. Brussels sprouts and onions also reheat well. Vegetables like asparagus can become a bit softer upon reheating, but are still enjoyable. If you prefer crispier vegetables after reheating, consider adding quicker-cooking options like broccoli florets or bell pepper strips during the last 10-15 minutes of the initial cooking time, or prepare them separately and add them to your meal prep containers fresh.
- How can I ensure the chicken stays moist and doesn’t dry out when cooking on a sheet pan?
Several techniques contribute to moist chicken in a sheet pan meal. Firstly, using boneless, skinless chicken breasts is generally easier to manage, but they can dry out quickly if overcooked. Marinating the chicken in a flavorful liquid for at least 30 minutes can infuse moisture and flavor. Ensure you don’t overcook the chicken; using an instant-read thermometer to check for an internal temperature of 165°F (74°C) is the most reliable method. The parchment paper packet method, as detailed in the recipe, is highly effective as it steams the chicken in its own juices. Finally, allowing the chicken to rest for 5-10 minutes after cooking before slicing is crucial for redistributing those precious juices.