Grilled Lemon Chicken Recipe – The Best Lemon Marinade!
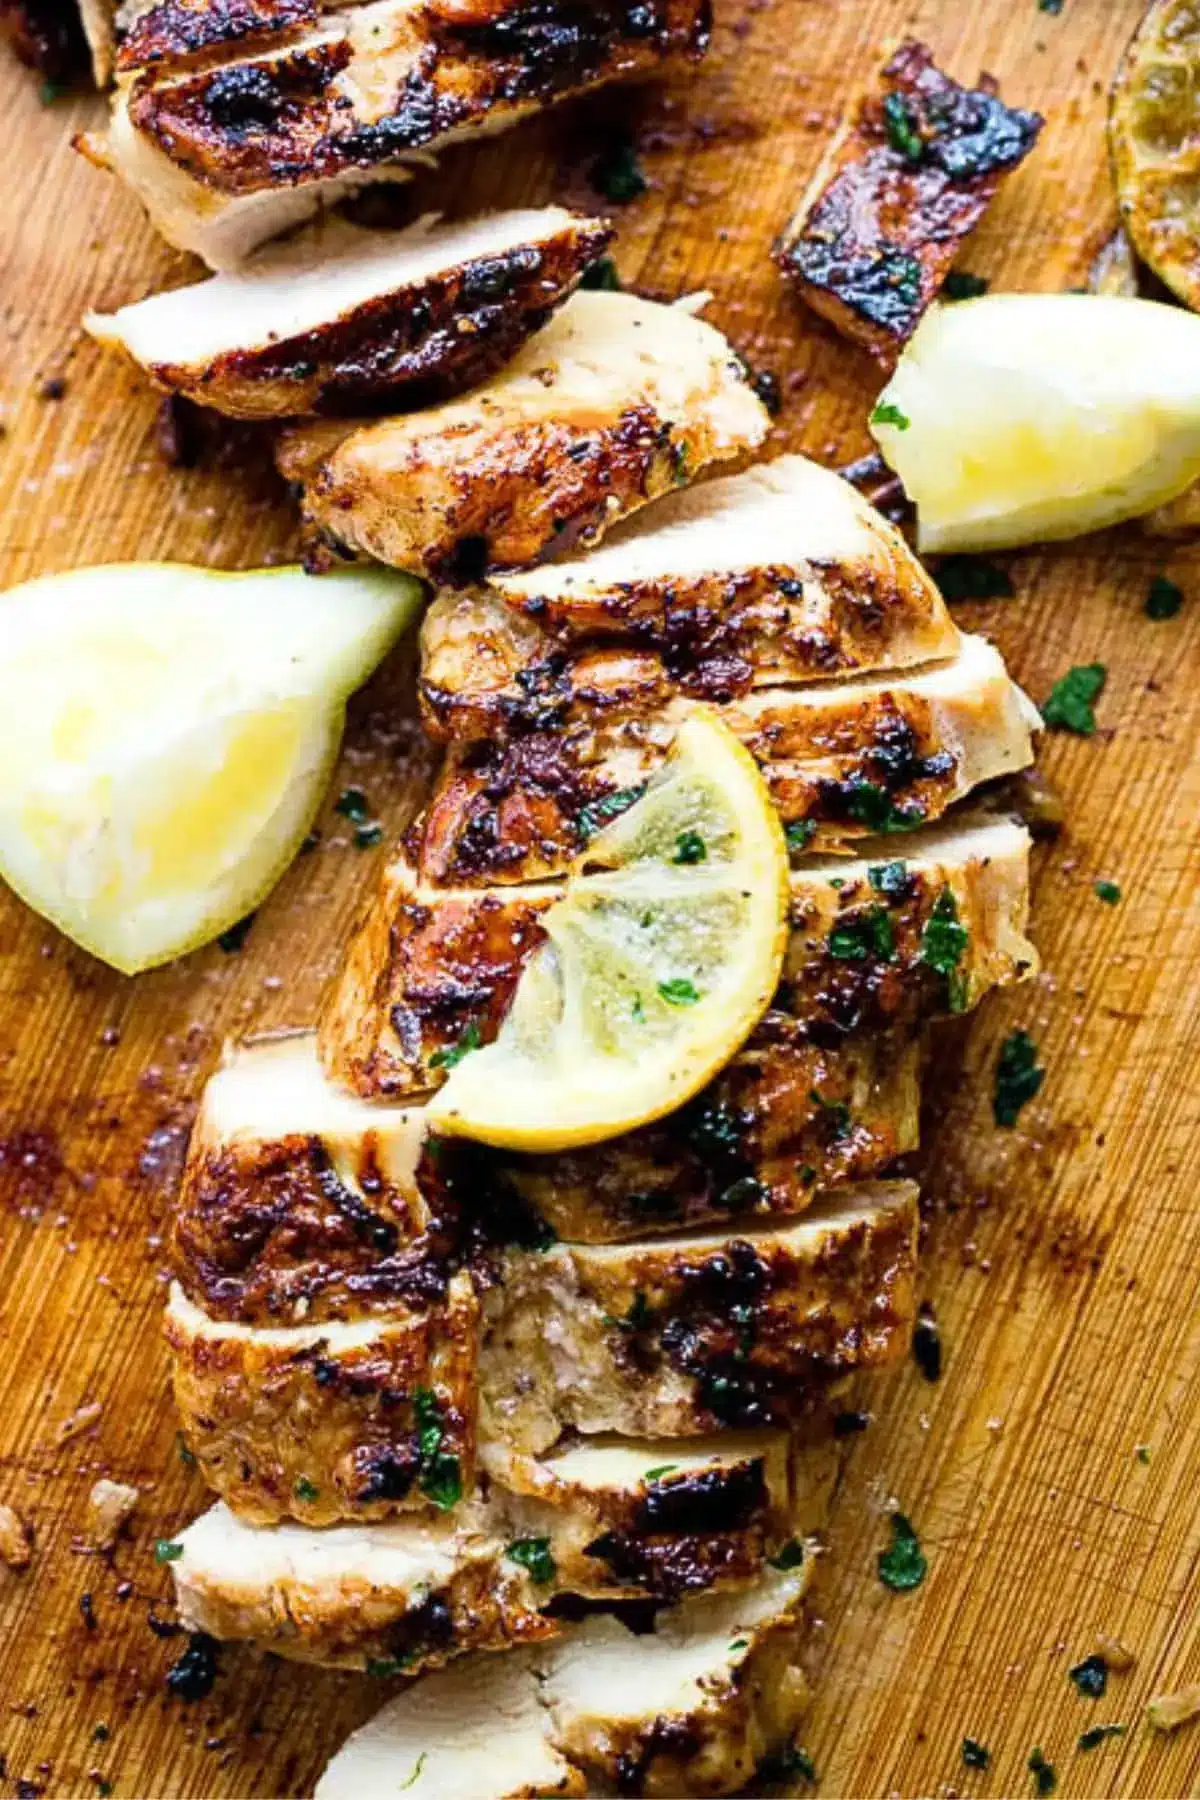
This juicy grilled lemon chicken has always been my family’s go-to grilled chicken recipe for summer. Bursting with fresh flavor and herbs, the garlicky lemon chicken marinade is quick and easy to make, promising a delightful culinary experience for any occasion. The vibrant citrus notes are perfectly balanced with savory garlic and fresh parsley, creating an irresistible aroma that will have everyone gathering around the grill.
In honor of May Day, I’m marinating juicy chicken with plenty of lemon and tossing it onto the grill. May Day is basically European Labor Day, a time of celebration and delicious outdoor cooking. One whiff of this garlicky lemon chicken on the grill takes me right back to our holiday picnics in Macedonia, evoking cherished memories of family gatherings and abundant, flavorful food.
Why You Will Love This Recipe
- Effortless Marinade: The simple yet incredibly flavorful lemon and garlic marinade comes together in minutes, requiring just a handful of common ingredients for maximum taste impact.
- Quick Grilling: This chicken cooks up beautifully on the grill, with relatively short cooking times that make it perfect for weeknight dinners or spontaneous summer barbecues.
- Versatile Flavor: The bright, zesty lemon flavor is incredibly versatile, pairing wonderfully with a wide range of side dishes and complements many different cuisines.
- Juicy Perfection: Marinating and then resting the chicken ensures it stays incredibly moist and tender, making every bite a delight.
- Family Favorite: This recipe is a tried-and-true hit, passed down through generations, guaranteeing a delicious meal that appeals to all ages.
Ingredients You Need
The beauty of this grilled lemon chicken lies in its simplicity and the quality of its ingredients, which work together harmoniously to create an unforgettable dish. Focusing on fresh, vibrant components is key to unlocking the full potential of the lemon and herb marinade, ensuring a bright, zesty, and deeply satisfying flavor profile that’s both refreshing and comforting.
Grilled Lemon Chicken

This juicy lemon chicken is a go-to grilled chicken recipe for summer! The garlicky lemon marinade is bursting with fresh flavor and needs only 5 ingredients.
- 2 pounds boneless, skinless chicken breasts
- zest of 2 lemons
- 4 cloves garlic, minced
- salt and fresh ground pepper, to taste
- 1 whole lemon, cut into slices
- 1In a large ziploc bag, combine chicken, olive oil, lemon zest, lemon juice, garlic, parsley, salt, and pepper. Seal the bag and shake it all up until well combined. Place the bag in the refrigerator and marinate for about 4 hours or overnight.
- 2Preheat the grill to about 375°F to 400°F. Brush the grill grates with olive oil.
- 3Remove the chicken breasts from the marinade and place them on the hot grill; cook without touching the grill until they start to get grill marks, about 5 minutes.
- 4Turn the chicken breasts over, cover the grill, and let them finish cooking, about 7 more minutes, depending on the thickness of the chicken. The chicken is done when a meat thermometer registers 165 degrees Fahrenheit.
- 5Remove chicken from grill; cover and let rest for 5 minutes before cutting and serving.
Keywords: Grilled Lemon Chicken, Lemon Chicken, Grilled Chicken, Summer Recipe, Easy Chicken Recipe, Garlic Lemon Chicken
Quantities for these essential components are readily available in the recipe card provided, guiding you to the perfect balance of flavors for this delightful meal.
Variations
This classic grilled lemon chicken recipe is wonderfully adaptable, allowing for creative twists to suit various dietary preferences and culinary explorations. Whether you’re aiming for a plant-based option or a lighter, lower-carbohydrate meal, the core principles of bright citrus and savory herbs can be reimagined with exciting ingredient swaps.
For a fantastic vegan alternative, consider marinating firm tofu or thick slices of halloumi cheese in a similar lemon-garlic mixture. Pressing the tofu beforehand will help it absorb the marinade more effectively and achieve a delightful texture on the grill. You could also explore large portobello mushrooms or thick slices of zucchini and eggplant, which grill beautifully and soak up the zesty flavors wonderfully.
If you’re following a low-carb lifestyle, this recipe is already a fantastic foundation. You can elevate it by serving the chicken alongside a generous portion of grilled asparagus, broccoli florets tossed with olive oil and garlic, or a crisp, fresh salad with a light vinaigrette. For an extra protein boost that complements the lemon chicken, think about adding grilled shrimp or scallops to the same marinade.
Another delightful variation involves incorporating a touch of sweetness or spice. A teaspoon of honey or maple syrup whisked into the marinade can add a subtle caramelization when grilled, while a pinch of red pepper flakes or a finely chopped jalapeño can introduce a pleasant warmth that contrasts beautifully with the citrus. Don’t hesitate to experiment with other fresh herbs like rosemary or thyme, which pair exceptionally well with lemon and chicken.
How to Prepare grilled lemon chicken
Step 1: Marinate the Chicken
Begin by gathering your ingredients and preparing the flavorful marinade that will infuse the chicken with its signature zesty and garlicky essence. In a large resealable plastic bag or a non-reactive bowl, combine the olive oil, fresh lemon zest, freshly squeezed lemon juice, minced garlic, chopped fresh parsley, and a generous pinch of salt and freshly ground black pepper. Ensure all these aromatic components are well incorporated to form a cohesive mixture.
Next, add the boneless, skinless chicken breasts or thighs to the marinade. Gently toss the chicken pieces to ensure they are thoroughly coated on all sides. Seal the bag tightly, pressing out any excess air, or cover the bowl securely. Place the marinated chicken in the refrigerator to allow the flavors to meld and penetrate the meat.
The marinating time is crucial for tenderizing the chicken and imparting that bright, refreshing lemon flavor. For optimal results, aim for a minimum of 4 hours, but for an even more intense and delicious taste, consider marinating the chicken overnight. This extended period allows the citrus acids to work their magic, making the chicken exceptionally tender and flavorful.
Step 2: Prepare the Grill
While the chicken is busy soaking up all that delicious marinade, it’s time to get your grill ready for action. Preheat your outdoor grill to a medium-high heat, aiming for a temperature between 375°F and 400°F. This temperature range is ideal for achieving a beautiful char on the chicken while ensuring it cooks through evenly without burning.
Once the grill has reached the desired temperature, it’s essential to prepare the grates to prevent the chicken from sticking. Lightly brush the grill grates with a bit of olive oil or another high-heat cooking oil. You can use a folded paper towel dipped in oil and held with tongs, or a grill brush designed for this purpose. Ensuring the grates are clean and oiled will make flipping the chicken a breeze and contribute to those coveted grill marks.
If you’re using an indoor grill pan, preheat it over medium-high heat until it’s nice and hot. A hot grill pan is key to achieving a good sear and those attractive grill marks, mimicking the results of an outdoor grill. Ensure the pan is adequately greased before adding the chicken.
Step 3: Grill the Chicken
Now for the main event: grilling the marinated chicken. Carefully remove the chicken pieces from the marinade, allowing any excess liquid to drip off, but do not rinse them. Discard the used marinade as it’s no longer safe for consumption after coming into contact with raw chicken. Place the chicken breasts or thighs directly onto the hot, prepared grill grates.
Resist the urge to move or flip the chicken immediately. Let it cook undisturbed for approximately 5 minutes. This initial period of not touching the chicken is vital for developing a beautiful, seared crust and those appealing grill marks. You should see the edges starting to firm up and char slightly.
After about 5 minutes, it’s time to flip the chicken. Use a pair of tongs or a spatula to turn each piece over. If you are using a lidded grill, cover it now. This will help to trap the heat and cook the chicken through more efficiently. Continue to cook for another 7 to 10 minutes, depending on the thickness of the chicken pieces.
Step 4: Check for Doneness and Rest
The final cooking time will vary based on the thickness of your chicken. To ensure the chicken is perfectly cooked and safe to eat, it’s important to check its internal temperature. Insert an instant-read meat thermometer into the thickest part of a chicken breast or thigh, avoiding any bones if using bone-in cuts. The chicken is done when it registers an internal temperature of 165°F (74°C).
Once the chicken has reached the safe internal temperature, carefully remove it from the grill. Place the cooked chicken onto a clean plate or cutting board. The immediate next step, which is as crucial as the cooking itself, is to let the chicken rest. Tent the chicken loosely with aluminum foil or cover it with a clean kitchen towel.
Allow the chicken to rest for at least 5 to 10 minutes. This resting period is essential for allowing the juices to redistribute throughout the meat. If you cut into the chicken too soon, all those delicious, moist juices will escape, leaving you with dry chicken. Patience here will be richly rewarded with exceptionally tender and juicy results.
Step 5: Prepare the Grill Pan Alternative (If Needed)
Should outdoor grilling not be an option, fear not! This delicious lemon chicken can be expertly prepared indoors using a cast-iron grill pan, which offers a fantastic alternative for achieving similar char marks and flavors. Begin by preheating your oven to 350°F (175°C) as the chicken will finish cooking in there. This combination of stovetop searing and oven finishing ensures even cooking and juicy results.
Generously grease your oven-safe grill pan with cooking spray or a bit of olive oil. Place the pan over medium-high heat on your stovetop and allow it to get thoroughly hot. The key to achieving those beautiful grill marks and a good sear is a properly preheated pan; if the chicken doesn’t sizzle immediately upon contact, the pan isn’t hot enough.
Carefully add the marinated chicken pieces to the hot grill pan. Sear the chicken for approximately 4 minutes per side, flipping once. This initial searing process helps to develop a flavorful crust and those desirable grill marks that give the dish its characteristic look. You want to achieve a nice golden-brown color on both sides.
Step 6: Finish in the Oven
After searing the chicken on the stovetop, it’s time to transfer the grill pan with the chicken into the preheated oven. This oven-finishing step ensures that the chicken cooks through evenly and remains incredibly moist. Place the entire grill pan into the oven, ensuring it’s positioned safely.
Allow the chicken to cook in the oven for about 18 to 20 minutes. The exact time will depend on the thickness of your chicken pieces. To confirm doneness, use an instant-read thermometer inserted into the thickest part of the chicken; it should register 165°F (74°C).
Once the chicken is cooked through, carefully remove the grill pan from the oven. Just as with grilling outdoors, it is essential to let the chicken rest before cutting and serving. Transfer the chicken to a clean plate or cutting board, tent it loosely with foil, and let it rest for 5 to 8 minutes. This resting period allows the juices to settle, ensuring a tender and succulent final product.
Pro Tips for grilled lemon chicken
Marinating Magic: For the most profound flavor infusion, let the chicken marinate for at least 4 hours, or ideally, overnight. This extended contact time allows the lemon juice and garlic to tenderize the meat while imparting a deep, zesty character that is truly irresistible. Don’t be afraid to leave it in the fridge longer; the flavors only get better.
The Importance of Zest: Don’t skip the lemon zest! While the juice provides tanginess, the zest contains the essential oils of the lemon peel, offering a more intense and aromatic lemon flavor that is distinct and irreplaceable. Zest the lemons before you juice them to make the process more efficient and capture every bit of citrusy goodness.
Achieve Perfect Grill Marks: Ensure your grill is properly preheated and the grates are clean and oiled before placing the chicken on them. Resist the urge to move the chicken too soon; allowing it to sear undisturbed for the first few minutes is key to developing those beautiful, appetizing grill marks that signal a perfectly grilled dish.
Rest is Best: This cannot be stressed enough – always let your grilled chicken rest before slicing. Covering it loosely with foil for 5-10 minutes after it comes off the grill allows the juices to redistribute throughout the meat. This simple step makes a world of difference in ensuring your chicken is incredibly moist and tender with every bite.
Don’t Overcook: Chicken breast, in particular, can dry out quickly if overcooked. Use an instant-read thermometer to check for an internal temperature of 165°F (74°C). It’s better to slightly undercook and let the residual heat finish the job during the resting period than to overcook and end up with dry poultry.
Serving Suggestions for grilled lemon chicken
Decoration
Elevate the presentation of your grilled lemon chicken with a few simple decorative touches that enhance its visual appeal. A scattering of fresh, finely chopped parsley over the top of the cooked chicken adds a vibrant pop of green and reinforces the herbaceous notes. For an extra burst of citrus color, garnish the platter with thin lemon slices or wedges, perhaps even some reserved lemon zest sprinkled artfully around the dish.
Consider adding a few fresh herbs sprigs, like rosemary or thyme, to the serving platter for an aromatic and visually appealing touch. If you’ve grilled lemon slices alongside the chicken, these can also serve as a beautiful and edible decoration. A light drizzle of good quality olive oil over the finished dish can add a lovely sheen and enhance its overall presentation.
For a more festive presentation, especially for gatherings, consider arranging the chicken with a colorful assortment of grilled vegetables. The vibrant colors of bell peppers, zucchini, and red onions, all bearing grill marks, will complement the chicken beautifully. A sprinkle of toasted sesame seeds or a light dusting of paprika can also add subtle visual interest.
Side Dishes
This vibrant grilled lemon chicken is incredibly versatile and pairs wonderfully with a wide array of side dishes, catering to various tastes and meal occasions. For a classic Mediterranean feel, serve it alongside fluffy dinner rice, perhaps a fragrant pilaf infused with herbs and lemon zest. Another excellent choice is a generous portion of roasted Mediterranean vegetables such as zucchini, bell peppers, red onions, and cherry tomatoes, all tossed with olive oil and herbs.
To complement the chicken’s bright flavors, consider serving it with a refreshing salad. A crisp Greek salad with cucumbers, tomatoes, olives, and feta cheese, dressed in a light lemon-oregano vinaigrette, would be a perfect match. Alternatively, a simple mixed green salad with a zesty lemon dressing provides a light and healthy accompaniment. Pasta dishes, like a lemon-herb pasta salad or a creamy orzo, also make excellent partners.
For heartier meals, consider starchy sides that absorb the delicious chicken juices. Creamy mashed potatoes, roasted sweet potatoes, or even a simple baked potato are excellent choices. If you’re looking for something lighter, steamed or grilled asparagus, green beans almondine, or a simple side of quinoa would be delightful. The possibilities are endless, allowing you to tailor the meal to your specific preferences and the occasion.
Creative Serving Ideas
Beyond the traditional plate, grilled lemon chicken lends itself to numerous creative serving interpretations that can transform it into a complete meal or a show-stopping appetizer. Slice the cooled chicken thinly and use it as a delicious filling for pita bread or wraps, combined with lettuce, tomato, cucumber, and a dollop of tahini sauce or Greek yogurt. This makes for a fantastic portable lunch or a casual picnic option.
Another engaging idea is to chop the grilled chicken and toss it into a vibrant grain bowl. Combine it with quinoa or farro, roasted chickpeas, a medley of fresh vegetables like spinach, bell peppers, and avocado, and a drizzle of your favorite dressing. This creates a healthy, satisfying, and visually appealing meal that’s perfect for meal prepping.
For a more elegant presentation, consider deboning and cubing the chicken, then threading it onto skewers with chunks of colorful vegetables like cherry tomatoes, zucchini, and bell peppers. These can be served as appetizers or as part of a tapas-style meal. A small side of tzatziki or a spicy aioli for dipping would be a fantastic addition to this presentation.
Preparation & Storage
Storing Leftovers
Leftover grilled lemon chicken is a treasure that can be enjoyed in various delicious ways. Once the chicken has completely cooled down to room temperature, it’s important to store it properly to maintain its quality and safety. Transfer the cooled chicken into an airtight container or wrap it tightly in plastic wrap or aluminum foil.
Store the container in the refrigerator. Properly stored leftovers will remain fresh and delicious for up to 3 to 4 days. The marinade’s acidity helps to preserve the chicken for a reasonable period, but it’s always best to consume it within this timeframe for optimal taste and texture.
The versatility of leftover chicken means you can enjoy it cold, perhaps tossed into salads, sandwiches, or wraps, or reheat it gently for a warm meal. Its bright lemon flavor makes it a refreshing addition to light lunches and quick dinners.
Freezing
If you find yourself with more grilled lemon chicken than you can consume within a few days, freezing is an excellent option for longer-term storage. Ensure the chicken has cooled completely before proceeding with the freezing process to prevent the formation of ice crystals and maintain the best possible texture. Once cooled, you can freeze the chicken in a few ways, depending on how you plan to use it later.
For the best results, wrap individual chicken breasts or portions tightly in plastic wrap, then place them inside a heavy-duty freezer bag or an airtight freezer-safe container. This double layer of protection helps to prevent freezer burn, which can degrade the quality of the meat. Alternatively, you can slice or dice the chicken before freezing, which can be convenient if you plan to add it directly to stews, soups, or pasta dishes.
Label the container or bag with the date and contents. Properly frozen grilled lemon chicken can maintain its quality for up to 2 to 3 months. When you are ready to use it, thaw it overnight in the refrigerator for best results, or use a rapid thawing method like placing the sealed bag in cold water.
Reheating
Reheating leftover grilled lemon chicken requires a gentle approach to ensure it remains moist and doesn’t become dry or tough. The best method depends on how you plan to use the reheated chicken. For a quick and easy reheat, especially for smaller portions, the microwave is often the most convenient option.
Place the chicken in a microwave-safe dish, add a tablespoon or two of water or broth to create steam, and cover the dish loosely with a microwave-safe lid or plastic wrap. Heat on medium power in short intervals (30-60 seconds), checking for warmth after each interval, until the chicken is heated through. This method helps to retain moisture.
For a more even reheat and a slightly crisper exterior, the oven is an excellent choice. Preheat your oven to a moderate temperature, around 350°F (175°C). Place the chicken in an oven-safe dish, add a splash of liquid (water, broth, or even a little extra lemon juice) to prevent drying, and cover the dish tightly with foil. Heat for about 10-15 minutes, or until the chicken is warmed through.
Frequently Asked Questions
-
Can I use chicken thighs instead of breasts?
Absolutely! Chicken thighs are an excellent substitute for chicken breasts in this grilled lemon chicken recipe, often resulting in even more tender and flavorful meat due to their higher fat content. The marinating process will work just as effectively, and the grilling time might be slightly longer for bone-in thighs or thicker cuts. Simply follow the same marinating and grilling steps, and always ensure the internal temperature reaches 165°F (74°C) for safety. The increased juiciness of thighs can make them even more forgiving if slightly overcooked.
-
How can I make the lemon flavor less intense if I’m sensitive to citrus?
If you find the strong lemon flavor to be too intense for your liking, there are a few adjustments you can make to temper the citrus notes without sacrificing the dish’s overall brightness. The most straightforward method is to reduce the amount of lemon juice and zest used in the marinade. For instance, you could try using the zest of only one lemon and about half the amount of lemon juice, supplementing with a bit more olive oil to maintain the marinade’s consistency. Alternatively, you can opt for Meyer lemons, which are naturally sweeter and less tart than standard lemons, or incorporate other herbs like dill or a touch of honey into the marinade to balance the acidity.
-
What is the best way to ensure the chicken doesn’t stick to the grill?
Preventing chicken from sticking to the grill is a common concern, but it’s easily avoidable with a few key steps. Firstly, ensure your grill grates are impeccably clean before you start; leftover residue is a primary culprit for sticking. Secondly, and crucially, preheat your grill to the proper temperature (375-400°F / 190-200°C) and then generously oil the grates just before placing the chicken on them. You can do this by dipping a paper towel in high-heat oil (like canola or vegetable oil) with tongs and wiping the grates. Finally, resist the urge to move or flip the chicken too early; allow it to sear and develop a crust for the first few minutes without disturbance, which helps it release naturally from the grates.