Rhubarb Chia Jam Recipe Easy Homemade Jam for Busy Weeknights
One chilly spring evening, I found myself staring at a bunch of rhubarb stalks I’d impulsively bought at the farmer’s market that morning. It was getting late, and I hadn’t planned dinner yet—let alone a rhubarb project.
But I wanted something fresh, tangy, and quick that could jazz up my breakfasts for the week. Enter rhubarb chia jam. I’d seen chia jam recipes floating around, but never tried making one with rhubarb before. Three tries later (and one small kitchen mess), I landed on this simple, no-cook, fridge-ready jam that’s perfect for busy weeknights when you want something homemade but don’t have hours to simmer pots on the stove.
Why You Will Love This Recipe
- Quick Preparation: Dinner is on the table in less than 30 minutes, making it ideal for busy weeknights or spontaneous cravings.
- Minimal Ingredients: This recipe relies on just a few pantry staples, so you likely have everything you need on hand already.
- Healthy Boost: Packed with fiber from chia seeds and natural goodness from rhubarb, this jam offers a nutritious alternative to store-bought options.
- Versatile Uses: Beyond toast, this jam elevates yogurt, pancakes, and even desserts, proving its adaptability in the kitchen.
- No-Cook Convenience: Forget simmering for hours; this jam thickens magically in the fridge, saving you time and energy.
Ingredients You Need
The beauty of this rhubarb chia jam lies in its simplicity, relying on fresh, vibrant ingredients to create a delightful spread. We’re focusing on quality and freshness to ensure the best flavor profile, making each spoonful a burst of springtime. This recipe uses minimal ingredients, making it accessible and easy to prepare even on the busiest of days, and the result is a truly delicious, homemade condiment that will enhance your meals.
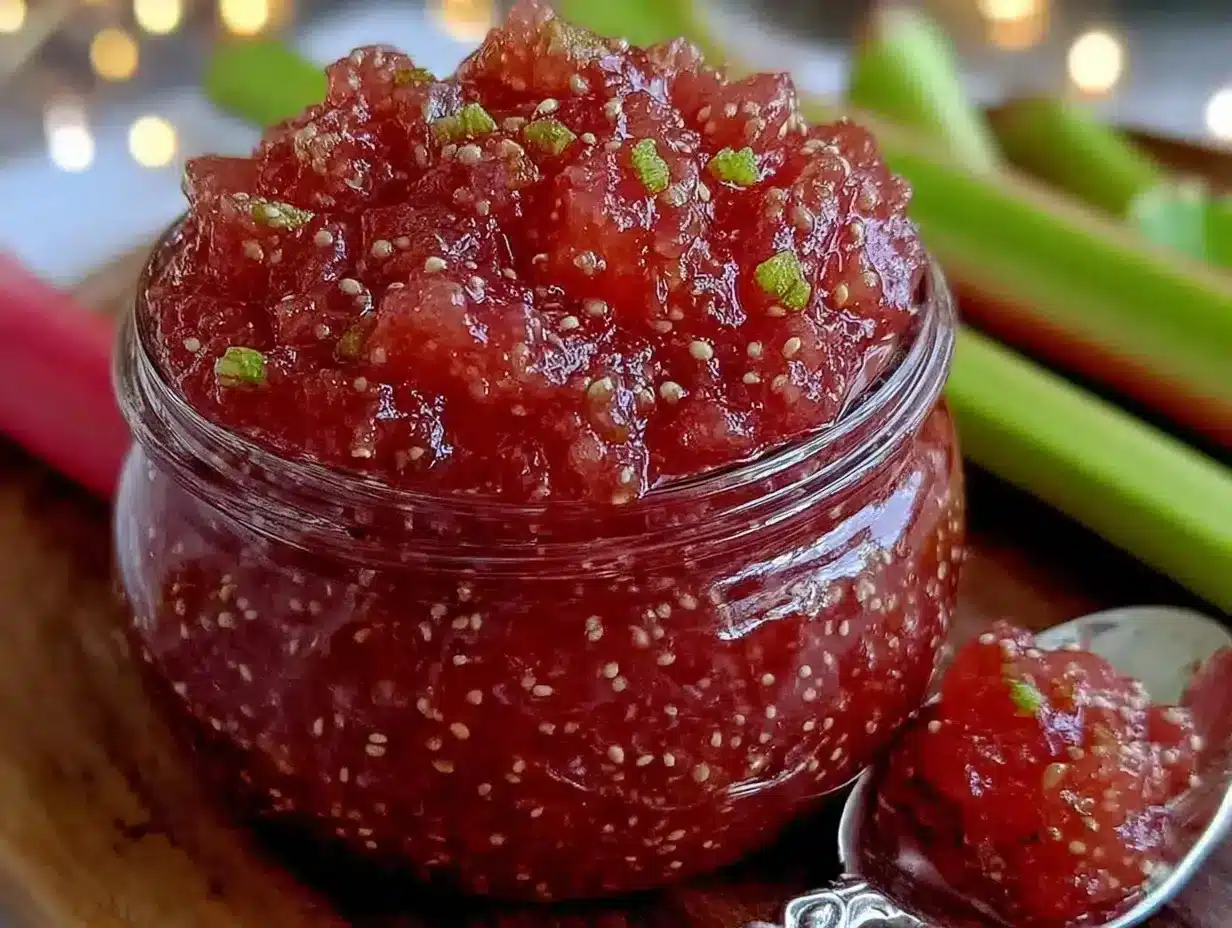
Easy Homemade Rhubarb Chia Jam

A quick and easy no-cook rhubarb chia jam that is tangy, slightly sweet, and perfect for busy weeknights. This homemade jam uses simple ingredients and comes together in under 30 minutes.
- 3 cups fresh rhubarb, chopped (about
- 375g / 13.2 oz)
- 1/4 cup maple syrup or honey (60ml)
- 2 tablespoons fresh lemon juice (30ml)
- 3 tablespoons chia seeds (30g)
- 1 teaspoon vanilla extract (optional)
- 1/4 teaspoon ground ginger (optional)
- 1Wash and chop the rhubarb into roughly 1/2-inch pieces.
- 2Place chopped rhubarb in a medium saucepan over medium-low heat. Add 2 tablespoons of water to prevent sticking.
- 3Stir occasionally as it softens and breaks down, about 8-10 minutes, until tender but not mushy.
- 4Mash the rhubarb slightly with a spoon or leave it chunkier, as preferred.
- 5Stir in the maple syrup (or honey) and fresh lemon juice. Taste and adjust sweetness.
- 6Remove the pan from heat. Stir in the chia seeds, vanilla extract, and ground ginger if using.
- 7Transfer the jam to a bowl or jar and let it cool to room temperature.
- 8Refrigerate for at least 15 minutes (preferably an hour or overnight) to thicken.
- 9Stir well before serving. If too thick, stir in a teaspoon or two of water or lemon juice to loosen.
Keywords: rhubarb jam, chia jam, homemade jam, no-cook jam, quick jam, healthy jam, easy jam recipe, rhubarb recipe
- fresh rhubarb: chopped into bite-sized pieces, the star of our tangy jam.
- maple syrup or honey: a natural sweetener to balance rhubarb’s tartness.
- fresh lemon juice: brightens the flavor and helps maintain the vibrant pink hue.
- chia seeds: the magic ingredient that thickens the jam without any cooking.
- vanilla extract: an optional addition for a hint of warmth and depth.
- ground ginger: another optional spice that pairs wonderfully with rhubarb.
The specific quantities for these ingredients are detailed in the recipe card for your convenience.
Variations
Once you’ve mastered the basic rhubarb chia jam, it’s fun to experiment with different flavor profiles to suit your palate. This recipe is incredibly adaptable, allowing you to infuse it with a variety of complementary tastes and textures, transforming it into something entirely new and exciting. Each variation offers a unique twist, proving that a simple jam can be a canvas for culinary creativity.
Consider a delightful strawberry-rhubarb fusion, a classic pairing that brings a touch of sweetness to the rhubarb’s tartness. Simply add a cup of chopped fresh strawberries during the rhubarb cooking stage. The natural sugars in the strawberries will enhance the overall sweetness and add a beautiful pink swirl, making it reminiscent of summer harvests and perfect for topping pancakes or swirling into desserts.
For a more aromatic and sophisticated touch, try an orange zest and cardamom variation. Stir in a teaspoon of fresh orange zest and a pinch of ground cardamom during the final mixing stage. This combination imparts a fragrant citrus note and a subtle warmth that complements the rhubarb beautifully, elevating the jam into something truly special and wonderfully complex.
Another exciting option is a spiced rhubarb jam, perfect for those who enjoy a bit of warmth in their spreads. Add ¼ teaspoon of ground cinnamon or a dash of ground cloves along with the chia seeds. These warming spices create a cozy flavor profile that’s particularly delightful during cooler spring evenings, offering a comforting and familiar taste that’s both exciting and comforting.
If you’re looking to reduce sugar intake, simply lower the amount of maple syrup or honey used, or even omit it if your rhubarb is particularly ripe. Be aware that a lower sugar content might result in a slightly less thick consistency, but the intense rhubarb flavor will still shine through beautifully. You can also explore alternative sweeteners like coconut sugar or brown sugar, adjusting the quantity to achieve your desired sweetness level.
For those who prefer to avoid chia seeds, other thickening agents can be explored, though they may alter the texture and simplicity. Ground flaxseeds can act as a substitute, or you could cook the rhubarb down for a longer period, similar to traditional jam-making methods. However, the ease and health benefits of chia seeds truly make them the star of this particular recipe.
How to Prepare rhubarb chia jam
Step 1: Preparing the Rhubarb
The first step in creating this delightful rhubarb chia jam is to prepare the star ingredient: the rhubarb. Begin by thoroughly washing the fresh rhubarb stalks under cool running water to remove any dirt or debris. Once clean, trim off the very ends of the stalks, as these can sometimes be tough or woody. Then, chop the rhubarb into roughly ½-inch to 1-inch pieces. Don’t worry about making them perfectly uniform; a rustic chop is perfectly fine and even adds to the homemade charm of the jam. The goal here is to create pieces that will soften easily during the next stage of cooking.
Ensure you have about 3 cups of chopped rhubarb, which is approximately 375 grams. If you’re using frozen rhubarb, which is a convenient option when fresh isn’t available, make sure to thaw it completely first. It’s crucial to drain away any excess liquid that accumulates during thawing, as too much moisture can affect the final consistency of your jam. This initial preparation ensures that the rhubarb is ready to release its vibrant color and tangy flavor.
Tip: If your rhubarb stalks are particularly thick or fibrous, you might want to peel them lightly before chopping, although this is rarely necessary for young, tender stalks. This simple preparation is the foundation for unlocking the fresh, tart essence of rhubarb.
Step 2: Softening the Rhubarb
Now that your rhubarb is prepped, it’s time to gently soften it to release its juices and begin the jam-making process. Place the chopped rhubarb into a medium-sized saucepan. It’s important to use a pan that has a good base to prevent sticking, especially if you’re not using a non-stick surface. To help the rhubarb release its liquid and prevent it from sticking to the bottom of the pan, add approximately 2 tablespoons of water to the saucepan. This initial moisture is usually enough to get the softening process started.
Heat the saucepan over medium-low heat. You want to cook the rhubarb gently, allowing it to break down slowly rather than boiling vigorously. Stir the rhubarb occasionally with a wooden spoon or silicone spatula to ensure even cooking and to prevent any pieces from adhering to the pan. Continue this process for about 8 to 10 minutes. During this time, you’ll notice the rhubarb stalks becoming tender and starting to collapse, releasing their vibrant pink juice into the pan.
The Best Part: The aroma that fills your kitchen during this stage is truly wonderful, a fresh, slightly tart scent that signals springtime is here. You’re aiming for tender rhubarb that’s beginning to break down, but you don’t want it to turn into a complete mush just yet. This gentle cooking ensures that the rhubarb’s natural flavor is preserved and not cooked away.
Step 3: Achieving Your Desired Texture
Once the rhubarb has softened and is easily mashable, you have a choice to make regarding the final texture of your jam. This is where you can customize the jam to your personal preference, whether you enjoy a smoother, more uniform consistency or a jam with delightfully chunky pieces of fruit. Take your wooden spoon or silicone spatula and gently press down on the softened rhubarb pieces in the saucepan.
If you prefer a smoother jam, mash the rhubarb more thoroughly, breaking down the majority of the stalks into a pulp. This will create a jam that spreads very easily and has a more homogenous texture, similar to what you might find in a store-bought preserve. On the other hand, if you enjoy the delightful textural contrast of fruit pieces in your jam, simply give the rhubarb a few gentle mashes. This will break down some of the rhubarb while leaving larger pieces intact, providing a more rustic and satisfying bite.
Pro Tip: This step can be done quickly, usually taking only about 2 minutes. It’s a great opportunity to assess how much you want the rhubarb to break down. Some people even use an immersion blender for a few quick pulses for a super smooth result, but a spoon works perfectly well. The key is to achieve a consistency that you will enjoy spooning onto your toast or into your yogurt.
Step 4: Sweetening and Brightening
With the rhubarb softened and its texture adjusted to your liking, it’s time to introduce the elements that balance its natural tartness and enhance its vibrant flavor. Stir in your chosen sweetener, whether it’s pure maple syrup or honey, along with the freshly squeezed lemon juice. Maple syrup provides a rich, caramel-like depth, while honey offers its own floral notes; either will beautifully complement the rhubarb. The lemon juice is crucial; it not only adds a zesty brightness but also helps to preserve the jam’s beautiful pink color, keeping it looking as fresh as it tastes.
This is also the critical moment to taste and adjust the sweetness. Rhubarb varieties can differ in their tartness, and personal preferences for sweetness vary widely. Start by tasting a small amount of the mixture. If you find it too tart for your liking, gradually add a little more sweetener, stirring well after each addition, until you achieve that perfect balance between tangy and sweet. The goal is a lively, bright flavor that sings on your palate without being overwhelmingly sour or cloyingly sweet. This tasting and adjusting step ensures your jam is perfectly tailored to your preferences.
Quick Fact: Freshly squeezed lemon juice contains more vibrant citric acid and essential oils than bottled juice, making a noticeable difference in the final brightness and flavor of the jam. Don’t skip this crucial step for the best results, as it truly elevates the overall taste profile of your homemade jam.
Step 5: Incorporating the Magic Thickeners
Now for the truly magical part of this no-cook jam: the addition of chia seeds, which will transform the liquid mixture into a luscious, spreadable jam without any stovetop simmering. Remove the saucepan from the heat entirely. This is important to prevent the chia seeds from clumping and to allow them to absorb the liquid effectively. Once removed from the heat, stir in the chia seeds thoroughly. If you’re using any optional flavor boosters like vanilla extract or ground ginger, now is the time to incorporate them as well.
Whisk or stir vigorously to ensure the chia seeds are evenly distributed throughout the rhubarb mixture. You’ll notice almost immediately that the chia seeds begin to absorb the liquid. They work by forming a gel-like substance as they hydrate, creating the characteristic texture of chia jam. Make sure there are no dry pockets of chia seeds; a thorough mix is key to achieving a uniform consistency. The mixture will start to thicken visibly as it sits, even at room temperature.
Insider Tip: If you’re adding spices like ginger or cinnamon, ensure they are well-distributed. A little goes a long way, and these additions can add a wonderful layer of complexity to the simple rhubarb flavor, making it perfect for a dessert or a special breakfast.
Step 6: Allowing the Jam to Thicken
The final stage in preparing your rhubarb chia jam involves patience and allowing time for the magic of the chia seeds to work. Once all the ingredients are combined, transfer the mixture from the saucepan into a clean bowl or, ideally, a glass jar. This makes it easy to store and handle during the thickening process. Allow the jam to cool down to room temperature first. This initial cooling period is important before refrigerating, as it helps the chia seeds to start their thickening action without being shocked by extreme cold.
Once the jam has reached room temperature, cover the bowl or seal the jar and place it in the refrigerator. You need to allow at least 15 minutes for the jam to thicken, but it’s highly recommended to let it sit for at least an hour, or even better, overnight. The longer it chills, the more the chia seeds will absorb the liquid, resulting in a thicker, more jam-like consistency. The texture will transform from a loose, rhubarb-filled liquid into a spreadable, delightful jam.
Enjoy! After it has had sufficient time to chill and thicken, give the jam a good stir before you use it. Sometimes, if it has been in the fridge for a while, it might thicken further. If it seems too thick for your liking, a simple solution is to stir in a teaspoon or two of water or a little extra lemon juice to loosen it to your desired consistency. This process is incredibly satisfying because you witness the transformation from simple ingredients to a finished product with minimal effort.
Pro Tips for rhubarb chia jam
Making this rhubarb chia jam is incredibly straightforward, but a few expert tips can elevate your experience and ensure consistently delicious results. These little nuggets of wisdom come from personal experience, helping to troubleshoot common issues and enhance the overall quality of your homemade jam. Following these guidelines will help you create a perfect jar of springtime goodness every single time.
Don’t skip cooking the rhubarb: While this is a “no-cook” jam in the sense of simmering for hours, gently cooking the rhubarb is essential. Raw rhubarb is too tough and intensely tart to be palatable in jam form. Cooking softens its texture and mellows its flavor, making it suitable for a delicious spread. This step is crucial for unlocking the rhubarb’s inherent sweetness and vibrant color, preparing it to meld harmoniously with the other ingredients.
Adjust sweetness gradually: It’s always better to start with less sweetener than you think you need. Rhubarb’s tartness can vary, and your personal preference for sweetness is unique. Begin with the suggested amount, taste, and then add more sweetener incrementally if necessary. This ensures you don’t end up with an overly sweet jam that masks the rhubarb’s natural tang. Remember, you can always add more sweetness, but you can’t take it away once it’s incorporated.
Use fresh lemon juice: Bottled lemon juice simply doesn’t offer the same bright, vibrant flavor as fresh lemons. The fresh zest and juice provide essential acidity that cuts through sweetness and enhances the fruit’s natural taste, while also helping to maintain that beautiful rosy color. If you want your jam to taste truly fresh and lively, fresh lemon juice is a non-negotiable ingredient in this recipe, truly transforming the final outcome.
Chia seeds are your thickening friends: Don’t underestimate the power of chia seeds. They are the unsung heroes of this recipe, responsible for turning a liquid mixture into a luscious jam without any heat. Ensure you use the correct amount; too few, and your jam might be too thin, while too many can make it overly gelatinous. They are a nutritional powerhouse, adding fiber and omega-3 fatty acids to your jam, making it a healthier choice.
Watch the cooking time for rhubarb: While you want the rhubarb to soften, overcooking it can lead to a mushy texture and a duller flavor. Aim for tender pieces that are easily mashable but still retain some integrity. Setting a timer for the suggested cooking duration, usually around 8-10 minutes, and checking the texture periodically is a good strategy. This ensures the rhubarb is perfectly prepared without losing its vibrant essence.
Storage matters for freshness: Homemade jams, especially those without preservatives, have a limited shelf life. Store your rhubarb chia jam in an airtight container in the refrigerator and aim to consume it within about two weeks for the best flavor and quality. If you notice any signs of spoilage, such as mold or an off smell, it’s best to discard it. This ensures you’re always enjoying your jam at its peak deliciousness.
If, after chilling, your jam is a bit too thick, a quick fix is to stir in a teaspoon or two of water or a splash more lemon juice to reach your desired consistency. Conversely, if it’s a little too thin (which is less common), you can add a tiny pinch more chia seeds and let it sit for another 15-20 minutes to thicken further. These minor adjustments ensure you always get the perfect jam texture.
Serving Suggestions for rhubarb chia jam
Decoration
Elevate your presentation by using this vibrant rhubarb chia jam as a beautiful topping. A generous dollop on top of a slice of plain cheesecake or a swirl within a bowl of panna cotta creates an immediate visual appeal. The bright pink hue contrasts wonderfully with creamy white desserts, making them look as delightful as they taste. You can also artfully drizzle it around the edges of a dessert plate for an elegant finishing touch that guests will surely admire.
For a simple yet stunning garnish, consider adding a small sprig of fresh mint or a delicate edible flower, like a pansy or viola, placed gently atop the jam. These small additions not only enhance the visual appeal but also provide a complementary freshness that balances the jam’s tanginess. This decorative approach makes even simple treats feel like restaurant-quality creations.
Side Dishes
This rhubarb chia jam is an absolute champion when paired with a variety of breakfast staples. Imagine spreading a thick layer on warm, toasted sourdough bread, the tanginess cutting through the rich butter, or enjoying it with fluffy pancakes or golden-brown waffles. It also makes a fantastic accompaniment to German pancakes, offering a bright, fruity counterpoint to the eggy richness.
Beyond breakfast, consider using it as a delightful component in more elaborate dishes. It pairs exceptionally well with savory items like roasted pork loin or chicken breasts, providing a sweet and tart glaze. For a more casual approach, a spoonful stirred into Greek yogurt or cottage cheese transforms a simple snack into a gourmet treat. It’s also an unexpectedly wonderful addition to a cheese board, pairing beautifully with sharp cheddar or creamy brie.
Creative Serving Ideas
Unleash your inner chef by incorporating this versatile jam into unique culinary creations. Swirl it into the batter of a vanilla or almond cake before baking, infusing every bite with a subtle fruity surprise. It’s also an excellent filling for thumbprint cookies or linzer cookies, adding a burst of flavor and color. Imagine a thin layer spread on a puff pastry base before adding other fruit, creating a delightful tart.
For a truly innovative use, consider using it as a quick sauce for ice cream or frozen yogurt. A simple drizzle can transform a plain scoop into something extraordinary. It can even be whisked into a vinaigrette for a salad dressing, adding a fruity tang that complements greens and grilled chicken wonderfully. This jam proves that its uses extend far beyond the traditional toast topping, offering endless possibilities for culinary adventure and delightful flavor combinations.
Preparation & Storage
Storing Leftovers
Proper storage is key to maintaining the freshness and delightful flavor of your homemade rhubarb chia jam. Once it has cooled completely, transfer the jam into an airtight container or a clean glass jar. It’s essential that the container is sealed tightly to prevent air from entering, which can lead to spoilage and affect the jam’s texture. Ensure the container is impeccably clean to avoid introducing any unwanted bacteria that could shorten its shelf life.
Store the jam in the refrigerator, where it will continue to thicken as it chills. For the best quality and taste, aim to consume the jam within two weeks of preparation. The absence of commercial preservatives means it’s best enjoyed fresh. Before each use, give the jam a good stir, as it might thicken further in the fridge. This simple step ensures you get the perfect consistency every time you reach for your delicious homemade spread.
Freezing
If you find yourself with an abundance of this wonderful rhubarb chia jam or want to preserve its delightful taste for longer, freezing is an excellent option. Ensure the jam is completely cooled before portioning it into freezer-safe containers or bags. Small, individual portions are ideal, as they allow for easy thawing as needed without compromising the entire batch.
When packing for the freezer, leave a little headspace in the container, as the jam may expand slightly when frozen. Label your containers clearly with the date of freezing to keep track of freshness. Properly stored, this rhubarb chia jam can remain frozen for up to three months, retaining its vibrant flavor and appealing texture. When you’re ready to use it, simply transfer the frozen jam to the refrigerator the day before and allow it to thaw completely.
Reheating
While this jam is designed to be enjoyed cold or at room temperature, there might be occasions where a slightly warmer consistency is desired, or you need to loosen it up after refrigeration. If your jam has become too thick after chilling, a gentle reheating process can help. You can achieve this by placing the desired amount of jam in a small saucepan over very low heat, stirring constantly. Alternatively, a few seconds in the microwave on a low power setting, followed by stirring, can also loosen its consistency.
Be cautious not to overheat the jam, as excessive heat can degrade the texture and flavor, especially since it doesn’t contain traditional pectin. The goal is simply to warm it enough to make it more pliable and easier to spread or incorporate into other dishes. If you’re just looking to slightly loosen the jam for easier spreading, stirring in a teaspoon of water or a bit more lemon juice at room temperature is often sufficient and requires no heating at all.
Frequently Asked Questions
-
Can I use frozen rhubarb for this jam?
Absolutely! Frozen rhubarb is a perfectly acceptable substitute for fresh when it’s not in season, offering the same vibrant flavor. However, there are a couple of key differences to keep in mind to ensure your jam turns out perfectly. Firstly, frozen rhubarb often releases more liquid when thawed than fresh rhubarb does. It’s crucial to drain any excess water thoroughly before you start cooking it to prevent your jam from becoming too watery. Secondly, frozen rhubarb may sometimes be a bit softer or more broken down already. This means you might need to cook it for a slightly shorter duration to achieve the right tender consistency before proceeding with adding the sweeteners and chia seeds.
-
Why do I need chia seeds in this jam?
Chia seeds are the secret weapon and the star of this “no-cook” jam recipe, playing a crucial role in achieving the perfect jam-like consistency without the need for traditional cooking methods or added pectin. When chia seeds are exposed to liquid, they absorb it rapidly and swell up, forming a gelatinous, gel-like substance. This natural thickening property is what transforms the softened rhubarb mixture into a luscious, spreadable jam. Beyond their thickening power, chia seeds also contribute significant nutritional benefits, adding dietary fiber, protein, and heart-healthy omega-3 fatty acids to your jam, making it a much healthier alternative to many store-bought jams that are often high in sugar and lack these valuable nutrients.
-
Can I substitute the maple syrup with something else?
Yes, you have several excellent options for substituting the maple syrup, depending on your dietary preferences and what you have available in your pantry. Honey is a fantastic natural sweetener that pairs wonderfully with rhubarb, offering its own unique floral notes. Agave nectar is another liquid sweetener that works well and provides a similar consistency. If you prefer a granulated sweetener, coconut sugar or brown sugar can also be used, though you might need to stir them in a bit more thoroughly to ensure they dissolve completely. Whichever sweetener you choose, it’s always a good practice to start with a slightly smaller amount than the recipe calls for and then taste and adjust. Rhubarb’s tartness varies, and so does personal sweetness preference, so finding that perfect balance is key. Be aware that different sweeteners can impart slightly different flavors, so experiment to find your favorite combination.