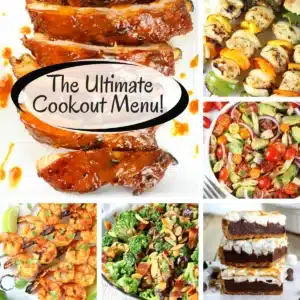
The Ultimate Cookout Menu!

The warmth of the sun, the scent of charcoal in the air, and the joyful chatter of friends and family – these are the hallmarks of a perfect summer cookout. This season is all about vibrant flavors, fresh ingredients, and creating memorable moments around delicious food. Get ready to elevate your entertaining game with a collection of recipes designed to impress and delight everyone at your next gathering.
From appetizers that spark conversation to main courses that steal the show, and from refreshing salads to decadent desserts, this guide has everything you need. We’re diving deep into the essence of summer dining, ensuring your cookout is not just a meal, but an experience. Prepare to become the host with the most, crafting a culinary celebration that captures the spirit of the season.
Why You Will Love This Recipe
- Effortless Entertaining: Designed to simplify your hosting duties, these recipes allow you more time to mingle with guests and less time stressing in the kitchen.
- Crowd-Pleasing Flavors: Every dish is curated to satisfy a variety of palates, from the pickiest eaters to the most discerning foodies, ensuring smiles all around.
- Seasonal Freshness: We emphasize using the best of summer’s bounty, highlighting fresh produce and vibrant ingredients that are at their peak during this time of year.
- Versatile Selection: The collection offers a balanced menu, covering appetizers, main courses, sides, and desserts, providing a complete culinary framework for your event.
- Grill Master Approved: Many recipes leverage the beloved smoky char of the grill, infusing dishes with that quintessential summer cookout essence.
Ingredients You Need
The foundation of any exceptional cookout lies in the quality of its ingredients. Opting for fresh, seasonal produce and high-quality proteins will undoubtedly elevate your dishes from good to unforgettable. This approach not only enhances the flavor profile but also supports the vibrant, wholesome spirit of summer cooking. Consider sourcing local when possible to capture the true essence of the season’s best offerings.
Cheesy Buffalo Shrimp Dip
Your new go-to holiday appetizer ready in less than 15 minutes! This yummy dip is full of creamy cheesy goodness and only requires 5 ingredients – shrimp, hot sauce, cream cheese, shredded cheese and green onions.
- shrimp
- hot sauce
- cream cheese
- shredded cheese
- green onions
- 1Combine all ingredients in a bowl.
- 2Mix well until everything is evenly distributed.
- 3Bake at 350°F (175°C) for 15-20 minutes, or until bubbly and heated through.
- 4Serve hot with crackers or vegetable sticks.
Keywords: appetizer, dip, shrimp, buffalo, cheesy, holiday, party
The specific quantities for each ingredient are detailed within the provided recipe card, ensuring precision in your culinary creations.
Variations
For those seeking plant-based delights, transforming many of these cookout staples into vegan versions is remarkably simple. For instance, the grilled chicken kabobs can be reimagined with firm tofu or hearty tempeh, marinated in a similar lemon-rosemary blend, and grilled to perfection alongside colorful bell peppers and onions. Alternatively, swap out the dairy in dips and salads for cashew-based creams and plant-based yogurts, creating equally delicious and satisfying options.
Low-carb enthusiasts can find joy in a wealth of options, focusing on protein and non-starchy vegetables. Shrimp skewers, grilled fish, and steak are excellent main course choices. For sides, embrace salads packed with leafy greens, cucumbers, and avocado, or grilled zucchini and asparagus. Many of the potato salad variations can be adapted by using cauliflower florets instead of potatoes, offering a creamy texture with a lower carbohydrate count.
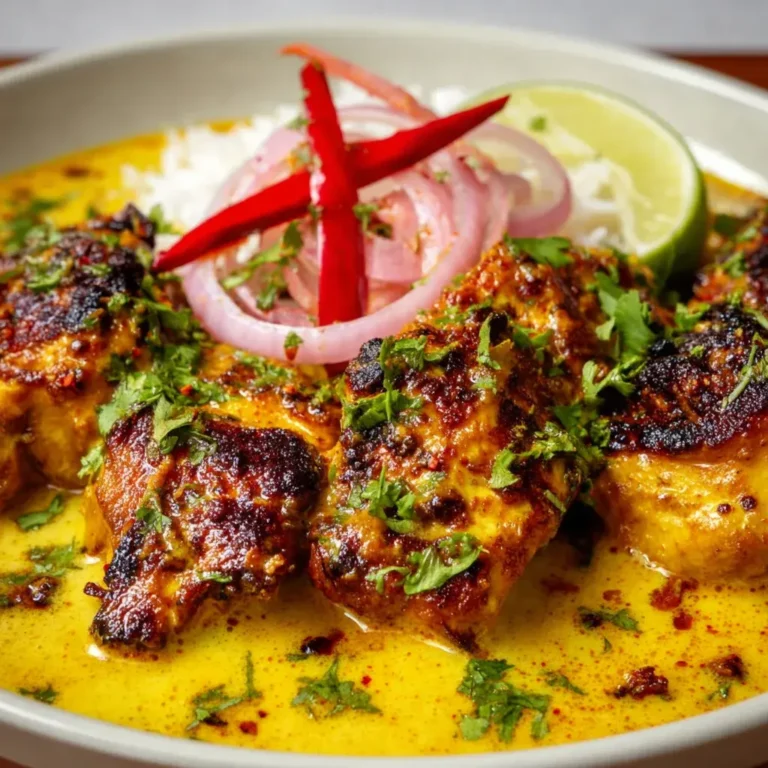
Adventure seekers might enjoy incorporating international flair into their cookout. Consider marinating chicken or tofu in a teriyaki or satay sauce for an Asian-inspired twist, or try a Cuban mojo marinade for pork or plantains. Experiment with global spice blends for rubs on ribs or steaks, bringing an exciting new dimension to your familiar summer favorites and turning your cookout into a culinary journey around the world.
How to Prepare summertime cookout recipes
Step 1: Marinate and Prep the Proteins
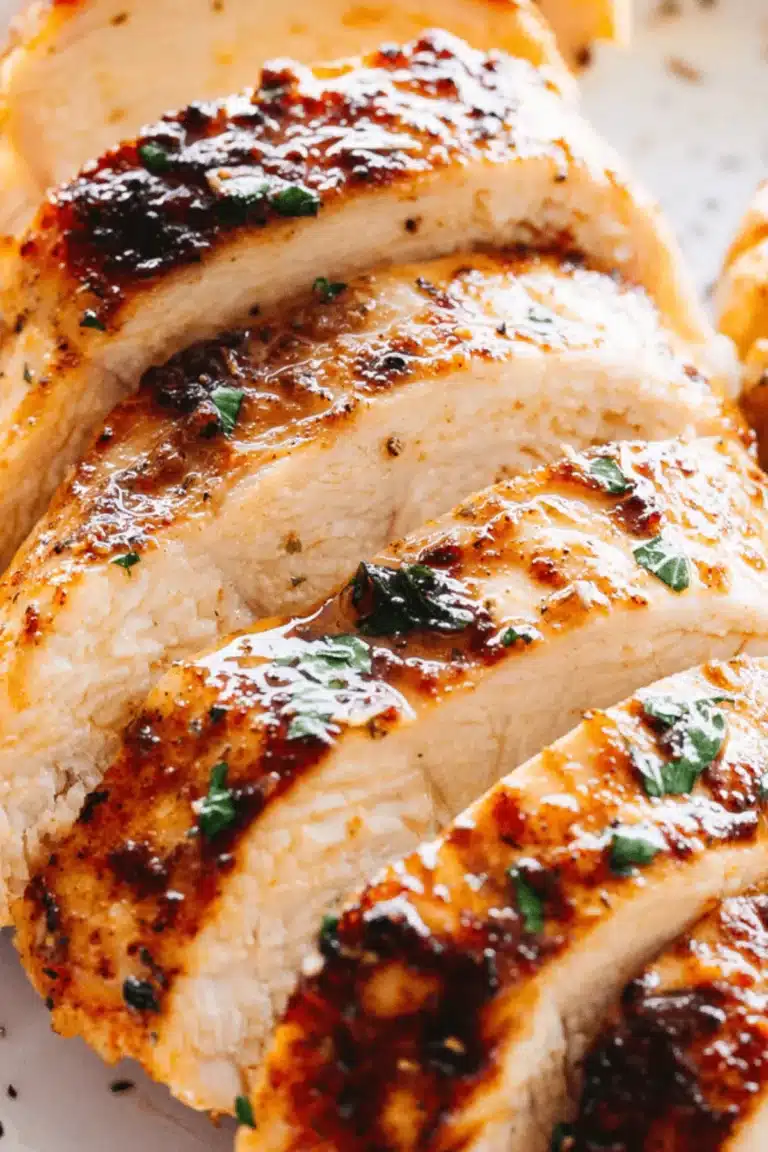
Begin by preparing your chosen proteins for grilling. For recipes like the Grilled Rosemary Lemon Chicken Kabobs, this involves creating a vibrant marinade. Whisk together fresh lemon juice, Dijon mustard, finely chopped fresh rosemary, salt, freshly ground black pepper, minced garlic, and a touch of honey in a large bowl. Ensure the honey is fully dissolved for an even coating.
Cube your chicken breasts or thighs into uniform pieces, roughly 1.5 to 2 inches. Add the chicken to the marinade, ensuring each piece is thoroughly coated. Cover the bowl tightly with plastic wrap or transfer the mixture to a resealable plastic bag. Refrigerate for at least 30 minutes, or up to 4 hours, to allow the flavors to meld and tenderize the meat beautifully. For the Grilled Chili Lime Shrimp, a similar marination process using smoked paprika, chili powder, garlic, lime juice, olive oil, and honey will imbue them with a zesty and smoky profile.
If you’re preparing BBQ Baby Back Ribs or Balsamic Baby Back Ribs, the initial preparation involves ensuring they are cleaned and any excess membrane is removed from the back. A dry rub, applied generously and left to adhere for at least an hour, or ideally overnight in the refrigerator, is crucial for developing a flavorful crust before they hit the grill. The complexity of the flavors in these ribs is built through careful seasoning and patient marination.
Step 2: Assemble Skewers and Prepare Vegetables
While the proteins are marinating, it’s time to prepare your kabob components and vegetables for grilling. For the chicken kabobs, chop colorful bell peppers (red, yellow, green), red onion wedges, and perhaps some zucchini into similarly sized pieces as the chicken. This ensures even cooking on the grill.
If you are using wooden skewers, remember to soak them in water for at least 30 minutes prior to assembly. This prevents them from burning on the grill. Thread the marinated chicken pieces alternately with the prepared vegetables onto the skewers, leaving a small space between each item to allow for proper heat circulation and even cooking. For a visually appealing presentation and balanced flavor, aim for a consistent pattern of meat and vegetables on each skewer.
Beyond the kabobs, prepare other vegetables that will be grilled or incorporated into salads. Corn on the cob can be husked and any silk removed; it’s excellent grilled whole or cut into halves. Zucchini and summer squash can be sliced into planks or rounds and lightly tossed with olive oil, salt, and pepper before grilling. These simple preparations ensure that even the vegetables are packed with smoky, caramelized flavor from the grill.
Step 3: Preheat the Grill and Sear the Proteins
Preheating your grill is a critical step for achieving that perfect sear and ensuring your food cooks evenly. Aim for a medium-high heat, around 400-450°F (200-230°C). A clean grill grate is essential to prevent sticking and ensure beautiful grill marks. Once the grill is hot, carefully place your marinated chicken kabobs and shrimp skewers onto the grates.
Sear the kabobs for about 3-4 minutes per side, turning them with tongs to achieve a beautiful char on all surfaces. The total cooking time will vary depending on the size of the chicken pieces and the heat of your grill, but aim for an internal temperature of 165°F (74°C). For the shrimp, which cook much faster, grill for only 2-3 minutes per side until they turn pink and opaque. Overcooked shrimp can become tough, so vigilance is key.
For the BBQ Baby Back Ribs, the grilling process often involves indirect heat initially to allow them to cook through slowly before being finished over direct heat or with an additional glaze. This slow cooking method ensures the meat becomes incredibly tender. The initial sear on the ribs helps to render some of the fat and build a robust flavor base, setting the stage for the barbecue sauce.
Step 4: Grill or Bake Side Dishes and Appetizers
While the main proteins are taking center stage on the grill, turn your attention to the accompanying dishes. Many of the salads can be prepared ahead of time, allowing the flavors to meld. For the Jalapeno Cilantro Corn Salad, simply combine fresh corn kernels (grilled or raw), diced red onion, finely chopped jalapenos, and fresh cilantro. Dress it with a lime vinaigrette and let it sit for at least 30 minutes.
If you’re making the Smoky Poblano Corn Dip, you’ll want to char your poblanos and corn either on the grill or under a broiler until they have a nice smoky blister. Once cooled, dice them and combine with your other creamy ingredients like cream cheese, sour cream, and seasonings. This dip is often baked until bubbly and golden, making it a warm, comforting appetizer.
The Three Cheese Tomato Tart requires pre-baking the crust before layering it with sliced heirloom tomatoes, shallots, herbs, and a generous blend of cheeses. Baking this tart until the cheese is melted and bubbly and the tomatoes are tender will result in a stunning and flavorful appetizer or light side dish that captures the essence of summer. Ensure your oven is preheated and ready to receive the tart.
Step 5: Glaze and Finish Main Courses
As your main proteins approach doneness, it’s time for the finishing touches that truly elevate them. For the BBQ Baby Back Ribs, this is where the magic of the barbecue sauce happens. Brush a generous layer of your favorite BBQ sauce over the ribs during the last 15-20 minutes of cooking. Allow the sauce to caramelize and create a sticky, delicious glaze. You might want to apply multiple layers, turning the ribs to ensure even coating and intense flavor development.
Similarly, for the Balsamic Baby Back Ribs, the rich, garlicky brown sugar and balsamic glaze needs to be slathered on towards the end of the cooking process. The balsamic vinegar will reduce and thicken, creating a syrupy coating that perfectly complements the tender pork. The “cayenne kick” in this recipe adds a delightful subtle heat that balances the sweetness of the sauce.
For the Grilled Rosemary Lemon Chicken Kabobs, a final squeeze of fresh lemon juice over the cooked kabobs just before serving can brighten the flavors significantly. The residual heat will further enhance the aromatic rosemary. If you find your kabobs are looking a little dry, a final basting with a bit of the marinade (after it has been heated to a safe temperature, or reserved separately) can add moisture and flavor.
Step 6: Assemble Salads and Prepare Desserts
With the main dishes grilling or resting, it’s time to bring together the fresh salads and prepare your sweet treats. For the Grilled Chicken Bacon Ranch Pasta Salad, cook your pasta al dente and cool it down. Then, toss it with grilled chicken pieces, crispy bacon, creamy avocado, and ripe tomatoes. The homemade buttermilk ranch dressing should be generously applied, coating all the ingredients in a luscious, tangy embrace.
The Grilled Veggie Corn Salad is a celebration of summer’s produce. Combine grilled corn kernels, cherry tomatoes, diced zucchini, and red onion. A light and tangy white balsamic vinaigrette, made with olive oil, white balsamic vinegar, a touch of honey or maple syrup, salt, and pepper, ties everything together beautifully. This salad is best served slightly chilled, allowing the vinaigrette to permeate the ingredients.
For desserts, the Baked Nutella S’mores are designed for easy assembly and a quick bake. Layer graham crackers, chocolate, and a generous swirl of Nutella in a cast-iron skillet or individual ramekins. Top with marshmallows and bake until the marshmallows are golden brown and gooey. The Blueberry Lemon No Bake Cheesecake Jars are a fantastic make-ahead option; simply layer the graham cracker crust mixture, the lightened cheesecake filling, and the homemade blueberry sauce in individual jars and chill until ready to serve.
Pro Tips for summertime cookout recipes
Master Your Grill: Understanding your grill’s heat zones is crucial. Designate areas for direct heat (for searing) and indirect heat (for slower cooking). This allows you to manage different recipes simultaneously and prevent burning delicate items.
Rest Your Meats: Always let grilled meats rest for at least 5-10 minutes after removing them from the heat. This allows the juices to redistribute throughout the meat, resulting in a more tender and flavorful final product. Tent loosely with foil to keep warm.
Prep Ahead: Many components of a cookout can be prepared a day in advance. Chop vegetables, make marinades and dressings, and even assemble certain salads or desserts. This significantly reduces stress on the day of the event, allowing you to enjoy your guests.
Food Safety First: Always practice good food safety. Keep raw meats separate from ready-to-eat foods, use clean utensils and cutting boards, and ensure all cooked foods reach their proper internal temperatures. Don’t leave perishable food out at room temperature for more than two hours.
Embrace the Char: Don’t be afraid of a little char on your grilled items. A bit of caramelization from the grill adds a wonderful depth of flavor that is signature to a summer cookout. Just be mindful of excessive burning, which can create bitter tastes.
Serving Suggestions for summertime cookout recipes
Decoration
Transform your outdoor space into a festive cookout haven with simple yet impactful decorations. Think about colorful tablecloths and coordinating paper napkins that add a pop of vibrancy. String fairy lights or lanterns overhead to create a magical ambiance as the sun sets, encouraging lingering conversations long into the evening. Fresh flowers or sprigs of herbs in simple mason jars can act as charming centerpieces that echo the freshness of the food.
Side Dishes
Complement your main grilled dishes with a diverse array of refreshing and satisfying side dishes. The Jalapeno Cilantro Corn Salad offers a zesty crunch, while the Grilled Chicken Bacon Ranch Pasta Salad provides a creamy, hearty option. For a lighter touch, the Grilled Veggie Corn Salad bursts with the flavor of summer produce. Don’t forget the classic comfort of potato salads; the Salt and Vinegar Potato Salad brings a tangy twist, and the Greek Tzatziki Potato Salad offers a cool, herbaceous contrast.
Creative Serving Ideas
Elevate the presentation of your cookout fare with a few creative touches. For the kabobs, arrange them artfully on a large platter, perhaps garnished with extra fresh herbs and lemon wedges. Serve dips like the Smoky Poblano Corn Dip or Cheesy Buffalo Shrimp Dip in rustic ceramic bowls with an assortment of dippers, including grilled bread, tortilla chips, and fresh vegetable sticks. Consider a “build-your-own” station for something like the pasta salad, offering extra toppings like shredded cheese, croutons, or extra grilled chicken for guests to customize their plates.
Preparation & Storage
Storing Leftovers
Properly storing leftovers is key to enjoying your delicious cookout creations for days to come. Allow all cooked food to cool to room temperature, which typically takes about one to two hours, before refrigerating. Store dishes in airtight containers to maintain freshness and prevent odor absorption. Salads with creamy dressings, cooked meats, and baked goods will generally keep well in the refrigerator for 3-4 days.
Freezing
Many cookout dishes lend themselves well to freezing, allowing you to enjoy them even outside of grilling season. Fully cooked and cooled meats, such as ribs or chicken that wasn’t in a heavy sauce, can be wrapped tightly in plastic wrap and then aluminum foil or placed in freezer bags for up to 2-3 months. Denser items like the Three Cheese Tomato Tart or certain casseroles can also be frozen after being cooled and portioned into freezer-safe containers. Be aware that some items, like very crisp salads or those with a high water content, may not freeze as well.
Reheating
Reheating leftovers should be done carefully to preserve quality and ensure food safety. For meats like ribs or chicken, the oven is often the best option for gentle reheating, allowing them to warm through without becoming dry. You can reheat them at a lower temperature, around 300-325°F (150-160°C), perhaps adding a little extra sauce or a splash of broth to maintain moisture. Pasta salads can often be enjoyed cold or at room temperature. Baked dishes like the tomato tart can be reheated in the oven or a toaster oven until warmed through. Always ensure food is heated to an internal temperature of 165°F (74°C) before serving.
Frequently Asked Questions
-
How can I ensure my grilled items don’t stick to the grill grates?
Preventing food from sticking to the grill is a common concern, but easily managed with a few key techniques. Firstly, always ensure your grill grates are thoroughly cleaned before you start cooking. Residual food particles are a primary cause of sticking. Secondly, preheat your grill to the appropriate temperature; a sufficiently hot grill sears food quickly, creating a barrier. Thirdly, oiling the grates just before placing food on them is highly effective; use a high smoke point oil like canola or vegetable oil applied with a paper towel held by tongs. For delicate items like fish or marinated vegetables, consider using a grill basket or foil packets, which also allows for even cooking and moisture retention.
-
What are some good make-ahead options for a busy cookout day?
To make your cookout day less hectic, focusing on make-ahead dishes is a smart strategy. Many salads, like the Jalapeno Cilantro Corn Salad or the Grilled Veggie Corn Salad, actually benefit from sitting for a few hours, allowing the flavors to meld beautifully. Pasta salads and potato salads are also excellent candidates for advance preparation. Appetizers such as the Smoky Poblano Corn Dip can be assembled and baked just before serving, or even baked ahead and reheated. Desserts like the Blueberry Lemon No Bake Cheesecake Jars are perfect as they need to chill anyway, making them ideal for assembly the day before. Even marinades for proteins can be prepared in advance, saving crucial time on the day of your event.
-
How can I adjust these recipes for dietary restrictions like gluten-free or dairy-free?
Adapting these cookout recipes for common dietary restrictions is quite feasible with thoughtful substitutions. For gluten-free needs, ensure your chosen pasta for the pasta salad is gluten-free, and opt for gluten-free crackers or bread for dips. For the Three Cheese Tomato Tart, a gluten-free pie crust can be used. Dairy-free adaptations involve swapping out dairy cheeses for nut-based or soy-based alternatives, and using plant-based milks and yogurts in dressings and dips. For example, the Greek Tzatziki Potato Salad can be made dairy-free by using a plain, unsweetened dairy-free yogurt alternative. Always check labels on pre-made ingredients like BBQ sauces to ensure they meet your specific dietary requirements.