Oven Baked Bone-In Pork Chops – Ready in Half an Hour!
Welcome to a culinary journey that promises to delight your taste buds and simplify your weeknight dinners. We’re diving into the art of creating perfectly baked, bone-in pork chops, a dish that embodies comfort, flavor, and impressive results with minimal fuss. This recipe is designed to be accessible to home cooks of all levels, ensuring you can achieve restaurant-quality results right in your own kitchen. Prepare to be amazed by the succulent tenderness and rich, aromatic flavors that emerge from this straightforward preparation.
Bone-in pork chops offer a superior depth of flavor and moisture retention compared to their boneless counterparts, thanks to the presence of the bone, which acts as a natural insulator during cooking. This recipe leverages that inherent advantage, combined with a quick sear and a flavorful garlic butter sauce, to create a meal that is both elegant and incredibly satisfying. Get ready to discover your new favorite go-to pork chop recipe, one that will undoubtedly become a staple in your culinary repertoire and a guaranteed hit at any family gathering.
Why You Will Love This Recipe
- Exceptional Tenderness: The combination of bone-in cuts, a quick sear, and precise oven baking ensures that each bite is incredibly tender and juicy, avoiding the dryness often associated with pork.
- Rich Flavor Profile: Infused with aromatic garlic, savory butter, and a blend of classic herbs and spices, these pork chops boast a deeply satisfying and complex flavor that complements the natural taste of the pork beautifully.
- Speedy Preparation: Despite the gourmet taste, this recipe is remarkably quick, with most of the active preparation taking mere minutes and the total cooking time clocking in at around 30 minutes, making it perfect for busy evenings.
- Versatile Presentation: Whether served simply with your favorite sides or presented with a flourish, these pork chops look as good as they taste, making them suitable for both casual family dinners and more formal entertaining.
- Foolproof Execution: Designed with simplicity in mind, the step-by-step instructions are easy to follow, minimizing the chance of error and maximizing your success, even if you’re new to cooking pork chops.
The success of any great dish hinges on the quality of its ingredients, and these oven-baked bone-in pork chops are no exception. We believe in using the freshest, highest-quality components to ensure the most delicious outcome. From the robust flavor of the bone-in pork chops themselves to the fragrant aromatics and rich butter that create the luscious sauce, every element plays a crucial role in the final masterpiece.
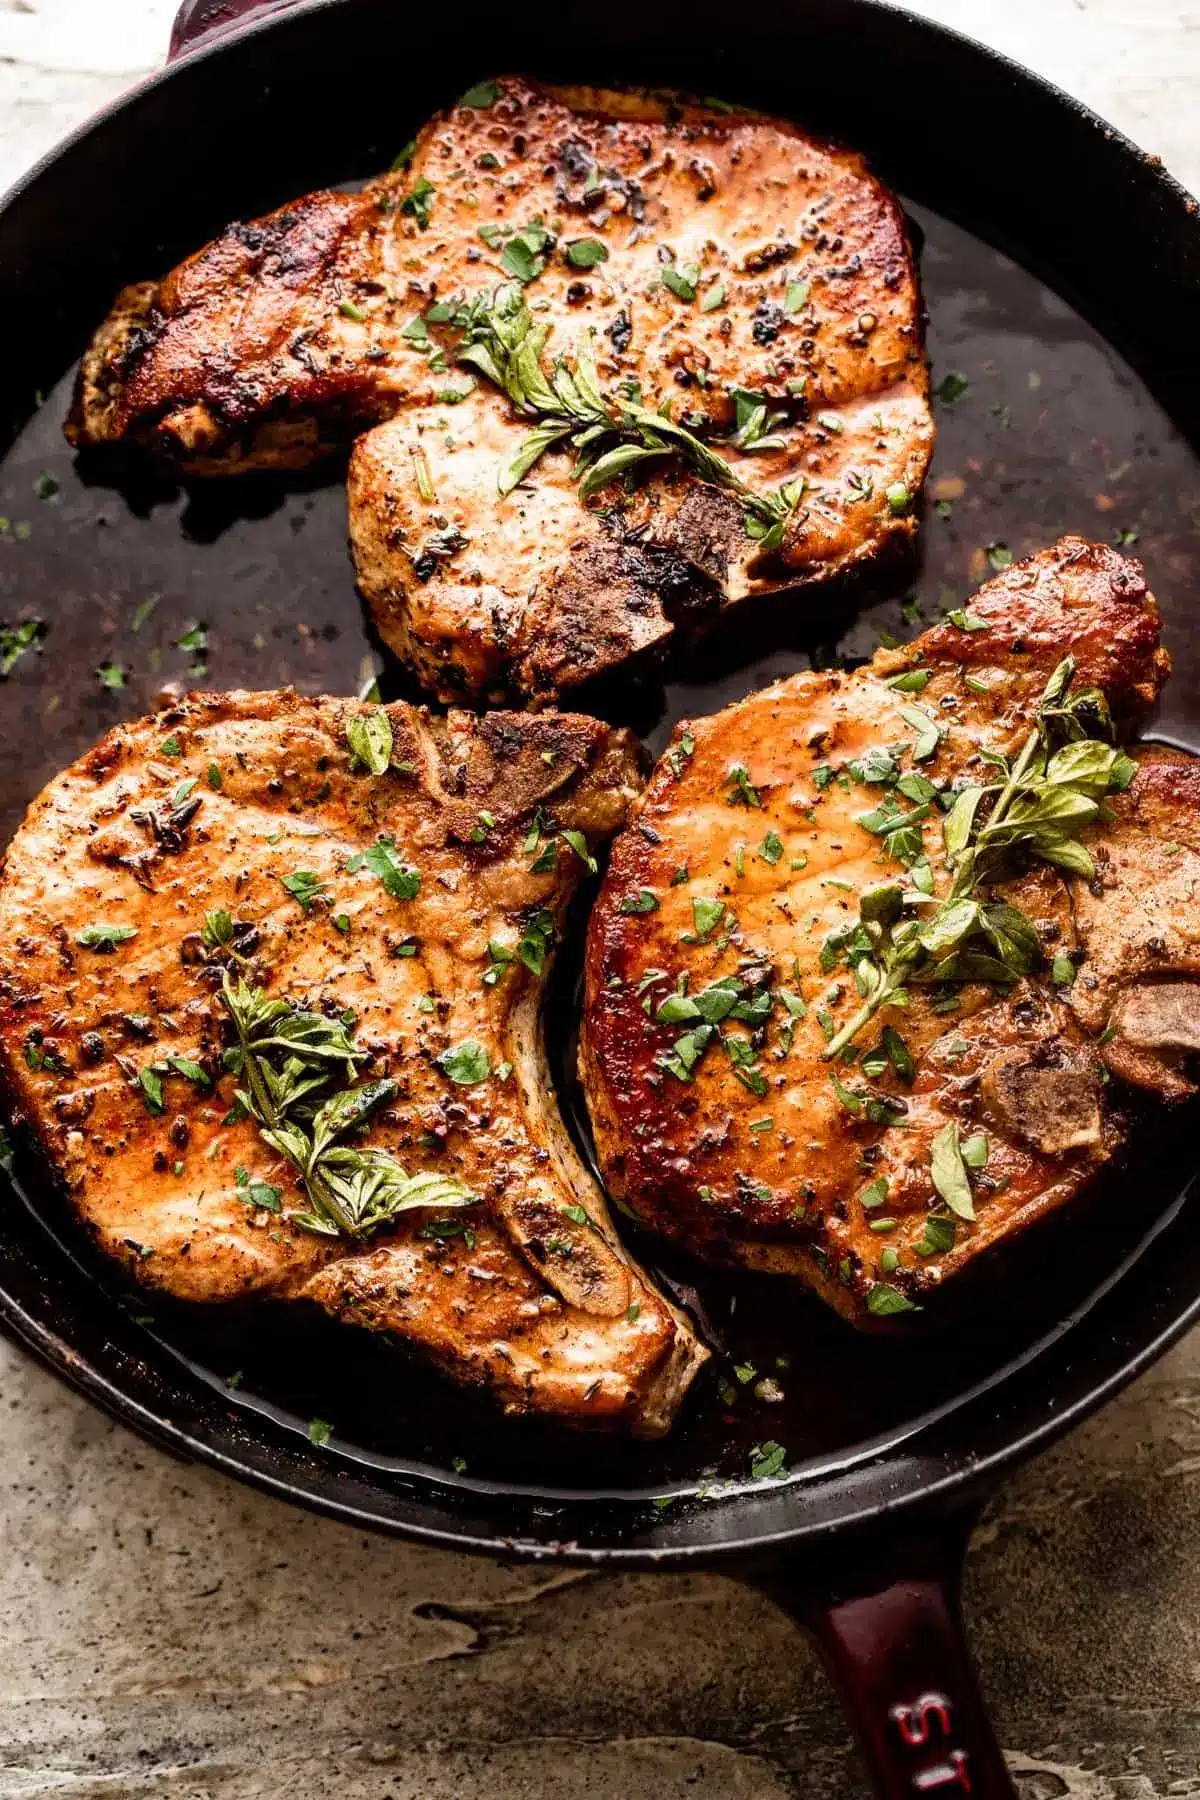
Oven Baked Bone-In Pork Chops

A quick sear and a short time in the oven are all that these oven baked bone-in pork chops need! The result is tender, juicy chops with garlic butter sauce, ready in about 30 minutes.
- 2 tablespoons olive oil
- 4 bone-in pork loin chops
- salt and freshly ground black pepper, to taste
- 1 teaspoon onion powder
- 1 teaspoon paprika
- ½ teaspoon dried oregano
- ½ teaspoon dried thyme
- 8 tablespoons butter, melted
- 4 cloves garlic, minced
- chopped fresh parsley, for garnish
- 1Preheat the oven to 375°F.
- 2Heat the olive oil in an oven-safe 12-inch skillet (preferably a cast-iron skillet) over medium-high heat.
- 3Pat dry the pork chops with paper towels and season them with salt, pepper, onion powder, paprika, oregano, and thyme.
- 4Sear the pork chops for about 2 to 3 minutes per side, or until browned. Do not crowd the skillet with the pork chops while browning them. If the skillet is too small, brown the chops in batches.
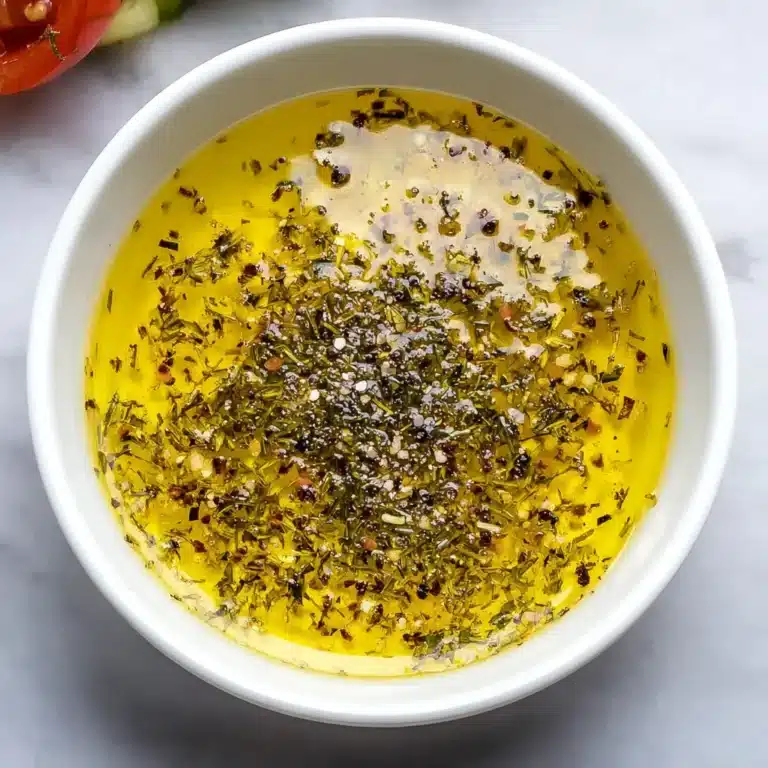
- 5In the meantime, combine the melted butter and garlic in a mixing bowl.
- 6Remove the skillet from the heat and pour the garlic butter sauce over the pork chops.
- 7Transfer the skillet to the oven and bake the pork chops for 12 to 15 minutes, or until cooked through and the internal temperature registers at 145°F. Cooking time will vary depending on the thickness of the chops. Baste with the butter sauce halfway through cooking.
- 8Remove the pork chops from the oven and transfer them to a serving plate; let them rest for 5 minutes before serving and cutting. Spoon the butter sauce over the pork chops, garnish with parsley, and serve.
Keywords: pork chops, oven baked, dinner, easy, weeknight, garlic butter
While the specific quantities are detailed in the accompanying recipe card, understanding the role of each ingredient can elevate your cooking experience. Choosing fresh, vibrant ingredients will not only enhance the taste but also contribute to a more enjoyable cooking process. We encourage you to seek out the best possible items available to you, as this small effort makes a significant difference in the final product.
Variations
Elevate your oven-baked bone-in pork chops with a few delightful variations that cater to different palates and dietary preferences. These creative twists ensure that this classic dish can be enjoyed in new and exciting ways, keeping your meals fresh and interesting.
For a Lighter, Brighter Taste: Citrus Herb Marinade. Before searing, consider marinating your pork chops in a zesty blend of olive oil, lemon juice, minced garlic, fresh rosemary, and thyme. Let them soak for at least 30 minutes, or up to 2 hours in the refrigerator, to allow the flavors to penetrate. This brightens the pork and adds a wonderfully fresh dimension, pairing exceptionally well with lighter side dishes like a fresh lemon chicken style approach.
For a Spicy Kick: Chipotle Honey Glaze. If you enjoy a bit of heat with your savory dishes, a chipotle honey glaze offers a fantastic contrast. After the initial sear and just before baking, brush the pork chops with a mixture of honey, minced chipotle peppers in adobo sauce, a touch of soy sauce, and a pinch of smoked paprika. The sweetness of the honey balances the smoky heat of the chipotle, creating an irresistible caramelized finish on the chops.
For a Richer, Creamier Experience: Mushroom Cream Sauce. Transform your pork chops into a decadent meal by preparing a simple mushroom cream sauce to accompany them. Sauté sliced cremini mushrooms and shallots in the same skillet after searing the chops, then deglaze with a splash of white wine or chicken broth. Stir in a swirl of heavy cream and a sprinkle of fresh chives, simmering until thickened. This luxurious sauce is perfect for spooning generously over the finished pork chops, making for an incredibly comforting lobster bisque level of richness.
How to Prepare oven baked bone-in pork chops
Step 1: Preheat and Prepare the Skillet
Begin by preheating your oven to a steady 375 degrees Fahrenheit (190 degrees Celsius). This consistent temperature is crucial for ensuring the pork chops cook evenly and develop a beautiful crust without drying out. Simultaneously, place an oven-safe skillet, ideally a well-seasoned cast-iron skillet, over medium-high heat on your stovetop. A cast-iron skillet distributes heat exceptionally well, providing that perfect sear.
Once the skillet is hot, add about two tablespoons of olive oil. Allow the oil to heat up for a minute or two until it shimmers slightly, indicating it’s ready for searing. A hot skillet is key to achieving a beautiful, flavorful crust on the pork chops, which not only enhances the taste but also helps to seal in the juices during the subsequent baking process. Do not overcrowd the skillet when adding the pork chops; if necessary, sear them in batches to ensure each chop gets adequate contact with the hot surface.
The initial sear is a critical step that builds the foundation of flavor for this entire dish. It creates a Maillard reaction on the surface of the pork, developing deep, savory notes that are essential to the final taste. This quick browning process also contributes to the visual appeal of the finished dish, giving the pork chops an appetizing golden-brown exterior.
Step 2: Season the Pork Chops Generously
While the skillet is heating, it’s time to prepare the star of the show: the pork chops. Take your bone-in pork loin chops and thoroughly pat them dry with paper towels. Removing excess moisture is vital for achieving a proper sear; damp meat will steam rather than brown. Once dry, season both sides of each pork chop generously with salt and freshly ground black pepper. The salt not only seasons the meat but also helps to draw out some moisture, further aiding in the searing process.
Next, apply the dry seasonings. Sprinkle each chop evenly with one teaspoon of onion powder, one teaspoon of paprika, half a teaspoon of dried oregano, and half a teaspoon of dried thyme. The onion powder and paprika provide a subtle savory depth and a beautiful color, while the oregano and thyme impart an earthy, aromatic complexity that is classic with pork. Ensure the seasonings are distributed evenly across the entire surface of the chops for consistent flavor in every bite.
This meticulous seasoning process ensures that each component of the flavor profile is present from the very beginning. The dry rub adheres beautifully to the surface of the pork, creating a flavorful crust that will be further enhanced by the garlic butter sauce later in the cooking. Don’t be shy with the seasoning; a well-seasoned chop is a delicious chop, and the heat of the oven will help meld these flavors beautifully.
Step 3: Sear the Pork Chops to Golden Perfection
Carefully place the seasoned pork chops into the hot, oiled skillet. You should hear a satisfying sizzle as they make contact with the surface. Sear the pork chops for approximately two to three minutes per side. The goal here is to achieve a deep, golden-brown crust on each surface. Resist the urge to move the chops around too much during this searing process; allow them ample time to develop that beautiful color and flavor.
If your skillet is not large enough to accommodate all four pork chops without overcrowding, it is essential to sear them in batches. Overcrowding the pan will lower the temperature of the skillet, leading to steaming rather than searing, and will prevent you from achieving that desirable crispy exterior. It’s far better to take a few extra minutes to sear in batches than to compromise on the quality of the sear. The browning achieved in this step is not just for appearance; it develops complex flavors through the Maillard reaction.
This browning process is the cornerstone of the dish’s rich flavor. The intense heat caramelizes the natural sugars present in the pork and the seasonings, creating a depth of taste that is both savory and slightly sweet. Once both sides of the pork chops have achieved a beautiful golden-brown hue, carefully remove them from the skillet and set them aside on a plate for a moment while you prepare the luscious garlic butter sauce. The sizzle and aroma during this stage are truly enticing.
Step 4: Create the Irresistible Garlic Butter Sauce
While the pork chops are resting briefly after their sear, it’s time to prepare the star of the flavor show: the garlic butter sauce. In a small mixing bowl, combine eight tablespoons of melted butter with four cloves of minced fresh garlic. The combination of rich butter and pungent garlic creates an incredibly aromatic and savory sauce that will infuse the pork chops with incredible flavor during the baking process. Using fresh garlic is highly recommended, as it provides a more potent and vibrant garlic flavor.
Whisk the melted butter and minced garlic together thoroughly until well combined. This simple mixture is where much of the magic happens, transforming ordinary pork chops into something truly special. The butter acts as a carrier for the garlic flavor, allowing it to evenly coat and penetrate the pork as it bakes. Ensure the garlic is finely minced or even pressed through a garlic press for maximum flavor distribution and a smoother sauce consistency.
Once the garlic butter sauce is ready, carefully pour it over the seared pork chops. You can do this while the chops are still in the skillet or after transferring them to a baking dish if your skillet isn’t oven-safe. Ensure that the sauce is distributed as evenly as possible across the tops of the chops. This ensures that every bite will be infused with the delicious garlic butter, creating a truly decadent eating experience. The aroma alone at this stage is enough to make your mouth water.
Step 5: Bake to Tender Perfection
Now, it’s time to transfer the skillet containing the pork chops and garlic butter sauce into the preheated oven. Bake the pork chops for approximately 12 to 15 minutes. The exact cooking time will depend on the thickness of your pork chops and your oven’s calibration, so it’s essential to use a meat thermometer for accuracy. The internal temperature should reach 145 degrees Fahrenheit (63 degrees Celsius) at the thickest part of the chop, avoiding the bone.
About halfway through the baking time, it’s highly beneficial to baste the pork chops with the accumulated butter sauce from the bottom of the skillet. Spoon the flavorful sauce over the tops of the chops. This basting action helps to keep the pork moist and adds another layer of flavor. It ensures that the entire surface of the chop is continuously bathed in the delicious garlic butter, contributing to an even more tender and succulent result. This simple step significantly enhances the overall juiciness.
Continue baking until the internal temperature reaches the target of 145°F. Once they’ve reached this temperature, carefully remove the skillet from the oven. The pork chops should look beautifully golden and slightly caramelized from the butter sauce. Avoid overcooking, as this can lead to dry pork, even with the bone-in cuts. The visual cues, combined with the temperature check, will ensure you achieve perfectly cooked, tender, and juicy pork chops every single time.
Step 6: Rest and Serve with Flair
After removing the skillet from the oven, resist the temptation to serve the pork chops immediately. It is crucial to let the pork chops rest for at least 5 to 8 minutes on a clean serving plate or a cutting board before cutting into them. This resting period allows the juices, which have been pushed to the center of the meat during cooking, to redistribute throughout the chop. If you cut into them too soon, these delicious juices will simply run out onto the plate, leaving your pork drier.
During this resting phase, the meat fibers relax, reabsorbing the moisture and resulting in a significantly more tender and juicy pork chop. While the chops are resting, you can spoon some of the residual garlic butter sauce from the skillet over them. This adds an extra touch of flavor and moisture. The aroma at this stage is truly enticing, a testament to the simple yet profound flavors you’ve created.
Finally, garnish the rested pork chops with freshly chopped parsley for a pop of color and fresh flavor. The vibrant green of the parsley beautifully contrasts with the rich brown of the pork and the golden butter sauce. Serve immediately and enjoy the fruits of your labor – tender, juicy, and incredibly flavorful oven-baked bone-in pork chops that are sure to impress. This final touch of freshness makes the dish visually appealing and adds a subtle herbaceous note.
Pro Tips for oven baked bone-in pork chops
- Choose Quality Bone-In Chops: Opt for pork chops that are at least 1-inch thick and have a good amount of marbling. The bone not only adds flavor but also helps to protect the meat from drying out during cooking, ensuring a juicier result.
- Don’t Skip the Pat-Dry Step: Before seasoning and searing, thoroughly pat the pork chops dry with paper towels. This is a small but critical step that ensures a proper sear, creating a delicious crust and preventing the chops from steaming in the pan.
- Master the Sear: Ensure your skillet is adequately hot before adding the pork chops for searing. A high heat sear for just a few minutes per side is sufficient to develop a beautiful golden-brown crust, which locks in juices and adds significant flavor through the Maillard reaction.
- Invest in a Meat Thermometer: For perfectly cooked pork chops every time, use an instant-read meat thermometer. Insert it into the thickest part of the chop, avoiding the bone. Aim for an internal temperature of 145°F (63°C) for optimal tenderness and juiciness.
- Allow for Resting Time: This is non-negotiable for tender, juicy pork. Let the cooked chops rest for at least 5-8 minutes after removing them from the oven. This crucial step allows the juices to redistribute throughout the meat, resulting in a more succulent final product.
Serving Suggestions for oven baked bone-in pork chops
Decoration
A sprinkle of vibrant, freshly chopped parsley is the classic and most effective garnish. It adds a beautiful pop of green color that contrasts wonderfully with the rich tones of the pork and the golden garlic butter sauce. For a slightly more festive touch, consider adding a few thin slices of lemon on the side of the platter, which can be squeezed over the chops just before serving to add a touch of brightness. A tiny sprig of fresh rosemary or thyme placed artfully on top of the resting chops can also enhance their visual appeal and hint at the aromatic flavors within.
Side Dishes
These oven-baked bone-in pork chops pair beautifully with a variety of classic comfort foods. Creamy mashed potatoes are a perfect partner, soaking up the delicious garlic butter sauce. Roasted vegetables such as Brussels sprouts, asparagus, or carrots offer a healthy and colorful accompaniment, bringing earthy sweetness and a pleasing texture. A simple side salad, perhaps an heirloom tomato salad, provides a refreshing counterpoint to the richness of the pork. Consider also serving with garlic breadsticks, which are ideal for dipping into any leftover pan sauce, similar to how one might enjoy them with a hearty lobster bisque.
Creative Serving Ideas
For a more elegant presentation, arrange the pork chops on a bed of creamy polenta or risotto. This adds a luxurious base that complements the tender pork and savory sauce. You could also serve them open-faced on thick slices of toasted sourdough bread, creating a delicious sandwich experience with the garlic butter sauce drizzled over the top. For a more rustic approach, consider serving the chops family-style on a large platter, with the pan juices spooned generously over the top, perhaps alongside a hearty german pancake for a unique brunch or dinner hybrid.
Preparation & Storage
Storing Leftovers
Leftover oven-baked bone-in pork chops should be stored in an airtight container in the refrigerator. Ensure they have cooled down to room temperature before sealing the container to prevent condensation from making the chops soggy. Properly stored, they will remain fresh and safe to eat for up to 3 to 4 days. It’s advisable to store them with any remaining garlic butter sauce, as this will help to keep them moist when reheating.
Freezing
If you have a larger quantity of cooked pork chops that you won’t consume within a few days, freezing is an excellent option for long-term storage. Wrap each cooled pork chop individually and tightly in plastic wrap, followed by a layer of aluminum foil or placing them in a freezer-safe bag. This double-layer protection helps to prevent freezer burn. Frozen pork chops can be stored for up to 2 to 3 months. Thaw them overnight in the refrigerator before reheating for the best results.
Reheating
To reheat your oven-baked bone-in pork chops and retain their moisture and flavor, it’s best to use a gentle method. Place the refrigerated or thawed chops in an oven-safe skillet or baking dish. Add a tablespoon or two of water, chicken broth, or some of the reserved pan juices from the original cooking to the dish. Cover the dish tightly with foil and heat in a preheated oven at around 300-325°F (150-160°C) for about 10-15 minutes, or until the internal temperature reaches a safe 145°F (63°C). You can also reheat them gently on the stovetop over low heat, covered, with a splash of liquid.
Frequently Asked Questions
-
What is the best type of bone-in pork chop for baking?
The best types of bone-in pork chops for baking are typically bone-in pork loin chops, which offer a good balance of leanness and tenderness. Rib chops, also known as pork ribeye or tomahawk chops (if they have the extended rib bone), are also excellent choices due to their rich marbling, which contributes to superior flavor and moisture. Center-cut chops are another fantastic option, offering a thick, meaty cut with good flavor. The presence of the bone is key, as it insulates the meat during cooking, preventing it from drying out too quickly and adding extra flavor to the chop as it cooks. When selecting your chops, look for ones that are at least 1-inch thick; thinner chops are more prone to overcooking and becoming dry, even with bone-in cuts. A good marbling of fat throughout the meat is also desirable, as this fat renders down during cooking, basting the meat and adding significant moisture and flavor.
-
Why are my baked pork chops dry, and how can I prevent it?
Pork chops often become dry due to overcooking. Pork is a lean meat, and unlike fattier cuts, it has a narrower window between being perfectly cooked and becoming dry and tough. The most crucial step to prevent dryness is to use an instant-read meat thermometer and remove the chops from the heat as soon as they reach an internal temperature of 145°F (63°C) in the thickest part, avoiding the bone. Another key factor is allowing the pork chops to rest for at least 5-8 minutes after cooking. This resting period is essential for the juices to redistribute throughout the meat; cutting too soon will cause these juices to escape. Choosing thicker cuts (at least 1-inch) also helps, as they are more forgiving. Additionally, proper searing beforehand creates a flavorful crust and helps to seal in moisture, making the subsequent baking process more successful. Marinating or brining the pork chops before cooking can also add an extra layer of moisture and flavor, further reducing the risk of dryness.
-
Can I make this recipe with boneless pork chops?
Yes, you can adapt this recipe for boneless pork chops, but there are a few adjustments to keep in mind. Boneless pork chops tend to cook faster and are more prone to drying out due to the absence of the bone, which acts as a heat insulator. If using boneless chops, it’s even more critical to monitor the internal temperature closely and remove them from the heat once they reach 145°F (63°C). The searing time might also need to be slightly shorter to prevent the edges from becoming overcooked before the center is done. You may want to reduce the baking time by a few minutes, or keep a very close eye on them. For the best results with boneless chops, it’s recommended to select thicker cuts, ideally 1-inch or more, to give yourself a little more leeway in the cooking process and help retain moisture. A marinade or brine can also be particularly beneficial for boneless chops to ensure they remain tender and juicy.