Ultimate Simple Dark Chocolate Pumpkin Tart
When the seasons shift and the air turns crisp, it’s time to indulge in comforting desserts that blend tradition and innovation. The Simple Dark Chocolate Pumpkin Tart is exactly that—a delightful fusion of rich chocolate and the warm flavors of spiced pumpkin. Have you ever experienced the magic of creamy pumpkin wrapped in a velvety chocolate crust? This recipe offers just that, creating a luxurious treat that is both delectable and easy to make.
This tart is a celebration of autumnal flavors, where the earthy depth of dark chocolate meets the comforting sweetness of pumpkin and spice. It’s a dessert designed to evoke warmth and coziness, perfect for gathering with loved ones or for a moment of personal indulgence. Imagine the aroma filling your kitchen as it bakes, promising a truly special treat that looks as stunning as it tastes.
Why You Will Love This Recipe
- Exceptional Flavor Combination: The harmonious blend of rich dark chocolate and spiced pumpkin creates a complex, satisfying taste profile that is both classic and exciting.
- Effortless Preparation: This recipe is designed with simplicity in mind, making it accessible to bakers of all skill levels, from beginners to seasoned pros.
- Crowd-Pleasing Appeal: With its universally loved flavors and elegant presentation, this tart is guaranteed to be a hit at any gathering, from casual get-togethers to holiday feasts.
- Beautiful Presentation: The deep chocolate crust and vibrant pumpkin filling make for a visually stunning dessert that will be the centerpiece of your dessert table.
- Versatile for Any Occasion: Whether it’s Thanksgiving, a birthday, or simply a craving for something sweet, this tart fits perfectly into any celebratory or comforting dessert moment.
Ingredients You Need
The foundation of this exceptional tart lies in carefully selected ingredients that work in perfect harmony. Using high-quality cocoa powder and fresh pumpkin puree will elevate the final taste significantly, ensuring a rich and authentic flavor. The sweetness from the condensed milk and sugar is balanced by the warm spices, creating a delightful symphony of tastes that dance on your palate. Don’t underestimate the power of good ingredients; they are the secret to a truly memorable dessert experience.
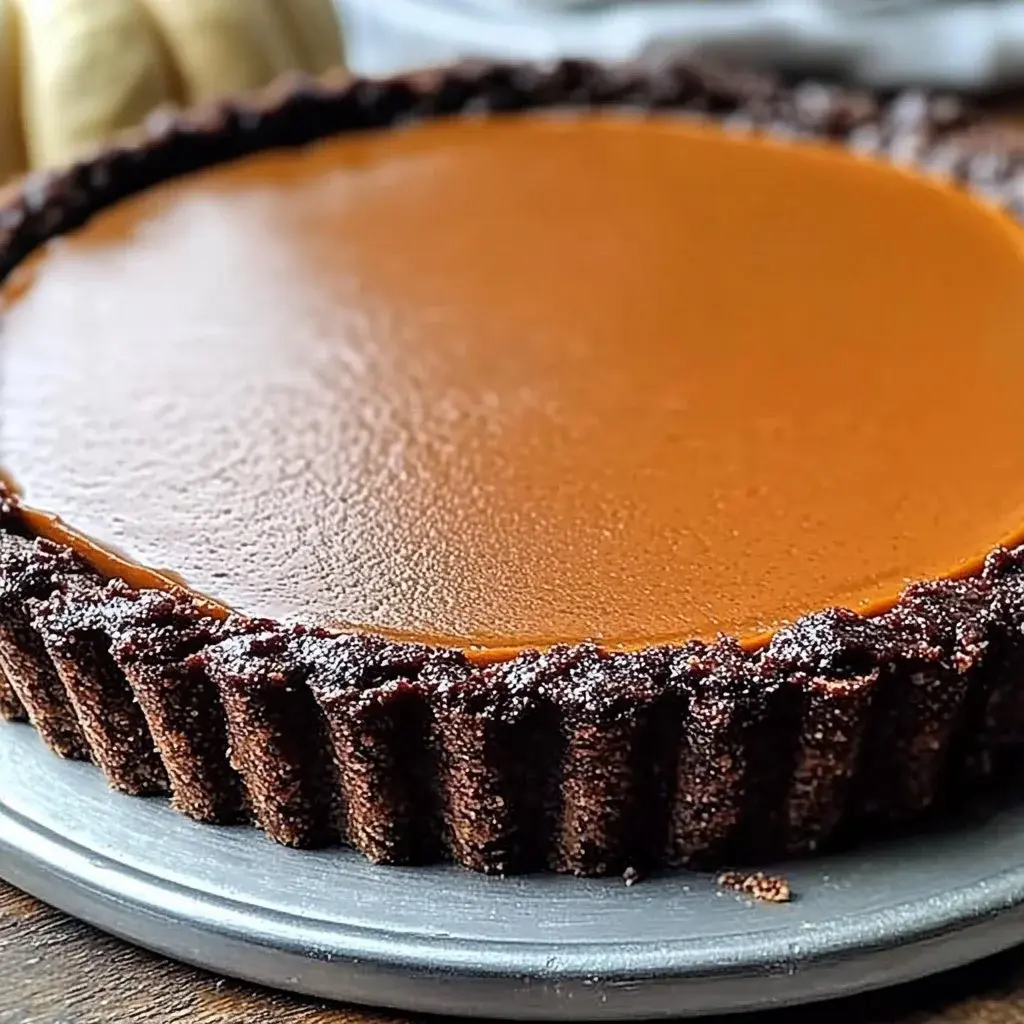
Simple Dark Chocolate Pumpkin Tart
A delightful fusion of rich chocolate and warm spiced pumpkin, this tart is both luxurious and easy to prepare, making it perfect for any occasion.
- 1 cup all-purpose flour (Can substitute with gluten-free blend.)
- 1/2 cup unsweetened dark cocoa powder
- 3/4 cup white sugar (Can substitute with coconut sugar or stevia.)
- 1/2 tsp kosher salt
- 1/2 cup unsalted butter, melted (Can substitute with plant-based butter for dairy-free.)
- 1 can pure pumpkin (15 oz)
- 1 can sweetened condensed milk (14 oz) (Can substitute with coconut cream for a dairy-free option.)
- 1 large egg (Can substitute with flaxseed meal for vegan.)
- 1 tsp pumpkin pie spice (Can substitute with a mix of cinnamon, nutmeg, and ginger.)
- 1/4 tsp kosher salt
- 1Preheat your oven to 425°F (220°C) and spray a 9-inch round tart pan with non-stick cooking spray.
- 2In a large mixing bowl, whisk together the flour, cocoa powder, sugar, and 1/2 tsp salt.
- 3Pour the melted butter into the dry mixture and mix until it forms a crumbly dough.
- 4Press the dough evenly into the bottom and up the sides of the pan.
- 5Bake the crust for 10 minutes, then remove and let cool for 10 minutes.
- 6In a separate bowl, whisk together the pumpkin, sweetened condensed milk, egg, pumpkin pie spice, and 1/4 tsp salt until smooth.
- 7Pour the filling into the cooled chocolate crust.
- 8Bake at 425°F for 10 minutes, then reduce the oven to 350°F (175°C) and bake for another 25-30 minutes until set.
- 9Cool in the pan for at least 1 hour before slicing.
Keywords: Chocolate Tart, easy baking, Fall Recipes, holiday cooking, Pumpkin Dessert
- all-purpose flour: a key component for creating a tender and sturdy crust.
- unsweetened dark cocoa powder: provides the deep, rich chocolate flavor for the crust.
- white sugar: sweetens the crust and balances the bitterness of the cocoa.
- kosher salt: enhances the flavors of the crust and balances the sweetness.
- unsalted butter, melted: binds the crust ingredients together and adds richness.
- pure pumpkin: the star of the filling, offering earthy sweetness and a creamy texture.
- sweetened condensed milk: adds sweetness and a wonderfully smooth, creamy consistency to the filling.
- large egg: helps to bind the filling ingredients and contributes to its set texture.
- pumpkin pie spice: a classic blend that infuses the filling with warm, aromatic notes.
- kosher salt: fine-tunes the sweetness and brings out the complex flavors of the filling.
The specific quantities for each ingredient are detailed within the recipe card for your convenience.
Variations
Consider a delightful vegan adaptation for those who prefer plant-based options. This can be achieved by swapping the butter for a good quality vegan butter or coconut oil, and using a rich coconut cream instead of sweetened condensed milk. For the egg, a flax egg (one tablespoon of ground flaxseed mixed with three tablespoons of water, left to sit for five minutes) serves as an excellent binder.
For a low-carb or gluten-free twist, the crust can be transformed. Almond flour or a blend of coconut flour and almond flour can replace the all-purpose flour, offering a nutty undertone and a satisfying texture. Ensure you use a sugar substitute that is suitable for baking, such as erythritol or stevia, to keep the carbohydrate count low while maintaining sweetness.
Another creative variation involves enhancing the filling with subtle additions. A swirl of cream cheese filling, much like a cheesecake, can add a delightful tanginess that contrasts beautifully with the sweet pumpkin and chocolate. Alternatively, incorporating finely chopped dark chocolate chips or a hint of espresso powder into the pumpkin mixture can deepen the flavor profile and add an extra layer of indulgence.
How to Prepare Dark Chocolate Pumpkin Tart
Step 1: Crafting the Irresistible Chocolate Crust
Begin by preheating your oven to a welcoming 425°F (220°C). This initial high heat is crucial for a perfectly baked crust. While the oven heats, take a standard 9-inch round tart pan, the perfect vessel for this creation, and generously coat it with a non-stick cooking spray. This step is vital to ensure your beautiful crust releases cleanly after baking, preserving its intricate design.
In a large mixing bowl, you will combine the dry ingredients that form the backbone of your chocolate crust. Measure out one cup of all-purpose flour, which provides structure, and a generous half cup of unsweetened dark cocoa powder for that intense chocolate hue and flavor. Add three-quarters of a cup of white sugar for sweetness and half a teaspoon of kosher salt to balance and enhance all the other flavors. Whisk these dry ingredients together thoroughly, ensuring they are completely homogenous before moving to the next step.
Now, create a small well in the center of your perfectly blended dry ingredients. Into this void, pour half a cup of unsalted butter that has been melted to a liquid state. This melted butter will act as the binder, bringing all the dry components together to form a cohesive dough. It is at this stage that you can get your hands a little messy, which is often the best way to ensure the butter is evenly distributed throughout the flour and cocoa mixture. Gently work the mixture with your fingertips or a fork until it transforms into a crumbly yet cohesive dough, resembling coarse breadcrumbs that hold together when squeezed.
Once the dough has reached the right consistency, it’s time to shape it into the tart pan. Transfer the chocolatey crumbs into your prepared tart pan. Using your fingers, press the dough firmly and evenly across the bottom and up the sides of the pan. Aim for a consistent thickness throughout the crust to ensure even baking. Pay special attention to the corners and edges, ensuring there are no thin spots that might burn or thick spots that might remain undercooked. This careful pressing is key to a structurally sound and visually appealing crust.
With the crust pressed into its mold, it’s time for its first dance with the heat. Place the prepared tart pan on a sturdy baking sheet. This baking sheet not only provides a stable surface but also catches any potential butter overflow during baking. Carefully slide the baking sheet into your preheated oven and bake the crust for approximately 10 minutes. During this time, the crust will begin to set and develop a slightly firmer texture. You might notice it puffing up in places; this is completely normal for a butter-based crust and will settle as it cools.
After its initial bake, carefully remove the tart pan from the oven. Let the crust cool in the pan for at least 10 minutes. This cooling period is crucial; it allows the crust to firm up further and become easier to handle before filling. While the crust is cooling, you can begin preparing the luscious pumpkin filling, setting the stage for the next exciting phase of this delightful tart.
Step 2: Whisking Together the Dreamy Pumpkin Filling
In a clean, medium-sized mixing bowl, you will now assemble the components of the luscious pumpkin filling. The star of this show is one 15-ounce can of pure pumpkin puree. Ensure it’s pure pumpkin and not pumpkin pie filling, as the latter already contains added sugar and spices which would alter the intended flavor balance of this recipe. Give the pumpkin a quick stir to ensure it’s smooth and free of any watery separation.
Next, pour in one 14-ounce can of sweetened condensed milk. This ingredient is the secret to the filling’s luxurious creaminess and sweet, rich flavor. Its thick, syrupy consistency will create a wonderfully smooth texture once blended. Follow this with one large egg, which acts as a binder, helping the filling to set beautifully during baking and achieve that perfect custard-like consistency.
Now, it’s time to introduce the warm, aromatic spices that define the season. Add one teaspoon of pumpkin pie spice to the mixture. This blend typically includes cinnamon, ginger, nutmeg, and cloves, providing that classic autumnal aroma and taste. For an extra touch of flavor harmony and to subtly enhance the sweetness, add a quarter teaspoon of kosher salt. This small amount of salt is critical for balancing the overall sweetness and deepening the other flavors in the filling.
Using a whisk, combine all the filling ingredients thoroughly. Whisk until the mixture is perfectly smooth and all the ingredients are well incorporated. There should be no streaks of condensed milk or unincorporated spices visible. The goal is a velvety, homogenous filling that will bake into a creamy, set delight. The color should be a vibrant, inviting orange.
Step 3: Assembling and Baking the Tart to Perfection
With your pre-baked chocolate crust cooled and your creamy pumpkin filling perfectly blended, it is time to bring them together. Carefully pour the smooth pumpkin filling into the cooled chocolate crust. Use a spatula or the back of a spoon to gently spread the filling evenly, ensuring it reaches all the edges of the crust. This even distribution is important for consistent baking and a beautiful slice every time you cut into the tart.
Once the tart is filled, it’s time for its second, longer bake. Return the tart, still on its baking sheet, to the preheated oven. Bake at 425°F (220°C) for the first 10 minutes. This initial blast of heat helps to set the outer edges of the filling quickly.
After those initial 10 minutes, it is time to adjust the oven temperature. Reduce the oven temperature to 350°F (175°C). This lower, more gentle heat will allow the center of the pumpkin filling to cook through without over-browning the crust or the top of the filling. Continue baking for another 25 to 30 minutes.
The tart is ready when the filling is set. To test for doneness, gently insert a toothpick into the center of the tart. If the toothpick comes out clean, or with just a few moist crumbs attached (not wet batter), then the filling is perfectly cooked and set. The edges of the filling should appear slightly puffed and set, while the center may still have a very slight jiggle, which will firm up as it cools.
Step 4: The Crucial Cooling and Setting Process
Once the tart has achieved that perfect bake, remove it from the oven. It will likely appear a beautiful golden brown and the filling will seem mostly set. However, this is not the final stage of preparation; the cooling process is just as critical as the baking itself for achieving the ideal texture.
Leave the tart in its pan and place it on a wire cooling rack. Allow it to cool for at least one full hour. During this time, the residual heat will continue to gently cook the filling, and more importantly, it will allow the filling to set completely. This is essential for neat slicing; rushing this step can result in a runny tart, no matter how well it was baked.
As the tart cools, the flavors will also meld together, enhancing the overall taste experience. Patience during this stage will be greatly rewarded when you finally get to slice into a perfectly set, decadent tart.
Step 5: Presentation and Enjoyment
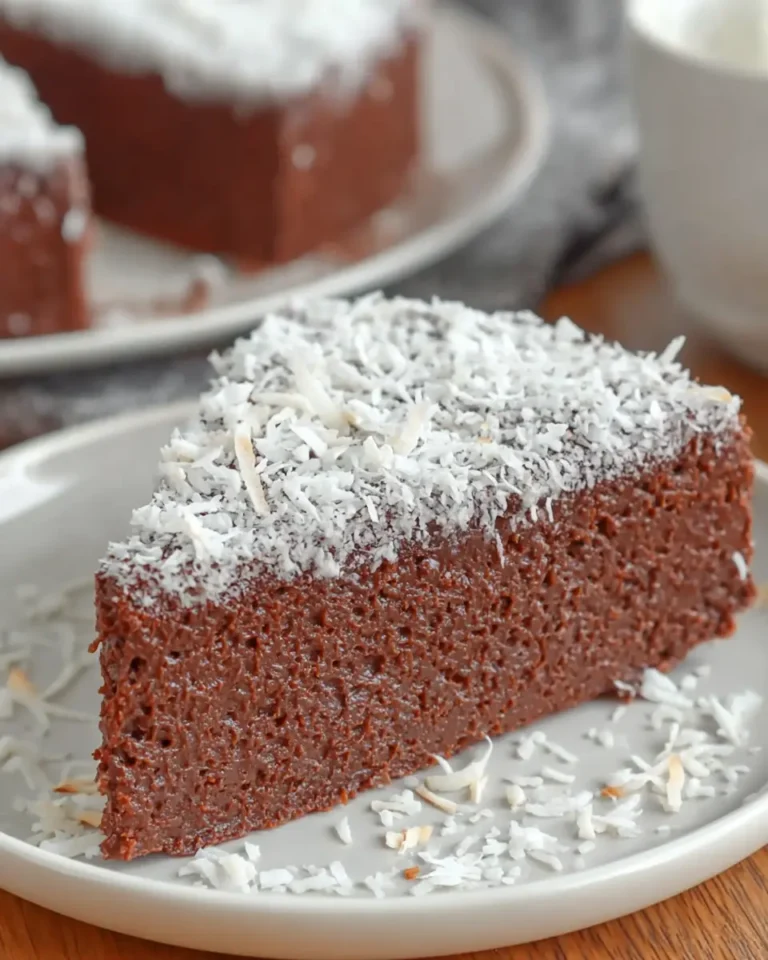
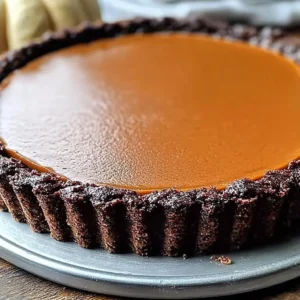
After at least an hour of cooling, the Simple Dark Chocolate Pumpkin Tart is ready to be admired and enjoyed. The deep, rich color of the chocolate crust contrasts beautifully with the warm, inviting hue of the pumpkin filling. It stands as a testament to simple ingredients transformed into something truly special.
Serving this tart is an opportunity to add your personal touch. A generous dollop of freshly whipped cream is a classic accompaniment, its lightness and airy texture providing a delightful contrast to the richness of the tart. For an extra layer of indulgence, a scoop of high-quality vanilla ice cream melts beautifully alongside a warm slice, creating a comforting and decadent experience.
Consider a light dusting of cinnamon or a few chocolate shavings on top of the whipped cream for an added visual and flavor flourish. This tart is not just a dessert; it’s an experience, meant to be savored and shared, bringing joy and warmth to any occasion.
Pro Tips for Dark Chocolate Pumpkin Tart
Quality Cocoa is Key: For the most intense and satisfying chocolate flavor in the crust, opt for a high-quality unsweetened dark cocoa powder. Brands like Dutch-processed cocoa can offer a smoother, less acidic, and deeper chocolate essence, truly elevating your tart.
Don’t Overmix the Crust: While you want the butter to be incorporated, overworking the flour and butter mixture can develop the gluten too much, leading to a tough crust instead of a delightfully tender one. Mix just until the dough starts to come together.
The Power of Cooling: Resist the urge to slice the tart too soon. Allowing it to cool completely in the pan for at least an hour, and ideally chilling it further in the refrigerator, is crucial for the filling to fully set, ensuring clean, beautiful slices.
Spice Adjustments: While the standard pumpkin pie spice blend is wonderful, feel free to adjust it to your preference. If you love ginger, add a touch more; if cinnamon is your favorite, increase that slightly. You can even make your own blend for personalized warmth.
Achieve a Flatter Top: If you notice your filling has a slight dome when it comes out of the oven, don’t worry. Gently tap the tart pan on the counter a few times before it goes into the oven. This can help to distribute the filling more evenly and achieve a flatter surface.
Serving Suggestions for Dark Chocolate Pumpkin Tart
Decoration
Elevate the visual appeal of your tart with simple yet elegant decorations. A swirl of freshly whipped cream, lightly sweetened and perhaps infused with a hint of vanilla extract, provides a beautiful, cloud-like contrast to the dark crust and pumpkin filling. For an extra touch of sophistication, consider dusting the whipped cream with a fine layer of cocoa powder or a sprinkle of cinnamon for added aroma and visual interest.
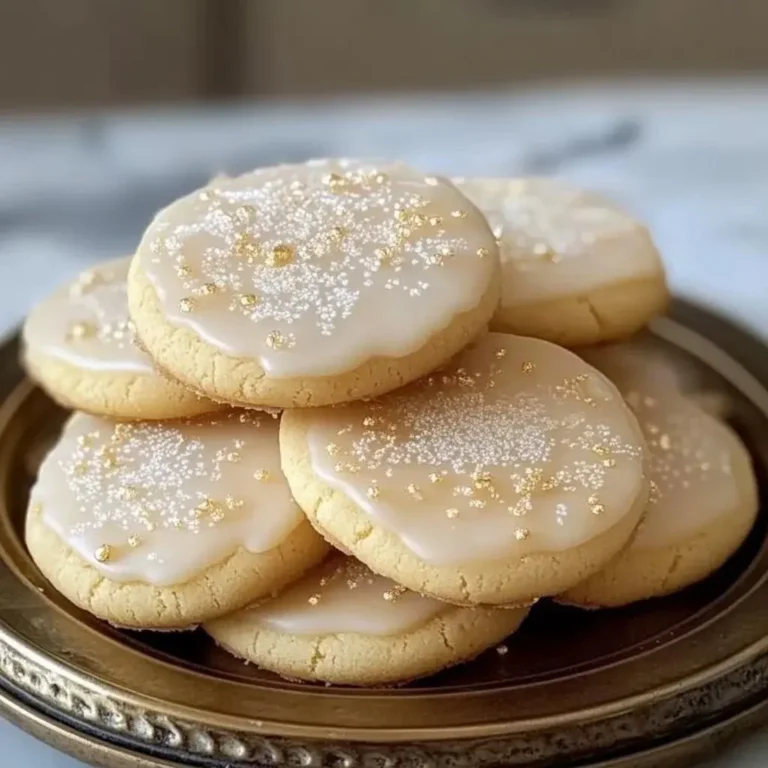
Edible gold leaf can add a touch of luxury and sparkle, perfect for special occasions or holiday celebrations. Alternatively, a drizzle of melted dark chocolate or a caramel sauce can create an intricate pattern across the surface of the tart, adding both visual appeal and an extra layer of decadent flavor. To enhance the autumnal theme, consider arranging a few candied pecans or toasted pumpkin seeds artfully around the edge of the tart.
Side Dishes
Complement the rich flavors of the tart with carefully chosen accompaniments. A scoop of premium vanilla bean ice cream is a timeless classic, its creamy sweetness melting into the tart to create a heavenly combination. For a lighter option, a dollop of unsweetened Greek yogurt or crème fraîche can provide a refreshing tanginess that cuts through the richness of the chocolate and pumpkin.
A simple fruit salad featuring seasonal berries or crisp apple slices can offer a bright, palate-cleansing counterpoint. For those who enjoy a coffee pairing, a strong, freshly brewed espresso or a robust drip coffee beautifully complements the deep flavors of the tart, acting as a sophisticated digestive. Consider offering a small pitcher of extra whipped cream or a warm caramel sauce on the side for guests to customize their dessert experience further.
Creative Serving Ideas
Transform individual slices into mini dessert experiences by plating them with a scattering of chocolate shavings and a sprig of fresh mint. For a more informal gathering, serve small tartlets made in mini tart pans, making them easy to handle and perfect for a dessert bar. You can also crumble some of the cooled tart crust and sprinkle it over individual servings of ice cream or pudding for added texture and flavor.
Consider a deconstructed approach by serving the tart filling alongside small pieces of the chocolate crust, allowing guests to assemble their perfect bite. A warm slice served with a small glass of dessert wine, such as a port or a late-harvest Riesling, can create an elegant and memorable pairing. For a festive touch, use cookie cutters to create small shapes from leftover crust dough, bake them until crisp, and use them as decorative toppers for each slice.
Preparation & Storage
Storing Leftovers
Properly storing leftover Simple Dark Chocolate Pumpkin Tart is key to maintaining its deliciousness and texture. Once the tart has cooled completely, cover it tightly with plastic wrap or aluminum foil. You can also transfer the covered tart to an airtight container, which offers an extra layer of protection against air exposure.
Store the covered tart in the refrigerator. It will keep well for up to 5 to 7 days. The flavors often meld and deepen over the first day or two, so leftovers can be just as delightful, if not more so, than when first baked. Ensure the covering is secure to prevent the tart from drying out or absorbing any unwanted odors from other items in the refrigerator.
Freezing
If you find yourself with more tart than you can enjoy within a week, freezing is an excellent option. It allows you to prepare this delightful dessert in advance for future cravings or unexpected guests. First, ensure the tart is entirely cooled. Then, wrap the entire tart securely in a double layer of plastic wrap, pressing out as much air as possible.
For optimal protection against freezer burn, place the plastic-wrapped tart into a freezer-safe airtight container or a heavy-duty freezer bag. Label the container or bag with the date you froze it. The Simple Dark Chocolate Pumpkin Tart can be stored in the freezer for up to 2 to 3 months. Freezing whole is generally better for maintaining texture than freezing individual slices, although slices can also be frozen.
Reheating
When you’re ready to enjoy your frozen tart, the best method for thawing is in the refrigerator. Remove the tart from the freezer and place it, still wrapped, in the refrigerator overnight. This slow thawing process helps to maintain the integrity of the filling and crust.
If you wish to serve the tart slightly warm, or if you are reheating individual slices that have already been thawed, you can use either the oven or the microwave. For slices, a short burst in the microwave (about 15-20 seconds per slice) can warm it through gently. For a crisper crust, a brief stint in a low-heat oven (around 300°F or 150°C) for a few minutes is ideal. Be careful not to overheat, as this can cause the filling to become too soft or watery.
Frequently Asked Questions
-
Can I prepare the Simple Dark Chocolate Pumpkin Tart entirely ahead of time, and if so, how should I store it to maintain freshness?
Absolutely! This tart is an ideal make-ahead dessert. It is best prepared a day in advance, allowing the flavors to fully meld and the filling to set perfectly. After it has completely cooled, cover the tart tightly with plastic wrap or place it in an airtight container. Store it in the refrigerator for up to 5 days. This method ensures that the crust remains crisp and the filling stays wonderfully creamy, ready to be served chilled or slightly warmed when desired.
-
What are the best substitutions for dietary restrictions, such as gluten-free, dairy-free, or vegan, without compromising the tart’s flavor and texture?
For a gluten-free version, substitute the all-purpose flour in the crust with a 1:1 gluten-free baking blend; this will maintain a similar texture. To make it dairy-free, use plant-based butter (like coconut oil or a vegan butter stick) for the crust and full-fat coconut cream in place of sweetened condensed milk for the filling, which will provide a rich, creamy consistency. For a vegan tart, in addition to the dairy-free substitutions, replace the egg with a flax egg (1 tablespoon ground flaxseed mixed with 3 tablespoons water, let sit for 5 minutes) to act as a binder.
-
How can I tell when the Simple Dark Chocolate Pumpkin Tart is perfectly baked, and what should I do if the filling seems too soft or too firm?
The tart is ready when the filling is set around the edges and the center has just a slight jiggle. A toothpick inserted into the center should come out mostly clean, perhaps with a few moist crumbs but no wet batter. If the filling appears too soft after the suggested baking time, cover the tart loosely with foil to prevent the crust from burning and continue baking in 5-minute increments until set. If the filling seems too firm or is cracking, it might indicate it was overbaked; this can sometimes be remedied by serving it with a generous amount of whipped cream or ice cream, which will add moisture and richness.