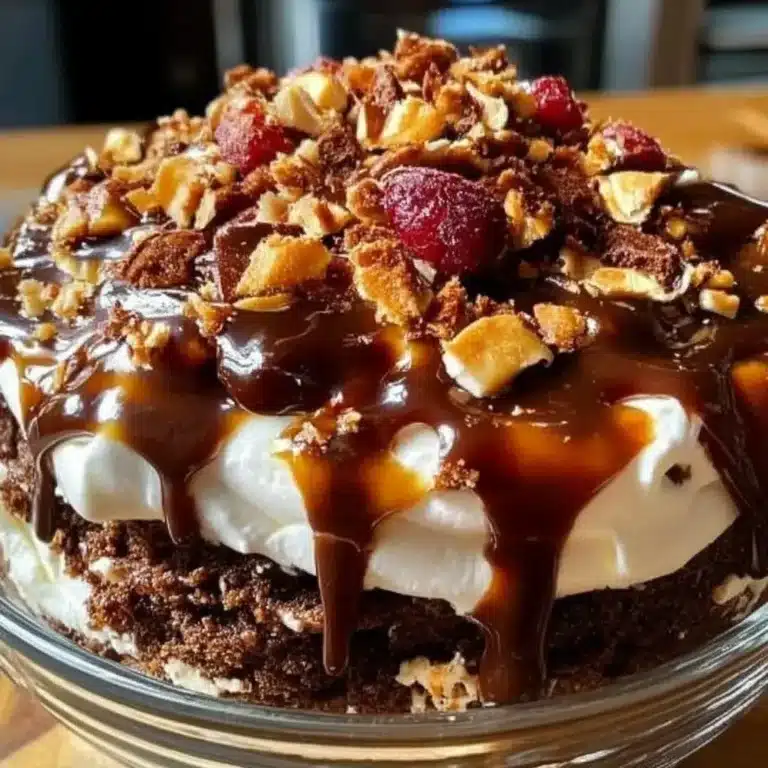
No-Bake Coconut Chocolate Cake
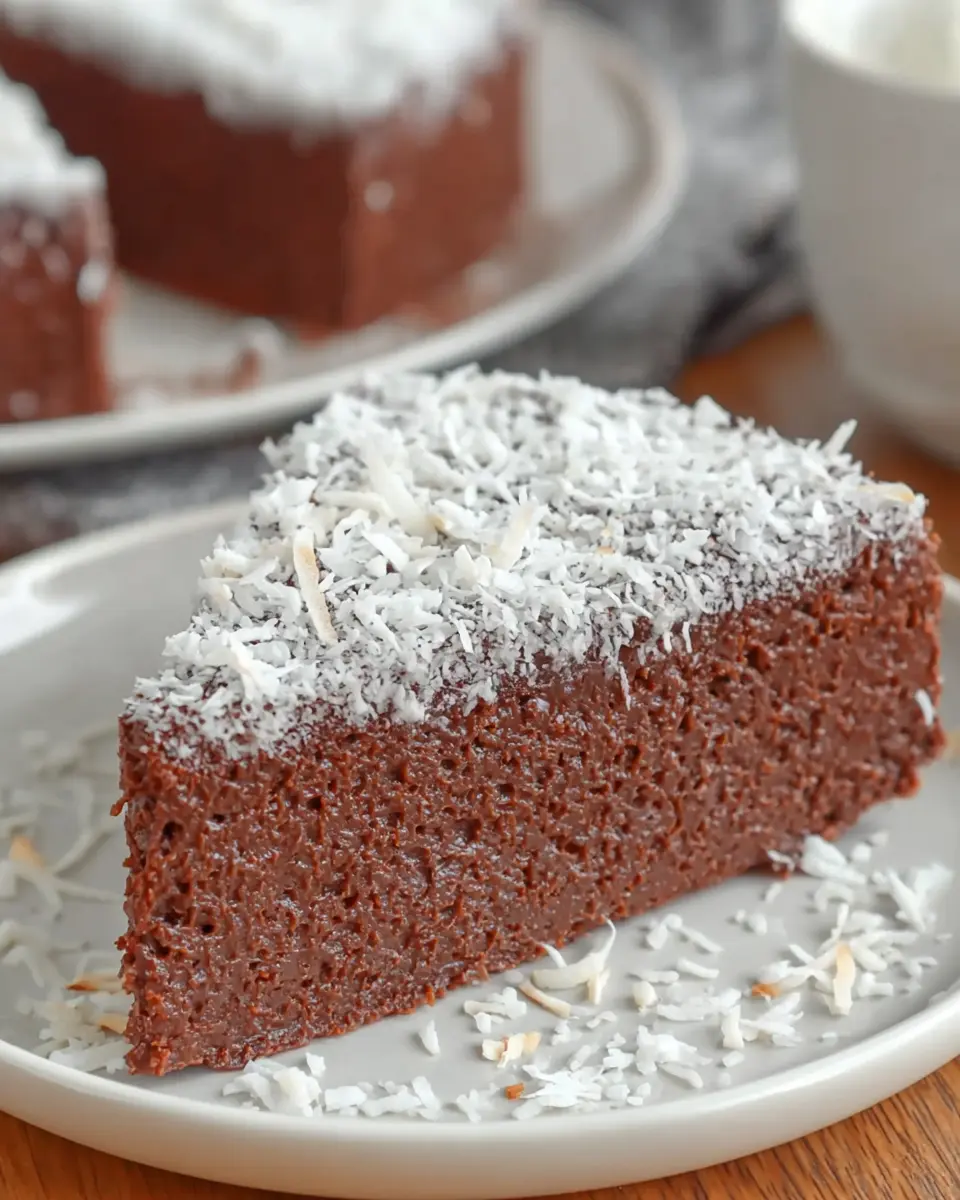
No Bake Coconut Cake is a quick, make-ahead dessert that turns just three ingredients into a rich, sliceable treat.
It is beginner-friendly, perfect for small gatherings, and delivers firm chocolate-coconut texture with almost no hands-on work.
This is the kind of dessert you make when you want something sweet without turning on the oven.
The mixture comes together in minutes, presses neatly into a small pan, and chills into a cake that feels surprisingly polished for such a simple method.
Why You Will Love This Recipe
- Effortless Preparation: This delightful cake requires no baking whatsoever, making it an ideal choice for those who want to avoid the oven.
- Minimal Ingredients: With just a handful of common ingredients, you can create a surprisingly sophisticated dessert that feels truly special.
- Make-Ahead Magic: Prepare this cake in advance and store it in the refrigerator, freeing up your time and ensuring a delicious treat is always on hand.
- Impressive Texture: The combination of smooth chocolate and chewy coconut creates a wonderfully satisfying mouthfeel that will delight your taste buds.
- Perfect for Any Occasion: Whether it’s a casual afternoon snack or a contribution to a potluck, this no-bake cake is a guaranteed crowd-pleaser.
Ingredients You Need
The beauty of this no-bake coconut cake lies in its simplicity, relying on high-quality staples to create a truly delicious outcome.
Selecting good quality semisweet chocolate and unsweetened shredded coconut will elevate the final flavor and texture of your dessert significantly.
Even though the ingredient list is short, each component plays a vital role in achieving that perfect balance of rich chocolate and satisfying coconut chew.
No Bake Coconut Cake
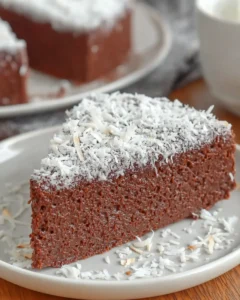
A simple chilled dessert made with melted semisweet chocolate, milk, and shredded coconut. This no-bake cake sets into a firm, sliceable treat with a rich chocolate flavor and a pleasing coconut texture.
- 2 cups unsweetened shredded coconut
- 3/4 cup low-fat milk
- 1 1/2 cups semisweet chocolate chips
- 1Prepare a 6-inch round springform pan by lightly coating the inside with non-stick cooking spray.
- 2Line the pan with parchment paper. Use a round parchment piece for the base and trimmed strips along the sides so the interior is fully covered.
- 3Place the semisweet chocolate chips and low-fat milk into a large microwave-safe mixing bowl.
- 4Microwave in 15- to 30-second intervals, whisking well after each heating period, until the chocolate is fully melted and the mixture is smooth. A double boiler on the stovetop may also be used to melt the chocolate and milk gently.
- 5Add the shredded coconut to the melted chocolate mixture and stir thoroughly until the coconut is evenly incorporated and fully coated, with no dry spots remaining.
- 6Transfer the mixture to the prepared springform pan.
- 7Smooth the top with a spatula so the surface is level and evenly spread. Additional shredded coconut may be scattered over the top for garnish, if desired.
- 8Place the cake in the refrigerator and chill until firm, about 1 to 3 hours. For the most complete set, refrigerate it overnight.
- 9For faster setting, the cake may be placed in the freezer for 30 to 60 minutes.
- 10If chilled in the freezer, let the cake come to room temperature before slicing and serving. If refrigerated, allow it to stand for a few minutes before serving.
Keywords: No Bake Coconut Cake
- unsweetened shredded coconut: this provides the core structure and delightful chew to the cake, making it more than just a chocolate confection.
- low-fat milk: a small amount is used to help the chocolate melt smoothly and create a blendable consistency.
- semisweet chocolate chips: these form the rich, decadent base of the cake, providing deep chocolate flavor and helping it set.
The precise quantities for these essential components are detailed within the recipe card for your convenience.
Variations
While the classic no-bake coconut cake is wonderfully satisfying, a few simple tweaks can lead to exciting new flavor profiles.
Consider infusing your cake with different extracts or spices to impart a unique character.
These variations offer a chance to personalize the dessert and cater to diverse preferences, ensuring there’s a version for everyone to enjoy.
For a Tropical Twist: Enhance the coconut flavor by adding a tablespoon of coconut extract to the melted chocolate mixture. You could also fold in a quarter cup of toasted shredded coconut for an added layer of nutty depth. This variation truly amplifies the tropical essence, transporting your senses to a sunny beach with every bite.
Decadent Dark Chocolate Version: Swap the semisweet chocolate chips for dark chocolate chips for a more intense, grown-up flavor. You might want to add a touch more milk if the dark chocolate is thicker. The richer chocolate notes create a more sophisticated dessert that is perfect for serious chocolate lovers.
Citrus Zest Addition: Incorporate the finely grated zest of one orange or lemon into the mixture. The bright citrus notes cut through the richness of the chocolate beautifully, offering a refreshing counterpoint. This is a fantastic way to add complexity and a hint of brightness to the classic recipe.
How to Prepare No Bake Coconut Cake
Step 1: Prepare Your Pan
The initial step in creating this delightful no-bake cake involves meticulous preparation of your chosen baking vessel.
A 6-inch springform pan is highly recommended for its ease of use when it comes time to unmold the finished product.
Properly lining the pan ensures that your cake will release cleanly, preserving its beautiful shape and making for an elegant presentation.
The Importance of Parchment Paper: Begin by lightly greasing the inside of your 6-inch springform pan, ensuring all surfaces are coated.
Next, cut out a circle of parchment paper to perfectly fit the bottom of the pan.
Then, trim strips of parchment paper to line the sides of the pan, creating a complete barrier between the cake mixture and the metal. This double lining is crucial for easy removal and prevents any sticking, which is especially important for a no-bake dessert that relies on its form.
Alternative Pan Considerations: If a springform pan is unavailable, a small round cake pan or even a loaf pan can be utilized.
However, it is imperative to line these pans even more generously with parchment paper, ensuring there is enough overhang to easily lift the set cake out.
This step requires a bit more care to avoid damaging the cake’s structure upon removal from a standard pan.
Ensuring a Smooth Surface: After lining, gently press the parchment paper against the sides and bottom to create a smooth, even surface.
This smooth interior helps the cake take on a beautiful, uniform shape once it has set.
Take your time with this step, as a well-prepared pan sets the foundation for a perfectly presented dessert.
Step 2: Melt the Chocolate
This stage is where the magic truly begins, transforming simple chocolate chips into a luscious, smooth base for your cake.
Careful melting is key to achieving the desired glossy texture and ensuring the chocolate doesn’t seize or burn.
The microwave method is convenient, but requires attention and patience to achieve perfect results every time.
Microwave Method Mastery: Place the semisweet chocolate chips and the low-fat milk into a microwave-safe bowl.
It is essential to use a bowl that is large enough to accommodate stirring without overflowing.
Begin heating in short intervals, typically 15 to 30 seconds at a time, stirring thoroughly between each burst.
The Art of Stirring: Between each heating interval, remove the bowl from the microwave and stir the chocolate and milk mixture vigorously.
This stirring is critical for evenly distributing the heat and preventing the chocolate from scorching or becoming grainy.
You are aiming for a completely melted and glossy liquid consistency, smooth as silk and free of any lumps.
Avoiding Overheating: It cannot be stressed enough that patience is paramount during this step.
Overheating the chocolate will cause it to thicken excessively and become unmanageable, leading to a less desirable texture in your final cake.
If you notice the chocolate becoming too thick and resistant to stirring, you may need to add a tiny splash more milk, but do so very sparingly to avoid making the mixture too liquid.
Stovetop Alternative: For those who prefer a stovetop method or have had trouble with microwaves, a double boiler can be used.
Place the chocolate chips and milk in the top of a double boiler over simmering water, stirring constantly until smooth.
This method offers more gentle heat and control, which some bakers find more reliable for achieving perfectly melted chocolate.
Step 3: Combine with Coconut
Once your chocolate is beautifully melted and smooth, it’s time to introduce the star of the show: the shredded coconut.
This step is where the mixture starts to gain its structure and develop that signature texture that no-bake coconut cake is famous for.
Thorough incorporation ensures every bite is packed with delightful coconut flavor and chew.
Gentle Folding is Key: Add the unsweetened shredded coconut directly into the bowl with the melted chocolate and milk mixture.
Using a spatula or a sturdy spoon, gently begin to fold the coconut into the chocolate.
The goal here is to coat every strand of coconut evenly with the rich chocolate, ensuring no dry pockets remain.
Achieving Uniformity: Continue to stir and fold until the mixture is thoroughly combined and has a uniform appearance.
You should see that the chocolate has beautifully coated all of the coconut, creating a thick, cohesive mass.
The mixture will likely appear quite thick at this stage, almost like a dense dough, which is exactly what you want for a firm cake.
Texture Considerations: If, by chance, the mixture seems a little too dry and crumbly after adding the coconut, you can add another teaspoon or two of milk.
However, be very cautious, as too much liquid will make the cake too soft to set properly.
Conversely, if it seems too wet, you can add a tablespoon more of shredded coconut to help absorb some of the moisture.
Visual Cues: The ideal consistency for this mixture is one that holds together when you squeeze a bit in your hand.
It should be thick enough to spoon into the pan and spread without being overly sticky or runny.
The chocolate should create a binding agent for the coconut, transforming it from individual flakes into a cohesive cake-like mass.
Step 4: Press into Pan
With your delicious chocolate-coconut mixture ready, the next crucial step is to transfer it into your prepared pan.
This is where you begin to shape the cake and prepare it for its chilling transformation.
Pressing the mixture firmly and evenly is vital for a cake that slices cleanly and holds its form beautifully.
Even Distribution: Spoon the entire mixture into the prepared springform pan.
Use your spatula to spread the mixture out as evenly as possible across the bottom and up the sides of the pan.
Aim for a consistent layer throughout, avoiding any significant peaks or valleys.
The Power of Pressing: This is where you need to apply gentle but firm pressure.
Use the back of your spatula or even the palm of your hand (covered with a piece of parchment paper if desired) to press the mixture down into the pan.
You are essentially compacting the coconut and chocolate, removing any air pockets and ensuring the cake will be dense and sliceable.
Creating a Compact Base: A well-compacted mixture is key to a cake that won’t crumble when you slice it.
Take your time to ensure the entire surface is pressed down evenly, paying particular attention to the edges.
This firm base is what will hold the cake together once it’s chilled and unmolded.
Achieving a Smooth Top: Once the mixture is pressed firmly, use your spatula to smooth the top surface.
This will not only make the cake look more polished but will also help when it comes time to slice it.
A flat, even top ensures that each slice will be consistent in thickness and appearance.
Step 5: Garnish (Optional)
While not strictly necessary, a little bit of garnish can elevate the visual appeal of your no-bake coconut cake, making it look even more impressive.
This is a simple step that adds a professional touch without requiring any extra culinary skills.
It’s the perfect way to add a little something extra before the cake heads into its chilling phase.
Simple Sprinkle: If you desire a decorative touch, lightly sprinkle some extra shredded coconut over the smoothed top of the cake.
This creates a beautiful, textured finish that hints at the delicious ingredients within.
You can also use a few extra chocolate chips scattered artfully for a different look.
Toasted Coconut for Flair: For an even more sophisticated garnish, consider toasting a small amount of shredded coconut before sprinkling it on top.
Toast it in a dry skillet over medium-low heat, stirring constantly, until golden brown and fragrant.
This adds a lovely nutty aroma and a richer color, complementing the cake beautifully.
Subtle Chocolate Drizzle: Another option is to melt a tablespoon or two of extra chocolate and drizzle it sparingly over the top in a decorative pattern.
Use a fork or a piping bag with a very fine tip for this.
This can add a touch of elegance and a visual cue to the chocolatey goodness that awaits.
Edible Flowers or Fruit: For a truly special occasion, a few strategically placed edible flowers or a small cluster of fresh berries can make the cake look stunning.
Ensure any fresh fruit is added just before serving to maintain its freshness and visual appeal.
The key is to keep the garnish relatively simple so it enhances rather than overpowers the cake itself.
Step 6: Chill to Perfection
The final, and perhaps most important, step in creating your no-bake coconut cake is the chilling process.
This is where the magic of solidification happens, transforming a soft mixture into a firm, sliceable dessert.
Allowing adequate time for chilling is crucial for achieving the best texture and ensuring clean, neat slices.
Refrigerator Method: Place the prepared pan into the refrigerator.
Allow it to chill for at least 1 to 3 hours, or until the cake is completely firm to the touch.
The exact time will depend on your refrigerator’s temperature and how firm you want the cake to be.
Overnight Recommendation: For the absolute best results, both in terms of texture and how cleanly the cake slices, chilling the cake overnight is highly recommended.
This extended period allows the chocolate to set completely and the coconut to meld perfectly with it, creating a dense, cohesive structure.
An overnight chill ensures that even the most delicate slices will hold their shape.
Speedy Freezer Option: If you are in a time crunch and need the cake to set faster, you can place it in the freezer.
About 30 to 60 minutes in the freezer should be sufficient to firm it up considerably.
However, be mindful that freezing can sometimes alter the texture slightly, making it harder than refrigerator chilling, so allow it to sit for a few minutes at room temperature before slicing.
Assessing Firmness: Before attempting to unmold, gently press the center of the cake with your finger.
It should feel firm and resistant, not soft or yielding.
If it still feels soft, return it to the refrigerator for additional chilling time.
Pro Tips for No Bake Coconut Cake
Achieving a truly exceptional no-bake coconut cake involves a few subtle techniques that can make a world of difference in the final outcome.
These pro tips focus on enhancing flavor, improving texture, and ensuring a beautiful presentation every time.
Even small adjustments can lead to a more professional and satisfying dessert experience.
Tip: Temperature Matters for Melting. If your chocolate seems particularly stubborn to melt or very hot right after microwaving, let it sit for about a minute before stirring in the coconut.
This slight cooling prevents the hot chocolate from making the coconut too soft or oily.
The goal is a manageable, thick consistency that spreads well.
Tip: The Firmness Factor. Don’t be shy with the pressing! Instead of just loosely spooning the mixture into the pan, really press it down firmly.
This compaction is absolutely crucial for creating a dense cake that slices cleanly without falling apart.
Think of it as building a solid foundation for your dessert.
Tip: The Clean Slice Secret. For the most professional-looking slices, warm a sharp knife slightly by running it under hot water, then wipe it completely dry.
Slice straight down without sawing, and wipe the knife clean between each cut.
This simple trick ensures that each slice has sharp, defined edges and a pristine appearance.
Tip: Elevate with Extract. A tiny splash of vanilla extract or, for an extra tropical punch, a half teaspoon of coconut extract added during the chocolate melting stage can significantly boost the flavor profile.
These additions are subtle but add layers of deliciousness to the overall taste experience.
Experiment to find your favorite flavor enhancement.
Tip: Consider the Coconut Type. While unsweetened shredded coconut is standard, you can experiment with sweetened if you prefer a sweeter cake, or even use a mix of shredded and desiccated coconut for varied textures.
Just be mindful that sweetened coconut will alter the overall sweetness level and potentially the setting consistency.
The type of coconut can subtly influence the final texture and flavor.
Serving Suggestions for No Bake Coconut Cake
Decoration
A beautifully decorated cake is always a welcome sight, and this no-bake coconut cake is no exception.
Simple garnishes can transform it from a humble treat to an elegant dessert centerpiece.
Focus on complementary flavors and textures that enhance the cake’s inherent appeal.
Classic Coconut Snowfall: A generous dusting of extra shredded coconut over the entire top surface provides an inviting, snow-like appearance.
For added visual interest, use a combination of regular and toasted shredded coconut to create subtle color variations.
This mimics the cake’s primary flavor and adds a pleasing textural contrast.
Chocolate Accents: Melt a small amount of extra chocolate and drizzle it artfully over the cake using a fork or a piping bag.
Alternatively, sprinkle a few finely chopped chocolate shavings or curls on top.
This reinforces the chocolate flavor and adds a touch of decadence.
Fresh Fruit Crown: Adorn the top of the cake with a vibrant arrangement of fresh berries such as raspberries, blueberries, or sliced strawberries.
A few perfectly placed mint leaves can add a pop of green and a fresh aroma.
This adds a lovely contrast in color, freshness, and a slight tartness that balances the cake’s sweetness.
Side Dishes
While this cake is a delightful standalone treat, pairing it with complementary sides can create a more complete and luxurious dessert experience.
The goal is to offer something that balances the richness of the chocolate and the sweetness of the coconut.
Think light, fresh, and palate-cleansing accompaniments.
Lightly Whipped Cream: A dollop of unsweetened or lightly sweetened whipped cream provides a wonderful creamy contrast to the dense texture of the cake.
It softens the intensity of the chocolate and adds a delicate richness.
Infusing the cream with a hint of vanilla extract can further enhance its appeal.
Fresh Berry Compote: A warm or chilled compote made from mixed berries can offer a delightful tartness and a burst of fruity flavor.
The vibrant acidity of the berries cuts through the sweetness and richness of the cake beautifully.
Serve a small spoonful alongside each slice for a balanced dessert.
A Scoop of Vanilla Ice Cream: For a classic dessert pairing, a small scoop of high-quality vanilla bean ice cream offers a delightful contrast in temperature and texture.
The creamy, cold ice cream melting against the firm cake creates a truly satisfying experience.
Opt for a less sweet ice cream to avoid overpowering the cake’s flavor.
Creative Serving Ideas
Taking your no-bake coconut cake from a simple dessert to a memorable experience can be achieved with a little creativity in how you present and serve it.
These ideas are designed to add a touch of flair and thoughtfulness to your dessert offering.
They aim to make the occasion, and the cake, extra special.
Individual Portions: Instead of unmolding the entire cake, consider pressing the mixture into small silicone molds or mini muffin liners.
This creates perfect, single-serving portions that are easy to serve and incredibly cute.
They are ideal for parties or when you want to offer a neat, controlled serving size.
Layered Parfait Style: Crumble portions of the set no-bake coconut cake and layer them in glasses with fresh whipped cream and mixed berries.
This creates a deconstructed dessert that is visually stunning and offers a delightful mix of textures.
It’s a beautiful way to present the flavors in a new format.
Dessert Board Feature: Arrange slices of the no-bake coconut cake on a platter alongside other small sweet treats, such as mini cookies, chocolate-covered strawberries, or small squares of fudge.
This creates an impressive dessert board that offers variety and allows guests to pick and choose their favorites.
It’s perfect for gatherings and adds a touch of indulgence.
Preparation & Storage
Storing Leftovers
Fortunately, this delightful no-bake coconut cake stores exceptionally well, allowing you to enjoy its deliciousness for several days.
Proper storage is key to maintaining its texture and flavor, ensuring that each subsequent slice is as enjoyable as the first.
The refrigerator is your best friend when it comes to keeping this treat fresh.
Airtight Refrigeration: Once the cake has been served, any remaining portions should be promptly covered and stored in the refrigerator.
Using an airtight container is ideal, as it prevents the cake from drying out and also stops it from absorbing any unwanted odors from other foods in the fridge.
If you have leftovers in the springform pan, simply press a layer of plastic wrap directly onto the surface of the cake before covering the pan tightly.
Optimal Freshness Window: This no-bake coconut cake is best enjoyed within approximately 5 days of its preparation.
During this time, the chocolate will remain firm, and the coconut will retain its pleasant chewy texture.
Beyond this window, while still edible, the texture might begin to change slightly, and the flavors may not be as vibrant.
Maintaining Texture: For the best eating experience, it’s advisable to let the cake sit at room temperature for about 5-10 minutes before serving leftovers.
This brief resting period allows the chocolate to soften just enough to make slicing easier and the texture more pleasant, without compromising its overall firmness.
It ensures a delightful balance between chilled firmness and an approachable mouthfeel.
Freezing
Should you find yourself with an abundance of this delightful no-bake creation, or simply want to prepare it further in advance, freezing is an excellent option.
Freezing allows you to preserve its quality for an extended period, ensuring you always have a delicious dessert ready when the craving strikes.
Proper wrapping is paramount to preventing freezer burn and maintaining optimal texture upon thawing.
Wrap It Well: To freeze the no-bake coconut cake, it is best to either freeze individual slices or the entire cake once it has been fully set and is firm.
Wrap each slice or the entire cake tightly in a layer of plastic wrap, ensuring there are no air pockets.
Follow this with a secure layer of aluminum foil or place the wrapped cake into a freezer-safe airtight container.
Extended Shelf Life: Properly frozen, the no-bake coconut cake can retain its quality for up to 1 month.
This makes it an ideal candidate for making ahead for holidays, special events, or simply for having a ready-to-go dessert option on hand.
The freezing process effectively pauses the degradation of its texture and flavor.
Thawing Gently: When you are ready to enjoy your frozen cake, the best method is to thaw it slowly.
Transfer the frozen cake or slices from the freezer to the refrigerator and allow them to thaw completely overnight.
Alternatively, if you are in a bit of a hurry, you can allow slices to thaw at room temperature for about 15-20 minutes.
This gentle thawing process helps to preserve the cake’s intended texture and prevents any undesirable changes that can occur with rapid thawing.
Reheating
Reheating is generally not necessary for this particular dessert, as its appeal lies in its chilled, firm texture.
However, if you’ve frozen your cake and prefer a slightly softer consistency than straight from the refrigerator, a brief period at room temperature is the most effective approach.
There’s no need for an oven or microwave, which could negatively impact the delicate balance of the cake.
Room Temperature Rest: The most recommended method for bringing your no-bake coconut cake to an ideal serving temperature after refrigeration or thawing is to simply let it rest at room temperature.
Allowing it to sit out for about 10 to 15 minutes will slightly soften the chocolate and coconut, making it easier to slice and more pleasant to eat without making it melty.
This brief resting period ensures the perfect balance of firmness and tenderness.
Avoiding Heat: It is crucial to avoid any form of direct heating, such as microwaving or oven reheating, for this dessert.
These methods will likely cause the chocolate to melt unevenly, resulting in a greasy texture and a loss of the cake’s structural integrity.
The delicate composition of this no-bake treat is best preserved through gentle, ambient temperature adjustments.
Assessing Texture: The goal of this brief resting period is to achieve a texture that is firm in the center but slightly yielding at the edges.
This makes each bite more enjoyable and easier to manage.
The chocolate should be smooth and rich, not hard and brittle, and the coconut should retain its delightful chew.
Frequently Asked Questions
-
Can I use sweetened shredded coconut instead of unsweetened for this no-bake coconut cake?
Absolutely, you can use sweetened shredded coconut if that is what you have on hand or if you prefer a sweeter dessert. Be aware that using sweetened coconut will increase the overall sweetness of the cake. The moisture content in sweetened coconut can also sometimes be slightly different, potentially leading to a marginally softer final texture. However, it will still set up nicely and the flavor will be delicious, making it a very adaptable swap for this easy recipe.
-
How long does the no-bake coconut cake typically need to chill to become fully firm?
The chilling time for this no-bake coconut cake can vary slightly depending on your refrigerator’s temperature and the initial warmth of the chocolate mixture. Generally, it needs at least 1 to 3 hours in the refrigerator to achieve a firm, sliceable consistency. For the absolute best texture and the cleanest slices, it is highly recommended to chill it overnight. This extended period allows the chocolate and coconut to fully meld and set, resulting in a perfectly cohesive and delicious dessert that is easy to handle and serve.
-
What are the best alternatives if I do not have a springform pan to make this no-bake coconut cake?
If a springform pan is not available, you can successfully make this no-bake coconut cake using other types of pans, such as a small round cake pan or a loaf pan. The key is to ensure the pan is very well-lined with parchment paper, leaving enough overhang on the sides to help you lift the cake out easily once it has set. A properly lined regular cake pan will work, though unmolding might require a little more care to keep the cake’s shape intact compared to the effortless release a springform pan provides.