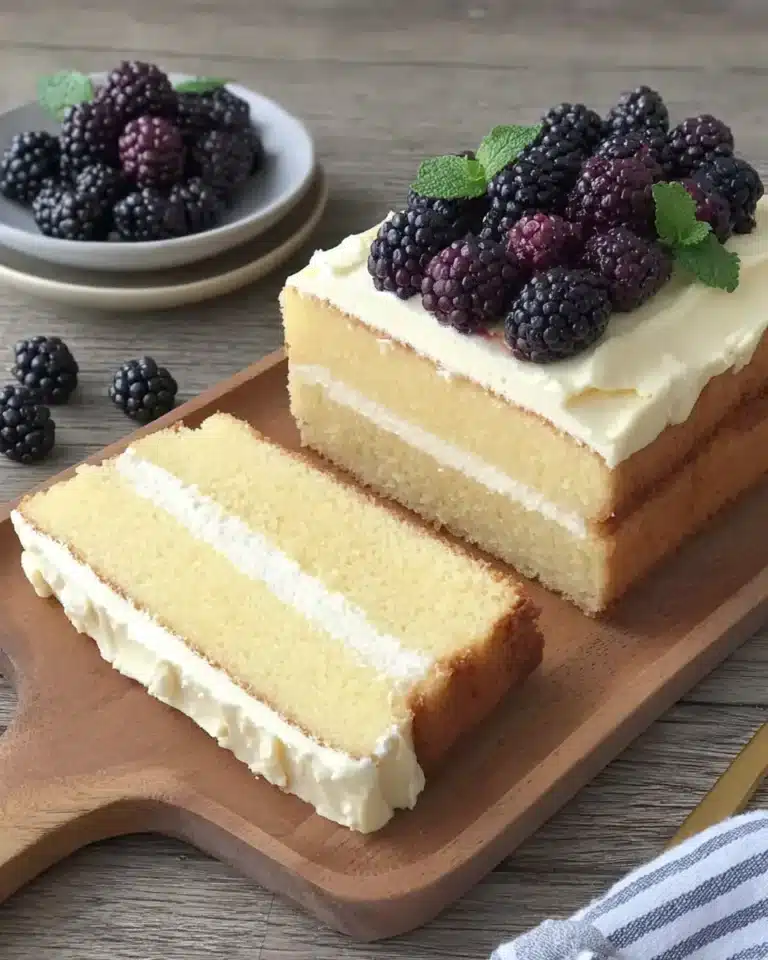
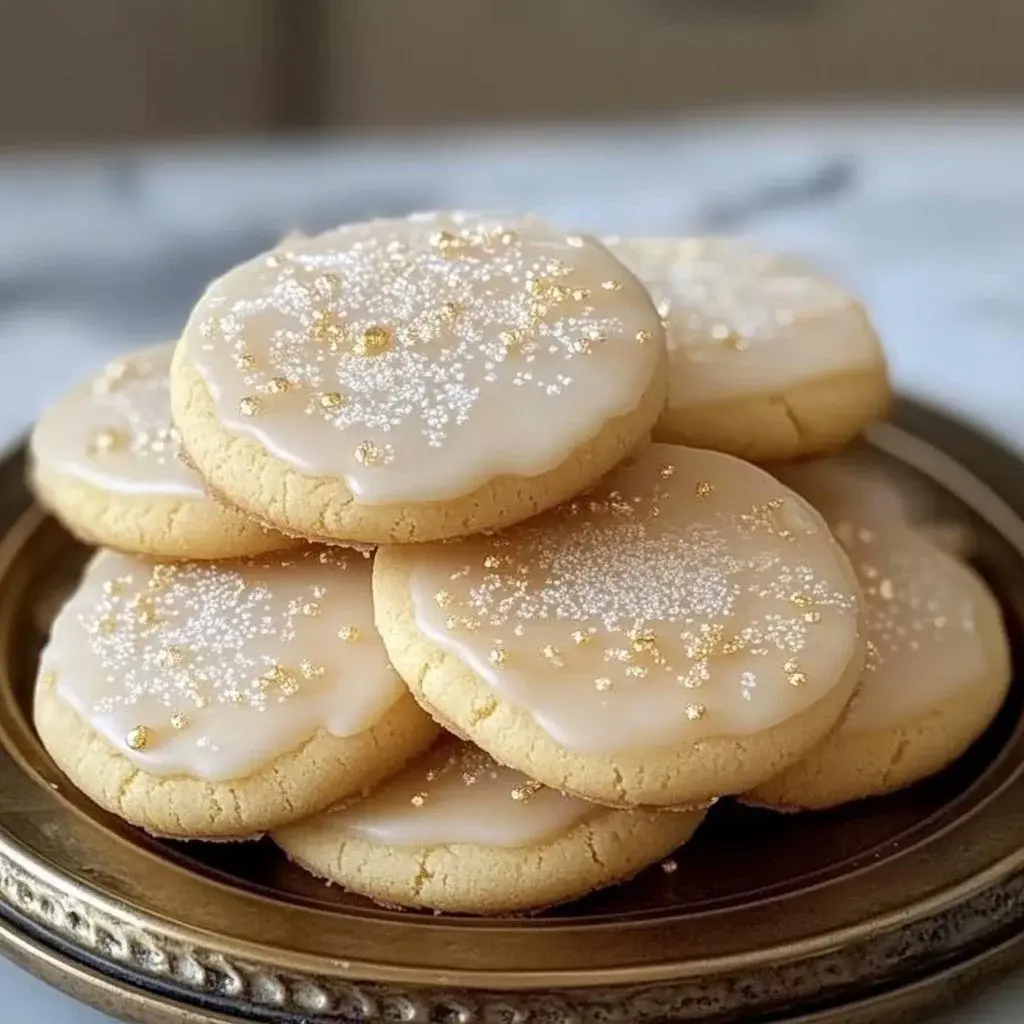
Easy Sparkling Vanilla Cookies
Baking cookies is one of life’s simple pleasures, isn’t it? There’s something magical about the aroma of freshly baked goods wafting through your home, and Sparkling Vanilla Cookies bring that enchantment right into your kitchen. They combine the universally beloved flavors of pure vanilla with a delightful, eye-catching sparkle that makes every single bite feel truly special. You’ll find them not only incredibly easy to make but also visually stunning, making them absolutely perfect for any kind of occasion, from festive holidays to casual family gatherings.
What truly elevates these Sparkling Vanilla Cookies beyond the ordinary is their inherent versatility and adaptability. You can effortlessly customize them by incorporating your favorite sprinkles or by selecting different glazes to perfectly suit any event, season, or personal preference. Furthermore, they are crafted using simple, everyday pantry staples, meaning you can whip up a batch anytime the sweet craving strikes without any fuss or delay. The exquisite balance of rich, buttery undertones and sweet, aromatic vanilla flavor is simply irresistible and utterly satisfying.
Why You Will Love This Recipe
- Irresistible Flavor Profile: The harmonious blend of rich, creamy butter and aromatic vanilla extract creates a taste sensation that is both classic and delightfully enhanced.
- Effortless Simplicity: Designed with the home baker in mind, this recipe breaks down complex techniques into easy-to-follow steps, making it ideal for beginners and experienced bakers alike.
- Endless Customization: From vibrant glazes to seasonal sprinkles, these cookies offer a perfect canvas for creative expression, allowing you to tailor them to any celebration or theme.
- Family-Friendly Fun: Engage your little ones in the joy of baking; they’ll undoubtedly love both the process of making these sparkling treats and the delicious outcome.
- Remarkably Quick Preparation: Enjoy freshly baked cookies with minimal waiting time, as the entire process from mixing the dough to baking is typically completed in under 30 minutes.
Ingredients You Need
The foundation of any great cookie lies in the quality of its ingredients, and these Sparkling Vanilla Cookies are no exception. Opting for fresh, high-quality components will elevate the final taste and texture, ensuring a truly delightful baking experience. Using good butter, pure vanilla extract, and fresh flour makes a noticeable difference in the final product.
Sparkling Vanilla Cookies

Delightful and visually stunning cookies made with rich buttery goodness and a sweet vanilla flavor, topped with edible glitter for a sparkling finish. These cookies are easy to make and perfect for any occasion, adding a touch of magic to your baking.
- 2 3/4 cups all-purpose flour
- 1 teaspoon baking soda
- 1/2 teaspoon salt
- 1 cup unsalted butter, softened
- 1 1/2 cups granulated sugar
- 1/2 cup powdered sugar
- 1 teaspoon vanilla extract
- 1 large egg
- Edible glitter for decoration
- Glaze (powdered sugar mixed with a little water or milk)
- 1Gather all your ingredients, ensuring butter is softened.
- 2In a large bowl, whisk together flour, baking soda, and salt.
- 3In another bowl, cream together softened butter, granulated sugar, and powdered sugar until light and fluffy.
- 4Beat in the egg and vanilla extract until fully incorporated.
- 5Gradually mix dry ingredients into wet ingredients until just combined; do not overmix.
- 6Scoop dough portions onto a parchment-lined baking sheet, spacing 2 inches apart.
- 7Preheat oven to 350°F (175°C).
- 8Bake for 8-10 minutes until edges are golden.
- 9Cool on the baking sheet for a few minutes, then transfer to a wire rack to cool completely.
- 10Prepare glaze by mixing powdered sugar with a little water or milk to a smooth, thick consistency.
- 11Once cookies are cool, dip each in glaze and immediately sprinkle with edible glitter.
Keywords: Baking, Cookies, Easy Cookies, sparkling cookies, vanilla cookies, dessert, sweet
- all-purpose flour: the essential base providing structure and a tender crumb.
- baking soda: a crucial leavening agent that ensures a perfect rise and light texture.
- salt: balances the sweetness and enhances the overall flavor profile.
- unsalted butter, softened: contributes richness, moisture, and a wonderfully creamy texture to the dough.
- granulated sugar: provides sweetness and aids in achieving those desirable crispy edges during baking.
- powdered sugar: adds a delicate sweetness and a smooth finish, especially in the glaze.
- vanilla extract: the star flavor, lending its warm, comforting aroma and taste.
- egg: acts as a binder, helping to hold all the ingredients together and contributing to the cookie’s structure.
- edible glitter: the key ingredient for that signature sparkle and visual appeal.
- glaze (powdered sugar mixed with a little water or milk): a simple yet elegant finishing touch that adds a touch of sweetness and a surface for the glitter.
You will find the precise quantities for each ingredient detailed within the comprehensive recipe card provided.
Variations
To truly make these Sparkling Vanilla Cookies your own, consider adding a handful of finely chopped nuts like pecans or walnuts into the dough before baking for an added layer of texture and a nutty depth of flavor. This simple addition can transform a classic cookie into something more sophisticated and satisfying.
For a delightful twist that appeals to chocolate lovers, gently fold in about half a cup of mini chocolate chips into the dough. The contrast between the sweet vanilla cookie and the rich chocolate is absolutely divine, offering a welcome surprise in every bite.
Experiment with different extracts to create entirely new flavor profiles. A touch of almond extract or even a hint of citrus zest, like lemon or orange, can offer a refreshing and nuanced flavor that pairs beautifully with the sweetness of the cookie.
How to Prepare sparkling vanilla cookies
Step 1: Gather and Prepare Your Ingredients
The journey to delicious cookies begins with careful preparation. Ensure all your ingredients are measured out precisely and readily accessible before you start mixing. This organized approach minimizes errors and makes the entire baking process much smoother and more enjoyable.
Crucially, make sure your unsalted butter is softened to room temperature. This is a vital step that allows the butter to cream properly with the sugar, creating the light and airy texture that is characteristic of perfectly baked cookies. Cold butter will not incorporate well, leading to a denser, less appealing final product.
If you are planning on using any additions like chocolate chips or nuts, have them ready to be mixed in at the appropriate stage. This foresight ensures that your workflow remains uninterrupted and efficient, leading to the best possible outcome for your sparkling vanilla cookies.
Step 2: Combine the Dry Ingredients
In a generously sized mixing bowl, meticulously combine the all-purpose flour, baking soda, and salt. Whisk these dry ingredients together thoroughly until they are completely homogenous. This step is essential for ensuring that the leavening agent (baking soda) and the salt are evenly distributed throughout the flour, which will guarantee uniform rising and balanced flavor in every cookie.
The importance of this step cannot be overstated for achieving consistent results. Uneven distribution of baking soda can lead to cookies that rise too much in some spots and not enough in others, or result in an unpleasant metallic taste. A good whisking ensures a perfect foundation for your cookie dough.
Once thoroughly combined, you can set this bowl of dry ingredients aside. It is now ready to be gradually incorporated into the wet ingredients, forming the dough for your beautiful, sparkling vanilla cookies.
Step 3: Create the Creamy Cookie Base
In a separate, even larger mixing bowl, begin the process of creaming the softened unsalted butter with both the granulated sugar and the powdered sugar. Using an electric mixer on medium speed is highly recommended for this task, as it will efficiently whip these ingredients together.
Continue beating this mixture for approximately 3 to 5 minutes. You are aiming for a pale yellow, exceptionally light, and wonderfully fluffy consistency. This creaming process incorporates air into the dough, which is fundamental for achieving tender and melt-in-your-mouth cookies.
Pay close attention to the texture during this stage. The mixture should significantly increase in volume and become noticeably lighter in color. This fluffy base is what gives your cookies their delicate structure and prevents them from becoming dense or heavy.
Step 4: Incorporate the Egg and Vanilla Extract
Once you have achieved the desired light and fluffy texture in your butter and sugar mixture, it is time to introduce the egg and the pure vanilla extract. Add the egg to the bowl, and then measure out your vanilla extract, adding it as well. It is best to add the egg first and beat it in until it is fully integrated into the creamy mixture before adding the vanilla.
Continue beating the mixture with your electric mixer. The addition of the egg will cause the mixture to become even more voluminous and slightly paler. The vanilla extract will seamlessly blend into the base, imparting its characteristic warm and comforting aroma and flavor.
Ensure a thorough incorporation of both the egg and the vanilla extract. Scrape down the sides of the bowl periodically with a spatula to make sure no unmixed ingredients are hiding. This step is crucial for binding all the components together and laying the groundwork for the cookie’s signature taste and aroma.
Step 5: Combine Wet and Dry Mixtures
Now, it’s time to bring the two main components of your cookie dough together. Begin by gradually adding the bowl of dry ingredients (flour, baking soda, salt) to the wet ingredients (creamed butter, sugar, egg, vanilla). It is best to add the dry ingredients in two or three additions, rather than all at once.
Mix on a low speed with your electric mixer, or stir gently with a sturdy spatula, until the ingredients are just combined. It is critical that you do not overmix the dough at this stage. Overmixing can develop the gluten in the flour too much, resulting in tough, dense cookies instead of tender, delicate ones.
The dough should be soft and possibly slightly sticky, but it should hold together when you gently press it. If the dough seems excessively dry, you can add a teaspoon of milk or water. Conversely, if it seems too wet, a tablespoon more of flour can be added, but proceed with caution to avoid overworking it.
Step 6: Scoop and Shape the Cookie Dough
With your cookie dough ready, the next step is to portion it out for baking. Using a tablespoon or a dedicated cookie scoop (a small one, about 1.5 tablespoons in size, works wonderfully), scoop out uniform portions of the dough. This ensures that all your cookies bake evenly.
Place each portion of dough onto a baking sheet that has been meticulously lined with parchment paper. Parchment paper is highly recommended as it prevents the cookies from sticking to the baking sheet and makes for much easier cleanup. You should space the cookie dough balls about 2 inches apart on the baking sheet.
Allowing adequate space between the cookie dough balls is vital. As the cookies bake, they will spread outwards. If they are too close together, they will meld into one giant cookie, and the edges will not bake up as nicely. This spacing ensures each cookie develops its own delightful shape and texture.
Step 7: Bake the Cookies to Golden Perfection
Preheat your oven to precisely 350 degrees Fahrenheit (175 degrees Celsius). Ensuring your oven is at the correct temperature before placing the cookies inside is a fundamental step for achieving consistent baking results. An oven that is too cool will result in flat, pale cookies, while an oven that is too hot can lead to burnt exteriors and undercooked centers.
Place the prepared baking sheets into the preheated oven. Bake the cookies for approximately 8 to 10 minutes. The exact baking time can vary depending on your oven and the size of your cookies, so it’s important to keep a close eye on them during this period. You are looking for the edges of the cookies to turn a beautiful golden-brown color.
The centers of the cookies may still look slightly underbaked when you remove them from the oven. This is perfectly normal and, in fact, desirable. The residual heat will continue to cook the cookies as they sit on the hot baking sheet, and they will firm up significantly as they cool. This ensures a tender, slightly chewy interior.
Step 8: Cool the Cookies Completely
Once the cookies have baked for their designated time and the edges have achieved that lovely golden hue, carefully remove the baking sheets from the oven. Allow the cookies to cool on the hot baking sheets for about 3 to 5 minutes. This brief cooling period on the sheet allows the cookies to set up slightly, making them more stable and easier to handle without breaking.
After this initial cooling on the baking sheet, gently transfer the cookies to a wire cooling rack. A wire rack allows air to circulate freely around the cookies, ensuring they cool down evenly and completely from all sides. This step is absolutely essential before moving on to the decorating phase, especially when applying a glaze.
Patience is key here. Glazing or decorating warm cookies will cause the glaze to melt and run off, and any edible glitter may not adhere properly. Ensuring the cookies are entirely cool to the touch will guarantee a smooth, beautiful finish for your sparkling vanilla cookies.
Step 9: Prepare the Sparkling Glaze
While your cookies are cooling to perfection on the wire rack, it’s the ideal time to prepare the simple yet elegant glaze. In a small bowl, combine powdered sugar with a very small amount of liquid. You can use either water or milk for this purpose, with milk yielding a slightly richer flavor and texture.
Start with a tablespoon or two of your chosen liquid and gradually add more, a tiny bit at a time, whisking continuously. The goal is to achieve a consistency that is smooth and pourable, yet thick enough to cling nicely to the cookie without being too runny. It should be like a thick, pourable icing.
The consistency is paramount for the glaze. If it’s too thin, it will simply drip off the cookies, and your glitter won’t adhere well. If it’s too thick, it will be difficult to spread and may create an overly sweet, doughy layer. Aim for a texture that coats the back of a spoon in a smooth, unbroken layer.
Step 10: Decorate with Edible Glitter
With your cookies completely cooled and your glaze perfectly prepared, it’s time for the magical finishing touch: the edible glitter! Take each cooled cookie and dip its top surface into the prepared glaze, or use a spoon to drizzle or spread the glaze over the cookie. Ensure a good, even coating.
Immediately after glazing, before the glaze has a chance to set, sprinkle your chosen edible glitter generously over the top of the glazed cookie. The moisture from the glaze will help the glitter adhere beautifully, creating that signature sparkling effect that makes these cookies so special and festive.
Allow the glazed cookies to set completely on the wire rack. This may take some time, depending on the humidity and the thickness of your glaze. Once the glaze is dry to the touch, your Sparkling Vanilla Cookies are ready to be admired and, more importantly, devoured! They are a delightful addition to any cookie tray or special occasion.
Pro Tips for sparkling vanilla cookies
For an Enhanced Vanilla Flavor: Don’t hesitate to add an extra half teaspoon of vanilla extract to your dough. You can also consider infusing your milk or water for the glaze with a vanilla bean for an even more intense vanilla aroma and taste.
Achieve Perfect Round Cookies: If you’re aiming for consistently round cookies, chilling the dough for about 30 minutes before scooping can significantly help. This firming step reduces spread during baking, helping them retain their shape.
Glazing Techniques: For a more controlled and elegant glaze application, consider using a piping bag with a fine tip to outline and then fill the cookie. Alternatively, a small offset spatula can be used to spread the glaze evenly.
Edible Glitter Selection: There are various types of edible glitter available, from fine dusts to larger flakes. Choose the type that best suits your desired aesthetic; a finer glitter offers a subtle shimmer, while larger flakes provide a more pronounced sparkle.
Temperature Matters: Always ensure your oven is accurately preheated to the specified temperature. Using an oven thermometer can help verify accuracy, as oven thermostats can sometimes be unreliable, leading to baking inconsistencies.
Serving Suggestions for sparkling vanilla cookies
Decoration
These cookies are designed to be visually delightful, and their decoration is key. The primary decorative element is, of course, the edible glitter, which gives them their signature sparkle. For an added touch, consider using glazes in different colors that complement specific holidays or themes.
Think beyond just glitter; you can also incorporate edible pearls, small sugar stars, or even food-safe edible paints to create intricate designs on the glazed surface. Tiny edible flowers can also add an elegant and natural flourish.
For a truly custom look, pair the glitter with carefully placed sprinkles. Whether it’s fine sanding sugar for a subtle sheen, or colorful jimmies for a playful pop, the right sprinkles can enhance the overall visual appeal significantly.
Side Dishes
Sparkling Vanilla Cookies are a wonderful standalone treat, but they also pair beautifully with a variety of beverages and other desserts. They are excellent alongside a steaming mug of coffee or a fragrant cup of herbal tea, perfect for a cozy afternoon break.
For a more decadent experience, serve them with a scoop of creamy vanilla bean ice cream. The combination of warm cookie (if slightly reheated) and cold ice cream is a classic dessert pairing that never disappoints.
They also serve as a delightful component on a larger dessert platter. Imagine them nestled amongst other baked goods like brownies, cupcakes, or fruit tarts, adding a touch of sparkle and a unique vanilla flavor to the spread.
Creative Serving Ideas
Transform these cookies into delightful party favors by placing a few in clear cellophane bags tied with a festive ribbon. They make for charming takeaways that guests can enjoy later.
For a whimsical touch at children’s parties, arrange the cookies on a tiered stand and call them “Fairy Dust Cookies” or “Starlight Treats.” Their sparkle naturally lends itself to such imaginative themes.
Consider using them as edible decorations for cakes or cupcakes. A few strategically placed sparkling cookies can add height, texture, and a beautiful focal point to a larger dessert creation, making your presentation truly stand out.
Preparation & Storage
Storing Leftovers
To ensure your delicious Sparkling Vanilla Cookies remain as fresh and delightful as possible, it is best to store them in an airtight container at room temperature. This prevents them from drying out or becoming stale. If you are storing them for more than a couple of days, consider placing layers of parchment paper between the cookies.
This simple step of using parchment paper will prevent the cookies from sticking to each other, especially if there is any slight moisture from the glaze. Properly stored, these cookies can maintain their excellent quality for about a week, making them perfect for enjoying over several days.
Avoid storing them in the refrigerator unless your climate is extremely hot and humid, as the moisture in the fridge can make the cookies soggy and diminish their delightful crispness. Room temperature is generally ideal for preserving their texture.
Freezing
If you find yourself with an abundance of Sparkling Vanilla Cookies or wish to prepare them further in advance, they are excellent candidates for freezing. To freeze them, first place the cooled, undecorated cookies in a single layer on a baking sheet. Ensure there is no glaze or excessive decoration that might smudge during the freezing process.
Once the cookies are solid after a few hours in the freezer, you can then transfer them to a freezer-safe airtight container or a heavy-duty freezer bag. This double-layering of freezing and then sealing helps to protect them from freezer burn and maintain their quality for an extended period.
Properly frozen, these vanilla cookies can retain their delicious taste and texture for up to three months. When you are ready to enjoy them, simply remove them from the freezer and let them thaw completely at room temperature before decorating or consuming.
Reheating
While these cookies are delightful at room temperature, there’s a special joy in enjoying them slightly warm, especially if they have been frozen. If you have thawed frozen cookies and they seem a bit firm, or if you simply prefer a warm, gooey cookie, reheating is a simple process.
Preheat your oven to a low temperature, around 300 degrees Fahrenheit (150 degrees Celsius). Place the cookies on a baking sheet lined with parchment paper. Bake for just 5 to 10 minutes, keeping a very close eye on them to prevent them from burning or overcooking.
This short period in the oven will gently warm the cookies, softening them and bringing back that wonderfully fresh-baked aroma and texture. They will become delightfully tender again, perfect for enjoying with a cold glass of milk or a warm cup of tea.
Frequently Asked Questions
-
Can I make the dough for these sparkling vanilla cookies ahead of time?
Absolutely, the dough for these delightful sparkling vanilla cookies can indeed be prepared in advance. Once you have mixed the dough, you can securely wrap it in plastic wrap or place it in an airtight container and refrigerate it for up to 3 days. This advance preparation is perfect for busy schedules, allowing you to bake fresh cookies on demand. Just ensure the dough is brought back to a workable temperature before scooping and baking; you might need to let it sit at room temperature for about 20-30 minutes.
-
What are the best substitutions for the butter and egg if I want to make these cookies vegan or dairy-free?
Creating vegan or dairy-free sparkling vanilla cookies is quite achievable with a few simple swaps. For the unsalted butter, you can successfully substitute it with an equal amount of high-quality vegan butter alternative or solid coconut oil. When using coconut oil, be mindful that it may impart a subtle coconut flavor. To replace the large egg, a common and effective vegan binder is a “flax egg,” made by whisking one tablespoon of ground flaxseed with three tablespoons of water and letting it sit for about 5-10 minutes until it forms a gel-like consistency. Other alternatives include unsweetened applesauce or mashed banana, though these may slightly alter the cookie’s flavor and texture.
-
How long do these sparkling vanilla cookies typically last when stored at room temperature, and what is the best way to ensure they stay fresh?
When stored properly in an airtight container at room temperature, these sparkling vanilla cookies will maintain their delightful texture and flavor for approximately 5 to 7 days. The key to longevity is minimizing their exposure to air, which causes them to dry out and lose their pleasant chewiness. If you are stacking cookies, placing a layer of parchment paper between them can prevent the glaze from sticking and preserve the integrity of each cookie’s surface. Ensuring the cookies are completely cooled before storing is also paramount; warm cookies can create condensation within the container, leading to sogginess.