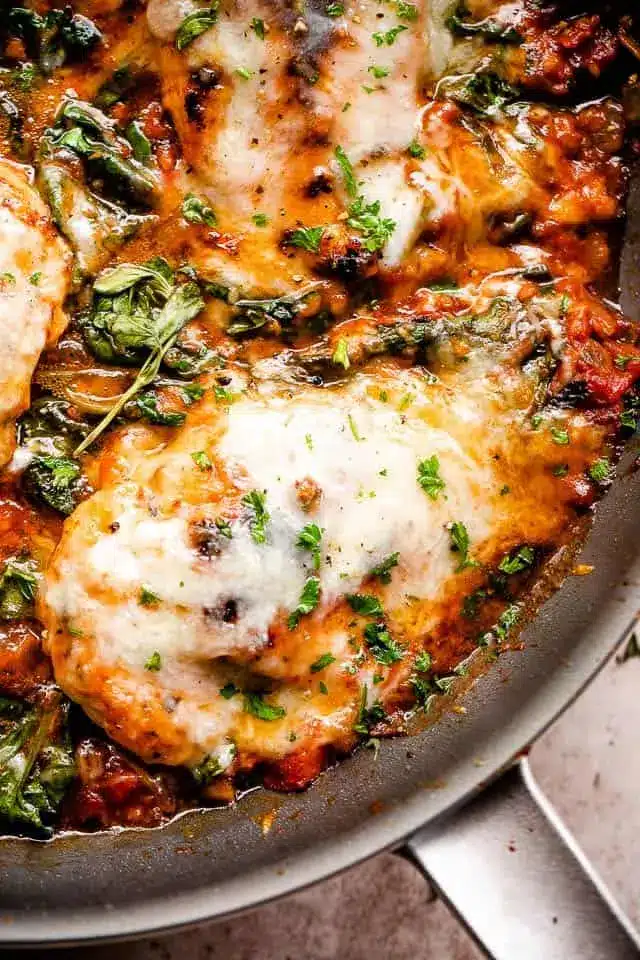
Delicious Creamy Chicken Caesar Dip – The Ultimate Party Pleaser
As I stirred the bubbling mix of creamy cheese and zesty dressing, a wave of nostalgia washed over me, reminding me of unforgettable gatherings filled with laughter and good food.
This Creamy Chicken Caesar Dip is my go-to appetizer that blends the beloved flavors of Caesar salad into a hearty, crowd-pleasing dish, perfect for game days and parties, taking just a few simple ingredients and minimal prep time to create a dip that everyone will rave about.
Why You Will Love This Recipe
- Irresistible Flavor: The blend of creamy cheeses, zesty dressing, and tender chicken creates a flavor explosion that keeps everyone coming back for more.
- Quick Preparation: With just a few simple steps, you can whip this up in no time, making it a fantastic option for last-minute gatherings or unexpected guests.
- Versatile Base: Feel free to swap ingredients—try it with shredded beef or add a spicy kick with buffalo sauce, making it adaptable to your preferences.
- Perfect for Any Occasion: Whether it’s game day or a cozy get-together, this Creamy Chicken Caesar Dip is guaranteed to impress.
- Crowd-Pleasing Appeal: This dip transforms familiar Caesar salad components into a warm, dippable appetizer that universally delights.
Ingredients You Need
The key to an exceptional Creamy Chicken Caesar Dip lies in the quality of the ingredients you choose, ensuring a rich and satisfying flavor profile.
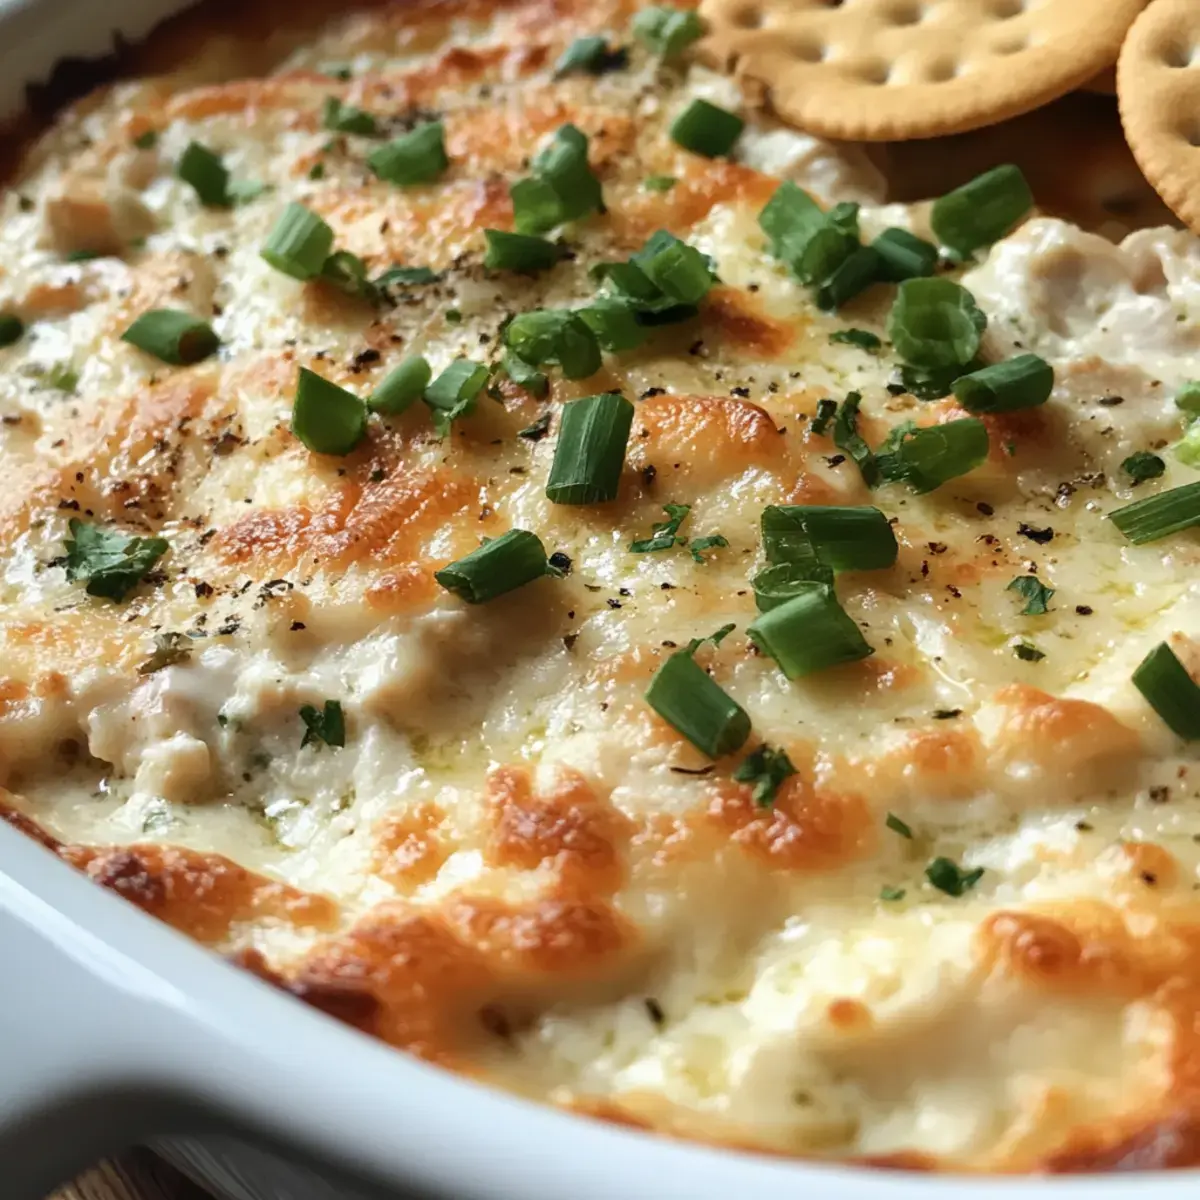
Creamy Chicken Caesar Dip

This Creamy Chicken Caesar Dip is a crowd-pleaser that blends classic Caesar salad flavors into a hearty, warm appetizer perfect for any gathering.
- 1 whole Rotisserie Chicken, shredded into small pieces
- 1 cup American Cheese, shredded
- 0.5 cup Parmesan Cheese, grated
- 8 oz Cream Cheese, room temperature
- 1.5 cups Caesar Dressing
- 0.25 cup Chopped Green Onions, for garnish
- 0.25 cup Extra Parmesan, for topping
- Fresh Herbs, such as parsley or basil for garnish
- 1Preheat your oven to 350°F (175°C) and grease an 8x8 inch baking dish with butter or non-stick spray.
- 2Shred the rotisserie chicken into bite-sized pieces and spread evenly in the baking dish. Drizzle with 1/2 cup of Caesar dressing.
- 3In a large mixing bowl, combine the shredded American cheese, grated Parmesan, cream cheese, and the remaining 1 cup of Caesar dressing. Blend with a hand mixer until smooth.
- 4Spread the cheese mixture evenly over the chicken layer in the baking dish.
- 5Bake for 25-30 minutes until bubbly and golden brown. Optionally, broil for 2 minutes for extra crispiness.
- 6Remove from the oven, garnish with the remaining Parmesan and chopped green onions, and serve warm.
Keywords: Chicken Caesar Dip, Appetizer, Party Food, Game Day Recipe, Cheesy Dip, Easy Appetizer
- rotisserie chicken: shredded into small pieces for tender, flavorful bites.
- american cheese: shredded to ensure perfect meltability and creamy texture.
- parmesan cheese: grated for that classic sharp, tangy essence.
- cream cheese: softened to room temperature for smooth, lump-free mixing.
- caesar dressing: the flavorful base that ties all the ingredients together beautifully.
- chopped green onions: for a fresh, mild oniony bite and vibrant garnish.
- extra parmesan: a generous sprinkle on top for added crispiness and visual appeal.
- fresh herbs: such as parsley or basil, to add a burst of color and aroma as a finishing touch.
Refer to the recipe card above for precise quantities to achieve the perfect balance.
Variations
This Creamy Chicken Caesar Dip is a fantastic foundation for culinary creativity, allowing you to tailor it to diverse tastes and dietary needs.
Consider a Buffalo Twist by substituting the classic Caesar dressing with your favorite buffalo sauce. This introduces a delightful tanginess and a pleasant heat that complements the creamy cheese base exceptionally well. The fusion of spicy buffalo sauce with the rich, cheesy dip creates an addictive appetizer that’s perfect for those who enjoy a little kick.
For a hearty, savory experience, try the Beefy Alternative. Simply swap out the shredded rotisserie chicken for tender, slow-cooked shredded beef. This variation offers a deeper, more robust flavor profile that pairs wonderfully with the creamy cheese mixture, providing a satisfying twist on the original. It’s a great way to repurpose leftover pot roast or experiment with different protein choices.
Embracing inclusivity, a Dairy-Free Option is easily achievable. Utilize dairy-free cream cheese and a blend of your favorite non-dairy shredded cheeses, such as cashew or almond-based varieties. This ensures that everyone can enjoy the creamy goodness of the dip without compromising on taste or texture, making it suitable for those with lactose intolerance.
To introduce a vegetarian delight, opt for the Veggie Delight variation. Replace the chicken with a medley of finely chopped sautéed mushrooms and wilted spinach. These vegetables add earthy notes and a pleasant chewiness, enhancing the dip’s texture and flavor without the meat. This version is surprisingly satisfying and packed with wholesome goodness.
A simple yet impactful change comes with the Zesty Ranch Variation. Experiment by using ranch dressing instead of Caesar dressing as the primary liquid component. This substitution yields a creamy, herbaceous flavor profile that is familiar and universally loved, offering a comforting twist for ranch enthusiasts. It’s a straightforward way to alter the dip’s character.
For a southwestern flair, integrate the Tex-Mex Style. Stir a packet of taco seasoning into your cheese mixture for a fun, zesty kick that pairs exceptionally well with tortilla chips. This variation brings a delightful heat and a complex blend of spices that livens up the dip. It’s a playful nod to popular flavors.
Adding freshness is effortless with the Herb-Infused approach. Stir finely chopped fresh herbs like basil, parsley, or chives directly into the cheese mixture or sprinkle them generously on top before serving. These herbs bring bright, aromatic notes that beautifully cut through the richness of the dip, adding a gourmet touch.
Finally, for those who crave an extra layer of excitement, the Spicy Sriracha Drizzle is a must-try. Before serving, artfully drizzle sriracha sauce over the top of the baked dip. This adds a vibrant visual appeal and a welcome burst of heat that captivates spicy food enthusiasts, making the dip truly unforgettable.
How to Prepare Creamy Chicken Caesar Dip
Step 1: Preheat and Prepare the Baking Dish
Begin by preheating your oven to a moderate 350°F (175°C), the ideal temperature for gently melting and warming the dip to perfection. While the oven is doing its work, take an 8×8 inch baking dish and generously grease its interior surfaces. You can use softened butter, a good quality cooking spray, or even a bit of olive oil for this purpose. This crucial step ensures that your Creamy Chicken Caesar Dip will release cleanly from the dish once it’s beautifully baked, preventing any sticking and making serving a breeze. A well-greased dish guarantees that the crust forms evenly and that the dip slides out in one luscious piece.
Ensuring the baking dish is properly prepared is more than just a procedural step; it’s fundamental to achieving the perfect baked finish. A non-stick surface allows the dip to heat through evenly without clinging to the sides, which can sometimes lead to uneven cooking or a less appealing presentation. The light coating of grease also contributes to the development of a subtly golden-brown edge around the dip, adding a delightful textural contrast to the creamy interior. Therefore, take a moment to be thorough; a quick swipe with butter or a light spray is all it takes to set yourself up for dip-making success.
Step 2: Shred the Chicken
Now, focus your attention on the star protein of our dish: the rotisserie chicken. If you’re using a pre-cooked rotisserie chicken, it’s already tender and infused with savory flavors, making it incredibly convenient. Take two forks and gently pull the meat apart, shredding it into small, bite-sized pieces. Alternatively, you can use your clean hands for this task, which can sometimes allow you to feel for any errant bones or cartilage more effectively. The goal is to have uniformly sized pieces of chicken that will distribute evenly throughout the dip.
Once your chicken is beautifully shredded, it’s time to layer it into the prepared baking dish. Distribute these tender chicken morsels evenly across the bottom of the greased dish, creating a substantial base for the cheesy goodness that will follow. Following this, it’s time to introduce the first wave of flavor from the Caesar dressing. Carefully measure out approximately ½ cup of your favorite Caesar dressing and drizzle it generously over the shredded chicken. Ensure that every piece of chicken is well-coated with the dressing; this initial dressing infusion is key to embedding the classic Caesar flavor deep within the dip.
This step is foundational for building the dip’s rich flavor profile. The shredded chicken provides a satisfying, savory texture, while the initial coating of Caesar dressing acts as a marinade, allowing the chicken to absorb the zesty, garlicky notes of the dressing. This ensures that each bite of the dip will be bursting with authentic Caesar taste, not just on the surface, but all the way through. It sets the stage perfectly for the creamy, cheesy layers to come, promising a truly cohesive and delicious appetizer experience for everyone to enjoy.
Step 3: Mix the Cheesy Ingredients
In a generously sized mixing bowl, it’s time to bring together the creamy heart of our dip. You’ll start by adding the shredded American cheese, which, as previously mentioned, offers unparalleled meltability and a wonderfully smooth consistency. Alongside this, incorporate the grated Parmesan cheese, providing its signature sharp, salty counterpoint to the milder American cheese, adding a layer of sophisticated flavor. Next, introduce the softened cream cheese, ensuring it’s at room temperature to facilitate easy and seamless blending; this is crucial for achieving that luscious, velvety texture.
Finally, pour in the remaining 1 cup of Caesar dressing into the bowl with the cheeses. This dressing not only contributes to the creamy consistency but also reinforces the essential Caesar salad flavor. Now, for the magic: using a hand mixer (or a sturdy whisk if a mixer isn’t available), begin to blend these components together. Mix until the entire combination is utterly creamy, smooth, and homogenous, with no visible lumps of cream cheese or separate cheese shreds. This tantalizing mixture is the very essence of your Creamy Chicken Caesar Dip, forming a rich and hearty filling that promises pure indulgence.
The goal here is to create a unified, luxurious base that will envelop the chicken in its cheesy embrace. The combination of different cheeses and the creamy dressing ensures a complex flavor profile that is both familiar and irresistible. Taking the time to mix thoroughly guarantees that every spoonful of the dip will deliver a consistent and delightful cheesy experience, laying the groundwork for a truly exceptional appetizer that will have your guests asking for the recipe. This smooth, creamy concoction is the foundation of the dip’s appeal.
Step 4: Spread the Cheese Mixture
With your incredibly smooth and luscious cheese mixture prepared, the next step is to gently transfer it into the baking dish. Carefully spoon the entire cheesy concoction over the layer of Caesar-dressed shredded chicken that you previously arranged at the bottom. Take your time with this process; it’s important to distribute the mixture as evenly as possible across the chicken base.
Utilizing a spatula, gently spread the cheese mixture out to cover the chicken completely, creating a smooth, even top layer. This creates a beautiful, uninterrupted surface that promises to melt into a decadent, cheesy blanket during the baking process. Ensuring this layer is uniform is essential for creating that dreamy, universally adored cheesy top that everyone anticipates in a dip like this.
The visual appeal of this step is already promising: a thick, creamy layer poised to bake to golden perfection. This even spread guarantees that the heat will circulate uniformly, melting the cheeses into a cohesive unit that binds the chicken and dressing together. It’s this carefully crafted layer that provides the satisfying, gooey texture and rich flavor that makes Creamy Chicken Caesar Dip such a comforting and beloved appetizer. The even distribution is key to the dip’s ultimate success and enjoyment.
Step 5: Bake to Perfection
Carefully slide the prepared baking dish into the preheated oven, positioning it in the center rack to ensure even heat distribution. Allow the dip to bake for approximately 25 to 30 minutes. During this time, the magic happens: the cheeses will melt into a glorious, gooey consistency, and the edges will begin to bubble invitingly, signaling that it’s almost ready. You’re looking for a beautifully golden brown hue to develop on the surface, indicating that the dip has reached its optimal level of cooked deliciousness.
For those who desire an extra layer of delightful crispiness, an optional, but highly recommended, final step awaits: broiling. Once the dip is bubbling and golden, carefully switch your oven to the broil setting. Keep a very close eye on the dip during this stage, as it can go from perfectly golden to slightly charred in a matter of moments. Broiling for about 1 to 2 minutes, or until the top achieves a delightful crispness and a slightly darker golden color, will elevate the texture and flavor profile significantly. This brief broiling time is well worth the effort for that perfectly finished crust.
The scent filling your kitchen as this dip bakes is truly intoxicating, a warm, savory aroma that promises pure comfort and satisfaction. The bubbling edges and golden-brown top are visual cues that indicate a perfectly cooked dip, ready to be devoured. The slight crisping from the broiling adds a wonderful textural contrast, making each scoop of the creamy interior even more delightful. This baking and optional broiling process is what transforms simple ingredients into a sensational, crowd-pleasing appetizer that is sure to impress.
Step 6: Garnish and Serve
Once your Creamy Chicken Caesar Dip has reached its perfect state of bubbly, golden deliciousness, carefully remove the baking dish from the oven. Use oven mitts and exercise caution, as the dish and its contents will be very hot. The aroma alone is enough to make mouths water in anticipation of the first taste. The visual appeal at this stage is already impressive, with a warm, inviting dip beckoning to be shared.
Now, it’s time for the final flourish that elevates the dip’s presentation and adds an extra dimension of flavor. Take the remaining sprinkle of grated Parmesan cheese and generously scatter it over the hot surface of the dip. Follow this by sprinkling the finely chopped green onions evenly across the top. These garnishes not only enhance the visual appeal, adding vibrant color and texture, but also contribute fresh flavor notes that perfectly complement the rich, creamy dip beneath.
Serve your masterpiece immediately while it’s hot and wonderfully melty. Present the Creamy Chicken Caesar Dip with an assortment of dippers, such as crispy tortilla chips, fresh vegetable crudités, or warm pita bread wedges. The contrast in textures and temperatures between the hot, creamy dip and the cool, crisp dippers is absolutely divine and creates an unforgettable appetizer experience. Enjoy the delighted reactions as your guests dive into this irresistible creation.
Pro Tips for Creamy Chicken Caesar Dip
Room Temperature Cream Cheese: Always ensure your cream cheese is softened to room temperature before you begin mixing. This is a critical step to avoid any lumps in your final dip, resulting in a luxuriously smooth and creamy texture that is absolutely essential for this recipe.
Layering Flavors: For a more intense and sophisticated flavor profile, consider adding minced garlic or a small splash of fresh lemon juice directly into your cheese mixture. These small additions can significantly enhance the overall complexity and brightness of the Creamy Chicken Caesar Dip experience, adding a gourmet touch.
Watch the Broiler: If you choose to broil the dip for extra crispiness, it is imperative that you stay nearby and keep a very close eye on it. The broiling process is fast; it can go from perfectly golden to unfortunately charred in mere moments, so constant vigilance is key to achieving the desired texture without burning.
Make It Ahead: This dip is an excellent candidate for making ahead of time, which can be a lifesaver for busy hosts. You can assemble the entire dip up to a day in advance, cover it tightly, and store it in the refrigerator until you are ready to bake it fresh for your guests.
Versatile Swap: Don’t be afraid to experiment with different proteins! Feel free to substitute the rotisserie chicken with shredded beef or even shredded turkey for a unique twist on the classic Creamy Chicken Caesar Dip. This adaptability makes the recipe incredibly versatile and allows for creative culinary exploration.
Serving Suggestions for Creamy Chicken Caesar Dip
Decoration
Elevate the visual appeal of your Creamy Chicken Caesar Dip with thoughtful garnishes. A generous sprinkle of extra grated Parmesan cheese not only adds flavor but also creates a beautiful golden-brown crust as it heats. Freshly chopped chives or thinly sliced green onions provide a vibrant splash of green, offering a visual contrast and a hint of fresh, mild onion flavor.
Consider adding a sprinkle of smoky paprika for a touch of color and a subtle smoky undertone, or a few fresh parsley leaves for a classic, elegant finish. A very light drizzle of extra Caesar dressing or even a swirl of sriracha can add visual interest and a promise of flavor complexity. The key is to add touches that enhance the dip’s appearance without overwhelming its savory essence.
Side Dishes
The perfect companions for Creamy Chicken Caesar Dip are those that offer textural contrast and complementary flavors. Crispy tortilla chips are a classic choice, providing a salty crunch that stands up well to the dip’s richness. Toasted baguette slices or hearty sourdough bread cubes offer a more substantial, satisfying vehicle for scooping.
For a healthier, refreshing option, assemble a colorful platter of fresh vegetable crudités, including carrot sticks, celery stalks, cucumber slices, bell pepper strips, and broccoli florets. These crisp vegetables provide a delightful balance to the dip’s creamy, savory nature. Warm pita bread wedges, lightly grilled or toasted, also make an excellent, slightly chewy dipper.
Creative Serving Ideas
Beyond the standard chip and veggie platter, think about how to present this dip in unique ways. Serve it warm directly from a small cast-iron skillet or a decorative baking dish for a rustic, inviting presentation. For individual servings, portion the dip into small ramekins or oven-safe bowls and bake until bubbly.
You could also use this dip as a decadent filling for mini bell peppers, baking them until the peppers are tender and the dip is hot. Another creative idea is to serve it as a warm topping for baked potatoes or sweet potatoes, transforming it into a more substantial meal component. The versatility of this dip truly allows for endless culinary creativity.
Preparation & Storage
Storing Leftovers
Should you find yourself with any leftover Creamy Chicken Caesar Dip, proper storage is key to maintaining its deliciousness. Ensure the dip has cooled down slightly before transferring it to an airtight container. This prevents condensation from forming, which can affect the texture. Store the container in the refrigerator, where the dip will remain fresh and safe to consume for up to 3 days.
When you decide to enjoy the leftovers, it’s best to reheat them thoroughly. This ensures any potential bacteria are eliminated and restores the creamy, melty consistency. The refrigerator helps to slow down spoilage, but prompt consumption of leftovers is always recommended for optimal taste and food safety. Properly stored, your dip remains a delightful treat.
Freezing
Creamy Chicken Caesar Dip freezes remarkably well, making it a convenient option for future enjoyment. Once the dip has cooled completely after baking, you can prepare it for freezing. It’s advisable to wrap the dip tightly first in a layer of plastic wrap, ensuring no air pockets remain. Subsequently, cover this with a layer of heavy-duty aluminum foil to provide an extra barrier against freezer burn and odors.
Label the package with the date to keep track of its freshness. Properly frozen, the dip can maintain its quality for up to 2 months. Thawing and reheating are straightforward processes, allowing you to enjoy this delightful dip again even after an extended period in the freezer. This makes it an excellent candidate for batch preparation and meal planning.
Reheating
Reheating your Creamy Chicken Caesar Dip is a simple process that brings it back to its warm, bubbly glory. If reheating from the refrigerator, place the dip in an oven-safe dish and bake in a preheated oven at 350°F (175°C) for about 20 to 25 minutes, or until it is hot and bubbly throughout. Stirring the dip once or twice during the reheating process helps to ensure even heating and maintains its smooth consistency.
If reheating from frozen, it’s best to thaw the dip in the refrigerator overnight first. Once thawed, proceed with the oven reheating method described above. If you’re in a rush and reheating directly from frozen, the baking time may need to be extended by an additional 10-15 minutes. Avoid using the microwave for reheating, as it can sometimes lead to an unevenly heated or rubbery texture.
Frequently Asked Questions
-
How do I choose the right rotisserie chicken for this dip?
When selecting a rotisserie chicken, prioritize one that looks evenly golden brown, indicating it has been cooked thoroughly and evenly. Avoid chickens with excessively dark spots or an off-putting odor, as these could signify spoilage. A fresh chicken should have a savory aroma. The skin should appear moist but not greasy. You can also opt for a chicken seasoned with herbs for an extra flavor boost. The meat should be tender and easily shreddable, making the prep work straightforward and enjoyable.
-
What are the best ways to store leftover Creamy Chicken Caesar Dip?
To keep your Creamy Chicken Caesar Dip tasting its best, store any leftovers in an airtight container in the refrigerator. This method effectively seals in the freshness and prevents the dip from absorbing other odors from your fridge. It’s recommended to consume the leftovers within 3 days for optimal flavor and texture. Reheating it in the oven, as described in the reheating section, will restore much of its original appeal, making it a delightful treat even a few days later.
-
Can I freeze Creamy Chicken Caesar Dip, and if so, what is the best method?
Yes, absolutely! To freeze your Creamy Chicken Caesar Dip, ensure it has cooled down completely after baking. Then, wrap it very tightly in plastic wrap, followed by a sturdy layer of aluminum foil. This double-wrapping technique is crucial for preventing freezer burn and maintaining the dip’s creamy texture. It can be stored in the freezer for up to 2 months. When you’re ready to enjoy it again, allow it to thaw overnight in the refrigerator before reheating in the oven.