Chicken Burger Recipe – The Best Homemade Burger Seasoning!
Elevate your weeknight dinner game with this incredibly flavorful and remarkably simple chicken burger recipe. Forget dry, bland patties; this version is packed with a homemade seasoning blend that will have everyone asking for your secret. It’s a juicy, satisfying meal that’s perfect for a quick dinner or a relaxed weekend barbecue.
This recipe is designed for maximum enjoyment with minimal fuss, ensuring that even novice cooks can achieve restaurant-quality results. The secret lies in a few key ingredients and a straightforward preparation method that brings out the best in ground chicken. Get ready to transform ordinary ground chicken into extraordinary burgers that will become a family favorite.
Why You Will Love This Recipe
- Flavorful Homemade Seasoning: A custom blend of herbs and spices creates an unforgettable taste profile that makes these burgers truly special.
- Incredibly Juicy Texture: The secret ingredient, mayonnaise, ensures unparalleled moisture and tenderness in every bite, preventing any dryness.
- Quick Preparation: With a hands-on time of just about 10 minutes, these burgers are perfect for busy weeknights when you need a delicious meal fast.
- Make-Ahead Friendly: The burger mixture can be prepared and chilled in advance, streamlining your cooking process and making entertaining a breeze.
- Versatile Topping Options: Easily customize your burger with a variety of toppings, from classic lettuce and tomato to more gourmet additions like bacon jam.
Ingredients You Need
The foundation of any great burger is high-quality ingredients, and this chicken burger recipe is no exception. Opting for fresh, good-quality ground chicken will make a noticeable difference in the final taste and texture. For the homemade seasoning, ensure you have fresh spices to maximize their aromatic qualities. The addition of mayonnaise is a game-changer for moisture, so don’t skip this crucial element.
Juicy Ground Chicken Burgers

This easy chicken burger recipe with the best homemade burger seasoning is perfect for a quick and delicious meal. Made with ground chicken, smoky spices, and a secret ingredient, these burgers are juicy, flavorful, and a crowd-pleaser. Serve them with your favorite toppings!
- For the seasoning:
- 1 teaspoon salt
- 1 teaspoon dried parsley
- 1 teaspoon smoked paprika
- For the burgers:
- 1 pound ground chicken
- 2 tablespoons mayonnaise (or cream cheese)
- 4 burger buns
- cooking oil, for frying
- 4 slices cheese (American, Provolone, Gouda, etc.)
- For serving:
- 4 tablespoons Sriracha mayo (or plain mayonnaise)
- tomato slices, lettuce, red onion (or as desired)
- 1Prepare the Homemade Seasoning: Combine salt, black pepper, dried parsley, smoked paprika, garlic powder, onion powder, chili powder, and dried thyme (if using) in a small bowl. Stir to combine.
- 2Mix and Shape the Burger Patties: In a larger bowl, add the ground chicken, breadcrumbs, mayonnaise, and the prepared spice mixture. Gently mix with clean hands until all ingredients are well combined. Be careful not to overmix.
- 3Refrigerate the Meat: Cover the bowl with plastic wrap and refrigerate for at least 15-20 minutes. This allows the flavors to meld.
- 4Shape into Patties: Remove the mixture from the fridge and divide it into four equal portions. Shape each portion into a patty, about ¾-inch thick. You can use your hands or a burger press for even patties.
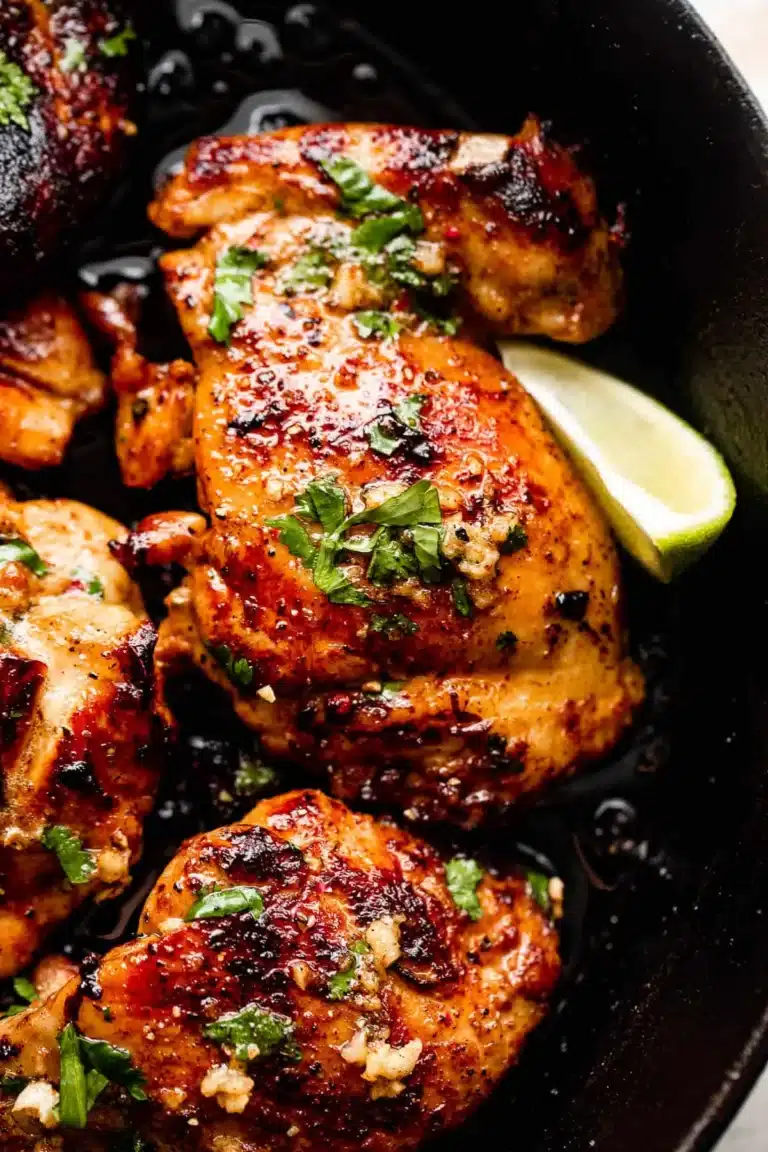
- 5Cook the Patties: Heat 2-3 tablespoons of cooking oil in a skillet or grill pan over medium-high heat. Once the oil is hot (it should sizzle when a drop of water is added), carefully place the patties in the pan. Cook for about 4-5 minutes per side, until golden brown and cooked through.
- 6Melt the Cheese: Once you flip the patties, place a slice of cheese on top of each one. Cover the pan with a lid to help the cheese melt while the other side of the patty finishes cooking.
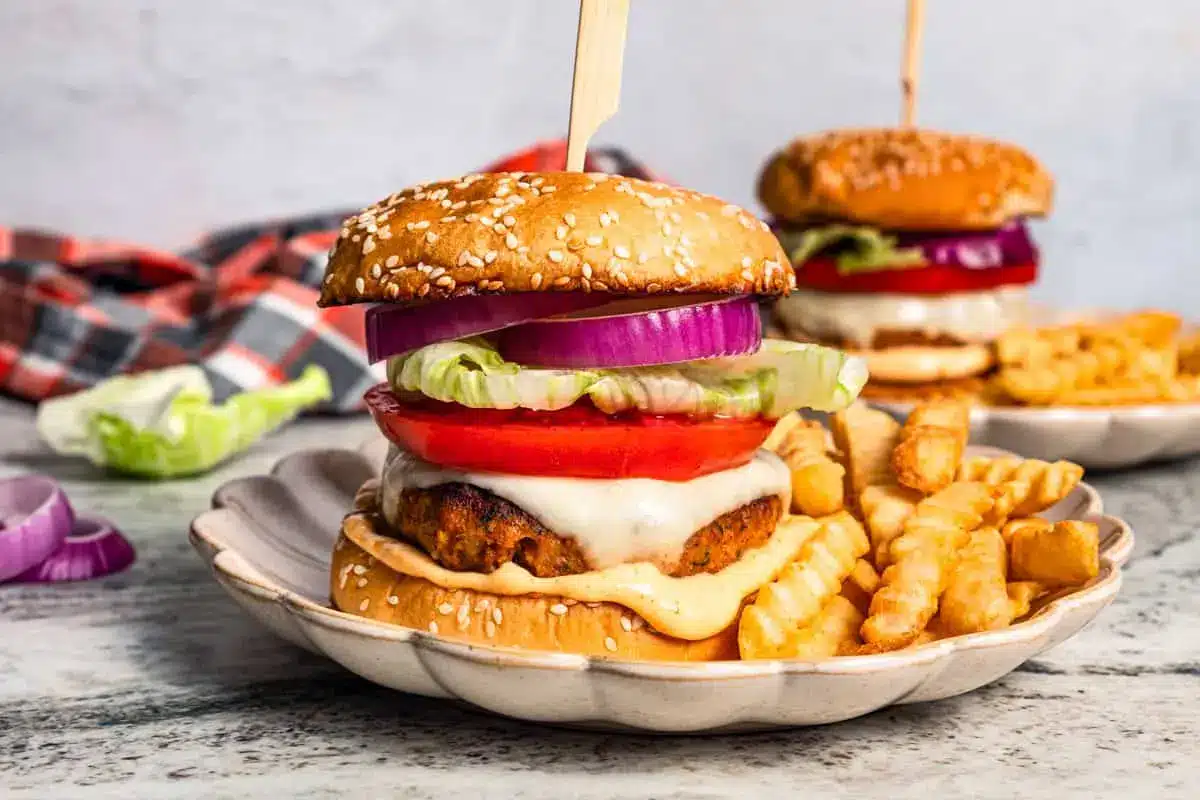
- 7Assemble the Burgers: Lightly toast the burger buns if desired. Spread Sriracha mayo (or plain mayonnaise) on the bottom half of each bun. Place a cooked chicken patty on top. Add your desired toppings like tomato slices, lettuce, and red onion. Place the top half of the bun on top and serve immediately.
Keywords: chicken burger, ground chicken, homemade seasoning, easy dinner, quick meal, juicy burger
The full list of ingredients and their precise quantities can be found in the recipe card below.
Variations
This chicken burger recipe is wonderfully adaptable, allowing you to tailor it to various dietary preferences and flavor profiles. Consider transforming these patties into a delicious vegan option by substituting the ground chicken with a hearty plant-based ground or finely crumbled firm tofu. You’ll want to adjust the seasoning slightly, perhaps adding a touch of smoked paprika for depth and a hint of nutritional yeast for a savory, cheesy note.
For those following a low-carb lifestyle, simply omit the breadcrumbs and adjust the binder accordingly; perhaps a tablespoon of almond flour or a bit more mayonnaise will help hold the patties together. Serve these low-carb chicken burgers on large lettuce wraps or portobello mushroom caps instead of traditional buns. The key is to maintain the flavor profile of the seasoning while adapting the structure.
If you’re looking for a spicy kick, amp up the chili powder in the seasoning blend or mix a generous amount of finely chopped jalapeños into the ground chicken mixture. For a Mediterranean twist, incorporate finely chopped Kalamata olives and a tablespoon of fresh oregano into the patty mix. Serve these with a tzatziki sauce and a side of Greek salad for a complete and vibrant meal that still honors the essence of a well-seasoned burger.
How to Prepare chicken burger recipe
Step 1: Prepare the Homemade Seasoning
The journey to an exceptional chicken burger begins with crafting a robust and aromatic seasoning blend. In a small bowl, meticulously combine the salt, freshly ground black pepper, dried parsley, smoked paprika, garlic powder, onion powder, and chili powder. If you enjoy a subtle herbaceous note, now is the time to whisk in the optional dried thyme, which adds a wonderful aromatic depth that complements the other spices beautifully.
Ensure that all the spices are thoroughly mixed together. This step is crucial because it allows the flavors to meld even before they hit the chicken, creating a more cohesive and intense taste experience. For an even more complex flavor profile, you can experiment with adding a pinch of cumin or a touch of mustard powder to this blend. Properly mixed spices guarantee that every bite of your burger will be bursting with flavor, rather than having pockets of individual spice tastes.
This homemade seasoning is the cornerstone of the burger’s deliciousness, elevating it far beyond a simple seasoned patty. By taking the time to combine these ingredients properly, you are setting the stage for a truly memorable burger. It’s the kind of seasoning that makes people wonder what your secret is, and now you’ll have a fantastic answer ready.
Step 2: Mix and Shape the Burger Patties
In a medium-sized bowl, gently combine the pound of ground chicken, the ⅓ cup of plain breadcrumbs, and the 2 tablespoons of mayonnaise. The mayonnaise is your secret weapon for achieving an incredibly moist and tender burger, so don’t be tempted to reduce it. Add the prepared homemade spice mixture to the bowl. It’s best to use your clean hands for this process, as it allows you to incorporate all the ingredients thoroughly without overworking the meat.
Gently mix everything together until just combined. Overmixing can lead to tough burgers, so aim for a mixture that holds together well but still feels tender. Once the mixture is cohesive, cover the bowl tightly with plastic wrap and place it in the refrigerator. Chilling the meat for at least 15 to 20 minutes is a vital step that allows the flavors to meld and the mixture to firm up slightly, making it easier to shape into patties.
After chilling, remove the bowl from the refrigerator. Divide the mixture into four equal portions. Shape each portion into a patty, about ¾ inch thick. You can do this by hand, gently forming the meat, or use a burger press for perfectly uniform patties. Make sure the edges are smooth and the center is slightly thinner than the edges to ensure even cooking. These carefully shaped patties are now ready for the next stage of their delicious transformation.
Step 3: Cook the Patties
Heat 2 to 3 tablespoons of your preferred cooking oil in a large skillet or a grill pan over medium-high heat. It’s important to get the pan sufficiently hot before adding the chicken patties; you’ll know it’s ready when a drop of water sizzles and evaporates instantly. Carefully place the shaped chicken patties into the hot oil, ensuring not to overcrowd the pan, which can cause them to steam rather than sear.
Cook the patties for approximately 4 to 5 minutes on the first side, or until a beautiful golden-brown crust forms. Resist the urge to move them around too much during this initial cooking phase, as this allows for a proper sear. Once the bottoms are nicely browned, carefully flip each patty using a spatula. This is the critical moment where the magic of melting cheese will happen.
Immediately after flipping, place a slice of your chosen cheese (American, Provolone, or Gouda work wonderfully) onto the top of each chicken patty. Cover the skillet with a lid, or a piece of foil if you don’t have a lid. This steaming action helps the cheese melt evenly and quickly while the other side of the patty finishes cooking. Continue to cook for another 4 to 5 minutes, or until the chicken is cooked through and the cheese is completely melted and gooey.
Step 4: Melt the Cheese
As soon as you flip the chicken patties, it’s time to introduce the cheese for that irresistible, gooey finish. Place one slice of your favorite cheese directly onto the center of each cooked side of the patty. The residual heat from the chicken and the pan will begin the melting process almost immediately.
To ensure the cheese melts perfectly and envelops the patty in a blanket of dairy delight, cover the skillet. This traps the heat and steam, creating a small convection environment that accelerates the melting process. You can use a tight-fitting lid for your skillet or, in a pinch, a piece of aluminum foil tented over the pan. This simple step ensures that the cheese becomes wonderfully melted and integrated with the burger, rather than just sitting on top.
Keep the lid on for the remaining 4-5 minutes of cooking time, allowing the cheese to achieve a smooth, fully melted consistency. The visual appeal of a perfectly melted cheese slice cascading over the edges of a juicy chicken burger is one of the most satisfying aspects of burger preparation. This step is quick but absolutely essential for that classic burger experience.
Step 5: Assemble the Burgers
Now that your perfectly cooked and cheesy chicken patties are ready, it’s time to bring everything together for the ultimate burger experience. Begin by preparing your burger buns. For an extra layer of texture and flavor, you can lightly toast the cut sides of the buns in a dry skillet, under the broiler, or in a toaster oven until golden brown. This step not only adds a delightful crispness but also helps prevent the buns from becoming soggy.
Spread a generous tablespoon of Sriracha mayonnaise onto the bottom half of each toasted bun. The spicy kick of the Sriracha mayo adds a wonderful complexity that complements the savory chicken patty. If you prefer a milder option, plain mayonnaise or a creamy aioli will also work beautifully. Arrange the cooked chicken patty, complete with its melted cheese, directly on top of the Sriracha mayo-covered bottom bun.
Finally, layer your favorite toppings over the chicken patty. This typically includes slices of ripe tomato, crisp lettuce leaves, and thinly sliced red onion, but feel free to add any other desired accompaniments. Place the second half of the bun on top to complete your masterpiece. Serve immediately and savor every delicious bite of your homemade chicken burger!
Step 6: Serve and Enjoy
Your beautifully crafted chicken burgers are now ready to be devoured. The aroma alone is enough to make mouths water, signaling a truly satisfying meal. Serve them hot, right off the grill or pan, to ensure the cheese is perfectly melted and the patties are at their most succulent.
Encourage everyone to enjoy their burgers with their favorite accompaniments. Whether they opt for a classic side of fries, a refreshing salad, or something more adventurous, the burger itself is the star. The combination of the juicy, well-seasoned patty, the creamy mayonnaise, the melted cheese, and the fresh toppings creates a symphony of flavors and textures.
This is more than just a meal; it’s an experience. The pride in serving a homemade burger that’s both incredibly easy to make and exceptionally delicious is immense. Share these with family and friends, and prepare for compliments to roll in. Enjoying this chicken burger recipe is a testament to simple, wholesome ingredients transformed into something truly special.
Pro Tips for chicken burger recipe
Don’t Overwork the Meat: When mixing the ground chicken with the breadcrumbs, mayonnaise, and seasonings, use a light touch. Overmixing develops the gluten in the breadcrumbs and toughens the chicken, leading to a dense, chewy burger instead of a tender one.
Chill the Mixture: Allowing the burger mixture to chill in the refrigerator for at least 15-20 minutes is a crucial step. This not only allows the flavors to meld beautifully but also firms up the meat, making it much easier to shape into perfect patties without them falling apart during cooking.
Achieve a Great Sear: A hot pan is key to achieving a delicious crust on your chicken burgers. Ensure your skillet or grill pan is properly preheated before adding the patties. A good sear creates a delightful texture and locks in the juices, contributing significantly to the overall flavor and mouthfeel of the burger.
Use a Meat Thermometer: To guarantee your chicken burgers are cooked safely and perfectly, invest in an instant-read meat thermometer. Insert it into the thickest part of the patty; it should register 165°F (74°C). This precise measurement prevents undercooking, ensuring food safety, and avoids overcooking, which can lead to dry burgers.
Toast Your Buns: Don’t underestimate the power of toasted buns! A quick toast on the cut sides of your burger buns adds a pleasant textural contrast and helps create a barrier against the moisture from the toppings and patty, preventing a soggy bottom bun. This simple step elevates the entire burger experience.
Serving Suggestions for chicken burger recipe
Decoration
While the burger itself is a visual delight, a few decorative touches can enhance its presentation. Consider adding a colorful skewer with a cherry tomato and a pickle spear piercing through the top bun. A sprinkle of fresh chopped parsley or chives over the melted cheese can also add a vibrant green accent and a hint of fresh aroma.
For a more rustic presentation, serve the burgers on wooden platters or rustic cutting boards. You can place a small ramekin of extra Sriracha mayo or aioli alongside each burger for dipping. A few edible flowers, like nasturtiums or pansies, can add an unexpected and elegant touch if you’re aiming for a gourmet look.
Don’t forget the accompanying elements. Arranging your side dishes artfully around the burger makes the entire plate more appealing. The goal is to create a visually inviting meal that promises as much deliciousness as it looks.
Side Dishes
Complementing your juicy chicken burgers requires sides that offer a range of textures and flavors. Classic French fries, whether oven-baked, air-fried, or deep-fried, are always a crowd-pleaser. For a slightly healthier yet equally satisfying option, consider crispy sweet potato wedges seasoned with paprika and a hint of cinnamon.
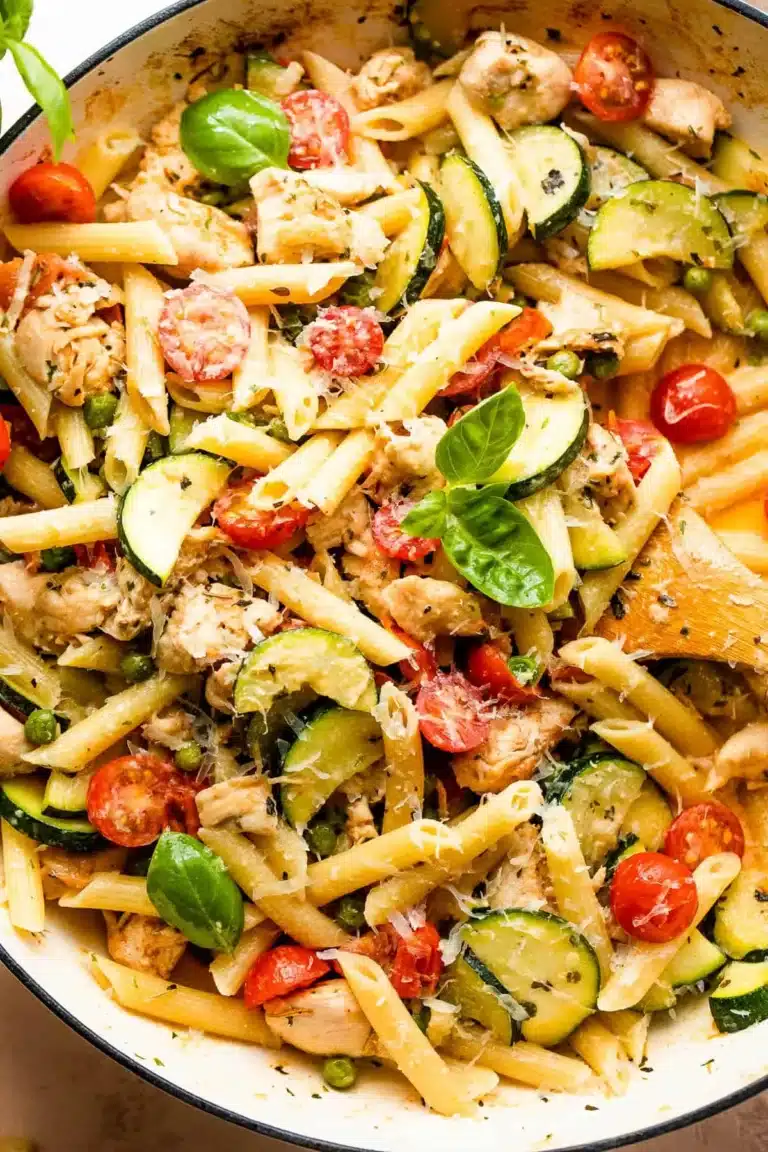
A refreshing coleslaw, either creamy or vinaigrette-based, provides a cool, crunchy contrast to the rich burger. Pasta salad, perhaps with a pesto dressing and cherry tomatoes, offers a more substantial side that can cater to a wider range of preferences. For a lighter touch, a crisp green salad with a lemon vinaigrette or a simple caprese salad with fresh mozzarella, tomatoes, and basil adds a burst of freshness.
Consider exploring international flavors with a side of easy lobster bisque if you’re feeling indulgent, or a hearty quinoa black bean salad for a protein-packed, fiber-rich option. The possibilities are vast, and the key is to choose sides that balance the richness of the burger and enhance the overall dining experience.
Creative Serving Ideas
Move beyond the traditional bun to offer a unique burger experience. Try serving your chicken patties nestled within large, grilled portobello mushroom caps for a low-carb, earthy alternative. Another inventive approach is to use thick slices of grilled halloumi cheese as buns, offering a salty, chewy bite that pairs wonderfully with the chicken.
Transform your chicken burgers into sliders for a fun appetizer or a party-friendly option. Use smaller buns or even large lettuce cups for these bite-sized delights. For a deconstructed approach, serve the seasoned chicken patty alongside a colorful salad and a dollop of your favorite sauce, allowing guests to build their own perfect bite.
Consider a “burger bowl” concept, where the patty is placed over a bed of mixed greens, rice, or quinoa, topped with all your favorite burger fixings and a drizzle of dressing. This is a fantastic way to enjoy all the flavors of a burger in a lighter, salad-like format. Exploring these creative serving ideas can make your chicken burgers even more memorable and exciting.
Preparation & Storage
Storing Leftovers
Should you be fortunate enough to have leftover chicken burger patties, proper storage is key to maintaining their quality and ensuring food safety. It’s best to store the cooked patties on their own, separated from any buns or toppings that can become soggy. Place the patties in an airtight container and refrigerate them promptly.
These leftover patties can be stored safely in the refrigerator for up to 3 to 4 days. Ensure the container is well-sealed to prevent the patties from drying out or absorbing odors from other foods in the refrigerator. Always check for any signs of spoilage before reheating and consuming.
When storing, it’s ideal to let the patties cool down to room temperature before placing them in the container. This helps to prevent condensation from forming inside the container, which can affect the texture of the meat. Properly stored leftovers are a great way to enjoy delicious chicken burgers without the need for extensive cooking.
Freezing
Chicken burger patties are excellent candidates for freezing, making them a convenient option for future meals. Once the patties have cooled completely, you can freeze them individually or in batches. Wrap each patty tightly in plastic wrap, then in aluminum foil, or place them in a freezer-safe bag, removing as much air as possible.
Frozen chicken burger patties can be stored for up to 2 months. For best quality, label the packages with the date they were frozen. This helps you keep track of their freshness and ensures you use them within their optimal storage period.
When you’re ready to use them, it’s recommended to thaw the frozen patties in the refrigerator overnight. This gradual thawing process helps maintain the patty’s structure and moisture content, ensuring a better result when you reheat them. Properly frozen patties offer a fantastic shortcut for quick and satisfying meals down the line.
Reheating
Reheating your delicious chicken burger patties is a simple process that brings them back to their former glory. The best method often depends on your preference for texture. For a slightly crisped exterior, reheat the patties in a skillet over medium heat with a touch of oil until heated through and golden brown.
The microwave is also a quick option for reheating, though the texture might be softer. Place the patty on a microwave-safe plate and heat in 30-second intervals, checking for doneness. If you have an air fryer, this is another excellent method, as it can help revive the patty’s texture and achieve a nice crispness, similar to pan-frying.
Ensure that the internal temperature of the reheated patty reaches at least 165°F (74°C) to guarantee it is safe to eat. Whichever method you choose, reheating allows you to enjoy the savory flavors and juicy texture of these homemade chicken burgers even when they are not freshly cooked. This makes them a truly versatile and convenient meal option.
Frequently Asked Questions
-
Can I make the burger patties ahead of time?
Absolutely! Preparing the burger mixture and chilling it in the refrigerator for up to 24 hours is a fantastic make-ahead strategy. You can even shape the patties a day in advance, cover them tightly, and refrigerate them until you’re ready to cook. This makes weeknight meal preparation significantly easier and is a great tip for hosting barbecues or gatherings.
-
What kind of ground chicken is best for burgers?
For the juiciest and most flavorful chicken burgers, it’s best to avoid extremely lean ground chicken. Look for ground chicken that has a mix of white and dark meat, as the darker meat contains more fat, which contributes to moisture and tenderness. A fat content of around 90% lean is generally ideal for achieving a succulent burger texture that doesn’t dry out during cooking. If you can only find very lean ground chicken, the addition of mayonnaise or a little extra olive oil in the mixture can help compensate for the lack of natural fat.
-
Why are my chicken burgers dry?
Dry chicken burgers are often a result of a few common issues, the most frequent being overcooking. Chicken, especially when lean, cooks quickly and can become dry if left on the heat for too long. Using an instant-read thermometer to ensure patties reach an internal temperature of 165°F (74°C) is the most reliable way to prevent this. Another common cause is using overly lean ground chicken without sufficient fat or moisture-adding ingredients like mayonnaise or a small amount of oil. Lastly, overmixing the burger mixture can also lead to a tougher, drier texture, so remember to handle the meat gently.