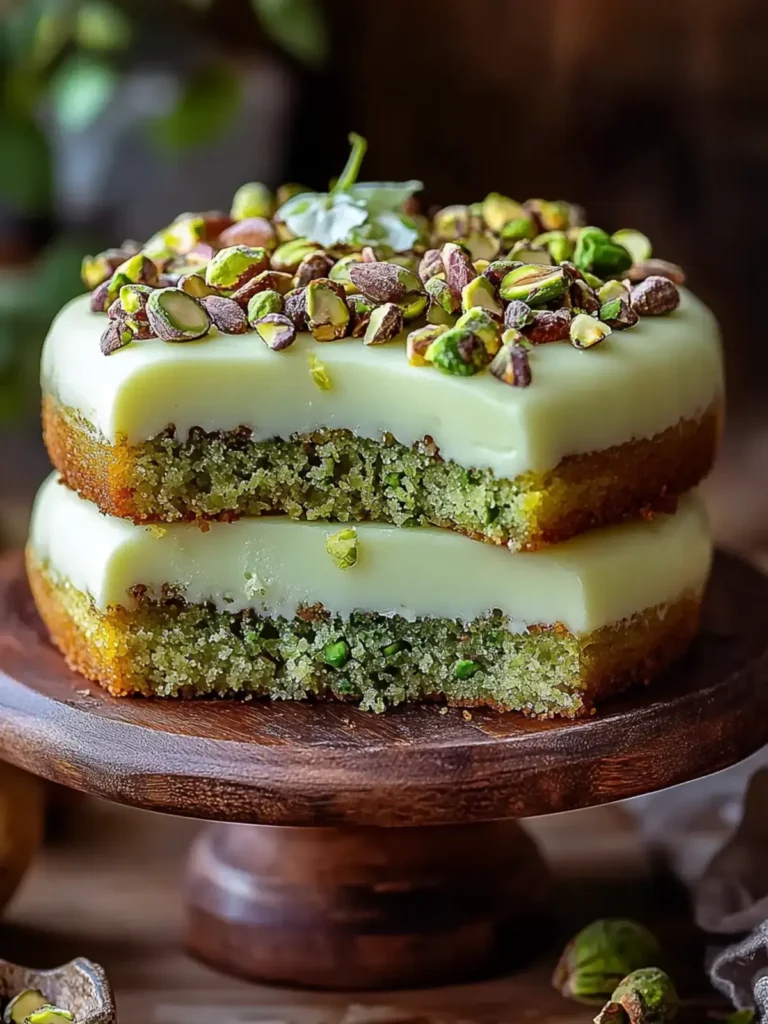
Ultimate Classic Spritz Cookies
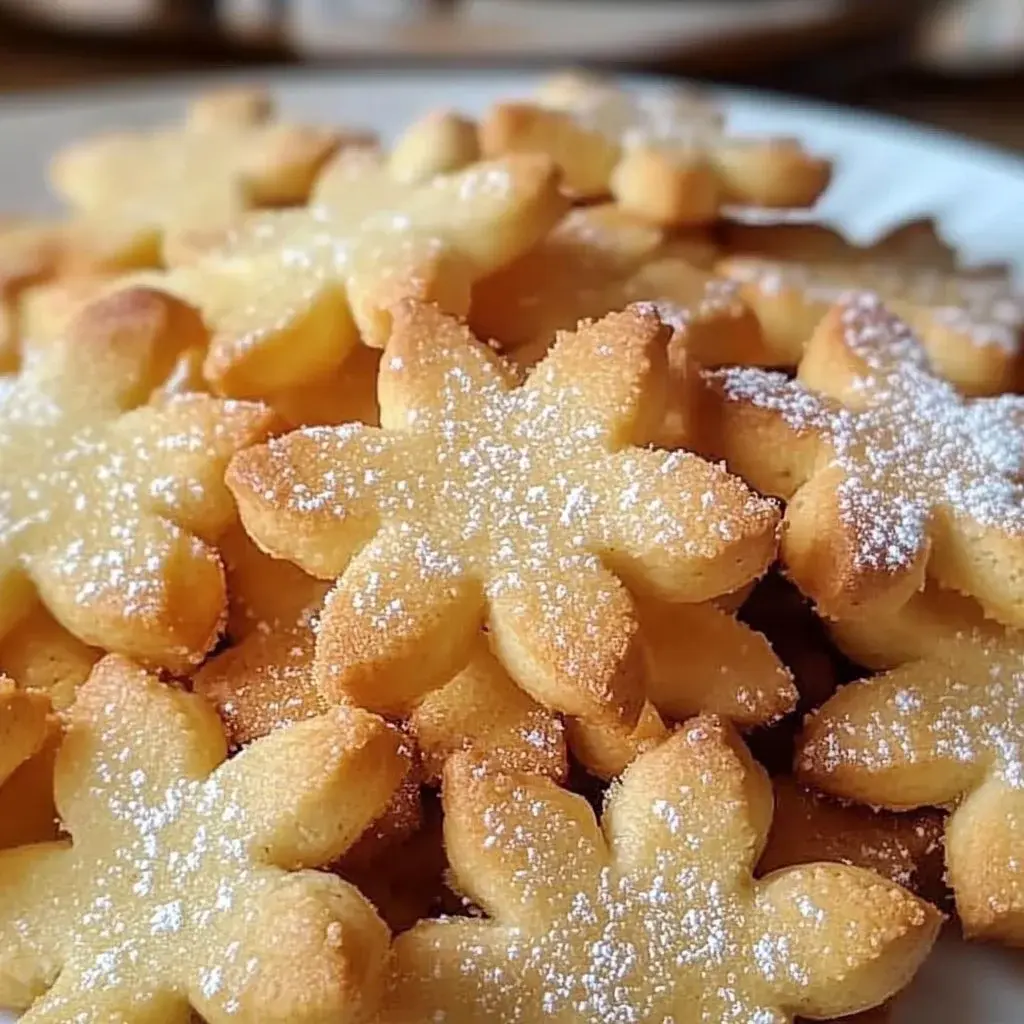
Classic Spritz Cookies are a delightful treat that many of us cherish from childhood, evoking wonderful memories of holidays and family gatherings with their buttery flavor and melt-in-your-mouth texture. Have you ever wondered how a simple combination of ingredients could create something so extraordinary and inviting? This recipe is straightforward and offers a tantalizing flavor that keeps everyone coming back for more, promising a truly memorable baking experience.
What makes Classic Spritz Cookies special is not just their delightful taste but also their charming shapes, achieved easily with a cookie press or pastry bag to create festive designs perfect for any occasion. Imagine serving these beautifully crafted cookies at a birthday party, holiday gathering, or a friendly afternoon tea, where they bring a unique touch to your dessert table and impress every guest with their lovely designs. This recipe is an invitation to create edible art that tastes as good as it looks.
Why You Will Love This Recipe
- Deliciously Buttery: The rich flavor from high-quality butter, perfectly balanced with a touch of sweetness, makes these cookies utterly irresistible and a true indulgence.
- Easy to Make: With only a handful of pantry-staple ingredients and straightforward instructions, even novice bakers can achieve perfect results and a delightful cookie every time.
- Beautiful Presentation: Their unique, press-formed shapes add an instant touch of elegance, making them ideal for gifting, holiday tables, or any special event where presentation matters.
- Versatile Customization: This recipe is a blank canvas; you can easily adapt flavors, add vibrant colors, or experiment with different toppings to suit any theme or personal taste preference.
- Family-Friendly Fun: The process of making and decorating these cookies is a wonderful activity to share with children and adults alike, creating lasting memories and a shared love for homemade treats.
Ingredients You Need
The foundation of truly exceptional Classic Spritz Cookies lies in the quality of your ingredients, ensuring a rich, buttery flavor and a perfect texture that melts in your mouth. Opting for fresh, high-quality staples will elevate these simple cookies into something truly memorable and delightful for any occasion. Every component plays a crucial role in achieving that classic taste and feel.
Classic Spritz Cookies

Delightfully buttery and beautifully shaped, Classic Spritz Cookies are perfect for any occasion, evoking fond memories of holiday gatherings and family fun. This straightforward recipe uses pantry staples to create a melt-in-your-mouth treat that's both easy to make and impressive to serve.
- 1 cup butter, softened (This is the base of the cookie and adds richness.)
- 1/2 cup sugar (Provides sweetness without overpowering the buttery flavor.)
- 1/2 teaspoon vanilla extract (Enhances the overall flavor profile.)
- 2 cups all-purpose flour (The main structure of the cookies.)
- 1/4 teaspoon salt (Balances the flavors.)
- 1/4 teaspoon baking powder (Helps the cookies achieve a light texture.)
- 1Gather all your ingredients together and measure them beforehand.
- 2Set your oven to 375°F (190°C). Preheating is essential.
- 3In a large mixing bowl, cream together the softened butter and sugar until smooth and fluffy.
- 4Beat in the vanilla extract until fully combined.
- 5In a separate bowl, combine the all-purpose flour, salt, and baking powder.
- 6Gradually blend the dry ingredients into the creamed mixture until just combined.
- 7Fill your cookie press or pastry bag with the cookie dough.
- 8On ungreased cookie sheets, pipe or press the dough into desired shapes.
- 9Bake for 8 to 10 minutes, watching closely for a lightly golden edge.
- 10Once baked, remove from oven and cool them on wire racks.
Keywords: butter cookies, Classic Cookies, Holiday Cookies, Spritz Cookies, easy cookies, buttery cookies, festive cookies
- butter, softened: This is the essential base that provides a rich, smooth texture and the signature buttery flavor everyone loves in these cookies.
- sugar: Granulated sugar offers a delicate sweetness that complements the butter without being overpowering, ensuring a perfectly balanced flavor profile.
- vanilla extract: A splash of pure vanilla extract enhances all the other flavors, adding a warm aroma and a classic depth to the cookie dough.
- all-purpose flour: This is the structural backbone of the cookies, providing the perfect consistency and ensuring they hold their shape beautifully after being pressed.
- salt: A pinch of salt is vital for balancing the sweetness and bringing out the full, nuanced flavor of the butter and other ingredients.
- baking powder: A small amount of baking powder helps to give the cookies a light, tender crumb, preventing them from becoming too dense.
You will find the precise quantities for each ingredient listed within the recipe card itself, ensuring accuracy for your baking success.
Variations
Elevating the classic spritz cookie is remarkably simple, allowing for a world of creative expression and flavor experimentation. Whether you’re aiming for a specific theme or simply want to explore new taste sensations, these variations offer exciting possibilities for your baking adventures.
Consider a delightful funfetti twist by incorporating colorful sprinkles directly into the dough before pressing. This not only adds a festive visual appeal but also a subtle textural crunch that kids and adults will adore. You can use an assortment of bright, candy-coated sprinkles to make each cookie a miniature celebration, perfect for birthdays or any joyous occasion.
For a sophisticated and grown-up flavor profile, a hint of citrus can transform the humble spritz cookie into something truly elegant. Zest from half a lemon or an orange, finely grated and mixed into the dough, provides a bright, aromatic lift that beautifully complements the rich butter. This citrus-infused cookie pairs wonderfully with afternoon tea or a delicate berry tart, offering a refreshing contrast.
Indulge in a decadent chocolate variation by either adding a tablespoon or two of unsweetened cocoa powder to the dry ingredients or by dipping the baked cookies halfway into melted dark or milk chocolate. A drizzle of contrasting white chocolate can add an extra layer of visual appeal and flavor complexity, making these a perfect treat for chocolate lovers seeking a refined cookie experience.
How to Prepare Classic Spritz Cookies
Step 1: Gather and Measure Your Ingredients
Before you even think about mixing, the very first step to baking perfect spritz cookies is to meticulously gather and accurately measure all your ingredients. This proactive approach ensures that everything you need is within easy reach, preventing any frantic searching or last-minute substitutions that could compromise the final outcome. Having all your components pre-measured and ready to go streamlines the entire baking process, making it much more enjoyable and efficient.
The importance of precise measurements cannot be overstated in baking, especially with delicate cookies like spritz. Too much flour can lead to dry, crumbly cookies, while too little can result in them spreading excessively and losing their shape. Similarly, the butter needs to be at the correct temperature – softened, but not melted – to cream properly with the sugar, which is crucial for the cookie’s texture.
Take a moment to review the ingredient list and ensure you have everything required, from the butter and sugar to the flour and leavening agents. This preparatory phase sets the stage for success, allowing you to move through the subsequent steps with confidence and a clear mind. It’s the silent hero of any great bake.
Step 2: Preheat Your Oven and Prepare Baking Sheets
Once your ingredients are measured and ready, the next critical step is to preheat your oven to the specified temperature, typically around 375°F (190°C). An oven that is not properly preheated will not bake the cookies evenly, potentially leading to undercooked centers and overcooked edges, or worse, a significant spread that ruins the intended shapes. The consistent heat of a preheated oven is key to achieving that perfect texture and delightful golden-brown hue.
Simultaneously, prepare your baking sheets by ensuring they are clean and ready for the cookie dough. For classic spritz cookies, it is generally recommended to use ungreased baking sheets. The dough contains enough butter, and greasing the sheets can cause the cookies to spread too much, losing their intricate designs. Some bakers prefer to line their baking sheets with parchment paper or silicone baking mats for easy cleanup and to prevent any sticking, though this is often optional and not strictly necessary.
Having your baking sheets ready also means you can immediately transfer the piped cookies into the oven once they are formed, maintaining the dough’s temperature and consistency. This immediate transfer helps ensure that all batches bake uniformly. This attention to detail in the initial stages of oven and sheet preparation significantly impacts the final quality of your cookies.
Step 3: Cream the Butter and Sugar
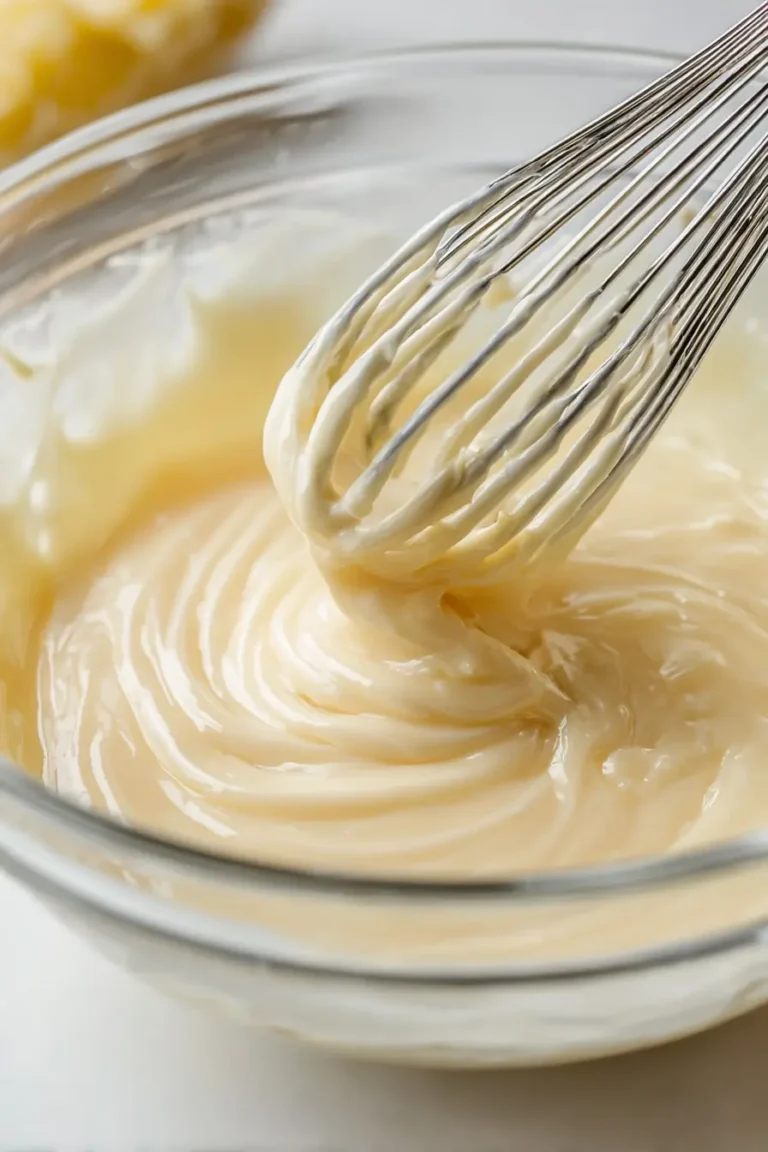
This is a pivotal moment in developing the perfect texture for your Classic Spritz Cookies. In a large mixing bowl, begin by creaming together the softened butter and granulated sugar until the mixture becomes light, fluffy, and pale yellow in color. Using an electric mixer, whether a stand mixer with a paddle attachment or a hand mixer, is highly recommended for this step as it efficiently incorporates air into the butter and sugar, which is vital for creating a tender cookie crumb.
The goal here is to achieve a texture that resembles fluffy whipped cream. This process not only sweetens the dough but also aerates it, contributing significantly to the cookies’ delicate structure and melt-in-your-mouth quality. Take your time, scraping down the sides and bottom of the bowl periodically to ensure all the butter and sugar are thoroughly combined and aerated. Patience during this creaming stage directly translates to superior cookie texture.
If your butter is too cold, it won’t cream properly, resulting in a greasy dough and potentially flat cookies. Conversely, if it’s too warm or melted, the dough will be too soft to hold its shape when pressed. Aim for butter that is soft enough to yield to gentle pressure but still holds its form, indicating it’s at the ideal temperature for creaming.
Step 4: Incorporate Vanilla Extract
Once the butter and sugar have been beautifully creamed into a light and fluffy consistency, it’s time to add the flavor enhancers. Beat in the vanilla extract until it is thoroughly combined with the butter-sugar mixture. Vanilla extract is essential for providing that classic, warm aroma and taste that defines many beloved baked goods, including spritz cookies. It adds a depth of flavor that complements the richness of the butter.
Ensure the vanilla extract is fully incorporated into the creamed mixture. This step is straightforward but important, as it evenly distributes the flavoring throughout the dough, guaranteeing that every bite of your spritz cookie will have that delightful vanilla essence. If you’re feeling adventurous, you could experiment with other extracts like almond or lemon for a different flavor profile, but classic vanilla is a timeless choice.
Some bakers also add a tiny pinch of salt at this stage, along with the dry ingredients, to further balance the sweetness and enhance the overall flavor. However, the primary focus here is ensuring the vanilla is seamlessly blended into the creamy foundation you’ve created, setting the stage for the dry ingredients to come.
Step 5: Combine and Mix Dry Ingredients
In a separate medium-sized bowl, whisk together the all-purpose flour, salt, and baking powder. Whisking these dry ingredients together before adding them to the wet mixture ensures that the salt and baking powder are evenly distributed throughout the flour. This even distribution is critical for the cookies to bake uniformly and achieve the desired light texture, preventing pockets of saltiness or uneven rising.
The salt acts as a flavor enhancer, balancing the sweetness and bringing out the rich buttery notes of the cookie. Baking powder is a leavening agent that provides a slight lift, contributing to a tender and delicate crumb, making the cookies wonderfully light rather than dense. Properly combining these elements beforehand is a small but significant step in achieving bakery-quality results at home.
Once these dry ingredients are well combined and aerated from whisking, they are ready to be introduced to the creamed butter and sugar mixture. This careful preparation of both the wet and dry components ensures that when they are finally brought together, they will form a cohesive, workable dough without any lumps or uneven seasoning, leading to perfect cookies every time.
Step 6: Gradually Add Dry Ingredients to Wet Mixture
Now, it’s time to bring the wet and dry ingredients together to form your spritz cookie dough. Gradually add the whisked dry ingredients to the creamed butter and sugar mixture. It is best to add the flour mixture in two or three additions, mixing on low speed after each addition until just combined. Overmixing at this stage can develop the gluten in the flour too much, resulting in tough, dense cookies instead of the desired tender and delicate ones.
The key here is to mix only until the flour streaks just disappear. You want a dough that is cohesive and smooth, but not overworked. The dough should start to come together, forming a soft but manageable mass that can be handled by a cookie press. If the dough seems too dry, you can add a tiny splash of milk or even a touch more vanilla extract, but do so very sparingly to avoid making it too wet.
Once the dough has just come together, stop mixing immediately. The texture should be soft, slightly sticky, and pliable, perfect for pressing into intricate shapes. Chilling the dough for a short period at this point can make it even easier to handle, especially in warmer kitchens, ensuring clean, sharp designs when piped.
Step 7: Prepare the Cookie Press or Pastry Bag
With your beautiful dough ready, the next step is to prepare your chosen shaping tool. If you are using a cookie press, follow the manufacturer’s instructions to load the dough into the press cylinder. Ensure the dough is packed in evenly to avoid air pockets, which can cause the press to skip or create uneven shapes. Select your desired disc attachment, whether it’s a star, flower, or ring, to create the classic spritz cookie designs.
Alternatively, if you do not have a cookie press, a pastry bag fitted with a decorative tip, such as a star tip (like an open or closed star), can be used. Spoon the dough into the pastry bag, being careful not to overfill it, and ensure the tip is securely attached. Work with manageable portions of dough in the pastry bag to maintain control and achieve consistent shapes. The goal is to have a tool ready to transform the soft dough into visually appealing cookie forms.
Having your press or bag ready to go is essential because the dough is at its optimal consistency right after mixing. Working quickly will prevent the dough from becoming too soft and sticky, which can make shaping more challenging. Prepare your chosen tool thoroughly so you can seamlessly transition to the shaping process, maximizing efficiency and creativity.
Step 8: Form the Cookies
This is where the magic happens and your dough begins to take on its iconic shapes. On your ungreased baking sheets, firmly press down the cookie press handle to extrude the dough, creating your desired designs. If using a pastry bag, hold the bag at a consistent angle and apply even pressure to pipe your shapes onto the baking sheets. Aim to create cookies that are roughly the same size for even baking.
Leave adequate space between each cookie on the baking sheet, typically about 1 to 2 inches apart. This is crucial because spritz cookies, while they don’t spread as much as some other types, will still expand slightly during baking. Giving them enough room ensures that the cookies do not merge together and that each design remains distinct and beautiful. Consistent spacing also contributes to even heat circulation around each cookie.
For those using a cookie press, a gentle twist and lift motion after pressing can sometimes help detach the cookie cleanly from the disc, preventing the dough from tearing. If the dough sticks, a slight dusting of flour on the disc or a brief chilling of the dough can help. The aim is to produce uniformly shaped, delightful cookies ready for their transformation in the oven.
Step 9: Bake the Cookies
Carefully place the prepared baking sheets into the preheated oven. Bake for approximately 8 to 10 minutes. The exact baking time will depend on your oven and the size of your cookies, so it’s important to keep a close eye on them during this crucial stage. You are looking for the edges of the cookies to be lightly golden brown, while the centers should remain relatively pale and just set.
Overbaking is a common pitfall that can lead to dry, hard cookies. Spritz cookies are meant to be delicate and slightly soft in the center, with just a hint of crispness around the edges. Removing them from the oven when they are *just* starting to show a faint golden hue is the secret to achieving that perfect melt-in-your-mouth texture. They will continue to firm up slightly as they cool on the baking sheet.
If you are baking multiple batches, allow the baking sheets to cool completely between batches. Placing dough onto a hot baking sheet can cause it to spread more, affecting the shapes. This patience will ensure each batch bakes and looks as beautiful as the first.
Step 10: Cool on Wire Racks
Once the cookies have reached that perfect stage of lightly golden edges and set centers, carefully remove the baking sheets from the oven. Allow the cookies to cool on the baking sheets for a few minutes, typically 2-5 minutes. This brief cooling period on the warm sheet allows the cookies to firm up enough to be moved without breaking, as they are still quite delicate immediately after coming out of the oven.
After this short resting period on the baking sheet, gently transfer the cookies to a wire cooling rack. This is essential for allowing air to circulate around all sides of the cookies, preventing condensation from forming on the bottoms, which can make them soggy. Complete cooling on a wire rack ensures they achieve the ideal crispness and texture. For more information on baking techniques, you might find this German pancake recipe helpful as it also emphasizes temperature control.
Ensure the cookies are entirely cool before decorating or storing them. Attempting to decorate warm cookies will cause frosting or toppings to melt and slide off. Patience in this final cooling stage is key to enjoying perfectly textured and beautifully finished Classic Spritz Cookies that are ready to be savored or shared.
Pro Tips for Classic Spritz Cookies
Mastering the art of Classic Spritz Cookies involves a few key techniques and considerations that elevate them from good to absolutely spectacular. Paying attention to these expert tips will help ensure your cookies are not only beautiful but also possess that perfect buttery, melt-in-your-mouth texture that makes them so beloved.
Temperature is Key: Ensure your butter is perfectly softened – not melted or cold. This is crucial for creaming with the sugar effectively, incorporating air to create a light dough. Similarly, if your kitchen is warm, chilling the dough for 15-30 minutes before pressing can make it much easier to handle and hold its shape beautifully. Cold dough is your friend for sharp designs.
Don’t Overmix the Dough: Once you add the flour, mix the dough only until just combined. Overmixing develops gluten, leading to tough cookies. Stop mixing as soon as you no longer see streaks of flour; a slightly soft, pliable dough is ideal for pressing.
Cookie Press Maintenance: Keep your cookie press clean and dry between batches, especially if working with sticky dough. If the dough is adhering too much, a very light dusting of flour on the disc or the inside of the press can help. Sometimes, warming the press slightly in your hands before loading dough can also aid in smooth extrusion.
Baking Precision: Watch your cookies closely as they bake. Spritz cookies should have lightly golden edges but remain pale in the center. They are delicate and can go from perfectly baked to overdone very quickly. Remove them as soon as they achieve this delicate coloring for the best texture.
Consider Flavor Enhancements: While classic vanilla is divine, don’t hesitate to experiment! A little almond extract, a touch of lemon or orange zest, or even a tiny pinch of finely ground cardamom can add a unique and delightful twist to your spritz cookies, making them even more memorable.
Serving Suggestions for Classic Spritz Cookies
Decoration
The decorative possibilities for Classic Spritz Cookies are as endless as your imagination, transforming them from simple treats into edible works of art. Before baking, consider lightly dusting them with colored sugars in vibrant reds, greens, or golds for a festive holiday shimmer, or opt for edible glitter for a touch of sparkle. You can also press a small candy or a sprinkle into the center of each cookie immediately after piping for a pop of color and texture.
Once baked and completely cooled, the real decorating fun can begin. A delicate drizzle of melted white chocolate or dark chocolate across the top of a star-shaped cookie, or dipping half of a flower-shaped cookie into melted chocolate, adds a layer of indulgence and visual appeal. Edible food coloring can be mixed into a simple confectioners’ sugar glaze to create colorful coatings, or use food-safe edible markers to draw intricate designs onto the cookie’s surface, making each one a unique miniature masterpiece.
For more elaborate presentations, consider creating a small edible scene on a platter using your decorated spritz cookies as the stars. Think about pairing different cookie shapes and colors together to create a visually stunning display that is almost too beautiful to eat, perfect for special occasions or as a thoughtful homemade gift. This attention to detail in decoration truly elevates the humble cookie.
Side Dishes
While Classic Spritz Cookies are often enjoyed as a standalone treat, they also pair wonderfully with a variety of accompaniments that can enhance the overall tasting experience. Their buttery richness and delicate sweetness make them a perfect counterpoint to a freshly brewed cup of coffee or a fragrant pot of tea, making them an ideal component of a relaxing afternoon break or a sophisticated drink pairing.
For a more dessert-focused experience, serving these cookies alongside a scoop of creamy vanilla bean ice cream or a light, fruity sorbet can create a delightful contrast in temperature and texture. The cool, smooth ice cream melting alongside the crisp cookie is a classic combination that never fails to please. You might also consider them as a delightful accompaniment to a slice of rich dessert, like a decadent chocolate cake or a light, airy mousse, offering a contrasting texture and flavor profile.
Fresh fruit platters also make an excellent companion to spritz cookies, especially during warmer months. The bright, refreshing flavors of berries, melon, or citrus fruits can cut through the richness of the cookies, creating a balanced and enjoyable sweet and tangy experience. This combination is perfect for brunches or light gatherings, offering something for everyone.
Creative Serving Ideas
Beyond the traditional cookie plate, there are numerous creative ways to present and serve Classic Spritz Cookies that will make them a memorable part of any event. For holiday gatherings, consider using them as edible place card holders by carefully piping them onto the rim of a glass or attaching them to a name tag with a small edible adhesive.
Another enchanting idea is to create a “cookie bouquet” by attaching individual spritz cookies to skewers or floral wire and arranging them in a decorative vase or pot. This makes for a stunning centerpiece that guests can easily pluck and enjoy. For themed parties, tailor the cookie shapes and decorations to match the event’s motif, turning your cookies into miniature edible decorations or favors.
Consider a “cookie tasting station” where you offer several variations of spritz cookies, perhaps with different flavor extracts or colors, allowing guests to sample and compare. This interactive approach adds an element of fun and discovery to your dessert table, encouraging conversation and engagement among your guests. These creative presentations transform simple cookies into an extraordinary experience.
Preparation & Storage
Storing Leftovers
Proper storage is crucial to maintain the delightful crispness and fresh flavor of your Classic Spritz Cookies. The best method for storing leftover cookies is in an airtight container at room temperature. Ensure the cookies are completely cool before storing them to prevent any moisture buildup, which can lead to sogginess or a compromised texture. Placing a piece of parchment paper between layers of cookies can help prevent them from sticking together, preserving their intricate shapes.
An airtight container creates a barrier against humidity and other airborne contaminants, keeping the cookies fresh for an extended period. While they are best enjoyed within a few days of baking, well-stored spritz cookies can retain their delicious quality for up to a week. Avoid storing them in areas with strong odors, as their delicate flavor can absorb surrounding smells.
If you find your cookies have lost a bit of their crispness, a brief stint in a very low oven (around 200°F or 95°C) for a few minutes can help revive them. This simple step can bring back that satisfying crunch, making them almost as good as fresh from the oven.
Freezing
Freezing is an excellent option for preserving the delightful taste and texture of Classic Spritz Cookies for longer periods, making them convenient to have on hand for unexpected guests or future celebrations. To freeze baked cookies, ensure they are completely cooled and then arrange them in a single layer on a baking sheet. This initial freezing step helps prevent them from sticking together when they are transferred to a freezer-safe container or bag.
Once the cookies are frozen solid, transfer them to an airtight freezer bag or a freezer-safe container. For extra protection against freezer burn and to maintain freshness, consider wrapping the cookies individually in plastic wrap or placing them between layers of parchment paper within the container. Properly stored, baked spritz cookies can retain their quality in the freezer for up to three months.
When you are ready to enjoy your frozen treats, simply remove them from the freezer and allow them to thaw completely at room temperature. Avoid the temptation to microwave them immediately, as this can sometimes affect their texture. Letting them come to room temperature naturally ensures they retain their intended crispness and flavor profile.
Reheating
While Classic Spritz Cookies are typically enjoyed at room temperature, there are occasions when a gentle reheating might be desired to bring back their crispness or to serve them slightly warm. If your cookies have become a bit soft from storage, you can easily refresh them by placing them on a baking sheet and warming them in a preheated oven at a low temperature, around 200-250°F (95-120°C), for 3-5 minutes. This brief period in the oven will help to evaporate any excess moisture and restore their delightful crunch.
Alternatively, for a very quick refresh, you can place a few cookies on a microwave-safe plate and heat them in 10-second intervals. Be extremely cautious with microwaving, as it can quickly alter the texture, potentially making them chewy rather than crisp. This method is best used sparingly and for immediate consumption if a slight warmth is desired.
If you are serving spritz cookies as part of a dessert presentation that involves warm elements, such as alongside a warm sauce or fruit compote, you can gently warm them just before serving. This ensures they maintain their texture and don’t become overly soft. Always aim for a low heat and a short duration to avoid overcooking or negatively impacting the cookie’s structure.
Frequently Asked Questions
-
Can I prepare the dough for Classic Spritz Cookies ahead of time, and how should it be stored?
Absolutely, preparing the dough in advance is a fantastic time-saver and can even improve the cookie’s texture. You can refrigerate the dough for up to 3-4 days in an airtight container. If you need to store it for longer, freezing is an excellent option; wrap the dough tightly in plastic wrap and then place it in a freezer-safe bag or container. Frozen dough can be kept for up to 2-3 months and should be thawed in the refrigerator overnight before use.
-
What is the best way to ensure my Classic Spritz Cookies hold their intricate shapes and do not spread too much during baking?
Several factors contribute to maintaining those beautiful shapes. First, ensure your butter is properly softened but not melted; over-softened or melted butter will cause excessive spreading. Second, avoid overmixing the dough after adding the flour, as this develops gluten and can lead to a looser dough. Chilling the dough for at least 15-30 minutes before pressing can also significantly help it hold its form. Lastly, baking on ungreased, cool baking sheets at the correct oven temperature is crucial; a hot baking sheet can cause the dough to spread too quickly.
-
What are the most common mistakes to avoid when making Classic Spritz Cookies, and how can I troubleshoot them?
Common mistakes include using butter that is too warm or too cold, overmixing the dough (leading to tough cookies), and overbaking them (resulting in dry, hard cookies). If your cookies are spreading too much, try chilling the dough longer or ensuring your butter is at the correct softened consistency. If they are too crumbly, it might indicate too much flour or not enough butter. If they are not holding their shape, the dough might be too warm or too soft. Always bake a test cookie to check texture and shape before committing to a full batch.