Apple Cider Braised Pork Shoulder – A Beautiful Fall Dinner!
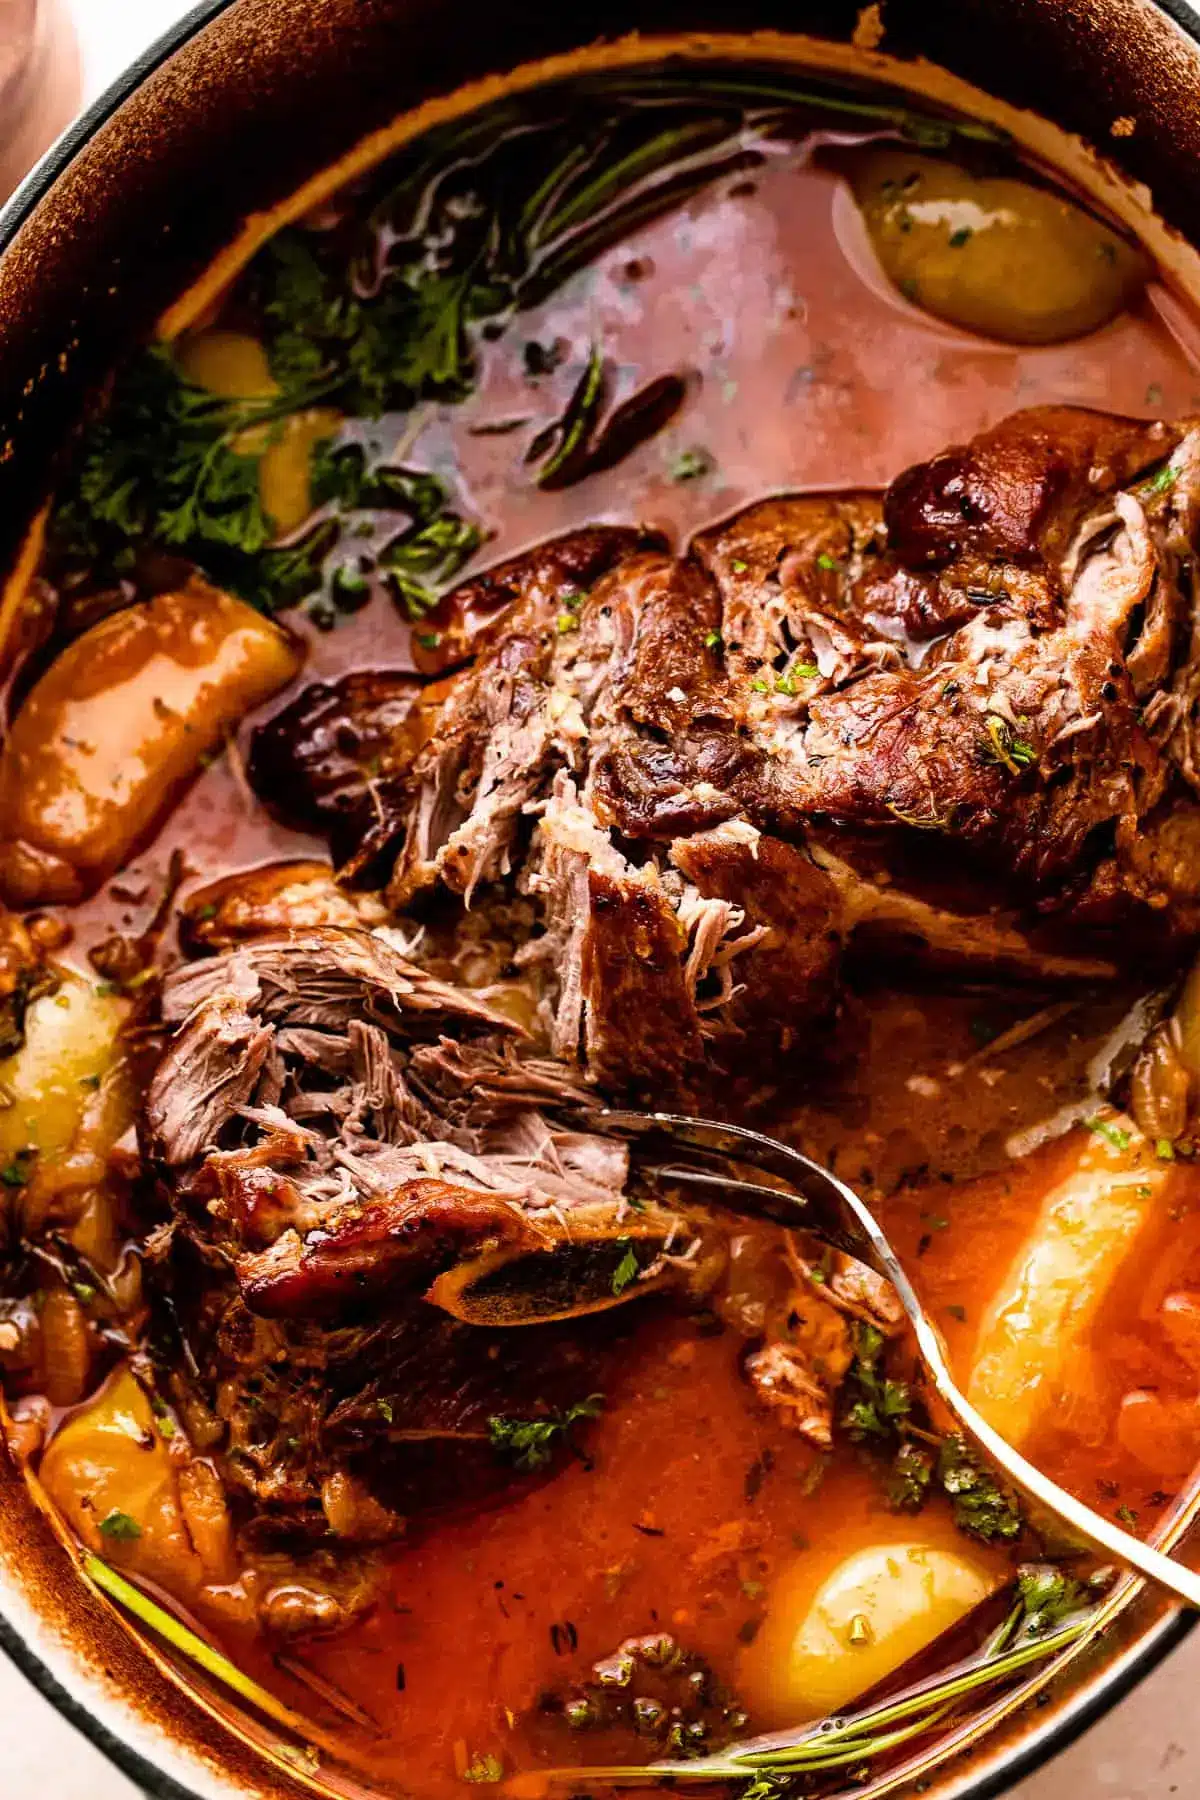
The aroma of slow-cooked pork, mingled with sweet apples and fragrant herbs, is a sensory experience that instantly conjures feelings of warmth and comfort. This braised pork shoulder recipe is designed to deliver exactly that – a deeply satisfying meal that’s both elegant and incredibly approachable.
Imagine a dish that requires minimal hands-on time but yields maximum flavor and tenderness. This braised pork shoulder is that dish, perfect for a cozy autumn evening, a festive holiday gathering, or simply a comforting Sunday dinner that the whole family will adore.
Why You Will Love This Recipe
- Incredible Tenderness: The slow braising process breaks down the connective tissues in the pork shoulder, resulting in meat that is unbelievably tender and practically falls apart with a fork.
- Rich, Complex Flavors: A harmonious blend of apple cider, white wine, aromatics like onions and garlic, and fresh herbs creates a depth of flavor that is both sweet and savory, with a delightful tang.
- Effortless Elegance: While the flavors are sophisticated, the preparation is straightforward. The oven does most of the work, allowing you to relax and enjoy the process while a restaurant-quality meal comes together.
- Versatile Comfort Food: This dish is the epitome of comfort food, yet its refined taste and presentation make it suitable for special occasions. It’s a guaranteed crowd-pleaser that will impress your guests.
- Adaptable for Different Methods: Whether you prefer using a Dutch oven for stovetop to oven cooking or a slow cooker for an even more hands-off approach, this recipe offers flexibility to fit your kitchen tools and schedule.
Ingredients You Need
The beauty of this braised pork shoulder lies in its ability to transform simple, high-quality ingredients into something truly spectacular. We’ll be focusing on fresh produce and a well-marbled cut of pork to ensure the best possible outcome. Using fresh herbs and unfiltered apple cider will impart the most vibrant and authentic flavors to your dish.
Braised Pork Shoulder
This braised pork shoulder recipe is an easy and beautiful autumn main course! Made with unfiltered apple cider, Granny Smith apples, onions, garlic, and white wine, the flavors are out of this world—and so perfectly cozy. When you think of a braised roast, you may immediately think of beef, but in this recipe, we're making pork roast, and let me tell you, this apple cider braised pork shoulder might just become your new favorite!
- 3 pounds pork shoulder roast
- Kosher salt and fresh ground black pepper, to taste
- 2 tablespoons olive oil
- 4 yellow onions, thinly sliced
- 6 cloves garlic, minced
- ¼ cup dry white wine
- 1 tablespoon fresh thyme, or use 1 teaspoon dried thyme
- 1 tablespoon fresh chopped rosemary leaves, or use 1 teaspoon crushed dried rosemary
- 1 teaspoon smoked paprika
- 1½ cups Apple Cider, NOT Apple Cider Vinegar
- 1½ cups low sodium chicken broth
- 2 bay leaves
- 2 granny smith apples, cored and quartered
- 1Preheat the oven to 400˚F.
- 2Pat dry the pork with paper towels and season all over with kosher salt and black pepper.
- 3Heat the oil in a large oven-safe Dutch oven set over medium-high heat. To the heated oil, add the pork and brown it on all sides; about 5 minutes per side.
- 4Remove the pork from the pot and set it aside.
- 5Add onions to the pot and cook over medium heat for about 4 to 5 minutes, stirring often, until softened. Stir in the garlic and cook for 20 seconds.
- 6Deglaze the pot with the wine, scraping up all the browned bits from the bottom of the pot. Then, stir in the thyme, rosemary, and paprika.
- 7Add the pork back to the pot. Add in the apple cider, chicken broth, and bay leaves; bring the mixture to a boil.
- 8Cover the pot with a tight-fitting lid and transfer the pork to the oven.
- 9Reduce the oven temperature to 350˚F and cook for 2 hours.
- 10Remove the lid from the pot and drop in the apples. Cover and continue to cook in the oven for 30 minutes or until the internal temperature of the pork registers at least 145˚F and up to 200˚F.
- 11Remove from the oven and return the pot to the stovetop. Remove the pork from the pot and transfer it to a cutting board; let it rest for 10 minutes.
- 12In the meantime, set the pot over high heat and bring it to a boil; cook for a couple minutes or until sauce is slightly reduced and thickened.
- 13Cut the pork and serve it with the sauce, onions, and apples.
Browning is Key: Don’t rush the browning step. Creating a good sear on the pork shoulder enhances the flavor and gives the dish a richer color.
Deglazing the Pot: Make sure to scrape up all the browned bits from the bottom of the pot after adding the wine.
Internal Temperature: While pork is safe to eat at 145˚F, you will want to cook a pork shoulder longer than that to allow the pork to reach its sweet spot. The best internal temperature for pork shoulder is about 170˚F to 190˚F, but for pulled pork, the best temp is around 205˚F.
Resting Time: Always allow your pork to rest before slicing. This ensures the juices redistribute throughout the meat, keeping it juicy.
Strain the Sauce (optional): If you prefer a smoother sauce, you can strain it after reducing it to remove the onions and any remaining herbs.
Herbs: While thyme and rosemary are recommended, you can also experiment with other herbs like sage, which pairs wonderfully with pork and apples.
Serving Suggestion: Consider serving the pork over a bed of creamy mashed potatoes or buttery egg noodles to soak up the delicious sauce.
Keywords: pork, braised, apple cider, fall, autumn, comfort food, roast
The precise quantities for these ingredients are detailed in the accompanying recipe card, ensuring you have everything you need for a flawless preparation.
Variations
This versatile braised pork shoulder recipe serves as a fantastic base for numerous culinary explorations. By making a few thoughtful adjustments, you can tailor this comforting dish to meet various dietary preferences and flavor profiles, ensuring everyone can enjoy its deliciousness.
For a Vegan or Vegetarian Adaptation, you could substitute the pork shoulder with a substantial plant-based protein like large portobello mushrooms, seitan roasts, or even extra-firm tofu. The key is to marinate these ingredients similarly and braise them in the flavorful apple cider and vegetable broth mixture. Ensure you use vegetable broth instead of chicken broth, and perhaps add a splash of balsamic vinegar to the braising liquid for an extra layer of richness.
If you’re following a Low-Carbohydrate Lifestyle, focus on the meat and the savory elements of the braise while adjusting the fruit and starch components. Omit the apples entirely or replace them with a few slices of lemon for a hint of acidity. Instead of serving with traditional starchy sides, consider pairing the pork with cauliflower mash, roasted Brussels sprouts, or a crisp green salad. The braising liquid itself is naturally low in carbohydrates and can be reduced to a delicious, rich sauce.
To introduce a touch of Smoky Southwestern Flair, consider adding a chipotle pepper in adobo sauce to the braising liquid, along with some cumin and a pinch of chili powder. You could also incorporate diced bell peppers and a can of fire-roasted tomatoes. For serving, think about topping the shredded pork with a fresh pico de gallo, avocado slices, or a dollop of lime crema. This variation transforms the dish into something with a delightful kick and vibrant, earthy undertones.
How to Prepare braised pork shoulder
Step 1: Prepare the Pork and Oven for Browning
The initial step in creating this incredibly flavorful braised pork shoulder involves preparing your star ingredient and preheating your oven. This ensures that when the pork hits the heat, it starts developing that crucial outer layer of deliciousness that will contribute to the final depth of flavor.
Begin by preheating your oven to a moderately high temperature of 400°F (200°C). While the oven is warming up, take your pork shoulder roast and thoroughly pat it dry using paper towels. This drying process is essential because moisture on the surface of the meat will steam rather than sear, hindering the development of a rich, browned crust. Once dry, season the pork shoulder generously on all sides with kosher salt and freshly ground black pepper. Don’t be shy with the seasoning; a well-seasoned roast is the foundation of a flavorful dish.
Next, select a large, oven-safe Dutch oven or a heavy-bottomed pot that can withstand both stovetop and oven heat. Place this vessel over medium-high heat on your stovetop. Add two tablespoons of olive oil to the hot pot. Allow the oil to shimmer, indicating it’s hot enough to properly sear the pork. Carefully place the seasoned pork shoulder into the hot oil, ensuring not to overcrowd the pot; if your roast is particularly large, you might need to brown it in batches.
Step 2: Achieve a Perfect Sear on the Pork
Browning the pork shoulder is a critical step that imparts a significant amount of flavor and color to the final dish. This Maillard reaction, a complex chemical process, creates hundreds of new flavor compounds that are essential for a truly exceptional braised pork shoulder.
Once the pork shoulder is in the hot oil in the Dutch oven, allow it to sear undisturbed for approximately five minutes on each side. During this time, you should observe a deep, golden-brown crust forming on the surface of the meat. This crust is where much of the savory, rich flavor originates. Resist the urge to move the pork around too much during this searing period, as continuous contact with the hot surface is what promotes effective browning.
After the initial searing is complete on all sides, carefully remove the pork shoulder from the Dutch oven. Use tongs to lift the roast and place it onto a clean plate or a small baking sheet. It’s important to set the browned pork aside temporarily. The pot will now contain the rendered pork fat and browned bits, which are invaluable for building the base of your braising liquid. Do not discard this flavorful residue; it will be the starting point for sautéing your aromatics.
Step 3: Sauté Aromatics and Deglaze the Pot
With the pork shoulder seared and set aside, the focus shifts to building the flavor foundation of the braising liquid. This stage involves softening the onions and garlic and then using the liquid to lift all those delicious browned bits from the bottom of the pot.
Return the Dutch oven to the stovetop over medium heat. Add the thinly sliced yellow onions to the pot, along with any remaining rendered pork fat or a touch more olive oil if needed. Cook the onions, stirring frequently, for about four to five minutes. You want them to soften and become translucent, releasing their natural sweetness. Once the onions have softened, stir in the minced garlic. Cook the garlic for just about 20 seconds, until fragrant, being careful not to burn it, as burnt garlic can turn bitter.
Now, it’s time to deglaze the pot. Pour in the ¼ cup of dry white wine. As the wine hits the hot pot, use a wooden spoon or a flat spatula to scrape up all the browned bits and fond that have adhered to the bottom of the Dutch oven. This process, known as deglazing, is crucial for incorporating all those concentrated flavors into your sauce. The wine will help lift these bits, creating a much richer and more complex braising liquid. Allow the wine to bubble and reduce slightly for about a minute.
Step 4: Build the Braising Liquid and Begin the Braise
With the aromatics softened and the pot deglazed, it’s time to assemble the flavorful liquid that will gently cook and tenderize the pork shoulder. This mixture of apple cider, broth, herbs, and spices is what gives the dish its characteristic cozy and autumnal profile.
After deglazing with the wine, stir in the fresh thyme, chopped rosemary, and smoked paprika into the pot with the onions and garlic. Let these herbs and spices toast for about 30 seconds, which helps to release their essential oils and deepen their aroma. Then, carefully return the browned pork shoulder roast back into the Dutch oven, nestling it amongst the softened onions. Pour in the 1 ½ cups of unfiltered apple cider and 1 ½ cups of low-sodium chicken broth. Add the two bay leaves to the liquid, ensuring they are submerged.
Bring the liquid in the pot to a rolling boil over medium-high heat. Once boiling, reduce the heat to low, cover the pot tightly with its lid, and carefully transfer the entire Dutch oven into your preheated oven. This is where the slow braising magic begins. The covered pot will trap the steam and moisture, allowing the pork shoulder to cook gently and evenly at a controlled temperature, transforming a tough cut into succulent perfection.
Step 5: Slow Braising and Adding Apples
The bulk of the cooking for this braised pork shoulder happens during the slow braising phase. This patient, low-and-slow method is key to achieving that signature fall-apart tenderness that makes this dish so beloved.
Once the Dutch oven containing the pork shoulder and braising liquid is in the oven, immediately reduce the oven temperature to 350°F (175°C). This lower temperature is essential for gentle, slow cooking, allowing the tough connective tissues in the pork shoulder to break down gradually. Cook the pork for approximately two hours. During this time, the pork will slowly absorb the flavors of the apple cider, broth, herbs, and aromatics, becoming incredibly moist and tender.
After two hours have passed, carefully remove the Dutch oven from the oven. Remove the tight-fitting lid. At this point, you will add the cored and quartered Granny Smith apples directly into the pot, nestled around the pork shoulder. The tartness of the apples will complement the richness of the pork beautifully. Replace the lid tightly onto the Dutch oven. Return the pot to the oven and continue to cook for another 30 minutes. This final braising period allows the apples to soften and infuse their flavor into the sauce, while ensuring the pork reaches its optimal tender state.
Step 6: Rest the Pork and Reduce the Sauce
The final steps involve allowing the cooked pork to rest, which is crucial for juiciness, and then reducing the braising liquid to create a rich, luscious sauce.
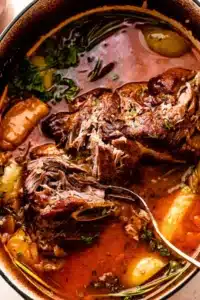
After the pork has finished braising for the final 30 minutes with the apples, carefully remove the Dutch oven from the oven. Using tongs or a large fork, transfer the tender pork shoulder from the pot to a clean cutting board. Tent it loosely with aluminum foil and let it rest for at least 10 minutes. This resting period allows the juices within the meat to redistribute evenly, ensuring that when you slice or shred the pork, it remains moist and succulent.
While the pork is resting, place the Dutch oven back on the stovetop over high heat. Bring the braising liquid, which now contains the softened onions, apples, and delicious rendered pork juices, to a vigorous boil. Allow it to boil for several minutes, stirring occasionally, until the sauce has reduced and thickened to your desired consistency. This reduction concentrates the flavors and creates a rich, glossy gravy. Once the sauce has thickened, you can either strain it to remove the solids if you prefer a smoother sauce, or leave the onions and apples in for added texture and flavor. Remove the bay leaves before serving. The pork is now ready to be sliced or shredded and served with this magnificent sauce.
Pro Tips for braised pork shoulder
To elevate your braised pork shoulder experience from good to absolutely exceptional, consider these expert tips. They focus on maximizing flavor, ensuring perfect texture, and simplifying the process for home cooks.
Choosing the Right Cut: When selecting your pork shoulder, look for a piece with ample marbling, which refers to the streaks of fat throughout the meat. This intramuscular fat is crucial for flavor and will melt during the long braising process, ensuring the pork remains incredibly moist and tender. Avoid cuts that are overly lean, as they may dry out during the extended cooking time.
Don’t Rush the Browning: The initial searing of the pork shoulder is non-negotiable. This step creates the flavorful Maillard reaction, developing a deep, rich crust that adds immense depth to the final dish. Ensure your pot is sufficiently hot and give the pork ample time to develop a dark, even brown color on all sides before moving on to the next step. This caramelization is a flavor powerhouse.
Master the Deglazing Technique: After searing the pork and sautéing the aromatics, the act of deglazing the pot with wine or broth is critical. Use a sturdy spoon to scrape up all the browned bits stuck to the bottom of the pan. These “fond” are concentrated pockets of flavor that will dissolve into your braising liquid, forming the backbone of a deeply savory sauce. Don’t leave any of that deliciousness behind.
Patience with the Braising Time: While the recipe provides specific cooking times, understand that ovens can vary, and the exact tenderness of pork shoulder can differ. It’s more important to cook the pork until it is fork-tender rather than strictly adhering to the clock. You should be able to easily shred or slice the meat with minimal resistance. If it’s not tender enough, simply return it to the oven for longer, checking periodically.
Resting is Essential: Never skip the resting period after the pork has finished cooking. Like any large roast, allowing the braised pork shoulder to rest for 10-15 minutes before slicing or shredding allows the juices to redistribute throughout the meat. This ensures that every bite is moist and flavorful, rather than losing all its liquid onto the cutting board.
Serving Suggestions for braised pork shoulder
Decoration
To beautifully present your braised pork shoulder, consider a garnish that adds both visual appeal and a burst of freshness. A sprinkle of freshly chopped flat-leaf parsley over the top of the sliced or shredded pork provides a vibrant green contrast against the rich, browned meat and glossy sauce. Thinly sliced green onions or chives can also offer a delicate oniony flavor and a pop of color. For a touch of elegance, a few fresh rosemary or thyme sprigs, echoing the herbs used in the braise, can be artfully placed around the serving platter.
Side Dishes
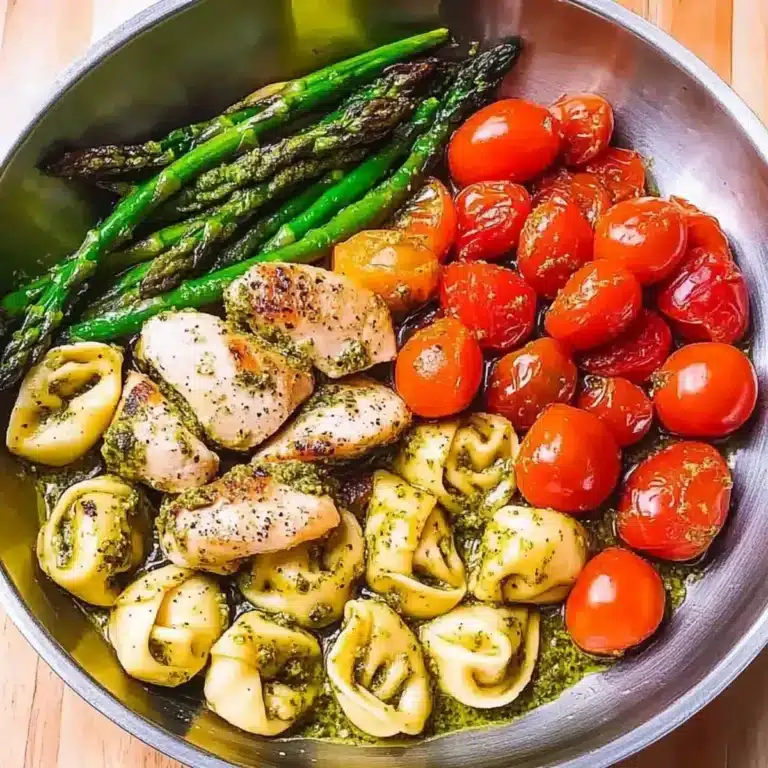
This rich and flavorful braised pork shoulder pairs wonderfully with a variety of side dishes that can soak up its delicious sauce. Creamy mashed potatoes are a classic pairing, offering a comforting and familiar base. Alternatively, consider buttery mashed cauliflower for a lower-carb option that is equally decadent. Fluffy white rice or wild rice pilaf can also serve as an excellent vehicle for the savory sauce. Roasted root vegetables, such as carrots, parsnips, and butternut squash, offer earthy sweetness that complements the pork beautifully, especially during autumn and winter months.
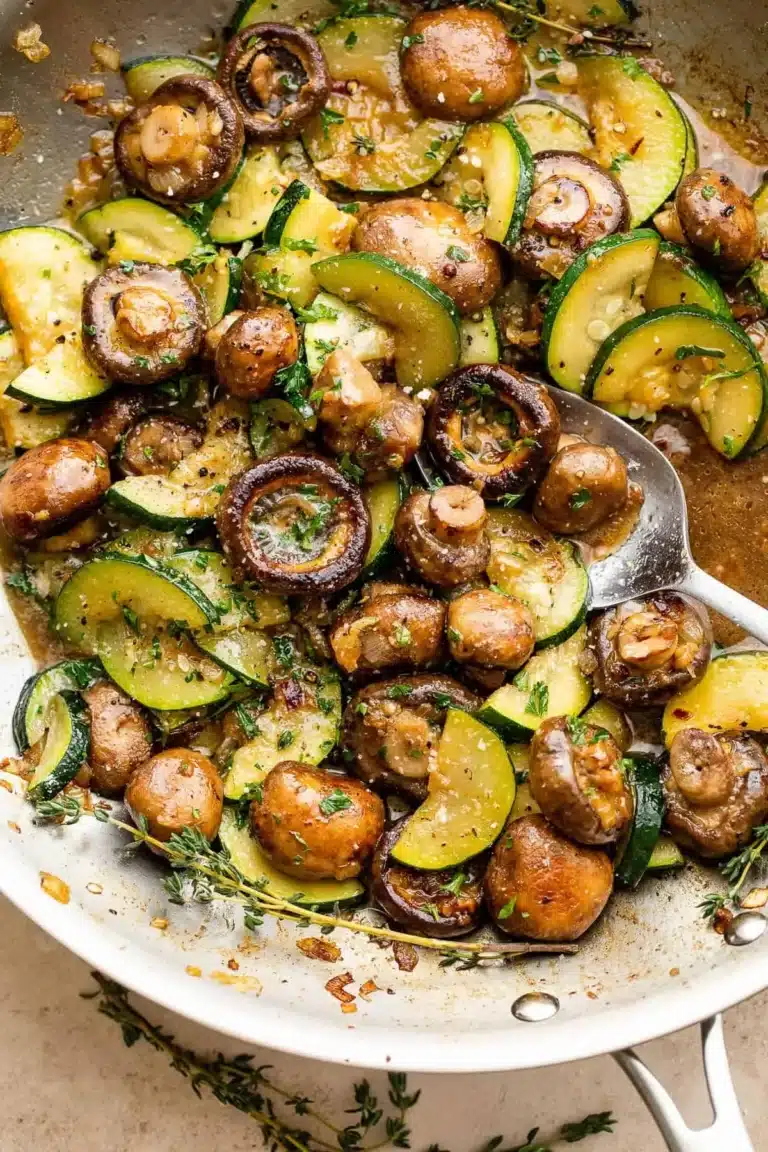
For a touch of brightness and to cut through the richness of the pork, a crisp green salad with a vinaigrette dressing is an ideal accompaniment. Sautéed or steamed green beans, broccoli, or asparagus also provide a welcome freshness and a healthy balance to the meal. If you’re serving this as a heartier meal, consider a side of baked macaroni and cheese for ultimate comfort food indulgence. A robust grain like farro or quinoa can also be a delightful and nutritious addition, providing a pleasing texture.
Exploring different textures and flavors with your sides will make the meal more dynamic. For instance, a sweet potato mash offers a different sweetness profile than regular potatoes and pairs wonderfully with pork. Consider incorporating elements that echo the flavors of the braise, such as thinly sliced sautéed apples or caramelized onions as a side. A simple coleslaw, especially one with a creamy or apple cider vinegar-based dressing, can offer a refreshing crunch and tang that balances the richness of the pork. Don’t forget about good crusty bread; it’s perfect for sopping up every last drop of that delectable braising sauce, making it a vital component of a truly satisfying meal.
Creative Serving Ideas
Beyond traditional plating, this braised pork shoulder can be transformed into several creative and exciting dishes. Consider shredding the tender pork and using it as a filling for tacos or enchiladas, topping with your favorite salsa, avocado, and cheese. It also makes a fantastic filling for hearty sandwiches or sliders, piled high on toasted buns with a tangy slaw or pickled onions. The shredded pork can be mixed with a bit of the reduced sauce and served over crispy fried polenta or cornbread for a rustic Southern-inspired meal. It’s also a star ingredient in a rich pork and apple pie filling, or incorporated into a savory stew with root vegetables and herbs.
For a more elegant presentation, slice the pork shoulder thinly and arrange it fanned out on a plate, then generously spoon the reduced sauce and softened apples and onions over the top. Another idea is to serve the shredded pork as a topping for loaded baked potatoes or sweet potatoes, creating a comforting and substantial meal. You could also incorporate the shredded pork into a pasta dish, perhaps tossed with pappardelle or rigatoni, and a creamy sauce. This versatile meat is also excellent in quesadillas, breakfast burritos, or even as a topping for homemade pizzas, showcasing its adaptability across various cuisines and meal types.
Think about how the texture of the shredded pork can be utilized. It’s perfect for adding to hearty grain bowls alongside roasted vegetables and a drizzle of a flavorful dressing. It can also be a delightful addition to savory fritters or croquettes, providing a rich, meaty core. If you’re hosting a brunch, consider incorporating the shredded pork into a savory bread pudding or as a filling for savory crepes. The possibilities are endless, allowing you to reimagine this comforting braised pork shoulder in countless delicious ways, making it a true kitchen workhorse for both everyday meals and special occasions.
Preparation & Storage
Storing Leftovers
To ensure your delicious braised pork shoulder remains at its best for future enjoyment, proper storage is key. Once the dish has cooled down to room temperature, transfer the pork along with any remaining sauce, onions, and apples into shallow, airtight containers. This helps to prevent the meat from drying out and absorbs any residual heat evenly. Store these containers in the refrigerator and aim to consume the leftovers within three to four days for optimal flavor and food safety.
When storing, it’s beneficial to keep the pork submerged in its braising liquid as much as possible. This liquid acts as a natural preservative and keeps the meat wonderfully moist. If you have a very large amount of leftovers, consider dividing them into smaller portions before refrigerating. This makes reheating individual servings much quicker and prevents the need to reheat and cool the entire batch multiple times, which can degrade the quality of the food.
Ensure the containers are truly airtight to prevent any cross-contamination with other foods in the refrigerator and to lock in the aromas. Labeling the containers with the date of storage can also be a helpful practice, especially if you have multiple leftovers in your fridge. Properly stored leftovers will maintain their delicious taste and texture, making them a convenient and satisfying meal for days to come.
Freezing
Should you find yourself with an abundance of braised pork shoulder that you won’t be able to consume within a few days, freezing is an excellent option to preserve its wonderful flavors and textures. Allow the cooked pork and its accompanying sauce to cool completely before preparing them for freezing. It is best to freeze the pork in portions that you are likely to use in a single meal to minimize thawing and refreezing.
For best results, use freezer-safe bags or airtight storage containers. If using bags, remove as much air as possible before sealing to prevent freezer burn, which can affect the taste and texture of the meat. You can also layer the pork and sauce between parchment paper to easily separate portions. Properly frozen braised pork shoulder can retain its quality for up to two to three months.
Ensure that your packaging is robust and leak-proof, especially if you are freezing it in a liquid-heavy sauce. Label each container or bag with the contents and the date of freezing. This will help you keep track of your frozen inventory and ensure you use the oldest items first. Thawing frozen pork should always be done gradually in the refrigerator to maintain food safety and prevent a sudden temperature change that could impact the meat’s texture.
Reheating
Reheating leftover braised pork shoulder is a simple process that effectively restores its tender texture and rich flavor. The best method often depends on how you plan to serve it. For a stovetop reheating, place the leftover pork and its sauce in a skillet or saucepan over low heat. Cover the pan to trap moisture and heat gently, stirring occasionally, until the pork is heated through. This method is excellent for keeping the pork moist and allowing the sauce to warm evenly.
If you have a larger quantity to reheat, or if the pork has been frozen, the oven can also be a good option. Place the pork and sauce in an oven-safe dish, cover it tightly with foil, and heat in a preheated oven at around 300°F (150°C) until warmed through. This gentle oven method helps to rehydrate the meat without drying it out.
For quick reheating, the microwave can be used, but it’s important to do so carefully to avoid overcooking or drying out the pork. Place the pork and sauce in a microwave-safe dish, cover loosely, and heat on medium power in short intervals, stirring in between, until fully heated. Regardless of the method, always ensure the pork is heated to an internal temperature of at least 165°F (74°C) for food safety. The goal is to gently warm the meat through, preserving its tenderness and the integrity of the sauce.
Frequently Asked Questions
-
What is the best type of pork shoulder to use for braising, and what is the difference between pork shoulder and pork butt?
For braising, the ideal cut is a pork shoulder, also known as a Boston butt or picnic shoulder. These cuts are rich in connective tissue and fat, which break down beautifully during slow, moist cooking, resulting in incredibly tender and flavorful meat. Technically, pork butt (or Boston butt) comes from the upper part of the shoulder, while the picnic shoulder comes from the lower part. Both are excellent for braising due to their marbling and connective tissue, which are essential for that melt-in-your-mouth texture that braising achieves so effectively. When selecting your cut, look for good marbling – those little flecks of fat interspersed within the meat – as this will contribute significantly to the succulence and depth of flavor in your final dish. The fat renders down during the cooking process, basting the meat from within and ensuring it remains moist and delicious throughout the braise.
-
Can I make this braised pork shoulder in a slow cooker or Instant Pot, and how would the cooking times differ?
Absolutely! This braised pork shoulder recipe is highly adaptable to both a slow cooker and an Instant Pot. For a slow cooker, after browning the pork and sautéing the aromatics as per the initial steps, place the pork and all the braising liquid ingredients into the slow cooker. Cook on LOW for 7-9 hours or on HIGH for 4-5 hours, adding the apples during the last 30 minutes of cooking. The slow cooker method requires less active cooking time and is incredibly convenient. For an Instant Pot, after searing the pork and sautéing the aromatics, add all the braising liquid ingredients, including the pork. Cook on high pressure for 60-75 minutes, followed by a natural pressure release for 15-20 minutes. The apples can be added during the last 15 minutes of cooking time, or if you prefer them softer, add them after the pressure release and sauté briefly with the sauce to thicken it. Both methods will yield incredibly tender pork, though the flavor depth might be slightly more pronounced with a traditional Dutch oven braise due to the direct searing and stovetop reduction.
-
What does it mean to “braise” meat, and why is this cooking method so effective for pork shoulder?
Braising is a cooking technique that involves searing food, usually meat, at a high temperature and then simmering it slowly in a small amount of liquid in a covered pot, either on the stovetop or in the oven. This method is exceptionally effective for tougher cuts of meat like pork shoulder because it relies on a combination of moist heat and low temperatures over an extended period. The long, slow cooking process breaks down the tough connective tissues and collagen within the meat, transforming them into gelatin. This gelatin not only tenderizes the meat, making it incredibly succulent and easy to shred or slice, but it also enriches the braising liquid, contributing to a deeply flavorful sauce. The sealed pot ensures that the moisture is trapped, preventing the meat from drying out and allowing it to cook gently, infusing it with the flavors of the braising liquid and aromatics.