Pineapple Glazed Pound Cake

Pineapple Pound Cake is a rich, moist dessert with a buttery crumb, bright fruit flavor, and a warm glaze that makes it especially good for holidays, potlucks, and make-ahead baking when you want something dependable and sliceable.
This is the kind of cake that feels classic the moment it comes out of the pan. It has the dense, satisfying texture you expect from a pound cake, but the crushed pineapple keeps every slice soft and tender instead of heavy.
Why You Will Love This Recipe
- Incredible Moistness: The crushed pineapple and its juice are the secret to a pound cake that stays exceptionally tender and moist, far from being dry.
- Classic Flavor Profile: It delivers the beloved buttery, sweet, and slightly tangy taste that pound cake enthusiasts adore, enhanced by the tropical essence of pineapple.
- Effortless Preparation: The batter comes together with straightforward mixing steps, and the glaze is a simple simmer, making it accessible even for novice bakers.
- Perfect for Make-Ahead: This cake not only bakes beautifully but also stores wonderfully, making it an ideal candidate for preparing a day or two in advance for any occasion.
- Versatile Serving: While delightful on its own, it pairs beautifully with fresh fruit, whipped cream, or a simple cup of coffee, allowing for flexible presentation.
Ingredients You Need
Choosing high-quality ingredients is paramount for achieving the signature taste and texture of this Pineapple Pound Cake. Opt for ripe, flavorful crushed pineapple and good-quality butter; these will significantly impact the final dessert. Using room-temperature dairy and eggs ensures a smooth, emulsified batter, which is crucial for an even crumb and consistent bake.
Pineapple Pound Cake

A rich, buttery pound cake made especially moist with crushed pineapple and finished with a warm pineapple glaze for added sweetness and flavor. This cake is a strong choice when you want something old-fashioned, reliable, and full of flavor without needing complicated steps. The buttery crumb, soft pineapple throughout, and warm fruit glaze give it a homemade feel that always looks generous on the table.
- For the cake:
- 3 cups granulated sugar
- 6 large eggs
- 1/2 cup buttermilk, brought to room temperature
- 2 teaspoons vanilla extract
- 1 3/4 cups salted butter, softened
- 20 ounces crushed pineapple in juice, undrained
- 4 cups all-purpose flour
- For the glaze:
- 1 tablespoon butter
- 1 cup granulated sugar
- Pineapple and pineapple juice (as used in the glaze preparation)
- 1Preheat oven to 325°F (160°C). Coat a 10-inch tube pan thoroughly with non-stick spray. Ensure all refrigerated ingredients are at room temperature.
- 2In the bowl of a stand mixer, combine flour, sugar, softened butter, buttermilk, eggs, 1/2 cup pineapple juice, and vanilla in that order. Beat on low speed for 1 minute.
- 3Scrape down the sides of the bowl. Continue mixing on medium speed for 4 minutes, or until the batter is smooth and fully blended.
- 4Gently fold in the crushed pineapple, ensuring it is evenly distributed throughout the batter.
- 5Spoon the batter into the prepared tube pan and smooth the top. Bake for 1 hour and 20 minutes to 1 hour and 30 minutes, or until a wooden pick inserted near the center comes out clean or with only dry crumbs attached.
- 6Let the cake cool in the pan on a wire rack for 20 to 30 minutes before inverting it onto a serving plate.
- 7To make the glaze, combine pineapple, pineapple juice, and sugar in a small saucepan. Bring to a boil, cook for 2 minutes, then reduce heat and simmer for 2 to 3 minutes more.
- 8Remove the saucepan from the heat and stir in the butter until fully melted and the glaze is smooth.
- 9Pour the warm pineapple glaze evenly over the cooled cake. Allow the glaze to settle slightly before serving.
Keywords: Pineapple Pound Cake, pound cake, fruit cake, moist cake, holiday baking, make-ahead cake
- granulated sugar: contributes sweetness and structure to the cake’s fine crumb.
- large eggs: provide richness, binding, and a sturdy yet tender texture.
- buttermilk (brought to room temperature for best results): adds moisture and a subtle tang, tenderizing the crumb.
- vanilla essence or pure vanilla extract: enhances the overall flavor profile and rounds out the sweetness.
- salted butter (softened): forms the rich, buttery foundation and creates a velvety smooth texture.
- crushed pineapple in juice (undrained): the star ingredient, infusing the cake with moisture, flavor, and delightful fruit pockets.
- all-purpose flour: provides the necessary structure for this substantial cake.
- butter (for the glaze): adds a silky richness and helps the glaze adhere to the cake.
- granulated sugar (for the glaze): balances the pineapple’s tartness and helps thicken the glaze.
- pineapple and pineapple juice (as used in the glaze preparation): reinforces the fruity essence and creates a lusciously pourable topping.
Refer to the recipe card for the precise quantities needed for each component of this delightful dessert.
Variations
To personalize your Pineapple Pound Cake, consider incorporating a hint of citrus zest into the batter. Lemon or lime zest can beautifully complement the pineapple’s tropical notes, adding an extra layer of brightness that cuts through the richness.
For a delightful textural contrast, a handful of toasted macadamia nuts or shredded coconut can be folded into the batter along with the pineapple. These additions will provide a satisfying crunch and an even more pronounced tropical flavor profile, elevating the cake for any special gathering.
A delightful low-carb variation can be achieved by substituting the granulated sugar with a granular erythritol-based sweetener and using finely ground almond flour in place of all-purpose flour. Ensure the crushed pineapple is drained well, and consider adding a touch more vanilla or a pinch of ground ginger to enhance the flavor.
How to Prepare Pineapple Pound Cake
Step 1: Preheat Oven and Prepare the Pan
Begin by preheating your oven to a steady 325 degrees Fahrenheit (160 degrees Celsius). This moderate temperature is crucial for allowing the pound cake to bake through evenly without burning the exterior, ensuring a tender crumb throughout. A well-preheated oven ensures consistent baking from the moment the cake enters.
Next, prepare a 10-inch tube pan with meticulous care. Generously grease the pan with butter or non-stick baking spray, paying close attention to every crevice, the center tube, and the outer edge. For an extra layer of security against sticking, you can dust the greased pan with a light coating of all-purpose flour or granulated sugar, tapping out any excess. This thorough preparation is the first defense against a cake that might stick, ensuring a clean release and a beautiful presentation.
Simultaneously, ensure that your refrigerated ingredients – specifically the butter, eggs, and buttermilk – are brought to room temperature. Ingredients at room temperature emulsify much more effectively, creating a smoother, more homogeneous batter. This homogeneity is key to achieving the classic, fine crumb structure characteristic of a perfect pound cake. Cold ingredients can lead to a denser, less appealing texture and can even result in streaks of unmixed fat or flour within the batter.
Step 2: Mix the Main Batter Ingredients
In the spacious bowl of your stand mixer, begin by adding the primary batter ingredients in the specified order: granulated sugar, softened salted butter, room-temperature eggs, room-temperature buttermilk, vanilla extract, all-purpose flour, and the measured amount of crushed pineapple juice. The order of addition can sometimes influence how ingredients incorporate, so following the recipe’s suggestion is a good practice for optimal results. This initial stage is about gently combining the components before they are fully beaten into a cohesive batter.
Start the mixer on a low speed, allowing the ingredients to just begin their union for approximately one minute. During this initial mix, the goal is not to create a smooth batter but rather to ensure that the larger, drier ingredients start to absorb moisture and the butter begins to soften and break down. This gentle start helps to prevent flour from flying out of the bowl and encourages a more even distribution of ingredients as the mixing progresses.
After this initial low-speed incorporation, stop the mixer. This is a critical juncture for thoroughness. Use a spatula to scrape down the sides and bottom of the mixing bowl meticulously. Ensure that no pockets of dry flour, clumps of butter, or unmixed egg remain clinging to the bowl’s surface. This scraping action is vital for guaranteeing that all components are fully integrated into the batter, preventing dense streaks or an uneven texture in the final cake. A clean bowl promotes a consistently mixed batter.
Once the bowl is thoroughly scraped, resume mixing on a medium speed. Continue to beat the batter for about four minutes. During this extended mixing period, the batter will transform from a shaggy mixture into a smooth, creamy, and fully blended mass. You should observe no remaining streaks of butter or flour; the batter should appear uniform in color and consistency. This stage develops the gluten in the flour just enough to provide structure, while the fat from the butter and moisture from the liquids create that desirable tender texture. Overmixing at this point can lead to a tougher cake, so aim for a smooth, cohesive batter without excessive beating.
Step 3: Gently Fold in the Crushed Pineapple
Once the main batter has achieved its smooth, creamy consistency, it is time to introduce the star ingredient that gives this cake its name: the crushed pineapple. Carefully measure out the specified amount of undrained crushed pineapple. The juice is essential, as it contributes significant moisture and flavor directly into the cake’s crumb, ensuring it remains wonderfully tender and not dry.
Gently fold the crushed pineapple into the batter using a large spatula or a rubber scraper. The technique of folding is key here; it involves using an upward motion, bringing the batter from the bottom of the bowl over the pineapple, and then turning the bowl slightly. Continue this process until the pineapple is just evenly dispersed throughout the batter. The goal is to distribute the fruit without overworking the batter, as excessive mixing at this stage can activate the gluten in the flour too much, potentially leading to a less tender or even tough finished cake. Aim for an even distribution where the pineapple pieces are visible throughout the mixture.
Take a moment to visually inspect the batter once the pineapple has been folded in. You want to see the bright pieces of pineapple distributed fairly evenly, with no large pockets of just batter or concentrated clumps of pineapple. The batter itself should remain relatively cohesive, with the pineapple pieces suspended within it. This careful incorporation ensures that each slice of your Pineapple Pound Cake will offer delightful bursts of fruity moisture and flavor, enhancing the overall eating experience without compromising the cake’s structure.
Step 4: Spoon Batter into Pan and Bake
With the pineapple gently folded into the batter, the next step is to transfer this rich mixture into your meticulously prepared 10-inch tube pan. Use your spatula to carefully spoon the batter into the pan, ensuring that you fill it evenly. It’s important to distribute the batter as uniformly as possible within the pan to promote even baking.
Once the batter is in the pan, use the back of your spatula or a small offset spatula to gently smooth the top surface of the batter. This will create a more level surface for baking, which can help in achieving a more even rise and a uniformly golden-brown crust. While pound cake batter is quite thick, a gentle smoothing ensures there are no major peaks or valleys that might bake at different rates.
Place the filled pan into the preheated oven. The baking time for this substantial cake will be quite lengthy, typically ranging from 1 hour and 20 minutes to 1 hour and 30 minutes. During this extended bake, the cake will gradually rise and set. It’s crucial to resist the urge to open the oven door too early, as this can cause the cake to collapse.
To determine if the cake is done, insert a long wooden skewer or a thin metal cake tester into the center of the cake, avoiding any large pineapple chunks if possible. The cake is ready when the tester comes out completely clean or with only a few dry crumbs attached. If there is wet batter on the tester, continue baking and check again every 10-15 minutes. Since this is a large, moist cake packed with fruit, it requires adequate time to fully cook through and develop its signature dense yet tender texture.
Step 5: Cool the Cake in the Pan
Once the cake has successfully baked and a tester comes out clean, carefully remove the pan from the oven. It is extremely important at this stage to let the cake cool in the pan for a specific period before attempting to unmold it. Place the hot pan on a wire cooling rack.
Allow the cake to rest and cool in the pan for approximately 20 to 30 minutes. This cooling period is not just about waiting; it’s a critical step in the cake’s structural development. During this time, the cake continues to set, and its internal structure firms up slightly. This process is especially beneficial for fruit-filled cakes like this Pineapple Pound Cake, as the moisture from the pineapple can make the cake more delicate when warm.
This brief rest allows the cake to firm up enough so that it can be turned out without breaking or losing its shape. Attempting to unmold a pound cake too soon can result in a sunken middle or pieces clinging to the pan. The warmth of the cake itself will also help the residual butter or spray to loosen its grip on the pan, facilitating a cleaner release.
After the initial cooling period in the pan, carefully invert the pan onto a wire rack that has been positioned over a serving plate or another rack. Gently tap the bottom of the pan, and the cake should release. If it seems hesitant, you can run a thin knife or offset spatula around the edges and center tube one last time to ensure no sticky spots remain. Let the cake cool completely on the wire rack before proceeding to glaze it.
Step 6: Prepare and Apply the Warm Glaze
While the cake is cooling, you can prepare the warm pineapple glaze that will crown this delightful dessert. In a small saucepan, combine the measured amount of butter, granulated sugar, and the pineapple with its juice specifically designated for the glaze. The combination of these ingredients will create a sweet, fruity, and glossy topping.
Place the saucepan over medium heat and bring the mixture to a gentle boil. Stir occasionally to ensure the sugar dissolves and the butter melts smoothly into the pineapple mixture. Allow the glaze to simmer for about two minutes, letting the flavors meld and the sugar start to dissolve fully. This simmering process will begin to thicken the glaze slightly.
After the initial boil and simmer, reduce the heat to low and let it simmer for an additional two to three minutes. The goal here is to achieve a slightly syrupy consistency. You want the glaze to be thick enough to coat the cake and create a beautiful sheen, but not so thick that it becomes difficult to pour or spread.
Once the glaze has reached the desired consistency, remove the saucepan from the heat. Stir in the tablespoon of butter until it is completely melted and fully incorporated into the pineapple mixture. This final addition of butter enriches the glaze, making it wonderfully smooth and giving it a beautiful glossy finish that enhances the cake’s appearance. It also helps to temper the sweetness slightly and adds a luxurious mouthfeel.
Ensure the cake has cooled sufficiently before applying the glaze. It should be warm to the touch but not hot. Carefully pour the warm pineapple glaze evenly over the top of the cooled cake. Use a spoon or spatula to gently spread the glaze, allowing it to drip down the sides. The warmth of the glaze will help it soak slightly into the surface of the cake, creating a delightful, slightly sticky, and intensely flavored topping that complements the buttery pound cake perfectly. Let the glaze set for a few minutes before slicing and serving.
Pro Tips for Pineapple Pound Cake
Don’t Drain the Pineapple: For maximum moisture and flavor, always use the crushed pineapple in its own juice without draining. This juice is a key component in keeping the pound cake incredibly tender and rich, infusing every bite with a subtle tropical sweetness.
Room Temperature is Key: Ensure all your dairy products and eggs are at room temperature before you start mixing. This is a foundational rule for pound cakes as it allows for proper emulsification, leading to a smoother batter and a finer, more even crumb texture without any greasiness.
Scrape, Scrape, Scrape: During the mixing process, particularly after the initial incorporation of dry and wet ingredients, take the time to thoroughly scrape down the sides and bottom of the mixing bowl. This ensures that all ingredients are evenly incorporated, preventing dense pockets of flour or unincorporated butter from marring the cake’s final texture.
Gentle Folding is Essential: When adding the crushed pineapple to the batter, use a gentle folding motion rather than vigorous mixing. Overworking the batter at this stage can develop gluten excessively, resulting in a tougher cake. The aim is to evenly distribute the pineapple without compromising the delicate crumb you’ve worked to create.
Glaze Temperature Matters: Apply the glaze when it’s warm, but not piping hot. A warm glaze will flow more easily over the cake, creating a beautiful, even coating. If it’s too hot, it may run off too quickly; if it’s too cool, it can become difficult to spread and may clump.
Serving Suggestions for Pineapple Pound Cake
Decoration
For an elegant presentation, consider topping the glazed cake with a sprinkle of toasted shredded coconut or finely chopped toasted macadamia nuts. A few delicate slivers of candied pineapple or thin strips of candied ginger can also add visual appeal and a burst of complementary flavor.
A dusting of powdered sugar over the top, applied through a fine-mesh sieve, offers a classic, understated look that highlights the glossy pineapple glaze. Fresh mint sprigs or edible flowers can provide a beautiful pop of color and a touch of natural elegance to your dessert display.
Side Dishes
This Pineapple Pound Cake pairs exceptionally well with a dollop of freshly whipped cream. For an extra touch of indulgence, lightly sweeten the cream with a hint of vanilla extract or a tablespoon of pineapple syrup from the glaze. Fresh berries, such as raspberries, strawberries, or blueberries, offer a delightful tartness that beautifully contrasts the cake’s sweetness and richness.
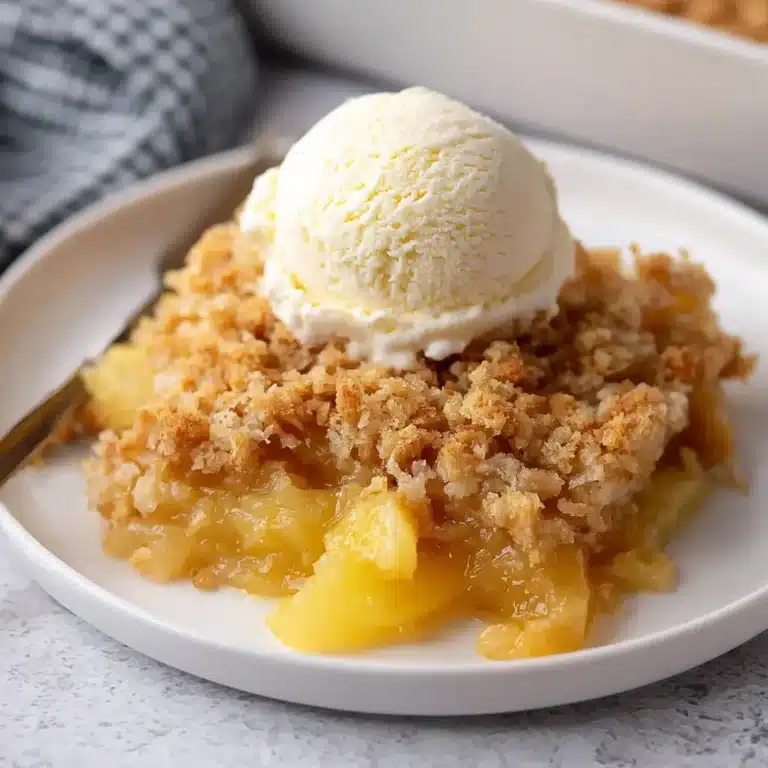
A scoop of high-quality vanilla bean ice cream or a lighter coconut sorbet makes for a refreshing accompaniment. If serving as part of a larger dessert buffet, consider pairing it with a simple fruit salad that includes pineapple, mango, and kiwi to echo the cake’s tropical theme.
Creative Serving Ideas
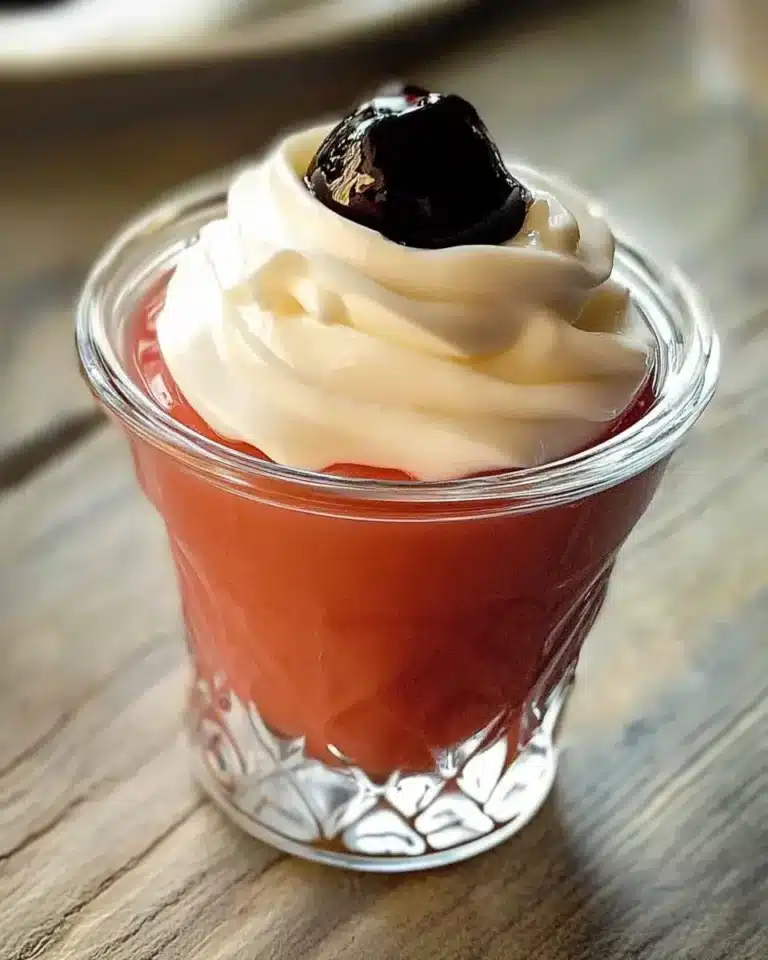
Transform slices of this pound cake into delightful individual desserts by layering them with whipped cream and fresh fruit in parfait glasses. A warm drizzle of caramel sauce or a hint of rum syrup can add an adult-friendly sophistication to the presentation.
For a brunch setting, serve smaller, individual slices alongside a cup of hot coffee or a refreshing tropical fruit smoothie. You could also grill thick slices of the pound cake briefly on both sides until lightly golden and serve them warm with a scoop of ice cream for a delicious grilled pound cake dessert experience.
Preparation & Storage
Storing Leftovers
Once fully cooled, wrap the Pineapple Pound Cake tightly in plastic wrap to prevent it from drying out. If your kitchen is kept at a consistently cool temperature, the cake can be stored at room temperature for up to two days. Ensure it is completely cool before wrapping to avoid trapping condensation, which can make the cake soggy.
For longer storage, it is best to refrigerate the cake. Wrap it well in plastic wrap, then place it in an airtight container. In the refrigerator, the cake will remain fresh for up to five days. The glaze may become slightly firmer when chilled, which is normal.
Freezing
To freeze Pineapple Pound Cake, allow it to cool completely and ensure the glaze has set firmly. You can freeze the entire cake or, more conveniently, individual slices. Wrap each slice or the whole cake securely in a layer of plastic wrap, followed by a layer of aluminum foil or heavy-duty freezer paper to protect it from freezer burn.
Place the wrapped cake or slices into a freezer-safe airtight container or a heavy-duty freezer bag. Properly stored, the cake can maintain its quality in the freezer for up to two months. Thawing it gradually will help preserve its texture best.
Reheating
If you wish to reheat a slice of Pineapple Pound Cake, especially if it has been refrigerated or frozen, a few seconds in the microwave on a low power setting are usually sufficient. This will gently warm the cake and slightly soften the glaze, making it more luscious again. Be careful not to overheat, as excessive microwaving can make the cake rubbery or dry.
Alternatively, you can warm individual slices in a toaster oven at a very low temperature for a few minutes. This method can help crisp up the exterior slightly, offering a different textural experience. Ensure the oven is set low to avoid overcooking or burning the cake or its glaze.
Frequently Asked Questions
-
Why is my Pineapple Pound Cake not as moist as expected, or tasting a bit dry?
Several factors can contribute to a less-than-moist pound cake. Firstly, ensure you did not drain the crushed pineapple; the juice is essential for moisture. Secondly, verify that your oven temperature was accurate; an oven that runs too hot can dry out the cake quickly. Overbaking is another common culprit; always rely on the toothpick test for doneness rather than just the clock. Using room-temperature ingredients, particularly buttermilk and eggs, is also critical for achieving the ideal tender crumb that holds moisture well. Lastly, ensure you measured your flour correctly; scooping flour directly from the bag can lead to too much flour, resulting in a dry cake, so spooning it into the measuring cup and leveling it off is a better method.
-
Can I use fresh pineapple instead of canned crushed pineapple for this recipe?
Yes, you can certainly use fresh pineapple, but it requires a bit more preparation and consideration. If using fresh pineapple, you will need to cut it into small, bite-sized pieces and then process it in a food processor or finely chop it to achieve a consistency similar to crushed pineapple. It’s crucial to measure the amount of fresh pineapple to match the 20-ounce can specified in the recipe. Importantly, do not drain the juice from the fresh pineapple; this juice is vital for the cake’s moisture and flavor, just as it is with canned pineapple. You might find that fresh pineapple is juicier or less sweet than canned varieties, so you may need to slightly adjust the sugar in the cake batter or glaze based on the ripeness and sweetness of the fruit you use.
-
What is the best way to ensure my pound cake releases cleanly from the tube pan without breaking?
Achieving a clean release from a tube pan is all about proper preparation and patience. Start by meticulously greasing the pan with softened butter or baking spray, ensuring every nook and cranny, including the center tube and any decorative edges, is covered. After greasing, dust the pan with a fine layer of all-purpose flour or granulated sugar, tapping out any excess; this creates a non-stick barrier. For an extra measure of security, especially with moist cakes like this one, some bakers like to line the bottom of the pan (the part that will become the top) with a circle of parchment paper after greasing and flouring. Crucially, allow the cake to cool in the pan for the recommended 20-30 minutes on a wire rack before attempting to unmold. This resting period allows the cake to firm up its structure, making it less fragile and more likely to slide out cleanly when inverted. If it still seems stuck, a quick pass with a thin knife or offset spatula around the edges can help loosen any stubborn spots.