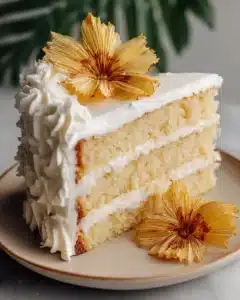
Sunny Pineapple Layer Cake

Pineapple Layer Cake is a light, creamy, make-ahead dessert with tender cake layers, juicy pineapple flavor, and a chilled vanilla topping that makes it perfect for birthdays, spring gatherings, and easy family celebrations.
This is the kind of cake that feels bright and cheerful the moment it hits the table. The soft layers soak up pineapple juice, so every bite stays moist and flavorful without feeling heavy. The frosting keeps things wonderfully simple, whipped topping, vanilla pudding mix, and crushed pineapple come together into a creamy finish that spreads easily and gives the cake its cool, fluffy texture.
Why You Will Love This Recipe
- Effortless Assembly: Designed for simplicity, this cake comes together with straightforward steps, making it accessible even for novice bakers. The use of cake mix as a base significantly cuts down on preparation time and complexity.
- Moist and Flavorful Layers: Infused with pineapple juice, each cake layer is exceptionally moist and bursts with tropical sweetness, ensuring that every bite is a delightful experience. This moisture is key to the cake’s appeal even after chilling.
- Light and Creamy Frosting: The frosting is a dream of fluffy whipped topping, smooth vanilla pudding, and delightful crushed pineapple. It’s light enough not to overpower the cake, yet rich enough to feel indulgent and satisfying.
- Make-Ahead Convenience: This cake is designed to be made in advance, a significant advantage for busy hosts. Chilling allows the flavors to meld and the texture to set perfectly, meaning dessert is ready whenever you are.
- Visually Appealing: While easy to make, the final cake presents beautifully. Its layers and creamy frosting make for an attractive centerpiece that promises a delicious dessert experience.
Ingredients You Need
The success of this delightful Pineapple Layer Cake hinges on using fresh, quality ingredients. Each component plays a crucial role in achieving the perfect balance of sweetness, moisture, and creamy texture. Opting for good quality cake mix, ripe pineapple, and fresh dairy ensures the best possible outcome for this cherished dessert. Remember, the exact quantities are detailed in the provided recipe card for your convenience.
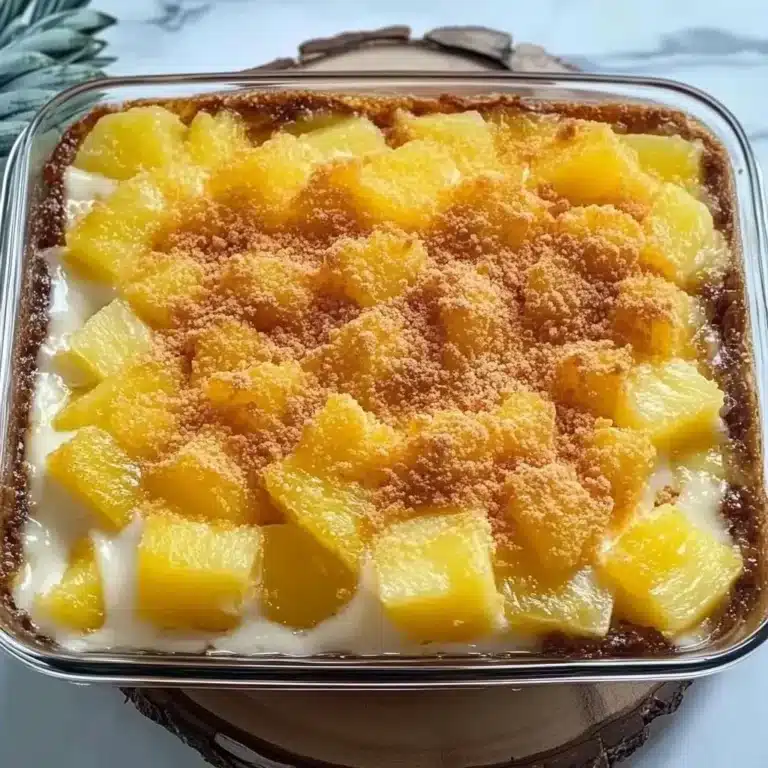
Pineapple Layer Cake
A light, creamy, make-ahead dessert with tender cake layers, juicy pineapple flavor, and a chilled vanilla topping that makes it perfect for birthdays, spring gatherings, and easy family celebrations. This cake shines on its own, but a few simple serving ideas can make it feel even more special.
- 1 package yellow cake mix
- 3 large eggs, brought to room temperature
- 1/3 cup neutral vegetable oil
- 1 cup water
- 1 cup pineapple juice
- 1 can crushed pineapple
- 12 ounces whipped topping, thawed
- 1 package instant vanilla pudding mix
- crushed pineapple from the ingredient list above
- 1Preheat the oven to 350°F.
- 2In a large bowl, prepare the cake batter by mixing the yellow cake mix, room-temperature eggs, vegetable oil, and water according to the package instructions. Stir until the mixture is smooth and evenly blended.
- 3Grease three 6-inch cake pans or two 9-inch cake pans thoroughly with nonstick cooking spray. Divide the batter evenly among the prepared pans.
- 4Bake for 35 minutes when using 6-inch pans, or 25 minutes when using 9-inch pans. The cake layers are ready when a toothpick inserted into the center comes out clean.
- 5Place the pans on a wire rack and allow the cakes to cool for 10 minutes before removing them from the pans. Turn the layers out and set them right side up to continue cooling until they are easy to handle.
- 6Using a serrated knife, trim away the rounded tops of the cake layers so each one is level.
- 7Slowly spoon or pour the pineapple juice over each layer, allowing the liquid to absorb into the cake. Leave the layers to cool completely before frosting.
- 8To make the frosting, combine the whipped topping, instant vanilla pudding mix, and crushed pineapple in a mixing bowl. Stir until the mixture is fully incorporated and creamy.
- 9Place one cake layer onto a serving plate and spread a generous portion of frosting across the top. Add the next layer and repeat. If using a third layer, continue in the same manner.
- 10After stacking the cake, spread the remaining frosting over the top and around the sides until the entire cake is evenly covered.
- 11Refrigerate the finished cake until serving time so the frosting can set and the flavors can develop fully.
Keywords: Pineapple Layer Cake, Cake, Dessert, Make-ahead, Chilled, Tropical, Easy
- yellow cake mix: a convenient and reliable base for tender, moist cake layers.
- large eggs: essential for binding the batter, providing structure, and adding richness to the cake crumb.
- neutral vegetable oil: ensures the cake layers remain incredibly moist and tender, even after chilling.
- water: used to combine the cake mix and create a smooth, pourable batter for even baking.
- pineapple juice: the secret ingredient that infuses the cake layers with bright, tropical flavor and extra moisture.
- crushed pineapple: adds delightful fruity texture and natural sweetness to the creamy frosting.
- whipped topping: forms the light, airy, and fluffy base for the luscious chilled frosting.
- instant vanilla pudding mix: thickens the frosting to the perfect consistency and enhances its creamy vanilla flavor.
Variations
Elevating this Pineapple Layer Cake is wonderfully simple, allowing for creative twists that cater to different dietary needs or flavor preferences. Consider a vegan adaptation by using a plant-based yellow cake mix and ensuring your whipped topping and pudding mix are dairy-free alternatives; this maintains the creamy texture and fruity notes beautifully.
For those seeking a low-carb option, you can explore using a sugar-free yellow cake mix and a sugar-free instant vanilla pudding mix. Sweeten the whipped topping with a suitable sugar substitute, and ensure the crushed pineapple is also drained well to minimize natural sugars. This approach allows for a guilt-free indulgence while still capturing the essence of the original recipe.
Another exciting variation involves incorporating other tropical fruits. Imagine adding finely diced mango or a hint of passion fruit puree into the frosting for an even more exotic flavor profile. You could also introduce toasted shredded coconut into the cake batter or sprinkled on top for an extra layer of texture and tropical aroma, making each slice a journey to paradise.
How to Prepare Pineapple Layer Cake
Step 1: Preparing the Cake Pans and Oven
Begin by preheating your oven to the specified temperature of 350°F (175°C). This ensures the oven is at the optimal heat for even baking, allowing the cake layers to rise properly and cook through without burning on the outside or remaining undercooked in the center.
Next, meticulously prepare your cake pans. Whether you are using three 6-inch pans for a taller cake or two 9-inch pans for a more classic presentation, thorough greasing and flouring (or using non-stick baking spray) is crucial. This step prevents the delicate cake layers from sticking to the pans, ensuring they release cleanly after baking and maintain their beautiful shape for stacking.
Taking these initial steps carefully sets the foundation for a perfect cake. A well-prepared pan guarantees that your hard work in mixing and baking will result in intact, appealing cake layers ready for the next stages of assembly. This attention to detail minimizes the risk of breakage and makes the entire cake-making process much smoother and more enjoyable.
Step 2: Mixing the Cake Batter
In a large mixing bowl, combine the contents of the yellow cake mix with the eggs, neutral vegetable oil, and water as directed on the cake mix package. The goal is to create a smooth, homogenous batter that is free of lumps and dry pockets of cake mix. Stir gently but thoroughly until all ingredients are fully incorporated and the mixture reaches a consistent, pourable texture.
Ensure that you scrape down the sides and bottom of the bowl periodically to catch any hidden dry ingredients. Overmixing can lead to a tough cake, so aim for just enough mixing to achieve a uniform consistency. The batter should look appealingly smooth and ready for baking, indicating that the emulsification of ingredients is complete.
Once the batter is perfectly blended, it is ready to be divided among the prepared cake pans. The ease of this step highlights the convenience of using a cake mix, making this recipe approachable for bakers of all skill levels. A well-mixed batter is the first significant step towards achieving that signature moist and tender crumb this cake is known for.
Step 3: Baking the Cake Layers
Divide the prepared cake batter evenly between your prepared cake pans. If using three 6-inch pans, fill each about two-thirds full. If using two 9-inch pans, distribute the batter accordingly, ensuring an even layer in each pan for uniform baking.
Place the filled pans into the preheated oven. Bake for the time specified, typically around 25-35 minutes depending on the pan size, or until a wooden toothpick inserted into the center of each cake layer comes out clean. This indicates that the cake has fully cooked through and is ready to be removed from the oven.
Once baked, remove the pans from the oven and place them on a wire cooling rack. Allow the cakes to cool in the pans for approximately 10 minutes before inverting them onto the rack to cool completely. This brief cooling period in the pan helps the cakes set slightly, making them easier to remove without breakage, and continuing the cooling process on a rack ensures air circulation, preventing condensation and sogginess.
Step 4: Leveling and Soaking the Cake Layers
Once the cake layers have cooled completely, it’s time to prepare them for frosting. Using a long, serrated knife, carefully slice off the domed tops of each cake layer. This creates a flat surface, which is essential for even stacking and allows the frosting to be applied uniformly, giving your finished cake a professional and polished appearance.
After leveling, place each cake layer, cut-side up, onto a clean surface or your serving plate. This is where the magic of the pineapple infusion happens. Begin slowly spooning or brushing the pineapple juice evenly over the entire surface of each cake layer. Be generous but allow the cake time to absorb the liquid gradually; avoid pouring too quickly, which could make the layers soggy.
This soaking step is critical for achieving the cake’s signature incredibly moist texture and intensifying its delightful pineapple flavor. The juice seeps into the tender crumb, ensuring that every bite is bursting with tropical goodness. Allow the layers to sit for a few minutes after soaking, enabling them to absorb as much juice as possible before proceeding to the frosting stage.
Step 5: Preparing the Frosting
In a medium-sized mixing bowl, combine the thawed whipped topping, the entire package of instant vanilla pudding mix, and the drained crushed pineapple. The crushed pineapple should be well-drained to prevent the frosting from becoming too liquidy. Stir these ingredients together until they are thoroughly combined and the mixture begins to thicken.
Continue stirring until the frosting is smooth, creamy, and has a uniform consistency. The instant pudding mix will work quickly to thicken the whipped topping, creating a luscious, spreadable frosting. The crushed pineapple pieces will be distributed throughout, adding delightful pockets of fruity texture and bursts of flavor to every spoonful.
This frosting is exceptionally light and airy due to the whipped topping, which makes it perfect for a chilled cake. Its simplicity belies its deliciousness, providing a wonderful creamy counterpoint to the moist, pineapple-infused cake layers. Ensure all ingredients are well-blended to achieve the best possible texture and taste for your frosting.
Step 6: Assembling and Chilling the Cake
To assemble the cake, place the first pineapple-soaked cake layer onto your serving plate or cake stand. Spread a generous, even layer of the prepared pineapple-vanilla frosting over the top of this first layer, ensuring it reaches close to the edges.
Carefully place the second cake layer on top of the frosting. Repeat the process, spreading another ample layer of frosting over the second cake. If you are using a third cake layer, stack it on top and continue frosting.
Once all layers are stacked, use the remaining frosting to cover the top and sides of the entire cake, smoothing it out for a neat finish. After the cake is fully frosted, cover it loosely with plastic wrap or a cake dome and refrigerate for at least 2-3 hours, or preferably overnight. This chilling period is crucial for the frosting to set properly and for the flavors to meld together, resulting in a moist, flavorful, and beautifully textured dessert that is perfect for serving.
Pro Tips for Pineapple Layer Cake
Ensure Complete Cooling: Before you even think about frosting, make absolutely sure that your cake layers are completely cool to the touch. Warm cake layers will cause the whipped topping frosting to melt and slide, leading to a messy and unstable cake. Patience here is truly a virtue.
Drain Pineapple Well: When using crushed pineapple for the frosting, it is essential to drain it thoroughly. Excess liquid can make your frosting too thin and runny, compromising its texture and ability to hold its shape. A fine-mesh sieve is your best friend for this step.
Gentle Absorption: When pouring or spooning pineapple juice over the cake layers, do so gradually. This allows the cake to absorb the liquid evenly. Pouring too much at once can oversaturate one spot, leading to a gummy texture in that area, while leaving other parts drier.
Chill for Best Results: Do not skip the chilling step! Refrigerating the assembled cake for several hours allows the frosting to firm up, the flavors to meld beautifully, and the cake to achieve its signature moist, chilled texture. This step is vital for clean slicing and optimal taste.
Serrate for Success: When leveling the cake layers, a long, serrated knife is far superior to a straight blade. It cuts through the tender cake crumb with ease, creating a clean, flat surface without tearing or compressing the cake structure. This makes for a much more stable and aesthetically pleasing stacked cake.
Serving Suggestions for Pineapple Layer Cake
Decoration
While this cake is beautiful in its simplicity, a few decorative touches can elevate its presentation even further. Consider garnishing the top with fresh pineapple chunks or rings for a vibrant, tropical look that echoes the cake’s flavors. A sprinkle of toasted shredded coconut over the frosting adds a delightful textural contrast and enhances the tropical theme.
For a touch of elegance, you could pipe a border around the top edge of the cake using some of the frosting, or even some whipped cream if you want to add more lightness. Fresh berries, such as raspberries or sliced strawberries, offer a beautiful color contrast against the pale frosting and add a hint of tartness that complements the sweetness of the cake.
If you’re feeling particularly artistic, thin slices of kiwi or star fruit can create stunning visual patterns. Even a simple dusting of powdered sugar over the top can give the cake a refined, finished appearance, especially if you use a stencil to create a pattern.
Side Dishes
This Pineapple Layer Cake is a complete dessert on its own, but it pairs wonderfully with a few complementary accompaniments. A small scoop of premium vanilla bean ice cream served alongside each slice provides a delightful temperature and texture contrast, melting slightly into the cake and frosting.
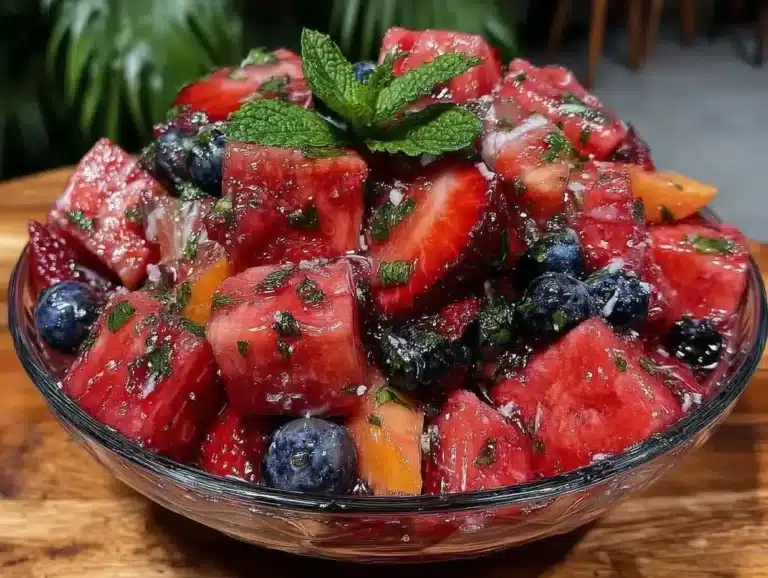
Fresh fruit salad, particularly one featuring berries, melon, and perhaps some citrus segments, offers a lighter, refreshing counterpoint to the cake’s sweetness. This is especially welcome if the cake is served at a larger gathering or a potluck where guests might appreciate a variety of lighter options.
For a warm beverage pairing, a cup of freshly brewed coffee or a soothing herbal tea is ideal. The subtle bitterness of coffee or the calming notes of tea can cut through the sweetness of the cake, creating a balanced and satisfying end to any meal. An iced tea, perhaps a green or black tea, also works wonderfully on a warmer day.
Creative Serving Ideas
Transform individual servings into charming parfaits by layering crumbled pieces of the cake with extra frosting and fresh pineapple in clear glasses or jars. This is a fantastic way to present the dessert at parties or for easy grab-and-go treats.
Consider serving mini Pineapple Layer Cakes using smaller baking molds or muffin tins for elegant individual desserts. Each guest receives their own perfectly portioned treat, adding a special touch to celebrations. This also makes for beautiful presentation on a dessert buffet.
For a fun twist, deconstruct the cake and serve the components separately: moist cake crumbles, a dollop of the pineapple frosting, and a side of fresh pineapple salsa. Guests can then assemble their own perfect bite, making it an interactive and memorable dessert experience.
Preparation & Storage
Storing Leftovers
Store any leftover Pineapple Layer Cake in an airtight container or tightly covered with plastic wrap in the refrigerator. Because the frosting contains whipped topping and pudding mix, it is essential to keep the cake chilled to maintain its texture and ensure food safety. The cake will remain delicious and moist for up to 3-4 days when stored properly.
When you’re ready to enjoy a slice, you can serve it directly from the refrigerator for a refreshing, chilled dessert. If you prefer a slightly softer texture, allow the slice to sit at room temperature for about 10-15 minutes before serving. This slight tempering can make the cake crumb even more tender.
Avoid leaving the cake at room temperature for extended periods, as this can cause the frosting to break down and the cake to spoil more quickly. Always return any uneaten portions to the refrigerator promptly to preserve their quality and safety.
Freezing
Freezing this Pineapple Layer Cake is a great option for preserving it for longer periods, but it is best done before the cake is fully assembled and frosted if possible. Unfrosted cake layers can be wrapped tightly in plastic wrap, then in aluminum foil, and frozen for up to 2 months. This method helps prevent freezer burn and maintains the integrity of the cake’s texture.
If you wish to freeze a frosted cake or individual slices, ensure the frosting is firm from being well-chilled. Wrap each slice or the entire cake securely in plastic wrap, followed by a layer of aluminum foil or a freezer-safe container. Frosted portions are best consumed within 1-2 months for optimal quality, as the whipped topping can sometimes change texture slightly over extended freezing times.
When you are ready to thaw, transfer the frozen cake or slices to the refrigerator. Allow them to thaw slowly overnight. This gradual thawing process helps the frosting remain stable and prevents condensation from forming on the cake’s surface, which could lead to sogginess.
Reheating
Reheating is generally not necessary for this Pineapple Layer Cake, as it is designed to be enjoyed chilled or at cool room temperature. The frosting is made with ingredients that are best served cold, and attempting to warm the cake could compromise its delicate texture and cause the frosting to melt.
If your cake has been refrigerated and you find it too firm for your liking, the best approach is simply to let it sit on the counter for a short period. About 10 to 15 minutes should be sufficient to take the chill off and allow the cake crumb to soften slightly. This will enhance its moistness and make it more melt-in-your-mouth.
Avoid using any form of oven or microwave reheating, as this will ruin the texture of the whipped topping frosting and could make the cake layers dense or dry. Embrace its intended cool serving temperature for the best possible flavor and sensory experience. The chilled nature is part of its refreshing appeal.
Frequently Asked Questions
-
Can I use fresh pineapple instead of crushed pineapple in the frosting?
Yes, you can use fresh pineapple, but it requires a bit more preparation. You would need to finely chop or puree fresh pineapple and then cook it down to reduce its moisture content significantly. This is crucial because excess liquid will make the frosting too thin. Draining canned crushed pineapple is a much simpler and more effective method for achieving the right frosting consistency without sacrificing flavor.
-
What kind of cake pans are best for this recipe?
The recipe is flexible and works well with either two 9-inch round cake pans or three 6-inch round cake pans. Using three 6-inch pans will result in a taller cake with more layers and more frosting in between, offering a more dramatic presentation. Two 9-inch pans are often more convenient for home bakers and yield a classic layered cake. Whichever you choose, ensure they are well-greased and floured or sprayed with baking spray for easy release of the cake layers.
-
Why is the cake so moist after chilling? Can I make it ahead of time?
The remarkable moistness of this cake comes from two key elements: the pineapple juice poured over the baked layers and the creamy, chilled frosting. The pineapple juice soaks into the cake crumb, infusing it with moisture and flavor that intensifies as it sits. Yes, this cake is absolutely designed to be made ahead of time; in fact, it’s often better when it has a few hours or even overnight to chill in the refrigerator. This allows the flavors to meld beautifully and the texture to set perfectly, making it an ideal dessert for entertaining or busy schedules.