Irresistible Frozen Greek Yogurt Peanut Butter Bites for Guilt-Free Snacking
As I stood in my kitchen, the midday slump creeping in, I felt that familiar tug for something sweet yet nourishing. Enter the Frozen Greek Yogurt Peanut Butter Bites—my absolute go-to for a high-protein snack that transforms the typical treat experience.
These delightful morsels blend creamy Greek yogurt with the rich allure of peanut butter, offering a refreshing bite that feels like a mini indulgence without the guilt, perfect for those who crave a healthy alternative! In just a few simple steps, you’ll be sinking your teeth into these decadent, customizable bites, ideal for an afternoon pick-me-up or a post-workout reward. Curious how easy they are to whip up and enjoy? Let’s dive into this delightful recipe!
Why You Will Love This Recipe
- Quick Preparation: Dinner is on the table in less than 30 minutes, making these bites a perfect option for busy weeknights.
- Healthy Indulgence: Satisfy your sweet cravings with a treat packed with protein and healthy fats, without the guilt associated with traditional desserts.
- Versatile Customization: Easily adapt the recipe to your taste by swapping nut butters, sweeteners, or even adding mix-ins for endless flavor possibilities.
- No-Bake Convenience: Enjoy a delicious snack without turning on the oven, perfect for warmer weather or when you’re short on time.
- Kid-Friendly Fun: These bites are a hit with children, and the simple preparation makes them a great activity to do together in the kitchen.
Ingredients You Need
Crafting these delightful Frozen Greek Yogurt Peanut Butter Bites begins with selecting high-quality ingredients that will ensure a delicious and satisfying outcome. The base of creamy Greek yogurt provides a tangy and protein-rich foundation, while smooth peanut butter lends its irresistible flavor and healthy fats. Choosing plain yogurt allows for complete control over the sweetness, enabling you to tailor each bite to your personal preference using your favorite natural sweeteners.
Frozen Greek Yogurt Peanut Butter Bites
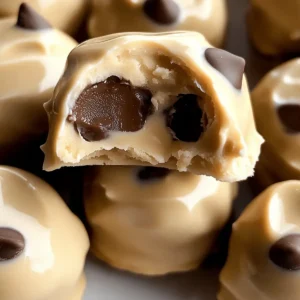
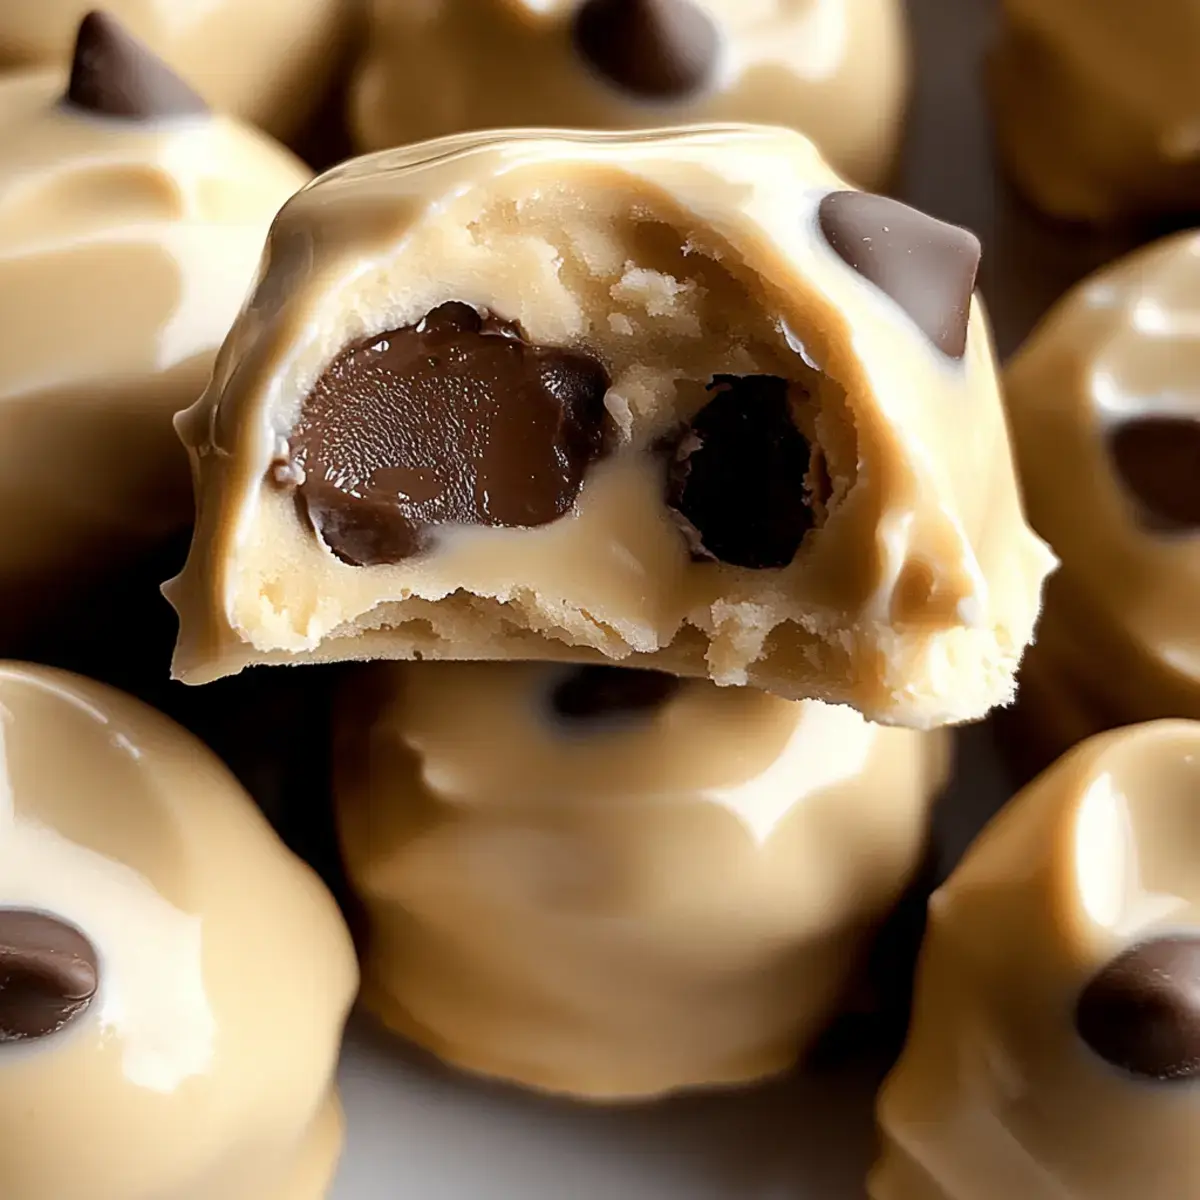
These Frozen Greek Yogurt Peanut Butter Bites are a high-protein, guilt-free snack that combines creamy Greek yogurt with rich peanut butter. Perfect for an afternoon pick-me-up or a post-workout reward, they are quick to make and infinitely customizable.
- For the Base
- 2 cups Greek Yogurt (plain for adjusting sweetness easily)
- 1 cup Peanut Butter (or swap in almond or cashew butter if preferred)
- For Sweetening
- Sweetener (Optional) (consider honey or maple syrup)
- For Extra Indulgence
- 1 cup Chocolate (Optional) (for dipping after freezing)
- 1Mix the Base: In a mixing bowl, combine Greek yogurt and peanut butter. Stir until the mixture is smooth, about 2-3 minutes.
- 2Sweeten to Taste: Add sweetener if desired, stirring well and tasting to customize sweetness.
- 3Fill the Molds: Spoon the mixture into ice cube trays or silicone molds, pressing firmly.
- 4Freeze Until Solid: Place molds in the freezer for at least 2-3 hours until solid.
- 5Remove from Molds: Remove molds from the freezer and twist to release the bites.
- 6Store for Later: Transfer the bites to a labeled freezer bag or airtight container for storage.
Keywords: Greek yogurt, peanut butter, frozen snack, healthy snack, high protein, no bake, easy recipe, customizable
- greek yogurt: a creamy, protein-packed base that offers a slightly tangy flavor.
- peanut butter: provides rich flavor and healthy fats, acting as the perfect complement to the yogurt.
- sweetener (optional): honey, maple syrup, or agave nectar to adjust the sweetness level to your liking.
- chocolate chips (optional): for melting and dipping, adding an extra layer of decadent indulgence.
The exact quantities for these components are conveniently detailed within the recipe card, ensuring you have all the precise measurements needed for success.
Variations
The beauty of these Frozen Greek Yogurt Peanut Butter Bites lies in their incredible adaptability, allowing you to tailor them to nearly any dietary need or flavor preference imaginable. This section explores a few exciting ways to transform the basic recipe into something truly unique and perfectly suited to your palate.
For those following a lower-carbohydrate lifestyle, the modifications are simple yet impactful. You can drastically reduce the carbohydrate count by opting for a sugar-free sweetener, such as stevia or erythritol, instead of honey or maple syrup. Furthermore, choosing a full-fat, plain Greek yogurt will ensure a creamier texture and higher fat content, which is often desired in low-carb eating plans. This adjustment makes them an excellent, guilt-free snack for keto and paleo followers.
If you’re aiming for a completely vegan treat, the substitution is equally straightforward. Simply swap the Greek yogurt for a thick, unsweetened coconut yogurt or a cashew-based yogurt alternative. Ensure the yogurt is of a creamy, rich consistency to mimic the texture of Greek yogurt. For the peanut butter, always double-check that it doesn’t contain any hidden dairy ingredients, although most natural nut butters are vegan-friendly. This vegan version maintains all the delightful creaminess and satisfying nature of the original.
Adding a touch of sophistication and flavor can be achieved by incorporating additional ingredients into the mix. Consider folding in finely chopped dark chocolate chips for a richer, more decadent bite, or perhaps a swirl of your favorite jam for a fruity surprise. A sprinkle of cinnamon or a pinch of nutmeg can add a warm, comforting spice note, especially perfect for cooler months. These small additions transform the basic bite into a gourmet experience, proving that healthy snacks can be incredibly exciting and varied.
For an extra protein boost, perfect for post-workout recovery or sustained energy, consider stirring in a tablespoon of your favorite unflavored or vanilla protein powder into the yogurt-peanut butter mixture. This addition will slightly alter the texture, making it a bit thicker, so you might need to adjust the consistency with a tiny splash of milk or water if it becomes too stiff. This simple enhancement elevates the nutritional profile significantly, turning these bites into a powerhouse snack.
Finally, for those who enjoy a bit of crunch, incorporating finely crushed nuts or seeds into the mixture before freezing can add a wonderful textural contrast. Almond slivers, chopped walnuts, or even a sprinkle of chia seeds will provide a satisfying bite and boost the healthy fat and fiber content. Ensure the nuts are finely chopped so they distribute evenly within the frozen bites. This textural variation makes each bite more engaging and provides a delightful surprise.
How to Prepare Frozen Greek Yogurt Peanut Butter Bites
Step 1: Preparing the Base Mixture
The foundation of these incredible frozen treats begins with the careful combination of two key ingredients: Greek yogurt and peanut butter. In a medium-sized mixing bowl, gather your ingredients, ensuring the peanut butter is at a consistency that is easy to stir, perhaps slightly softened if it has been refrigerated for a long time. You want to achieve a smooth, uniform blend that will form the perfect base for your bites.
Using a sturdy spatula or a wooden spoon, begin to vigorously stir the Greek yogurt and peanut butter together. Your goal is to create a homogenous mixture, free from any streaks of yogurt or dollops of peanut butter. Continue mixing until the consistency is wonderfully creamy and smooth, a process that typically takes about 2 to 3 minutes of dedicated stirring. This thorough blending is essential for ensuring that every single bite of your Frozen Greek Yogurt Peanut Butter Bites delivers that perfect creamy, nutty flavor profile.
The texture at this stage should be akin to a thick, luscious frosting. If you find that your mixture is too thick to stir easily, you can add a very small amount of milk (dairy or non-dairy) or even a teaspoon of water to loosen it up slightly. Conversely, if it seems too thin, a small spoonful of additional peanut butter or even a bit of chia seeds can help to thicken it as it chills. Getting this consistency just right now will pay dividends when you move to the molding stage, ensuring beautiful, well-formed bites.
Step 2: Adjusting the Sweetness
Once your Greek yogurt and peanut butter are perfectly combined into a smooth, creamy base, it’s time to introduce your preferred level of sweetness. This step is entirely optional, as many people enjoy the natural tang of the yogurt and the inherent sweetness of the peanut butter. However, if you prefer a sweeter treat, this is where you can customize your Frozen Greek Yogurt Peanut Butter Bites to perfection.
Choose your preferred sweetener; options like honey, maple syrup, agave nectar, or even a sugar-free alternative like stevia or erythritol work wonderfully. Begin by adding a small amount, perhaps one tablespoon of honey or maple syrup, to the mixture. Stir it in thoroughly with your spatula, ensuring it is completely incorporated into the yogurt-peanut butter blend. The key here is to taste as you go, allowing yourself to fine-tune the sweetness until it perfectly matches your palate.
It’s important to remember that the sweetness of the final product will also be influenced by the type of peanut butter used and whether it has added sugars. If you are using a natural peanut butter that is unsweetened, you will likely need to add more sweetener. Continue adding small increments of sweetener, stirring and tasting after each addition, until you achieve your ideal balance. This careful calibration ensures that your Frozen Greek Yogurt Peanut Butter Bites are not too bland nor overwhelmingly sweet, striking that perfect flavor harmony.
Step 3: Filling the Molds
With your delightfully flavored and perfectly sweetened mixture ready, the next step is to carefully portion it into your chosen molds. Ice cube trays, especially silicone ones, are excellent for this purpose, as they are flexible and make for easy removal of the frozen bites. Alternatively, small silicone candy molds in fun shapes can add an extra touch of charm to your treats, making them even more appealing, especially for children.
Using your spatula or a small spoon, carefully fill each cavity of the ice cube tray or silicone mold with the yogurt-peanut butter mixture. It’s important not to overfill the molds; aim to fill them about three-quarters of the way full. This prevents the mixture from spilling over the edges as it freezes and expands slightly, and it also ensures that the bites are a manageable size and thickness. Gently press the mixture down into the bottom of each mold to eliminate any air pockets and ensure a smooth, even surface.
Take your time with this step, ensuring each mold is filled neatly and consistently. A well-filled mold will result in uniformly shaped Frozen Greek Yogurt Peanut Butter Bites that are aesthetically pleasing and easy to handle. Once all the molds are filled, you can gently tap the tray on your counter a couple of times to settle the mixture and ensure an even distribution within each cavity. This meticulous filling process sets the stage for perfect frozen treats.
Step 4: Freezing for Firmness
Once your molds are filled to perfection, it’s time to send them on their journey to becoming firm, delightful Frozen Greek Yogurt Peanut Butter Bites. Carefully place the filled trays or molds onto a flat surface in your freezer. Ensuring the trays are level is crucial to prevent the mixture from slanting and creating uneven bites.
Allow the bites to freeze for a minimum of 2 to 3 hours. The exact freezing time can vary depending on the power of your freezer and the thickness of the mixture in the molds. You are looking for the bites to be completely solid and firm to the touch. To test for readiness, you can gently press on the edge of one of the bites; if it feels hard and doesn’t indent, they are likely ready to be removed from their molds.
It is important not to rush this freezing process. If the bites are not fully frozen, they will be difficult to remove from the molds and may lose their shape. Freezing them until they are completely solid ensures that they hold their form well, making them easy to store and enjoy. Planning ahead is key, as these require adequate time to transform from a soft mixture into satisfying frozen snacks. Patience during this phase guarantees the best possible outcome for your delightful bites.
Step 5: Removing from Molds
The moment of truth has arrived: it’s time to liberate your perfectly frozen delights from their molds! Once the bites have achieved a firm, solid state after their time in the freezer, carefully remove the trays from the freezer. If you are using silicone molds, this process is generally quite simple and yields excellent results.
To remove the Frozen Greek Yogurt Peanut Butter Bites, gently flex the silicone mold. You can also try pushing up from the bottom of each individual cavity. If the bites are still being a bit stubborn, a quick trick is to turn the mold upside down and gently tap the back of it against a clean surface. Another helpful method, especially for plastic ice cube trays, is to run the bottom of the tray under a stream of lukewarm water for just a few seconds; the slight warmth can help loosen the frozen bites without melting them.
Be delicate during this extraction process to maintain the shape of each bite. Once a bite is released, place it on a plate or a parchment-lined baking sheet. Repeat this process for all the molds, carefully freeing each one. Seeing them pop out cleanly, perfectly formed and ready to be enjoyed, is a deeply satisfying part of making these simple yet delicious treats. They are now ready to be stored or even enjoyed immediately!
Step 6: Storing for Future Enjoyment
You’ve successfully created your batch of Frozen Greek Yogurt Peanut Butter Bites, and now it’s time to ensure their longevity and easy accessibility for future snacking. Proper storage is key to maintaining their delightful texture and flavor for as long as possible, preventing freezer burn and preserving their overall quality.
Transfer the frozen bites from the plate or parchment paper into an airtight freezer bag or a freezer-safe container. If using a bag, it’s a good idea to press out as much air as possible before sealing it to further minimize the risk of freezer burn. Label the bag or container with the date you prepared them; this is a helpful practice for keeping track of freshness and ensuring you consume them within their optimal window.
When stored correctly in the freezer, these bites can maintain their delicious taste and texture for up to two weeks. This makes them an ideal make-ahead snack, perfect for having on hand whenever a healthy, satisfying treat is needed. Whether you need a quick post-workout refuel, an afternoon energy boost, or a healthy dessert alternative, your stash of Frozen Greek Yogurt Peanut Butter Bites will be ready and waiting for you.
Pro Tips for Frozen Greek Yogurt Peanut Butter Bites
Achieve Creamy Smoothness: Ensure you stir the Greek yogurt and peanut butter together thoroughly until they are completely combined. Any lumps at this stage will translate to an inconsistent texture once frozen, detracting from the overall smooth, creamy experience you desire from these delightful bites.
Taste and Adjust Sweetness: Don’t be afraid to taste your mixture as you add sweetener. What tastes perfect to one person might be too sweet or not sweet enough for another. Gradually add your sweetener of choice (like honey or maple syrup) and taste until you hit your personal ideal flavor balance for the Frozen Greek Yogurt Peanut Butter Bites.
Mold Filling Precision: Avoid overfilling your ice cube trays or silicone molds. Leave a small amount of space at the top. This not only prevents spills in the freezer but also makes it significantly easier to pop the frozen bites out of the molds without them breaking or sticking.
Ingredient Quality Matters: For the most flavorful and satisfying Frozen Greek Yogurt Peanut Butter Bites, use good quality ingredients. Opt for a thick, full-fat Greek yogurt and a natural, creamy peanut butter (or your preferred nut butter). The better the base ingredients, the more delicious your final product will be.
Proper Freezing Technique: Make sure your freezer is at an optimal temperature, typically 0°F (-18°C). Consistent, deep freezing is essential for the bites to set properly and maintain their firm structure. If your freezer temperature fluctuates, the bites might not freeze as solidly, potentially affecting their texture and how well they hold their shape after removal from the molds.
Serving Suggestions for Frozen Greek Yogurt Peanut Butter Bites
Decoration
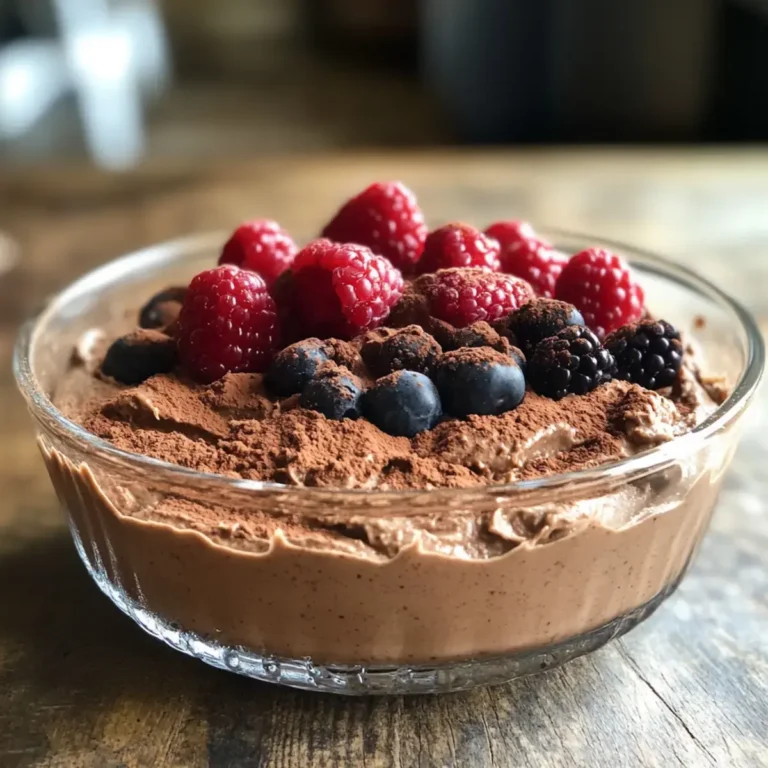
Elevate the visual appeal of your Frozen Greek Yogurt Peanut Butter Bites with simple yet stunning decorative touches. A delicate drizzle of melted dark chocolate over the top can add a touch of elegance and a hint of extra flavor. For a pop of color and texture, sprinkle a few tiny edible flowers or a light dusting of cocoa powder over the chocolate drizzle before it sets. A tiny dollop of unsweetened whipped cream on top of each bite can also make them feel incredibly festive and decadent, transforming them into a miniature dessert masterpiece.
Side Dishes
While these bites are perfect on their own, they also pair wonderfully with a variety of complementary items to create a more complete snack or light meal experience. A vibrant bowl of fresh, seasonal fruits like berries, melon, and grapes offers a refreshing contrast to the creamy, cool texture of the bites. For a heartier option, serve them alongside a small portion of homemade granola or a sprinkle of chopped nuts for added crunch and flavor. They also make a delightful accompaniment to a glass of cold milk or a refreshing herbal tea, cleansing the palate and enhancing the overall enjoyment.
Creative Serving Ideas
Think beyond just a simple snack when serving these versatile bites. They can be artfully arranged on a platter for a party dessert, perhaps interspersed with fresh fruit or chocolate-dipped strawberries. For a healthy breakfast option, embed a few bites into a bowl of overnight oats or yogurt parfait, allowing them to soften slightly as they meld with the other ingredients. Consider them as a unique addition to a children’s “build-your-own” dessert bar, alongside various toppings and dips. They even work surprisingly well as a “secret ingredient” addition to a smoothie, providing a creamy texture and a subtle peanut butter-yogurt flavor boost that is truly delightful and unexpected.
Preparation & Storage
Storing Leftovers
Leftovers of your delicious Frozen Greek Yogurt Peanut Butter Bites should be stored promptly to maintain their quality and prevent them from thawing. Once removed from the molds and before they begin to soften significantly, transfer them into a high-quality, airtight freezer bag or a sturdy freezer-safe container. Ensure that the container is well-sealed to create a barrier against air, which is the primary culprit for freezer burn.
It is highly recommended to label the bag or container with the date of preparation. This simple step helps you keep track of how long the bites have been in the freezer, ensuring you consume them at their peak freshness. When stored correctly in the freezer, these delightful treats can maintain their optimal texture and flavor for up to two weeks.
While they are designed to be enjoyed frozen, if you happen to have any that have thawed slightly, you can try refreezing them, but be aware that the texture might be slightly compromised, becoming a bit icier or softer than originally intended. For the best experience, always aim to consume them directly from the freezer.
Freezing
The freezing process is integral to achieving the perfect texture and consistency for these delightful yogurt and peanut butter bites. After portioning the mixture into your ice cube trays or silicone molds, place them on a level surface in your freezer. This ensures that the bites freeze evenly and maintain their intended shape without becoming lopsided or deformed.
Allow the bites to freeze completely, which typically takes at least 2 to 3 hours. The exact time can vary depending on the efficiency of your freezer and the thickness of the mixture within the molds. You’ll know they are ready when they are completely firm and solidify to the touch. A gentle press on the edge should reveal a hard, unyielding surface, indicating they are perfectly frozen and ready for the next step.
Once frozen solid, carefully remove the bites from their molds. It’s best to do this quickly to minimize any thawing. Immediately transfer the firm bites into your prepared freezer-safe bags or containers. By freezing them thoroughly and then transferring them to their storage containers, you ensure they remain solid and ready to enjoy whenever a healthy craving strikes, preserving their ideal texture.
Reheating
The concept of “reheating” these Frozen Greek Yogurt Peanut Butter Bites is a bit of a misnomer, as they are intended to be enjoyed in their frozen state, offering a refreshing and cool treat. Therefore, direct reheating is generally not recommended, as it would melt the yogurt and change the delightful texture entirely.
However, if you find them too hard to bite into straight from the freezer, or if you prefer a slightly softer consistency, there’s a simple method to achieve this. Simply let the frozen bites sit at room temperature for about 5 to 10 minutes before consuming them. This brief resting period allows them to soften just enough to be more easily bitten into, while still retaining a wonderfully cool and refreshing quality.
This short period of tempering is the closest you’ll get to “reheating,” and it’s the perfect way to enjoy them if you find them excessively hard. It strikes a delightful balance between a fully frozen, solid treat and a slightly softened, creamier confection, ensuring you can enjoy your Frozen Greek Yogurt Peanut Butter Bites in a way that best suits your preference.
Frequently Asked Questions
-
How do I choose the right Greek yogurt for the recipe?
Choosing the right Greek yogurt is key to achieving the perfect texture and flavor for your Frozen Greek Yogurt Peanut Butter Bites. I recommend opting for plain Greek yogurt, as it allows you to control the sweetness when you add any sweeteners. Full-fat versions typically yield a creamier result than non-fat options, which can sometimes be a bit icier. If you crave a different flavor, feel free to experiment with flavored yogurts, but be mindful that they may alter the overall taste and sweetness of your bites, and might contain added sugars you’d prefer to avoid.
-
What’s the best way to store Frozen Greek Yogurt Peanut Butter Bites?
To keep your Frozen Greek Yogurt Peanut Butter Bites fresh and at their best, transfer them into a labeled freezer bag or an airtight container. Make sure to mark the date on the bag to track freshness, which is crucial for enjoying them at their optimal quality. They can be stored safely in the freezer for up to 2 weeks for the best flavor and texture. If you choose to keep them in the fridge instead, they’ll last for about 3 days but may have a significantly softer texture, more akin to a yogurt dip than a frozen bite.
-
Can I freeze these bites for longer than 2 weeks?
While you can technically freeze your Frozen Greek Yogurt Peanut Butter Bites for longer than 2 weeks, I wouldn’t necessarily recommend it for the best possible eating experience. Over extended periods in the freezer, changes in temperature and exposure to air can lead to freezer burn, which can deteriorate their quality, alter their texture, and impart an off-flavor. For optimal taste and that delightful creamy-yet-firm consistency, aiming to consume them within the 2-week window is ideal. If you find you have more than you can eat in that time, consider sharing them with friends or family!
-
What should I do if my mixture turns out lumpy?
Absolutely, if you notice lumps in your mixture, don’t worry, it’s a common issue that can be easily rectified! The best approach is to pour your entire mixture into a food processor or a high-powered blender. Pulse it a few times, scraping down the sides as needed, until the mixture is completely smooth and homogenous. This extra step ensures that your Frozen Greek Yogurt Peanut Butter Bites have a wonderfully creamy texture without any unappetizing lumps—perfect for a delightful and professional-looking snack experience!
-
Are these bites suitable for those with nut allergies?
If you or someone you’re serving has a nut allergy, you can certainly customize this recipe to be nut-free while still enjoying the delicious concept! Simply swap out the peanut butter for an alternative like sunflower seed butter, tahini (sesame seed paste), or a commercially available nut-free butter blend. Always make sure to check the labels of all your ingredients for hidden allergens or cross-contamination warnings to ensure the safety of everyone enjoying your Frozen Greek Yogurt Peanut Butter Bites. This adaptability means everyone can partake in this healthy treat!