Creamy New York Style Baked Cheesecake Recipe with Vanilla Bean and Sour Cream Topping Perfect for Beginners
That’s what my coworker whispered one afternoon, sliding a tiny plate across our lunch table. I was skeptical—cheesecake always seemed like one of those fancy desserts that required too much fuss and fancy equipment. But that bite? It changed everything.
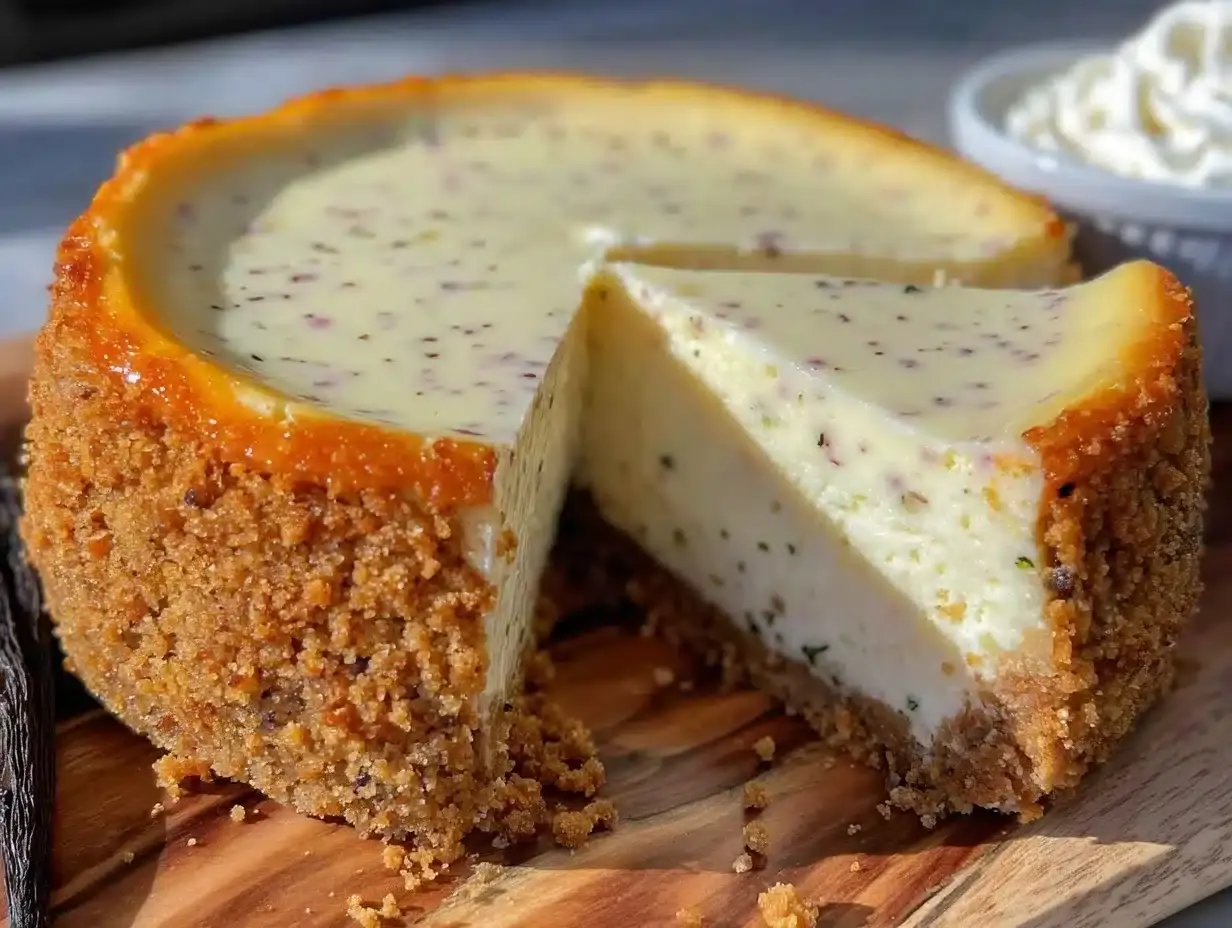
Turns out, making a creamy New York style baked cheesecake with a vanilla bean and sour cream top isn’t as intimidating as I thought. In fact, it was kind of a happy accident from a busy weeknight when I had just a few ingredients on hand and no time to waste. A vanilla bean pod sitting in the fridge begged to be used, and that sour cream topping was a random inspiration. The result was this luscious, dense, yet light cheesecake that felt like comfort wrapped in elegance.
Why You Will Love This Recipe
- Quick Preparation: This creamy New York style baked cheesecake comes together with under an hour of active prep time, making it an ideal choice for weeknight baking or when dessert cravings strike unexpectedly. It’s a fantastic option for those evenings when you desire something special without spending hours in the kitchen.
- Simple, Accessible Ingredients: You won’t need to hunt for obscure items; this recipe relies on common pantry staples like cream cheese, eggs, sugar, vanilla, and sour cream. This makes it incredibly convenient and budget-friendly, ensuring you can whip up this delightful dessert whenever the mood strikes.
- Impressive Presentation: Despite its straightforward preparation, this cheesecake looks and tastes like a gourmet creation. It’s perfect for birthdays, holidays, or any special occasion where you want to present a show-stopping dessert without the stress of complex techniques.
- Universal Crowd-Pleaser: From children to adults, everyone is drawn to the perfect balance of creamy richness, subtle vanilla notes, and the gentle tang from the sour cream topping. It’s consistently met with rave reviews, disappearing from plates faster than you can say “more, please!”
- Unforgettable Flavor Profile: The secret to its exceptional taste lies in the addition of a real vanilla bean and the tangy sour cream topping. This combination creates a depth of flavor and a smoothness that elevates it beyond the ordinary, making each bite a truly memorable experience.
What stuck with me beyond the rich taste was how this recipe feels like a quiet celebration — no flash, no stress, just pure creamy satisfaction. It’s the kind of dessert that makes you pause and savor, a little reward for yourself or a crowd. Honestly, I ended up making it three times that week (not that I’m complaining).
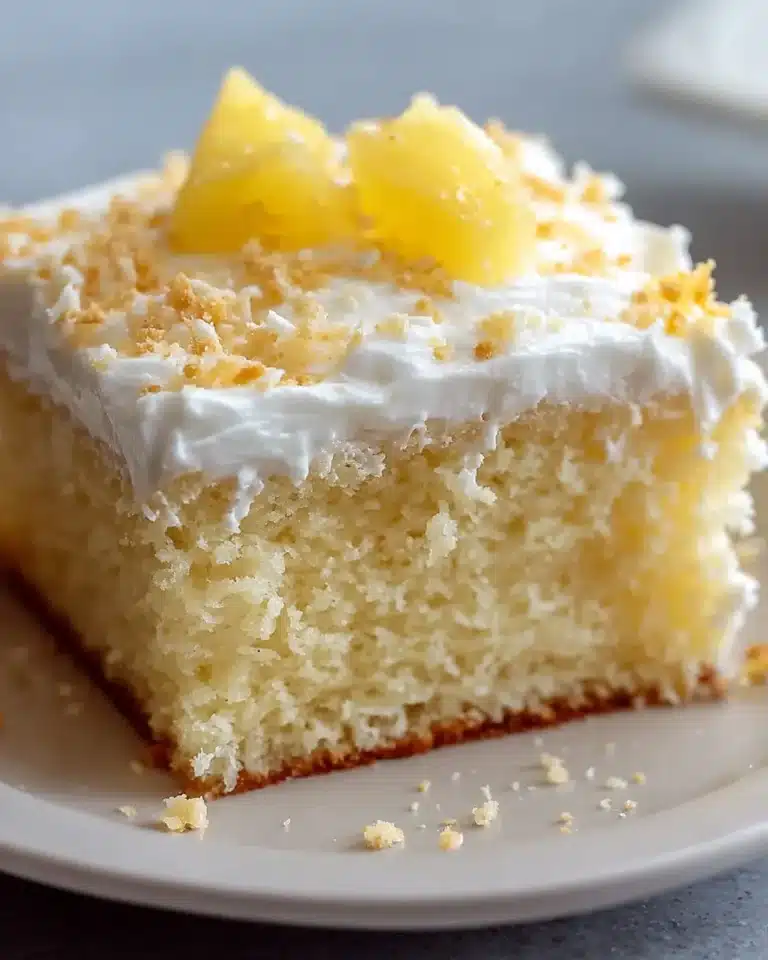
This isn’t just another cheesecake recipe floating around — the sour cream layer on top keeps it moist and adds a gentle tang, preventing that dry, crumbly finish you sometimes get. And the vanilla bean? It’s not just about flavor but the little black specks that make it feel handmade and special. If you appreciate dishes like the fluffy German pancake or the rich easy lobster bisque, you’ll find the same satisfying ease and flavor here.
Honestly, this recipe has been my go-to when I want something impressive but don’t want to spend all day in the kitchen. It’s like comfort food meets classic New York elegance, and you can trust it’ll impress without stress.
Ingredients You Need
This creamy New York style baked cheesecake recipe uses simple, wholesome ingredients to deliver bold flavor and a satisfying texture without the usual fuss. Most are pantry staples, and you can tweak a few for dietary preferences. High-quality ingredients are the bedrock of any exceptional dessert; choosing full-fat dairy and a fragrant vanilla bean will make a noticeable difference in the final taste and texture.
Creamy New York Style Baked Cheesecake Recipe with Vanilla Bean and Sour Cream Topping

A luscious, dense yet light New York style baked cheesecake topped with a tangy sour cream layer and real vanilla bean seeds, perfect for beginners and special occasions. This recipe is designed to be approachable, yielding a creamy, elegant dessert with minimal fuss.
- 4 packages (8 oz / 226 g each) cream cheese, softened
- 1 1/4 cups (250 g) granulated sugar
- 4 large eggs, room temperature
- 1 cup (240 ml) sour cream for topping
- 2/3 cup (160 ml) sour cream for batter
- 1 whole vanilla bean pod, split and seeds scraped
- 2 tablespoons (15 g) all-purpose flour
- 1/4 teaspoon salt
- 1 1/2 cups (150 g) graham cracker crumbs
- 1/4 cup (50 g) unsalted butter, melted
- 2 tablespoons sugar (for crust)
- 1Preheat oven to 325°F (160°C). Mix graham cracker crumbs, melted butter, and 2 tablespoons sugar until texture resembles wet sand. Press evenly into bottom of greased 9-inch (23 cm) springform pan. Bake for 10 minutes and let cool.
- 2Beat softened cream cheese on medium speed until smooth and creamy. Gradually add 1 1/4 cups sugar, mixing well after each addition. Scrape down sides as needed.
- 3Add eggs one at a time, beating just until combined after each addition to avoid over-mixing.
- 4Stir in 2/3 cup sour cream, vanilla bean seeds, flour, and salt. Mix gently until smooth and pourable.
- 5In a small bowl, combine 1 cup sour cream, 2 tablespoons sugar, and 1 teaspoon vanilla extract or remaining vanilla bean seeds for topping. Set aside.
- 6Pour filling over cooled crust and smooth top. Spread sour cream topping evenly over batter.
- 7Place springform pan in a larger roasting pan. Pour hot water into roasting pan until it reaches halfway up the sides of the springform pan.
- 8Bake at 325°F (160°C) for about 1 hour and 15 minutes, until edges are set but center jiggles slightly.
- 9Remove from water bath and cool on wire rack for 1 hour. Refrigerate for at least 4 hours or overnight before serving.
Keywords: New York style cheesecake, baked cheesecake, creamy cheesecake, vanilla bean cheesecake, sour cream topping, easy cheesecake recipe, beginner cheesecake
- cream cheese, softened: Four 8-ounce (226g) packages are essential for that signature dense and creamy texture.
- granulated sugar: 1 1/4 cups (250g) will provide just the right amount of sweetness to balance the tanginess of the dairy.
- large eggs, room temperature: Four eggs help bind the ingredients and contribute to the rich, custardy filling.
- sour cream: 1 cup (240ml) for the topping and 2/3 cup (160ml) for the batter, providing moisture and a pleasant tang.
- vanilla bean: One whole pod, split and seeds scraped, infuses the cheesecake with a complex, authentic vanilla flavor and beautiful speckles.
- all-purpose flour: Just 2 tablespoons (15g) are needed to lightly stabilize the filling without making it heavy or cakey.
- salt: 1/4 teaspoon helps to enhance all the other flavors and balance the sweetness.
- graham cracker crust: This classic base requires 1 1/2 cups (150g) of graham cracker crumbs, mixed with 1/4 cup (50g) of melted unsalted butter and 2 tablespoons of sugar.
The quantities for each ingredient are detailed within the provided recipe card. For the graham cracker crust, if you find yourself without graham crackers, digestive biscuits or even finely crushed shortbread cookies can serve as an excellent substitute, offering a slightly different but equally delightful flavor profile.
The sour cream topping is what sets this cheesecake apart from others — it keeps it moist and gives a subtle tang that makes every bite interesting. I always use full-fat sour cream here because it adds creaminess and depth. If you’re making this for a special occasion, consider adding a touch of lemon zest to the batter for a brighter note, or even a swirl of good quality fruit preserve into the filling before baking. Remember that room temperature ingredients are key for a smooth, lump-free batter; take your cream cheese and eggs out of the fridge at least an hour before you plan to start mixing.
Variations
This creamy New York style baked cheesecake recipe is a fantastic base, and you can tweak it a bit to suit your tastes or dietary needs. Consider adding a whisper of almond extract along with the vanilla for a subtle nuttiness that complements the creamy base beautifully.
For a vibrant fruity twist, gently swirl some high-quality raspberry or cherry compote into the cheesecake batter just before baking. This not only adds a gorgeous marbled effect but also introduces a delightful tartness that cuts through the richness. Ensure the compote isn’t too watery, or it could affect the cheesecake’s texture.
If you’re aiming for a lighter option, you can experiment with reduced-fat cream cheese and sour cream, though this may slightly alter the ultimate richness. Alternatively, for a completely dairy-free experience, explore vegan cream cheese and cashew-based sour cream alternatives. The baking times might need minor adjustments with these substitutions.
A popular variation involves adding a hint of citrus. A tablespoon or two of fresh lemon or lime zest stirred into the batter can provide a wonderfully bright counterpoint to the sweet, creamy filling. This makes the cheesecake feel lighter and more refreshing, especially during warmer months.
For those who adore chocolate, consider incorporating 1/4 cup of unsweetened cocoa powder into the dry ingredients, or even folding in some mini chocolate chips for delightful pockets of melted chocolate within the cheesecake. A chocolate ganache drizzle on top would be the ultimate indulgence for chocolate lovers.
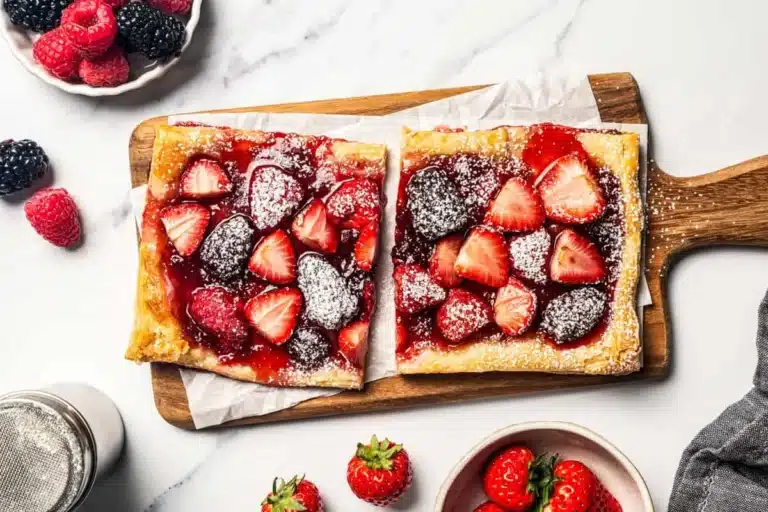
If you are looking for something different and equally delicious, you might enjoy the simplicity of this easy berry tart, which offers a delightful fruitiness with a crisp crust.
How to Prepare creamy New York style baked cheesecake
Step 1: Prepare the Graham Cracker Crust
Preheat your oven to a moderate 325°F (160°C). In a medium-sized mixing bowl, combine the graham cracker crumbs with the melted unsalted butter and the 2 tablespoons of sugar. Stir this mixture thoroughly until it resembles the consistency of wet sand, ensuring all the crumbs are evenly coated with the butter and sugar.
Next, take your greased 9-inch springform pan and press this crumb mixture firmly and evenly into the bottom. You want a compact and sturdy base that will hold its shape. You can use the bottom of a glass or a flat measuring cup to help achieve a smooth, even surface. Once pressed, bake this crust for approximately 10 minutes until it’s lightly golden and fragrant. After baking, remove it from the oven and set it aside to cool completely while you focus on preparing the luscious cheesecake filling.
The key here is to create a solid foundation. A well-pressed and pre-baked crust prevents it from becoming soggy once the wet cheesecake filling is added. Make sure the butter is fully incorporated; if the mixture seems too dry, you can add another teaspoon of melted butter. A slightly thicker crust can also provide a more satisfying textural contrast to the creamy filling.
Step 2: Create the Creamy Cheesecake Filling
In a large mixing bowl, place your softened cream cheese. Using an electric mixer on medium speed, beat the cream cheese until it is exceptionally smooth and creamy, ensuring there are absolutely no lumps. This initial step is crucial for achieving that signature silky texture that defines a New York style cheesecake. Take your time here, scraping down the sides of the bowl with a spatula periodically to ensure all the cream cheese is incorporated and uniformly smooth.
Gradually introduce the granulated sugar into the cream cheese mixture, beating well after each addition. Continue to mix until the sugar is fully dissolved and the batter has a smooth, light appearance. Again, remember to scrape down the sides of the bowl to maintain an even consistency throughout the batter. This gradual addition prevents the sugar from clumping and helps create a uniform texture.
The next critical step is to incorporate the eggs. Add them one at a time, beating on medium-low speed just until each egg is combined into the batter before adding the next. It is absolutely vital not to over-mix at this stage, as incorporating too much air can lead to cracks forming on the surface of your cheesecake during baking. Gently mixing ensures a dense, creamy final product.
Finally, gently stir in the sour cream, the scraped seeds from the vanilla bean pod, the all-purpose flour, and the salt. Mix these ingredients on low speed or by hand with a spatula until everything is just combined and the batter is smooth and glossy. The batter should be thick but still pourable, boasting a beautiful creamy color thanks to the vanilla bean specks. The delicate balance of these ingredients is what gives the cheesecake its signature flavor and texture, so avoid over-mixing to maintain that desired consistency.
This stage is where the magic truly happens, transforming simple ingredients into a rich, luxurious batter. The vanilla bean seeds, visible as tiny black specks, are not just for show; they impart a deeply aromatic and complex vanilla flavor that extract cannot replicate. The slight tang from the sour cream cuts through the richness, creating a perfectly balanced dessert. If you are a fan of similarly smooth and satisfying desserts, you might also enjoy this baked lemon chicken recipe which offers a different kind of comforting flavor profile.
Step 3: Prepare the Tangy Sour Cream Topping
In a separate, small bowl, combine the remaining sour cream (1 cup or 240ml) with 2 tablespoons of sugar. If you have any leftover vanilla bean seeds, you can stir them in here for an extra burst of vanilla flavor, or use 1 teaspoon of pure vanilla extract for convenience. Whisk these ingredients together until the sugar is dissolved and the mixture is smooth and well combined. This topping adds a wonderful tangy contrast and a beautiful glossy finish to the cheesecake.
This simple topping is what elevates this New York style cheesecake from good to absolutely divine. It adds a layer of complexity that prevents the cheesecake from being overly sweet and provides a welcome creaminess. The slight tartness of the sour cream beautifully balances the rich, sweet filling beneath, creating a flavor profile that is both decadent and refreshing.
Ensure the sugar is fully dissolved before you set the topping aside. A well-mixed topping will spread more evenly over the cheesecake, creating a uniform layer that bakes to a lovely, slightly golden hue. This step is quick and easy, but its impact on the final taste and appearance of the cheesecake is significant, making it a non-negotiable part of the process.
Step 4: Assemble and Bake the Cheesecake
Carefully pour the luscious cheesecake filling over the cooled graham cracker crust in the springform pan. Use a spatula to gently smooth the top, ensuring an even layer. Next, delicately spread the prepared sour cream topping evenly over the surface of the cheesecake batter. Aim for a smooth, consistent layer that covers the entire surface from edge to edge, creating a beautiful canvas for the baking process.
Prepare your water bath setup. Place the springform pan inside a larger, deep roasting pan or baking dish. Carefully pour hot water into the roasting pan, making sure the water level reaches about halfway up the sides of the springform pan. This water bath is crucial as it creates a humid environment, ensuring the cheesecake bakes evenly and preventing the dreaded cracks that can mar its surface. The gentle, indirect heat from the water bath is key to achieving that perfectly smooth, crack-free top.
Place the entire setup (roasting pan with water and cheesecake) into your preheated oven. Bake at 325°F (160°C) for approximately 1 hour and 15 minutes. You will know the cheesecake is ready when the edges are set and appear slightly puffed, but the center still jiggles slightly when you gently shake the pan. It should have a slightly wobbly appearance in the middle, indicating it will firm up as it cools.
Do not be tempted to overbake the cheesecake. Overbaking will result in a dry, rubbery texture and is a common cause of cracking. The residual heat will continue to cook the cheesecake as it cools, leading to a perfectly tender consistency. The water bath is a game-changer for cheesecake baking, providing a consistent and gentle heat that promotes even cooking and a smooth texture. If you’ve ever struggled with cheesecake cracking, this step is your best friend.
Step 5: Cool and Chill for Perfection
Once the baking time is complete, carefully remove the roasting pan from the oven. Lift the springform pan out of the hot water bath and place it on a wire cooling rack. Allow the cheesecake to cool at room temperature for at least 1 hour. This gradual cooling process is essential for preventing sudden temperature changes that can cause cracks and ensures the cheesecake sets properly before refrigeration.
After the initial hour of cooling, cover the cheesecake loosely with plastic wrap or foil. Place it in the refrigerator and chill for a minimum of 4 hours, or ideally, overnight. This extended chilling period is critical for the cheesecake to fully set, allowing its flavors to meld and its texture to become dense, creamy, and sliceable. Rushing this step will result in a softer, less structured cheesecake.
The patience exercised during the cooling and chilling phases directly impacts the final texture and structure of your cheesecake. A properly chilled cheesecake will slice cleanly, revealing its luxurious, creamy interior. If cracks do appear during cooling, do not fret; the sour cream topping often does a remarkable job of disguising them, and a dollop of whipped cream or fresh berries can easily cover any minor imperfections.
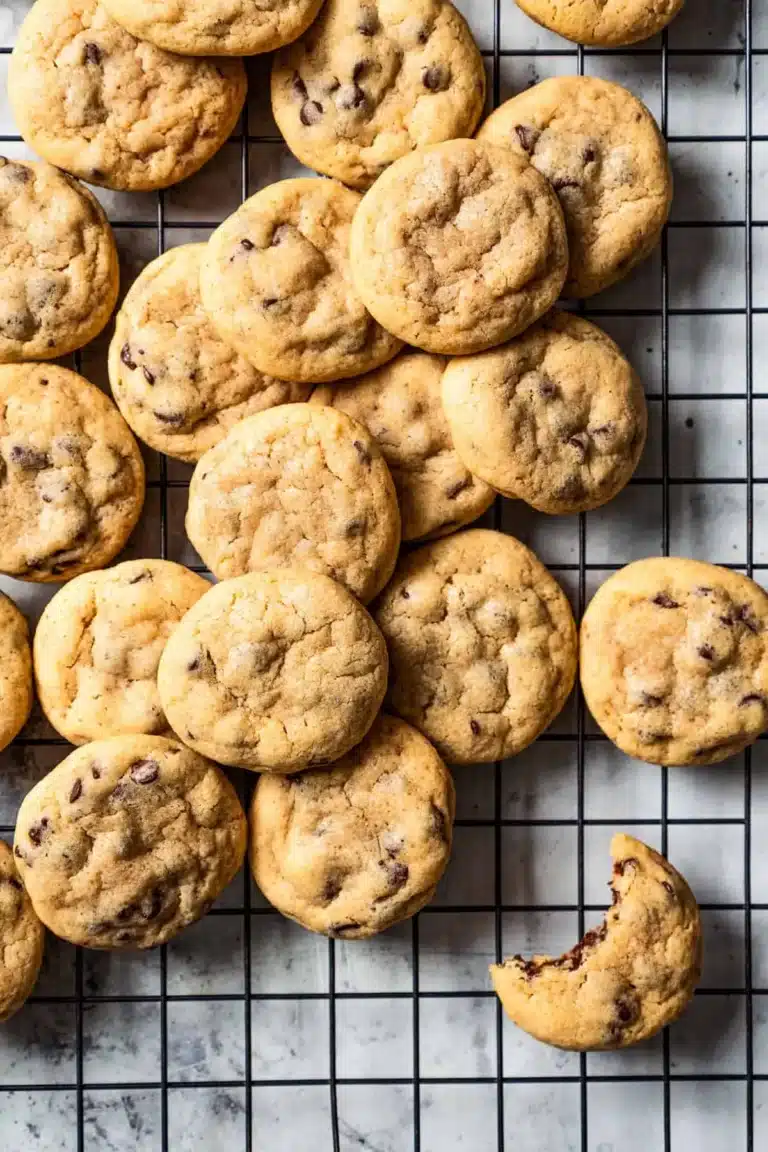
This slow and steady approach to cooling and chilling is what differentiates a truly magnificent cheesecake from a merely acceptable one. It allows the proteins in the eggs and dairy to set firmly, resulting in that characteristic dense yet tender crumb. For an extra touch of elegance before serving, consider letting the chilled cheesecake sit at room temperature for about 15-20 minutes; this slightly softens the edges, making it even creamier to eat. If you’re a fan of baked goods with a creamy texture, you might also enjoy this funfetti cookies recipe, which offers a different kind of delightful chewiness.
Pro Tips for creamy New York style baked cheesecake
Room Temperature is Key: Always ensure your cream cheese and eggs are at room temperature before you start. Cold ingredients will not blend smoothly, leading to lumps in your batter and potentially causing cracks. This simple step is the foundation for a truly silky cheesecake.
Don’t Overmix the Eggs: When adding eggs to the cream cheese mixture, beat on a low speed just until combined. Over-beating incorporates too much air, which expands during baking and then collapses, resulting in cracks and a less dense texture. Gentle is better here.
Embrace the Water Bath: While it seems like an extra step, baking your cheesecake in a water bath is non-negotiable for achieving a perfectly smooth, crack-free surface. It provides gentle, even heat and moisture, preventing the edges from overcooking before the center is done.
Know When to Stop Baking: Resist the urge to overbake. The cheesecake is ready when the edges are set and slightly puffed, but the center still has a slight wobble. It will continue to set as it cools. Pulling it out at this stage ensures that perfect creamy texture.
Patience with Cooling and Chilling: Cheesecakes hate sudden temperature changes. Allow it to cool gradually on a wire rack for at least an hour, then chill it thoroughly in the refrigerator for at least four hours (preferably overnight). This is essential for the cheesecake to firm up properly and develop its characteristic dense, creamy consistency.
Honestly, the first time I made a cheesecake without a water bath, I ended up with a cracked surface and a sad-looking dessert. Since then, I never skip it. Also, I learned the hard way that rushing the chilling time results in a crumbly mess — so give it those 4 hours or more in the fridge.
Serving Suggestions for creamy New York style baked cheesecake
Decoration
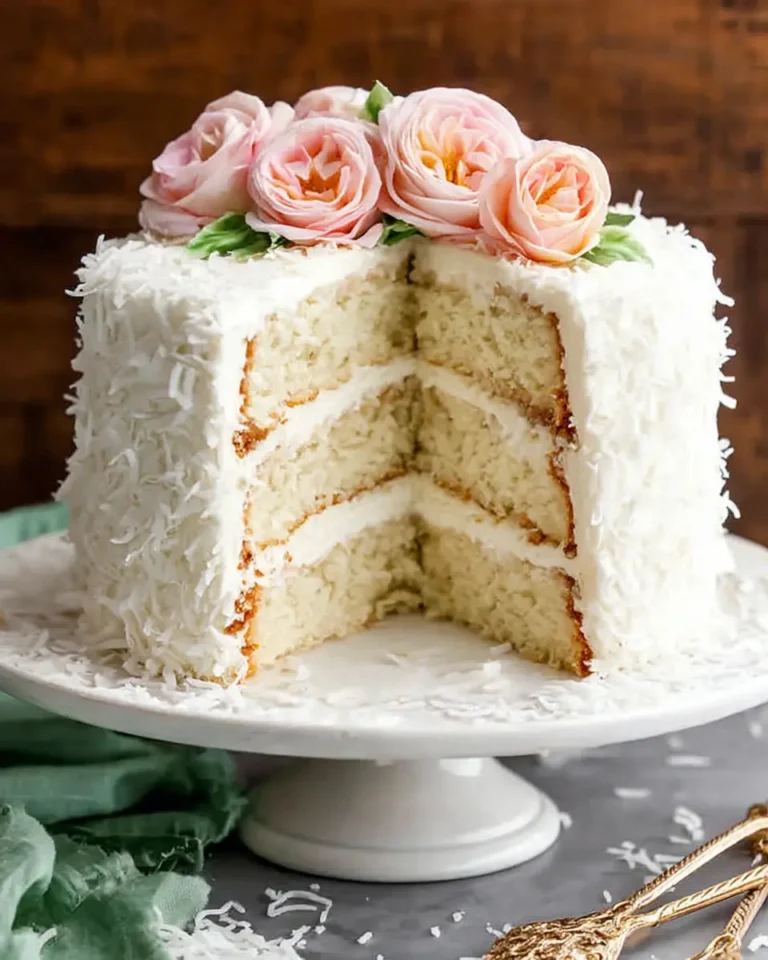
Keep it classic with a simple dusting of powdered sugar, a scattering of fresh mint leaves, or a delicate swirl of whipped cream. For a more vibrant look, arrange a medley of fresh berries—like raspberries, blueberries, and sliced strawberries—artfully around the edges or in the center. A drizzle of raspberry coulis or a simple berry compote also adds a beautiful splash of color and a touch of tartness.
If you’re feeling adventurous, a delicate chocolate ganache drizzle or even some toasted slivered almonds can provide an elegant and sophisticated finish. The key is to complement, not overpower, the rich, creamy flavor of the cheesecake itself. Consider the visual appeal; a few strategically placed elements can transform a slice into a work of art.
Side Dishes
While this cheesecake is a star on its own, a light and refreshing fruit salad makes an excellent accompaniment. Think a mix of melon, grapes, and berries, perhaps with a hint of lime juice for brightness. A small scoop of good quality vanilla or berry sorbet can also offer a delightful textural and temperature contrast.
For a more substantial pairing, consider a simple green salad with a light vinaigrette, or even some shortbread cookies. The goal is to provide a palate cleanser that doesn’t compete with the richness of the cheesecake. If you’re serving this as part of a larger meal, ensure the preceding courses are not overly heavy.
Creative Serving Ideas
Elevate your presentation by serving individual mini cheesecakes in ramekins or muffin tins, topped with a single perfect berry. You could also serve a slice with a warm caramel sauce or a dark chocolate sauce for an extra layer of indulgence. For a fun twist, try a deconstructed cheesecake: serve dollops of cheesecake filling with crumbled graham cracker crust and fresh fruit on the side.
Consider incorporating seasonal flavors into your toppings, such as a spiced apple compote in the fall or a lemon-poppy seed glaze in the spring. This makes the cheesecake feel unique and perfectly suited to the time of year. A small sprig of fresh mint or a delicate edible flower can add a final, charming touch.
Preparation & Storage
Storing Leftovers
Leftover cheesecake should be stored in an airtight container in the refrigerator. The plastic wrap should be snug against the surface of the cheesecake to prevent it from drying out. It typically stays fresh and delicious for up to 5 days when stored properly.
Actually, many people find that cheesecake tastes even better on the second or third day after it’s been made. This is because the flavors have more time to meld together, and the texture becomes even firmer and more uniformly creamy. So, don’t hesitate to make it a day in advance for the best results.
Freezing
Yes, this creamy New York style baked cheesecake freezes beautifully. For best results, ensure the cheesecake is fully cooled and chilled. Wrap the entire cheesecake tightly in a layer of plastic wrap, followed by a layer of heavy-duty aluminum foil to protect it from freezer burn. You can also freeze individual slices by wrapping them similarly.
When properly frozen, the cheesecake can maintain its quality for up to 3 months. To thaw, remove it from the freezer and unwrap it, then place it in the refrigerator to thaw overnight. Avoid thawing at room temperature, as this can affect the texture and potentially lead to condensation.
Reheating
Reheating cheesecake is generally not recommended, as it can alter its delicate texture. The beauty of this cheesecake lies in its chilled, creamy consistency. If you prefer a slightly softer texture, simply allow the cheesecake to sit at room temperature for about 15-20 minutes before serving, as mentioned in the pro tips.
The key is to serve it chilled or slightly tempered, never warm. If you have frozen slices, thawing them in the refrigerator overnight is the best way to retain their intended texture and flavor. Enjoying it at the correct temperature ensures the full, rich, and creamy experience.
Frequently Asked Questions
- Can I make this New York style cheesecake ahead of time, and how should I store it?
Absolutely! This cheesecake actually benefits from being made ahead of time, as the flavors have more time to meld and the texture firms up beautifully. Once it has completely cooled and chilled, cover it tightly with plastic wrap to prevent drying out. Store it in the refrigerator, where it will keep well for up to 5 days. Many find that its flavor and texture are even superior on the second or third day. - My cheesecake cracked on top. Is it ruined, and how can I prevent this in the future?
A cracked cheesecake is not ruined at all! Cracks are a common occurrence and do not affect the taste or texture significantly. The sour cream topping you’ve applied usually does a fantastic job of disguising minor cracks. To prevent cracks in the future, ensure you are using room temperature ingredients, avoid over-mixing the batter (especially the eggs), and always bake the cheesecake in a water bath. Also, avoid overbaking; the center should still have a slight jiggle. - How do I ensure the graham cracker crust doesn’t get soggy after baking the cheesecake?
To prevent a soggy crust, it’s crucial to pre-bake the crust for about 10 minutes before adding the filling, as specified in the recipe. Make sure the graham cracker crumbs are well-pressed into the pan to create a firm layer. Allowing the baked crust to cool completely before pouring in the cheesecake batter also helps. For extra insurance, you can chill the crust in the freezer for about 10-15 minutes after baking and cooling before adding the filling.