Coconut Cake with Coconut Milk
Embarking on the journey of creating a homemade Coconut Cake with Coconut Milk is an act of love, a delicious endeavor that promises a symphony of tropical flavors and tender textures. This isn’t just any cake; it’s a meticulously crafted dessert designed to transport your taste buds to a sun-drenched paradise with every single bite. The delicate balance of moisture from the coconut milk, the subtle sweetness, and the rich, creamy frosting make it an unforgettable centerpiece for any occasion.
From the initial mixing of ingredients to the final dusting of toasted coconut, the process is as rewarding as the outcome. It’s a recipe that encourages a bit of patience and care, ensuring that each layer is perfectly baked and that the final assembly is a testament to your culinary artistry. Prepare to impress your guests and yourself with this truly exquisite creation that embodies the very essence of comfort and celebration.
Why You Will Love This Recipe
- Exquisite Coconut Flavor: This cake boasts a profound and authentic coconut taste, thanks to the use of both coconut milk and coconut milk solids, ensuring a rich, layered flavor profile that isn’t just a whisper but a declaration of coconut’s deliciousness.
- Unbelievably Moist Texture: The secret to its tenderness lies in the full-fat coconut milk, which infuses the cake layers with exceptional moisture, resulting in a crumb that is both plush and delicate, preventing any dryness whatsoever.
- Delightful Textural Contrast: Experience a wonderful interplay of textures, from the soft, yielding cake layers to the slightly chewy coconut filling and the luxuriously smooth cream cheese frosting, creating a balanced and engaging bite every time.
- Make-Ahead Convenience: This cake is a baker’s dream for entertaining, as it can be baked, filled, and frosted in advance, holding its beautiful structure and flavor profile perfectly, making your hosting duties significantly less stressful.
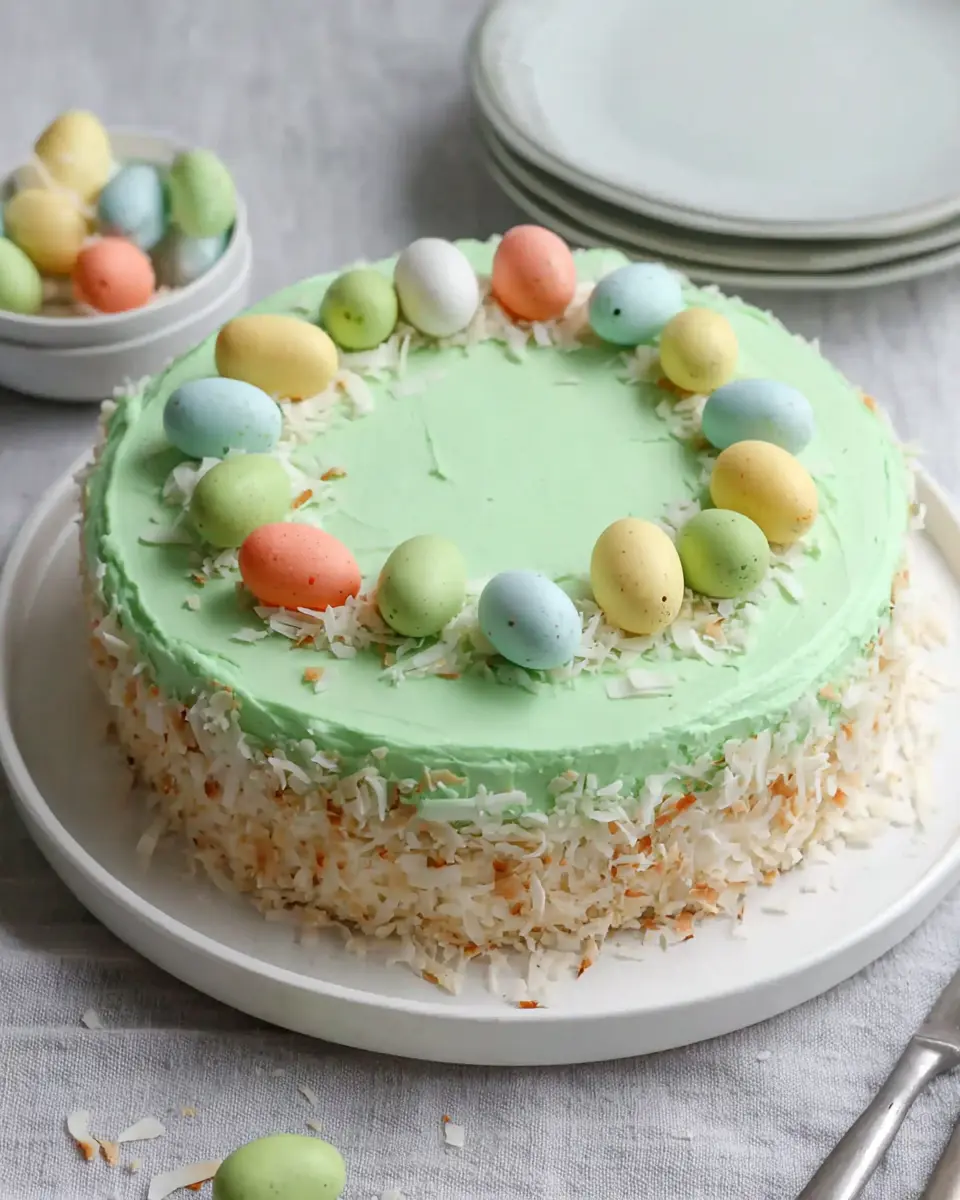
- Visually Stunning Presentation: With its potential for elegant decoration, including toasted coconut and charming chocolate eggs, this cake transforms into a showstopper that looks as impressive as it tastes, suitable for any special event or festive gathering.
Ingredients You Need
The quality of your ingredients plays a paramount role in the success and flavor of this exquisite Coconut Cake. Opting for fresh, high-quality components, especially the coconut milk and cream cheese, will elevate the final result from good to absolutely extraordinary. Every element, from the base flour to the finishing touches, contributes to the cake’s signature taste and unparalleled texture, making this a truly worthwhile baking experience. Take a moment to appreciate the simple yet impactful role each ingredient plays in bringing this tropical delight to life.
Coconut Cake Made with Coconut Milk

A rich, tender layer cake prepared with coconut milk, coconut milk solids, and coconut flavoring, then filled with a sweet coconut center and finished with a creamy coconut-cream cheese frosting. Optional toasted coconut and chocolate eggs provide an elegant decorative finish.
- For the cake: 2 cups all-purpose flour, 1 cup unsweetened full-fat coconut milk, 1 teaspoon baking soda, 1 teaspoon lemon juice, 2 cups granulated white sugar, 1 cup butter (softened to room temperature), 4 egg yolks, 4 egg whites, 1/4 teaspoon salt, 1/2 cup water, 1/4 cup coconut milk solids, 1 1/2 teaspoons coconut flavoring
- For the filling: 2 1/2 cups sweetened coconut flakes, 1/3 cup powdered sugar, 1/3 cup sweetened condensed milk, 3 tablespoons butter (melted)
- For the frosting: 1 1/2 cups unsalted butter (softened), 4 ounces cream cheese (softened), 8 cups powdered sugar (sifted), 2 teaspoons coconut essence, 2 to 4 tablespoons coconut milk, 1 pinch salt, Optional food color gel
- For the garnish (optional): 1 cup toasted shredded coconut, 1 cup chocolate eggs
- 1Preheat the oven to 350°F (175°C). Line the bases of three 8-inch round cake pans with parchment paper, then coat the pans with baking spray to help ensure clean release after baking.
- 2Place the lemon juice into a measuring cup, then add unsweetened coconut milk until the liquid reaches the full 1-cup mark. Set this mixture aside for later use.
- 3In a medium bowl, combine the flour, baking soda, and salt by whisking thoroughly. Reserve this dry mixture.
- 4In a large mixing bowl, beat the softened butter with the granulated sugar until the mixture becomes pale and fluffy. Add the egg yolks one at a time, mixing well after each addition.
- 5Blend in the water, coconut milk solids, and coconut flavoring until evenly incorporated. Add the flour mixture and the prepared coconut milk mixture in alternating additions, beginning and ending with the dry ingredients. Mix only until the batter comes together.
- 6In a separate bowl, beat the egg whites until stiff peaks form. Fold them gently into the batter, taking care not to deflate the mixture.
- 7Distribute the batter evenly among the prepared cake pans and smooth the tops with a spatula. Bake for about 30 minutes, or until the cake layers spring back lightly when touched.
- 8Let the cakes rest in their pans on wire racks for 5 minutes. Turn them out, remove the parchment paper, and allow the layers to cool completely before filling and frosting.
- 9To prepare the filling, stir together the sweetened coconut flakes, melted butter, sweetened condensed milk, and powdered sugar until the mixture is fully combined.
- 10For the frosting, beat the softened butter and cream cheese until light and airy, about 5 minutes. Add the coconut essence, a pinch of salt, and 2 tablespoons of coconut milk, then mix until smooth. Gradually incorporate the sifted powdered sugar and continue beating for about 5 more minutes, adding additional coconut milk as needed to reach the desired consistency. Blend in food color gel only if using.
- 11To assemble, place one cooled cake layer on a serving plate and spread a portion of the coconut filling over the top. Repeat with the next layer, then position the final cake layer on top.
- 12Cover the top and sides of the cake with the coconut frosting in an even layer. Finish with toasted shredded coconut and chocolate eggs, if desired.
Keywords: Coconut Cake, Coconut Milk Cake, Layer Cake, Cream Cheese Frosting, Dessert, Baking
The precise quantities for each ingredient are detailed within the accompanying recipe card, ensuring you have everything needed for a flawless execution. These measurements have been carefully calibrated to achieve the perfect balance of flavors and textures in every component of the cake. Should you find yourself needing specific items, the comprehensive list provides a clear guide.
Variations
This classic Coconut Cake is a wonderful base for creative adaptation, allowing you to tailor it to various dietary needs and flavor preferences. Imagine transforming it into a guilt-free indulgence or infusing it with complementary tropical notes for an even more vibrant experience. The inherent moisture and richness of the coconut milk lend themselves beautifully to such modifications, ensuring delicious results regardless of the path you choose.
For a decadent vegan twist, the butter in both the cake and frosting can be substituted with high-quality vegan butter, and the egg yolks and whites can be replaced with flax eggs and aquafaba, respectively. The cream cheese frosting can be recreated using a base of soaked cashews or vegan cream cheese, ensuring that the creamy texture and tang remain. This approach maintains the lusciousness while adhering to plant-based principles, proving that incredible flavor knows no dietary boundaries.
A low-carb rendition is also delightfully achievable. Almond flour or a blend of almond and coconut flour can stand in for the all-purpose flour, significantly reducing the carbohydrate count. The granulated sugar can be replaced with a sugar substitute like erythritol or stevia, and the sweetened condensed milk in the filling can be swapped for a sugar-free alternative or omitted entirely, perhaps supplemented with a touch more butter for richness. This makes the cake a delightful option for those managing their sugar intake without sacrificing taste or enjoyment.
Consider infusing your cake with additional tropical flavors for an even more transportive experience. A hint of lime zest can be added to the batter to complement the coconut beautifully, offering a bright, zesty counterpoint to the sweetness. Similarly, a touch of passion fruit puree could be swirled into the filling or incorporated into a glaze for a vibrant, tangy layer that sings of the tropics. These subtle additions can transform an already wonderful cake into a truly unique and memorable dessert.
How to Prepare Coconut Cake Made with Coconut Milk
Step 1: Preparing the Cake Pans and Oven
Begin by preheating your oven to the specified temperature of 350°F (175°C). This initial step is crucial for ensuring that your cake layers bake evenly and consistently. A properly preheated oven eliminates temperature fluctuations, which can otherwise lead to uneven baking, resulting in dry spots or undercooked centers.
Next, meticulously prepare three 8-inch round cake pans. Line the bottom of each pan with parchment paper; this acts as a protective barrier, preventing the cake from sticking and making removal a breeze. After lining, lightly grease the parchment paper and the sides of the pans with baking spray or softened butter, ensuring no surface is left untouched. This thorough preparation guarantees clean, intact cake layers that will be easy to handle for frosting.
Having the pans perfectly prepped and the oven ready is not just a procedural step; it’s an investment in the final aesthetic and texture of your cake. This diligence means that once the delicate batter is ready, it can be transferred to the oven immediately. Such promptness is vital, especially after incorporating whipped egg whites, as the batter’s airy structure benefits from swift baking to retain its lightness.
Step 2: Creating the Coconut Milk Mixture and Combining Dry Ingredients
In a standard measuring cup, combine one teaspoon of lemon juice with unsweetened full-fat coconut milk. You will need to add enough coconut milk to reach a total liquid volume of precisely one cup. The lemon juice reacts with the coconut milk, gently curdling it to create a buttermilk-like effect that adds tenderness and a subtle tang to the cake layers. Set this prepared mixture aside to allow it to work its magic.
Simultaneously, in a medium-sized mixing bowl, gather all your dry ingredients for the cake. This includes the all-purpose flour, baking soda, and a quarter teaspoon of salt. Whisk these components together thoroughly. The act of whisking ensures that the leavening agent (baking soda) and the salt are evenly distributed throughout the flour. This even distribution is critical for consistent rising and flavor throughout the cake.
This meticulous approach to preparing both the wet and dry components ensures that when it’s time to combine them, the batter will be homogenous and well-balanced. Proper aeration of the dry ingredients also helps prevent lumps and contributes to a lighter cake texture. These seemingly small steps are foundational to achieving that signature moist and tender crumb that defines this exceptional coconut cake.
Step 3: Creaming Butter and Sugar, and Incorporating Wet Ingredients
In a large mixing bowl, begin by creaming together one cup of softened butter with two cups of granulated white sugar. Use an electric mixer on medium-high speed and beat the mixture until it becomes visibly pale and noticeably fluffy. This process, known as creaming, incorporates air into the butter and sugar, which is essential for creating a light and airy cake texture. Continue mixing for at least 3-5 minutes, scraping down the sides of the bowl periodically to ensure uniform incorporation.
Once the butter and sugar mixture is light and airy, add the four egg yolks one at a time. It’s important to beat the mixture well after each addition to fully incorporate the yolk before adding the next. This ensures that the yolks emulsify properly with the fat, contributing richness and aiding in the cake’s structure. The batter will become even more cohesive and lustrous as you incorporate the yolks.
After the egg yolks are fully blended, mix in half a cup of water, a quarter cup of coconut milk solids, and one and a half teaspoons of coconut flavoring. Ensure these liquid and flavoring components are smoothly and evenly incorporated into the batter base. The coconut milk solids will dissolve, adding depth to the coconut flavor, while the flavoring provides an aromatic boost. This forms a smooth, well-emulsified base ready for the dry and wet ingredients to be combined.
Step 4: Alternating Dry and Wet Ingredients for the Batter
Now it’s time to bring everything together by alternating the addition of the dry ingredients mixture and the prepared coconut milk mixture into the creamed butter base. Begin by adding about one-third of the dry ingredients to the wet batter and mix on low speed until just combined. Be careful not to overmix at this stage, as overworking the gluten in the flour can result in a tough cake.
Following the first addition of dry ingredients, incorporate about half of the coconut milk mixture and mix until just incorporated. Then, add another third of the dry ingredients, mix, followed by the remaining half of the coconut milk mixture. Finally, add the last portion of the dry ingredients and mix only until the batter comes together and no dry streaks of flour remain. This gradual incorporation ensures that the wet and dry components blend smoothly and efficiently.
The key here is to mix gently and stop as soon as the batter appears homogeneous. Overmixing after the flour is added can toughen the cake’s structure, leading to a less tender crumb. This method of alternating ingredients helps to develop the cake’s structure without making it dense, ensuring a tender and moist result. The final batter should be smooth and pourable, with a delightful coconut aroma.
Step 5: Folding in Whipped Egg Whites
In a separate, impeccably clean bowl (any trace of grease can prevent the egg whites from whipping properly), beat the four egg whites until stiff peaks form. This means that when you lift the beaters, the egg whites will stand straight up without curling over. Achieving stiff peaks is crucial for incorporating maximum air into the batter, which is what gives this cake its signature light and soft texture. A pinch of cream of tartar can also be added to help stabilize the egg whites.
Once the egg whites are perfectly whipped, gently fold them into the prepared cake batter using a large spatula. Use a light, lifting motion, cutting down through the center of the batter, across the bottom, and up the side, turning the bowl as you go. The goal is to incorporate the egg whites without deflating them, thus preserving the airiness. This gentle folding technique is what transforms a denser cake batter into a cloud-like confection.
This specific step is what truly elevates the cake, giving it a finer crumb and a lighter mouthfeel, reminiscent of a professional bakery’s creation. Patience and a delicate hand are key during this stage to ensure the cake rises beautifully and has that coveted tender texture. Rushing this process can lead to a denser cake, so take your time to achieve the perfect incorporation.
Step 6: Baking and Cooling the Cake Layers
Divide the final cake batter evenly among the three prepared 8-inch cake pans. Use a spatula to gently spread the batter to the edges of the pans, ensuring each layer will be roughly the same thickness. Once the pans are filled, smooth the tops slightly. This even distribution of batter is essential for consistent baking, so all layers finish at the same time and have similar heights.
Place the filled pans into the preheated oven and bake for approximately 30 minutes, or until the cakes are golden brown and spring back lightly when gently pressed in the center. You can also insert a toothpick into the center of a cake; if it comes out clean, the cake is ready. Avoid overbaking, as this can lead to dry layers, which is the opposite of the desired moist outcome for this coconut cake.
Once baked, allow the cake layers to rest in their pans on wire racks for about 5 minutes. This brief resting period allows the cakes to firm up slightly, making them easier to remove from the pans without breaking. After this initial rest, carefully invert the pans onto the wire racks, remove the cake layers, and gently peel off the parchment paper from the bottoms. Let the cake layers cool completely on the wire racks before proceeding to filling and frosting, which is critical for the frosting to set properly.
Pro Tips for Coconut Cake Made with Coconut Milk
Use Room-Temperature Ingredients: For both the cake batter and the frosting, ensure your butter, egg yolks, and cream cheese are at room temperature. This is not just a suggestion; it’s a vital step for achieving smooth, well-emulsified mixtures that incorporate air effectively. Room-temperature ingredients blend seamlessly, creating a lighter texture and preventing the formation of lumps, which is especially important for a delicate cake like this.
Gentle Folding Technique: When incorporating the whipped egg whites into the cake batter, use a large spatula and a light, lifting motion. Avoid stirring vigorously, as this will deflate the precious air bubbles you worked hard to create. The goal is to gently combine the ingredients, preserving the aeration that contributes to the cake’s incredibly soft and airy crumb.
Chill Before Serving if Necessary: If your kitchen is particularly warm, or if you’ve frosted the cake shortly before serving, consider chilling the assembled cake in the refrigerator for a short period. This helps the frosting firm up, preventing it from becoming too soft or sliding, especially after the garnish is applied. A brief chill ensures a neater presentation and a more stable slice.
Full-Fat Coconut Milk is Key: Always opt for full-fat, unsweetened coconut milk for this recipe. The higher fat content is essential for providing the cake with its signature moistness and rich texture. Lighter versions or those with added sweeteners will not yield the same tender crumb and luxurious mouthfeel.
Sift Powdered Sugar for Frosting: For the smoothest, most lump-free frosting, always sift your powdered sugar before adding it to the creamed butter and cream cheese. This simple step removes any small clumps and ensures a silky-smooth consistency that spreads beautifully and looks professionally finished.
Serving Suggestions for Coconut Cake Made with Coconut Milk
Decoration
The finishing touches are what truly elevate this Coconut Cake from delicious to dazzling. For an effortlessly elegant look, a generous sprinkle of toasted shredded coconut over the top and sides is a classic choice that amplifies the coconut flavor and adds a delightful textural contrast. If you’re preparing the cake for a celebration, consider adding decorative elements like candied pineapple slices, maraschino cherries, or even delicate white chocolate shavings.
For a touch of whimsy and color, especially around holidays like Easter or spring celebrations, the inclusion of chocolate eggs provides a charming visual appeal. Arranging them artfully around the base of the cake or nestled amongst the toasted coconut creates a festive centerpiece. You can also pipe small rosettes of frosting around the edge of the cake for a more traditional bakery-style finish, perhaps using a food coloring gel to add subtle pastel hues.
A simple dusting of powdered sugar can also lend a snowy, elegant appearance, especially when paired with fresh berries. Consider a light drizzle of a coconut glaze made with powdered sugar and coconut milk for a glossy finish that catches the light. The key is to enhance the cake’s natural beauty without overpowering its delicate flavors.
Side Dishes
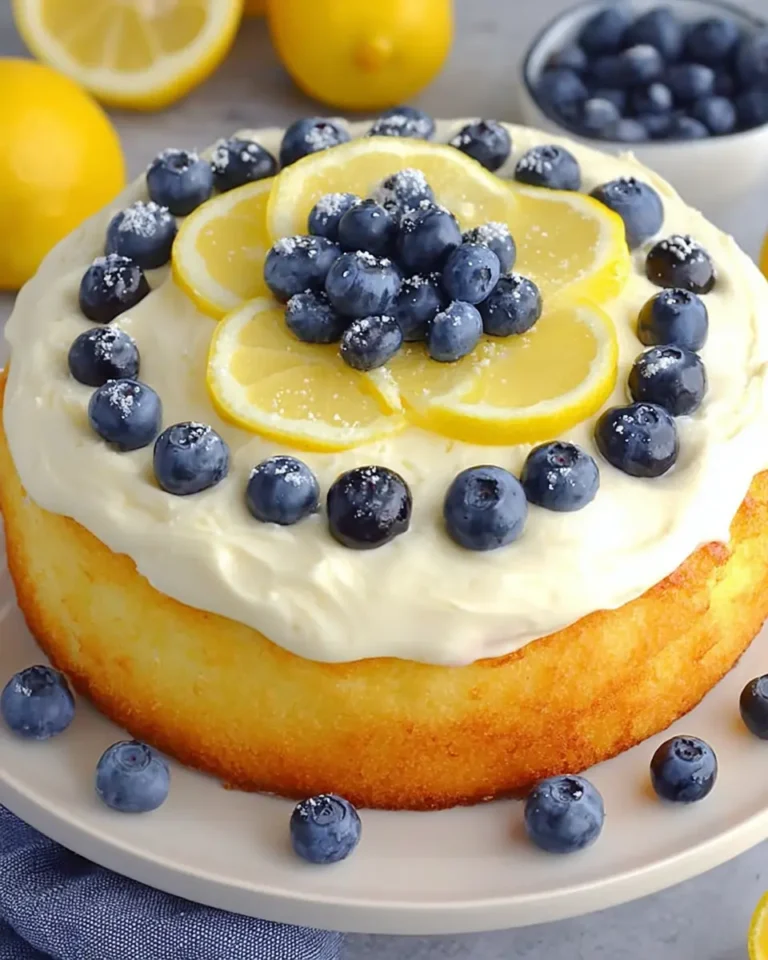
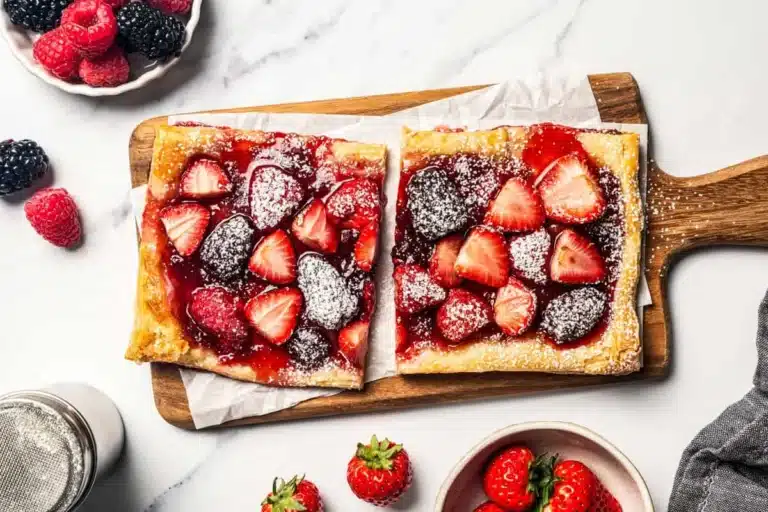
Complementing the rich sweetness of this Coconut Cake is best achieved with ingredients that offer a refreshing counterpoint or a harmonizing flavor profile. Fresh berries, such as raspberries, strawberries, and blueberries, are an exceptional choice. Their natural tartness and vibrant juiciness cut through the richness of the cake and frosting, providing a bright, palate-cleansing effect with every bite. A simple fruit salad incorporating tropical fruits like mango, kiwi, and pineapple would also make a fantastic accompaniment, echoing the cake’s tropical theme.
For a more indulgent pairing, consider a scoop of high-quality vanilla bean ice cream or a refreshing coconut sorbet. The creamy coolness of ice cream offers a delightful textural contrast and a complementary flavor, while a coconut sorbet intensifies the tropical notes without adding extra richness. A light and airy whipped cream, perhaps infused with a hint of lime zest or vanilla, can also provide a delicate counterpoint to the denser cake and frosting.
Beverage pairings can also enhance the overall dessert experience. A simple, well-brewed cup of coffee or a soothing herbal tea provides a grounding warmth that balances the cake’s sweetness. For those who enjoy something sweeter, a mild vanilla-flavored milk or a chilled glass of lemonade can offer a refreshing contrast. A light, tropical-inspired cocktail or a mocktail featuring coconut water and pineapple juice would be perfect for celebratory occasions.
Creative Serving Ideas
Transform a slice of this Coconut Cake into a mini dessert experience by serving it alongside a dollop of passion fruit curd or a swirl of mango coulis. These vibrant fruit sauces add an extra layer of tropical flavor and a beautiful visual contrast to the creamy white frosting. For an even more elaborate presentation, consider serving individual cake layers as part of a dessert tasting platter, accompanied by small samples of other tropical-themed treats like mini key lime tarts or coconut macaroons.
Another creative idea is to deconstruct the cake into parfaits. Layer crumbled cake pieces with the coconut filling and frosting in individual glasses, topping with fresh berries or toasted coconut for a visually appealing and easy-to-serve dessert. This method not only looks elegant but also allows each diner to experience the different components in a delightful, layered fashion.
For a more interactive experience, set up a “cake decorating station” where guests can add their own toasted coconut, berries, or chocolate drizzle to their slice. This is particularly fun for children’s parties or casual gatherings. You could also serve warm slices with a side of caramelized pineapple or grilled peaches for a sophisticated contrast between warm and cool, sweet and slightly savory elements.
Preparation & Storage
Storing Leftovers
Due to the cream cheese in the frosting, this delightful Coconut Cake must be stored in the refrigerator to maintain its freshness and prevent spoilage. Once the cake has been fully assembled and frosted, cover it tightly with plastic wrap or transfer it to an airtight cake carrier. This ensures that the cake remains moist and protected from absorbing any unwanted odors from other items in the refrigerator.
When you’re ready to enjoy a slice of leftover cake, it’s best to allow it to sit at room temperature for about 20 to 30 minutes before serving. This brief tempering period allows the frosting to soften slightly, bringing it back to its intended creamy consistency and enhancing the cake’s subtle coconut flavors, which can be muted when served directly from the cold.
Properly stored, this cake will maintain its delicious quality for approximately 4 to 5 days. By following these simple storage guidelines, you can ensure that every piece of this delectable treat remains as enjoyable as the first.
Freezing
The unfrosted cake layers are the easiest and most successful components to freeze. Once the layers have cooled completely after baking, wrap each layer individually and very tightly in a double layer of plastic wrap, followed by a layer of aluminum foil. This double protection minimizes the risk of freezer burn and helps preserve the cake’s moisture.
Store the wrapped cake layers in a single layer within an airtight freezer-safe container or heavy-duty freezer bag. They can be stored in the freezer for up to 2 months. For the best results, thaw the frozen cake layers overnight in the refrigerator before you plan to assemble and frost the cake. This slow thawing process helps maintain the cake’s structure and moisture content.
While frosted slices can also be frozen, the finish might not look as polished upon thawing. If you choose to freeze frosted slices, wrap them thoroughly as described above and thaw them similarly. While the taste will remain excellent, the frosting might soften more noticeably. Freezing unfrosted layers offers the most flexibility for future assembly and guarantees the best possible final presentation.
Reheating
Reheating this Coconut Cake is generally not recommended, as the goal is to enjoy its moist and tender texture, which is best achieved at room temperature rather than through artificial warming. The presence of cream cheese in the frosting means that applying direct heat can cause it to melt or become oily, altering its desirable texture and consistency significantly.
Instead of reheating, the preferred method for serving leftover cake is to allow it to come to room temperature naturally. As mentioned in the storage section, letting chilled slices sit out for 20 to 30 minutes is usually sufficient to bring them to an ideal temperature. This allows the flavors to meld and the textures to soften perfectly, providing the best possible eating experience.
If you find the cake to be slightly dry after being refrigerated for a few days, a very light application of a simple syrup (a mixture of equal parts sugar and water, heated until dissolved and cooled) brushed onto the layers before frosting could offer a subtle boost of moisture. However, this is typically unnecessary given the inherent moistness provided by the coconut milk. The cake is designed to be enjoyed at its naturally moist state, best preserved by proper refrigeration and gradual tempering.
Frequently Asked Questions
-
Can I use regular milk instead of coconut milk in the cake recipe?
While you can substitute regular milk for coconut milk, it will significantly alter the cake’s flavor and moisture content. Coconut milk, especially full-fat, contributes a unique richness and tropical aroma that is characteristic of this cake. Regular milk will result in a more standard vanilla cake flavor and may affect the tenderness and moisture. If you must substitute, use whole milk and consider adding a bit more coconut extract to try and replicate some of the lost flavor, though the texture will still differ.
-
My cake layers seem a bit dense. What could I have done wrong?
A dense cake texture often stems from a few common issues. Overmixing the batter after adding the flour is a primary culprit, as it develops the gluten too much, resulting in toughness. Another frequent cause is not whipping the egg whites to stiff peaks or deflating them during the folding process; these airy whites are crucial for lightness. Ensuring all ingredients, especially butter and eggs, are at room temperature helps create a better emulsion and allows for more incorporated air. Finally, make sure your baking soda is fresh, as expired leavening agents won’t provide adequate lift.
-
How can I ensure my frosting is the correct consistency for decorating?
Achieving the right frosting consistency is key for a smooth and beautiful finish. The ideal consistency for this coconut cream cheese frosting is spreadable but sturdy enough to hold its shape. If it’s too thick, gradually add more coconut milk, a tablespoon at a time, beating well after each addition until it reaches a smooth, easily spreadable texture. If it becomes too soft or runny, you can thicken it by gradually adding more sifted powdered sugar, a quarter cup at a time, until it firms up to your desired consistency.