Lemon Coconut Yogurt Cake
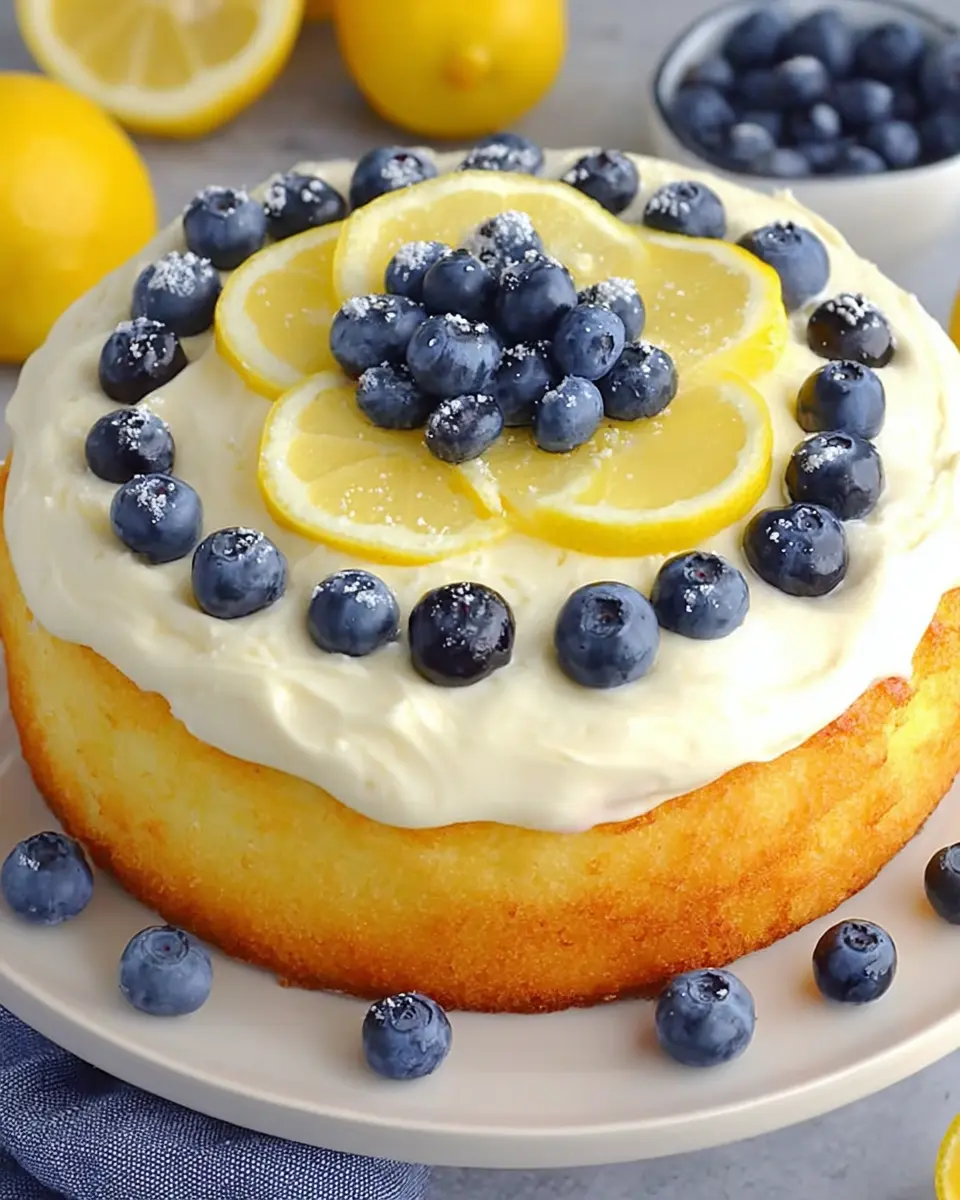
Light, moist, and beginner-friendly, coconut yogurt cake brings together bright lemon, gentle coconut flavor, and a soft crumb that feels just right with coffee or tea. It is a simple small-batch bake that looks elegant without asking much from your kitchen.
This is the kind of cake you make when you want something homemade but not fussy. The batter comes together with everyday mixing bowls, a small springform pan, and a short list of ingredients that each earn their place.
Why You Will Love This Recipe
- Light and Airy Texture: The combination of yogurt and baking powder creates an incredibly tender crumb that melts in your mouth.
- Bright Citrus Flavor: Fresh lemon juice and zest provide a refreshing counterpoint to the subtle coconut, making each bite invigorating.
- Simple Preparation: Requiring no special equipment and minimal effort, this cake is perfect for beginner bakers or those short on time.
- Delightful Coconut Aroma: The gentle presence of coconut oil and shredded coconut infuses the cake with a warm, inviting fragrance as it bakes.
- Versatile Enjoyment: This cake is wonderfully adaptable, suitable for a morning treat, an afternoon pick-me-up, or a light dessert.
Ingredients You Need
Choosing high-quality ingredients is paramount to achieving the perfect texture and flavor in your coconut yogurt cake. Freshness plays a significant role, especially for ingredients like eggs, lemon, and coconut. Using full-fat coconut yogurt will ensure a luxuriously moist crumb and a richer mouthfeel. Pay attention to the details for each ingredient to unlock the best possible outcome.
Light Coconut Yogurt Cake with Lemon
A light, moist, and beginner-friendly coconut yogurt cake with bright lemon and gentle coconut flavor. This simple bake offers a soft crumb, perfect for serving with coffee or tea.
- 3.5 oz granulated sugar
- 1 oz shredded coconut
- 2 medium eggs
- 4.25 oz plain flour (preferably all-purpose)
- 1.75 oz coconut oil (melted and brought to room temperature)
- 2.5 tsp baking powder
- 3.5 oz plain coconut yogurt (preferably full-fat)
- 1 tsp freshly grated lemon peel
- 1.35 fl oz fresh lemon juice
- 1Preheat oven to 350°F (175°C). Lightly grease and flour a 7–8 inch springform pan.
- 2In a bowl, whisk eggs and sugar until pale and foamy.
- 3Stir in coconut oil and coconut yogurt until smooth. Add lemon juice and peel, mix briefly.
- 4In a separate bowl, combine flour, baking powder, and shredded coconut.
- 5Gradually add dry ingredients to wet ingredients, stirring gently until just combined. Do not overmix.
- 6Pour batter into the prepared pan and smooth the top.
- 7Bake for 35-40 minutes, or until a toothpick inserted into the center comes out clean.
- 8Let the cake rest in the pan for 10 minutes before releasing the springform ring.
- 9Transfer to a wire rack to cool completely.
Keywords: Coconut Yogurt Cake, Lemon Cake, Yogurt Cake, Easy Cake, Beginner Baking, Tea Cake, Coffee Cake, Moist Cake, Light Cake
The precise quantities for all ingredients are detailed within the recipe card above, ensuring you have everything you need for a successful bake.
Variations
For those seeking a completely plant-based treat, the vegan variation is a delightful option. Simply substitute the eggs with a flax egg, which is made by mixing one tablespoon of ground flaxseed with three tablespoons of water and letting it sit for five minutes until it becomes gelatinous. This acts as an excellent binder, mimicking the function of eggs without compromising the cake’s structure. Ensure you use a vegan coconut yogurt and a plant-based oil like the specified coconut oil to maintain the intended flavor profile and moisture.
If you’re mindful of carbohydrate intake, a low-carb version can be achieved by making a few strategic substitutions. Replace the granulated sugar with a keto-friendly sweetener such as erythritol or xylitol, adjusting the amount to your preference as sweeteners can vary in intensity. For the flour, an almond flour and coconut flour blend works wonderfully, providing a similar texture while keeping the net carbs significantly lower. You might need to slightly adjust the liquid content or baking time with these flours, so keep a close eye on the cake as it bakes.
To elevate the flavor profile even further, consider adding a touch of extract or spice. A teaspoon of vanilla extract complements both the lemon and coconut beautifully, adding another layer of depth to the cake’s aroma and taste. For a warmer, more comforting note, a pinch of ground cardamom or cinnamon can be added to the dry ingredients. This simple addition transforms the cake into something truly special, perfect for a cozy afternoon tea or a festive gathering, offering a subtle yet distinct aromatic twist.
How to Prepare Coconut Yogurt Cake
Step 1: Oven and Pan Preparation
Begin by preheating your oven to a consistent 350°F (175°C). This ensures the oven cavity is at the optimal temperature for even baking from the moment the cake goes in. A properly preheated oven is crucial for achieving a good rise and consistent texture, preventing the cake from baking too slowly or too quickly.
Next, meticulously prepare your chosen springform pan, ideally one that is 7 to 8 inches in diameter. Lightly grease the entire interior surface with either a neutral oil or softened butter, ensuring all nooks and crannies are covered. Following this, dust the greased pan generously with a fine coating of all-purpose flour, rotating the pan to distribute it evenly. This process creates a non-stick barrier that is essential for a clean release of the cake, preventing it from sticking to the sides or bottom.
Once the pan is thoroughly coated, tap out any excess flour by inverting the pan over your sink or a trash receptacle. This step is important because too much residual flour can create a tough or dry coating on the cake’s exterior. Set the prepared pan aside; it’s now ready to receive the beautifully crafted batter, ensuring your finished cake will slide out effortlessly.
Step 2: Wet Ingredients Foundation
In a clean, dry mixing bowl, carefully crack your eggs. Using a whisk, begin to beat the eggs vigorously, gradually introducing the granulated sugar. Continue whisking until the mixture transforms into a pale, airy, and foamy consistency. This aeration process is vital as it incorporates air into the batter, which contributes significantly to the cake’s light and tender crumb structure. Patience here pays dividends in the final texture of your cake.
Once the egg and sugar mixture is perfectly aerated and has achieved a pale yellow hue, it’s time to incorporate the richness. Gently pour in the melted and slightly cooled coconut oil. Stir this in until it is fully incorporated and smooth, ensuring no oily pockets remain. Following the oil, add the plain coconut yogurt, which is the star ingredient for moisture. Mix these wet components together until you achieve a cohesive, smooth, and emulsified base for your cake batter.
The final additions to this wet ingredient base are the flavor powerhouses: fresh lemon juice and freshly grated lemon peel. Stir these in just enough to evenly distribute that vibrant citrus essence throughout the batter. Be careful not to overmix at this stage, as excessive agitation can develop the gluten in the flour too much, leading to a tougher cake. The goal is a fragrant, smooth, and unified wet mixture ready for the dry ingredients.
Step 3: Combining Wet and Dry Elements
In a separate, medium-sized bowl, combine your dry ingredients. This typically includes the all-purpose flour, which forms the structural base of the cake. Add the baking powder, the leavening agent responsible for the cake’s rise and light texture. Finally, stir in the shredded coconut, which will impart subtle texture and a delicate coconut flavor throughout the cake’s crumb. Whisk these dry components together gently to ensure they are well-distributed, especially the baking powder, so your cake bakes evenly.
Now, it’s time to unite the wet and dry components. Gradually add the combined dry ingredients to the wet mixture you prepared earlier. This should be done in stages, perhaps in two or three additions, to prevent overwhelming the wet ingredients and to facilitate easier mixing. Use a spatula or a gentle mixing spoon for this process, folding or stirring the batter just until the dry streaks of flour disappear and the ingredients are evenly incorporated.
The key here is to stop mixing as soon as the batter appears uniform and smooth; overmixing will develop the gluten in the flour excessively, resulting in a dense and less tender cake. You want to retain that lightness achieved in the initial egg-whipping stage. The final batter should look luscious, evenly combined, and free of any dry pockets, ready to be poured into the prepared pan.
Step 4: Batter into the Pan
With your batter perfectly mixed and your springform pan prepared, it’s time to transfer the mixture. Carefully spoon the batter into the prepared 7 to 8-inch springform pan. Ensure you scrape all the delicious batter from the mixing bowl using your spatula to maximize yield and avoid waste; every bit counts towards your final cake.
Once the batter is in the pan, use your spatula to gently smooth the top surface. This not only creates a more aesthetically pleasing cake but also helps ensure even baking. Aim for a level surface so that the cake rises uniformly in the oven, without a noticeable dome or dip in the center. A smooth top is the first step towards a beautifully finished cake.
Take a moment to admire the smooth, even surface of the batter. This careful preparation in the pan sets the stage for the transformation that will occur in the oven. The batter is now ready for its journey into the heat, where it will become a light, fluffy, and fragrant coconut yogurt cake.
Step 5: The Baking Process
Place the filled springform pan carefully into the center of your preheated 350°F (175°C) oven. The initial baking time is approximately 35 to 40 minutes. It’s always a good practice to start checking for doneness around the 35-minute mark, as oven temperatures can vary and small cakes can sometimes bake faster than anticipated.
To determine if the cake is fully baked, perform the classic toothpick test. Gently insert a wooden toothpick or a thin skewer into the very center of the cake. If it comes out clean, with no wet batter clinging to it, then your cake is perfectly baked. A few moist crumbs are acceptable, indicating a moist cake, but raw batter means it needs more time. The top of the cake should look set and lightly golden.
If the toothpick test indicates that the cake needs more time, continue baking in increments of 2-3 minutes, re-testing after each interval until it comes out clean. Overbaking can lead to a dry cake, so it’s crucial to monitor it closely during this final stage. Once perfectly baked, carefully remove the pan from the oven.
Step 6: Cooling and Resting
Once removed from the oven, place the springform pan on a heat-resistant surface or a wire rack. Allow the cake to rest in the pan for approximately 10 minutes. This resting period is important as it allows the cake structure to firm up slightly after the intense heat of the oven. It helps prevent the cake from collapsing or breaking when you attempt to remove it from the pan.
After the 10-minute resting period, carefully release the springform ring. The sides of the pan should detach easily, revealing the beautifully baked cake. Gently lift the ring away from the cake, being cautious not to disturb the delicate crumb. This is a critical moment where the cake’s shape is preserved.
Once the springform ring is removed, carefully invert the cake onto a wire cooling rack. If you greased and floured your pan properly, it should release smoothly. Allow the cake to cool completely on the wire rack. This ensures air circulates around the entire cake, preventing moisture from becoming trapped and making the bottom soggy. A fully cooled cake is much easier to slice and serve, allowing its flavors to meld.
Pro Tips for Coconut Yogurt Cake
Embrace Fresh Citrus: For the most vibrant and authentic lemon flavor, always opt for freshly grated lemon peel. While lemon zest products exist, freshly grated peel releases essential oils that provide a superior aroma and taste. This makes a significant difference in how bright and fresh your cake will ultimately taste, truly elevating the citrus notes.
Temperature Control for Oil: When incorporating the melted coconut oil, ensure it has cooled slightly before adding it to the wet ingredients. Adding hot oil can inadvertently cook the eggs or melt the yogurt too quickly, potentially altering the batter’s texture. A slightly cooled oil blends more smoothly and integrates harmoniously with the other components.
Vigilant Baking for Small Cakes: Smaller cakes, like this one baked in a springform pan, tend to bake more quickly than larger cakes. Therefore, it is essential to check for doneness starting at the earlier end of the recommended baking time. An overbaked cake will be dry, so keep a close eye on it during the final minutes of baking.
Gentle Mixing is Key: The principle of “less is more” applies significantly when mixing the batter, especially after the flour has been added. Overmixing develops gluten, which can lead to a tough, dense cake. Stir only until the ingredients are just combined, preserving the delicate structure you’ve worked to create.
Room Temperature Ingredients Matter: For the smoothest and most cohesive batter, ensure your eggs and coconut yogurt are at room temperature. This allows them to emulsify more effectively with the other ingredients, leading to a more uniform batter consistency and a better final texture for your cake.
Serving Suggestions for Coconut Yogurt Cake
Decoration
A simple dusting of powdered sugar offers an elegant yet effortless finish. For a more pronounced coconut presence and a delightful texture, consider a light sprinkle of toasted shredded coconut over the top. If you want to highlight the bright lemon notes, a scattering of finely chopped candied lemon peel or thin lemon slices can add both visual appeal and an extra burst of citrus flavor, making the cake look as delightful as it tastes.
Side Dishes
This cake pairs exceptionally well with a dollop of plain Greek yogurt or a light swirl of unsweetened whipped cream. These accompaniments provide a creamy contrast without overpowering the cake’s delicate flavors. A side of fresh berries, such as raspberries or blueberries, also adds a refreshing tartness and a vibrant pop of color, making the dessert feel more complete and visually appealing.
Creative Serving Ideas
Consider serving slices of this coconut yogurt cake alongside a cup of freshly brewed tea or a smooth, not-too-sweet coffee. The warmth of the beverage complements the cake’s soft crumb and citrus notes beautifully. For a more elaborate dessert presentation, the cake can be layered with a light lemon curd or a coconut cream frosting, transforming it into a truly show-stopping centerpiece for any occasion.
Preparation & Storage
Storing Leftovers
Once the coconut yogurt cake has cooled completely, it should be stored to maintain its freshness and moisture. Cover the cake tightly with plastic wrap or place it in an airtight container. If your kitchen is on the warmer side, it’s best to store it in the refrigerator. In a cool environment, it can sit at room temperature for up to a day, but refrigeration generally extends its shelf life and keeps the crumb perfectly tender.
In the refrigerator, the cake will keep well for up to four days. When you’re ready to serve a slice, it’s advisable to let it sit at room temperature for about 15-20 minutes beforehand. This allows the cake to soften slightly, enhancing its texture and allowing the subtle lemon and coconut aromas to become more pronounced, ensuring a more enjoyable eating experience.
For optimal flavor and texture upon serving, always aim to bring refrigerated cake slices back to a pleasant temperature. This simple step prevents the cake from tasting dense or overly chilled, allowing the delicate flavors to truly shine through. Enjoying the cake at the right temperature makes a world of difference in appreciating its moist crumb and subtle flavor notes.
Freezing
For longer-term storage, freezing is an excellent option to preserve this delightful cake. It is often best to freeze individual slices, as this allows for easier thawing and reduces the risk of the entire cake becoming freezer-burned or overly handled. Wrap each slice tightly in a layer of plastic wrap, ensuring no air can penetrate, then follow up with a layer of aluminum foil for added protection against freezer odors.
Once individually wrapped, place the slices in a freezer-safe bag or container. This double-layer protection is crucial for maintaining the cake’s quality over an extended period. Properly wrapped, the cake can remain frozen and retain its delicious texture and flavor for up to one month.
When you’re ready to enjoy a frozen slice, it’s best to transfer it from the freezer to the refrigerator to thaw. This slow thawing process helps the cake retain its moisture and prevent condensation, which can affect the texture. Alternatively, you can thaw it at room temperature for a shorter period, but always monitor it to prevent it from becoming too soft.
Reheating
If you prefer your cake slightly warm, reheating is a simple process that can bring back its soft, comforting texture. For individual slices, a very brief stint in the microwave on low power for 10-15 seconds can do the trick. Be extremely cautious with microwave times, as over-reheating can quickly dry out the cake or make it rubbery.
An alternative and often preferred method for reheating is in a low-temperature oven. Place a slice on a baking sheet and warm it in a preheated oven at around 300°F (150°C) for about 5-7 minutes, or until it feels just warmed through. This method helps to gently revive the cake’s softness without compromising its delicate crumb.
Ultimately, the goal of reheating is to gently warm the cake and restore its soft texture, making it as enjoyable as when it was freshly baked. Whether you choose the microwave or the oven, a short duration at a low heat is key to success, ensuring a delightful treat every time you serve it.
Frequently Asked Questions
-
Can I use regular yogurt instead of coconut yogurt?
Yes, you can certainly substitute regular plain yogurt for coconut yogurt, but be aware that it will alter the flavor profile slightly. A full-fat plain yogurt will provide a similar level of moisture and contribute to a tender crumb, which is essential for this cake’s texture. However, you will lose the distinct, gentle coconut undertones that make this recipe unique and fragrant. If you use a low-fat yogurt, the cake might be less moist, so opting for full-fat plain yogurt is the closest alternative for maintaining texture and richness.
-
Why should I avoid overmixing the batter?
Overmixing the cake batter, particularly after the flour has been added, is a common pitfall that can lead to a less-than-ideal texture. When flour is mixed with liquid, it activates gluten development, and excessive mixing develops this gluten too much. For a tender, light cake, you want minimal gluten development. Overmixing will result in a tougher, denser crumb that lacks the delicate, melt-in-your-mouth quality that this coconut yogurt cake is known for. It’s best to mix only until the ingredients are just combined and no dry streaks of flour remain.
-
How do I know when the cake is fully baked?
Determining when your coconut yogurt cake is perfectly baked is crucial for achieving the best texture. The most reliable method is the toothpick test: insert a wooden toothpick or a thin skewer into the center of the cake. If it comes out clean, meaning no wet batter is clinging to it, the cake is ready. A few moist crumbs are perfectly acceptable and indicate a moist cake, but raw batter means it needs more time. Visually, the cake’s top should appear set and have a light golden-brown hue, and the edges should start to pull away slightly from the sides of the springform pan.