Garlic Herb Grilled Veggie Skewers
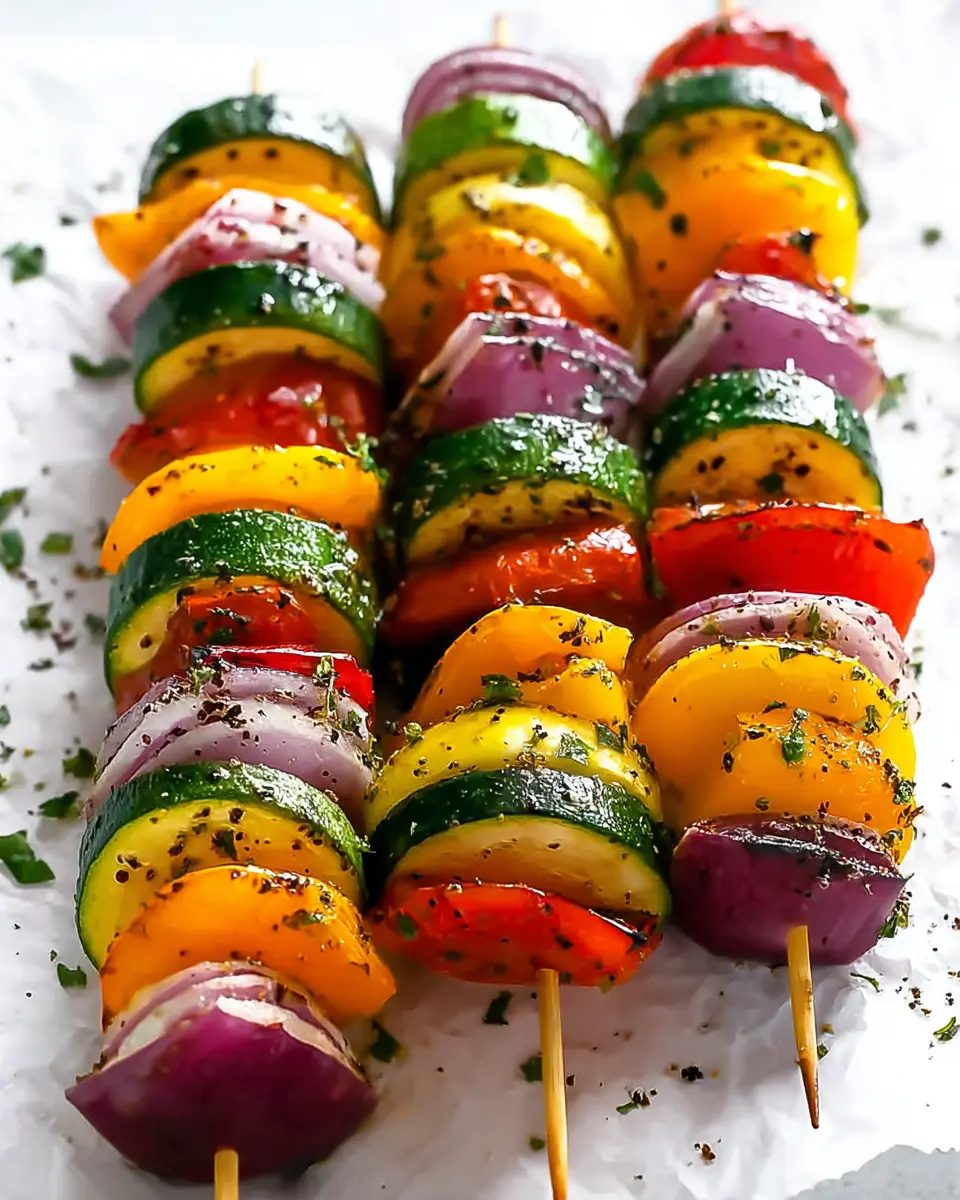
Grilled Veggie Skewers are a quick, colorful side dish with smoky edges, tender-crisp texture, and a bright garlic-herb finish.
They are simple to prep, reliable on the grill, and perfect for cookouts, weeknight dinners, or casual outdoor meals.
Why You Will Love This Recipe
- Vibrant Presentation: The assortment of colorful bell peppers, zucchini, and red onions creates a visually stunning dish that’s as appealing as it is delicious.
- Quick Preparation: With minimal prep time and fast grilling, these skewers are an excellent option for busy weeknights or spontaneous gatherings when you need a healthy side dish in a hurry.
- Versatile Flavor Profile: The combination of fresh vegetables, aromatic herbs, garlic, and a touch of smoky char from the grill makes these skewers a delightful complement to a wide range of main courses.
- Customizable: Easily adapt the recipe with your favorite vegetables or adjust the herb blend to suit your palate, making it a truly personalizable culinary experience.
- Healthy and Wholesome: Packed with nutrients and fiber from fresh produce, these skewers offer a guilt-free way to enjoy a flavorful and satisfying side dish.
Ingredients You Need
Choosing the freshest, highest-quality vegetables is paramount to achieving the best flavor and texture in your grilled veggie skewers. The natural sweetness of bell peppers and zucchini shines through beautifully when kissed by the grill’s heat. Complementing these vibrant stars is the savory depth of red onion, which caramelizes slightly to become wonderfully tender and sweet.
Grilled Veggie Skewers
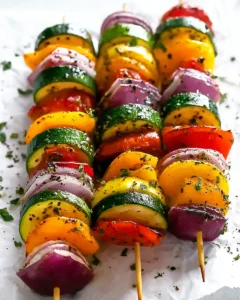
A colorful assortment of onions, zucchini, and sweet peppers is threaded onto skewers, grilled until lightly charred, and finished with a fresh garlic-herb sauce. An optional drizzle of balsamic vinegar adds a final layer of tangy depth.
- 2 red bell peppers, cut into 1-inch squares
- 4 zucchini, sliced into 1-inch-thick rounds
- 2 orange bell peppers, cut into 1-inch squares
- 4 red onions, cut into 1-inch wedges
- 2 yellow bell peppers, cut into 1-inch squares
- 2 green bell peppers, cut into 1-inch squares
- 8-12 wooden skewers
- For the garlic herb sauce:
- 3 tablespoons fresh parsley, finely minced
- 5 garlic cloves, freshly minced
- 1 teaspoon fresh rosemary, minced
- 3 tablespoons fresh cilantro, finely minced
- 1/3 cup olive oil
- Salt to taste
- Black pepper to taste
- Olive oil for brushing
- Balsamic vinegar for optional drizzling
- 1Place approximately 8-12 wooden skewers in water and let them soak for at least 15-30 minutes. This helps reduce the chance of burning during grilling.
- 2Prepare the vegetables for assembly. Peel each red onion, cut it in half, and divide each half into thirds so that each onion yields 6 pieces. Remove the seeds from the bell peppers and cut them into roughly 1-inch squares. Slice the zucchini into rounds about 1 inch thick.
- 3In a medium bowl, whisk together the olive oil, minced garlic, chopped parsley, cilantro, rosemary, salt, and black pepper until thoroughly combined. Set the garlic herb sauce aside.
- 4Thread the vegetables onto the soaked skewers, alternating the red onion, zucchini, and the assorted bell peppers. Once all skewers are assembled, lightly brush them with olive oil.
- 5Heat the grill to medium-high. Arrange the vegetable skewers on the hot grill and cook for 5-8 minutes per side, or until the vegetables begin to soften and develop light browning around the edges.
- 6Remove the skewers from the grill and brush them generously with the prepared garlic herb sauce. Drizzle with balsamic vinegar, if desired, and serve hot.
Keywords: Grilled Veggie Skewers
- red bell peppers: these provide a sweet, slightly smoky flavor and a delightful crunch even after grilling.
- olive oil: a good quality extra virgin olive oil is essential for brushing the vegetables and creating the base for the flavorful garlic-herb sauce, ensuring even cooking and preventing sticking.
- zucchini: adds a tender texture and mild flavor that absorbs the marinade wonderfully.
- orange bell peppers: contribute another layer of sweetness and vibrant color, enhancing the visual appeal of the skewers.
- red onions: offer a pungent bite that mellows into sweetness upon grilling, adding a savory dimension.
- balsamic vinegar: an optional but highly recommended finishing touch that adds a tangy-sweet complexity, cutting through the richness.
- yellow bell peppers: bring a bright, slightly milder sweetness and a cheerful yellow hue to the mix.
- green bell peppers: provide a classic slightly bitter note that balances the sweetness of the other peppers, adding complexity.
- wooden skewers: these are crucial for holding the vegetables together, making them easy to handle and turn on the grill; remember to soak them to prevent burning.
- fresh parsley: a key herb that adds a fresh, clean, and slightly peppery flavor to the sauce.
- salt: enhances all the other flavors and is essential for seasoning the vegetables and the sauce.
- garlic cloves: the foundation of the garlic-herb sauce, providing a pungent, savory depth that is irreplaceable.
- olive oil: used here again as the liquid base for the herb sauce, helping to meld the flavors and allowing for easy brushing.
- fresh rosemary: imparts a distinctive woodsy, pine-like aroma and flavor that pairs exceptionally well with grilled vegetables.
- black pepper: adds a subtle warmth and kick, balancing the fresh herbs and garlic in the sauce.
- fresh cilantro: offers a bright, citrusy, and slightly floral note that complements the other herbs and brightens the overall flavor profile.
The exact quantities for these ingredients can be found within the accompanying recipe card, ensuring you have precisely what you need for perfectly balanced skewers.
Variations
For a delightful vegan twist, focus on hearty vegetables that hold their own on the grill. Consider adding chunks of firm tofu or tempeh, marinated in a similar garlic-herb blend, alongside the usual suspects like bell peppers, onions, and zucchini. You might also incorporate mushrooms for an earthy depth, or cherry tomatoes that burst with sweetness when grilled.
If you’re looking to lower your carbohydrate intake, swap out some of the denser vegetables for lower-carb options. Broccoli florets, cauliflower florets, asparagus spears, and snap peas are excellent choices that grill beautifully. You can also lean into the protein by adding marinated tempeh or halloumi cheese for a satisfying vegetarian, low-carb option.
To add a touch of smoky sweetness without the direct char, try a quick pan-sear or bake. For those who love spice, incorporate a pinch of red pepper flakes into the herb marinade or a drizzle of sriracha sauce as a finishing touch. This offers a fiery counterpoint to the sweet, tender vegetables.
Consider a Mediterranean-inspired variation by adding artichoke hearts, Kalamata olives, and cubes of feta cheese (added towards the end of grilling to prevent excessive melting). Marinate these components in lemon juice, olive oil, oregano, and a hint of garlic for an authentic taste of the Aegean.
Another interesting avenue is to explore Asian-inspired flavors. Marinate your vegetables and tofu in a mixture of soy sauce or tamari, sesame oil, ginger, and a touch of honey or maple syrup. Garnish with toasted sesame seeds and chopped green onions for an extra burst of flavor and texture.
How to Prepare Grilled Veggie Skewers
Step 1: Prepare the Skewers and Vegetables
Begin by ensuring your wooden skewers are properly prepared for the grill. Submerging them in cool water for at least 30 minutes prevents them from scorching or catching fire as they cook over direct heat. This step is crucial, especially if you’re using a high-heat grill, as it allows the wood to absorb moisture and become more resilient to the intense heat.
While the skewers are soaking, it’s time to meticulously prepare your vegetables. Aim for uniform cuts; this is not just for aesthetics but for even cooking. Bell peppers should be cored, seeded, and cut into roughly one-inch squares, ensuring they are bite-sized yet substantial enough to stay on the skewer. Red onions should be peeled, halved, and then each half cut into wedges or thick slices that maintain their integrity on the skewer.
Zucchini should be sliced into rounds or half-moons about one inch thick. If your zucchini are very large, consider cutting them into quarters lengthwise before slicing to ensure they cook through without becoming mushy. The goal is for all the vegetables to be roughly the same size so they will reach tender-crisp perfection simultaneously, making for a harmonious and delicious skewer.
Step 2: Create the Flavorful Garlic-Herb Sauce
In a medium-sized bowl, assemble the ingredients for your vibrant garlic-herb sauce. This is where the magic happens, transforming simple grilled vegetables into a culinary delight. Start with a base of good quality olive oil, about one-third of a cup, which will act as the carrier for all the aromatic elements.
Next, mince your garlic cloves finely; five cloves should provide a robust, savory punch without being overpowering. Add the finely chopped fresh parsley and cilantro, which will bring a bright, herbaceous freshness to the sauce. Don’t forget the fresh rosemary, minced finely; its woody, aromatic notes are particularly wonderful with grilled produce.
Season generously with salt and freshly ground black pepper to taste. Whisk all these ingredients together vigorously until they are well combined and the sauce is emulsified. It’s beneficial to let this sauce sit for at least 10-15 minutes before using it, allowing the flavors to meld beautifully and the garlic to infuse the oil.
Step 3: Thread the Vegetables onto the Skewers
Now comes the fun part: assembling the skewers with your beautifully cut vegetables. Take your soaked skewers and begin threading the pieces, alternating between the different colors and types of vegetables. Start with a piece of red onion, followed by a zucchini slice, then a square of red bell pepper, perhaps an orange bell pepper, and continue this pattern.
The visual appeal of your skewers is enhanced by this alternating pattern; a rainbow of colors makes the final dish much more enticing. Ensure that you don’t pack the vegetables too tightly onto the skewers, as this can hinder even cooking and prevent the grill’s heat from circulating effectively. Leave a small space between each vegetable piece for optimal grilling results.
Continue threading until the skewer is nearly full, leaving a small portion of the skewer bare at each end for easy handling. You should aim to create skewers that are substantial and appealing, but not so long that they are difficult to manage on the grill. The number of skewers will depend on the quantity of vegetables you have and how generously you fill each one.
Step 4: Prepare the Skewers for the Grill
Before your carefully assembled skewers meet the heat of the grill, a light coating of olive oil is essential. Using a pastry brush, lightly coat each side of the vegetable-laden skewers with olive oil. This simple step serves multiple important purposes that contribute significantly to the final outcome of your grilled vegetables.
The olive oil acts as a barrier, preventing the vegetables from sticking directly to the grill grates, which is a common frustration. Furthermore, it helps to promote even browning and caramelization, giving the vegetables that desirable slightly charred, golden-brown exterior. This also imparts a subtle sheen to the vegetables, making them look more appetizing and professionally prepared.
This light brushing ensures that the vegetables cook smoothly and develop those characteristic grill marks, adding to both their visual appeal and their smoky flavor profile. It’s a small but impactful step that ensures your skewers will glide effortlessly off the grill and onto your serving platter.
Step 5: Grill the Vegetable Skewers to Perfection
Preheat your grill to a medium-high heat setting; this is crucial for achieving the perfect balance of tender vegetables and appealing char marks. Once the grill is hot and ready, carefully place the oiled vegetable skewers onto the grates. Ensure that you don’t overcrowd the grill, allowing enough space between each skewer for heat to circulate freely.
Allow the skewers to cook for approximately 5-8 minutes on the first side. During this time, the vegetables will begin to soften, and the edges will start to develop a beautiful char. Resist the urge to move them too frequently; let them develop those desirable grill marks.
Using tongs, carefully turn each skewer over to cook the other side. Continue grilling for another 5-8 minutes, or until the vegetables are tender-crisp and nicely charred around the edges. You are looking for a delightful texture that is cooked through but still retains a slight bite, with the peppers softened and the zucchini tender. The red onions should show signs of caramelization, adding a wonderful sweetness.
Step 6: Finish and Serve the Skewers
As soon as the grilled veggie skewers are removed from the heat, they are ready for their flavor finale. While they are still piping hot, generously brush them with the prepared garlic-herb sauce you made earlier. The residual heat from the grill will help the sauce to adhere beautifully to the vegetables and release its aromatic essence.
This is also the opportune moment to add the optional balsamic vinegar drizzle. A light, even drizzle over the hot skewers adds a layer of tangy sweetness that perfectly complements the smoky char and fresh herbs. This final touch elevates the dish from simply good to exceptionally delicious, providing a delightful contrast to the savory elements.
Serve these vibrant, flavorful skewers immediately while they are at their peak of freshness and warmth. They are best enjoyed straight off the grill, allowing guests to fully appreciate the tender-crisp texture and the bright, zesty flavors of the garlic-herb sauce.
Pro Tips for Grilled Veggie Skewers
Uniform Cutting is Key: For consistently cooked vegetables, ensure all your pieces of bell pepper, zucchini, and onion are cut into roughly the same size. This prevents some vegetables from becoming mushy while others remain undercooked, ensuring a harmonious bite every time you enjoy a skewer.
Don’t Skip the Soak: Soaking wooden skewers in water for at least 30 minutes before grilling is non-negotiable if you want to prevent them from burning. This simple step ensures the wood absorbs moisture, making it more resistant to charring and helping your skewers to hold their structure throughout the cooking process.
Reserve Some Sauce: While it’s tempting to use all the garlic-herb sauce during the grilling process, it’s highly recommended to save a portion. Applying a fresh brush of the sauce just before serving provides a burst of vibrant, unadulterated flavor that truly makes the skewers sing.
Master the Heat: Grilling over medium-high heat is ideal for achieving that perfect balance of tender-crisp vegetables and appealing char marks. Too low a heat will result in steamed, uninspired vegetables, while excessively high heat can scorch the outside before the inside is cooked.
Embrace the Char: A little bit of char on the edges of your vegetables is not only desirable for flavor but also indicates they’ve been cooked properly on the grill. Don’t shy away from it; it adds a wonderful depth and complexity to the overall taste profile.
Serving Suggestions for Grilled Veggie Skewers
Decoration
Enhance the visual appeal of your grilled veggie skewers with a sprinkle of freshly chopped herbs. A scattering of vibrant green parsley or a few delicate cilantro leaves can add a pop of color and freshness. For an extra touch of elegance, a light dusting of paprika or a few toasted sesame seeds can provide textural contrast and visual interest.
Side Dishes
These skewers are incredibly versatile and pair wonderfully with a wide array of main courses. They make an excellent accompaniment to grilled chicken, steak, or fish, providing a bright, fresh counterpoint to richer flavors. For a vegetarian feast, serve them alongside grilled tofu, halloumi, or a hearty grain salad.
Consider serving them alongside classic barbecue fare like burgers, ribs, or pulled pork for a complete outdoor dining experience. Their light and healthy nature makes them a perfect balance to more indulgent dishes. The simple yet delicious flavor profile ensures they won’t overpower the star of the meal.
For a lighter meal, these skewers can stand on their own, perhaps served with a simple side of couscous, quinoa, or a fresh green salad. This allows the vibrant flavors of the vegetables to truly shine. They also make a fantastic addition to any picnic or potluck spread, offering a colorful and healthy option.
Creative Serving Ideas
Transform your grilled veggie skewers into a vibrant appetizer by serving them upright in a decorative vase or a hollowed-out bell pepper. This presentation adds a playful and eye-catching element to any gathering, making them a conversation starter.
Incorporate them into larger dishes. For instance, they can be a fantastic topping for a bed of fluffy rice or a hearty lentil stew, adding texture and visual appeal. You can also deconstruct the skewers and mix the grilled vegetables with pasta or a grain salad for a more substantial meal.
Consider serving them as part of a tapas-style meal, allowing guests to mix and match with other small plates. This approach encourages sharing and exploration of various flavors and textures. They also work wonderfully tucked into warm pita bread with a dollop of hummus or tzatziki for a delightful wrap.
Preparation & Storage
Storing Leftovers
Leftover grilled veggie skewers can be stored in an airtight container in the refrigerator for up to 3 days. For easier storage and reheating, it is often best to remove the vegetables from the wooden skewers before placing them in the container. This prevents the vegetables from becoming soggy and makes it simpler to portion them out for future meals.
Freezing
Freezing grilled vegetable skewers is generally not recommended, as the texture of the vegetables, particularly zucchini and bell peppers, can degrade significantly upon thawing. They tend to become mushy and lose their appealing crispness, which is a hallmark of well-grilled produce. It’s best to enjoy them fresh or as leftovers within a few days.
Reheating
To reheat leftover grilled veggie skewers, you have a few excellent options depending on your desired outcome. For the best texture, gently warm them in a skillet over medium heat, tossing occasionally until heated through. Alternatively, you can reheat them in a low oven (around 300°F or 150°C) on a baking sheet until warm.
While a microwave can quickly reheat the skewers, it often results in a softer, less appealing texture for the vegetables. If you do use the microwave, heat them in short bursts, checking frequently to avoid overcooking. Regardless of the method, aim for a gentle reheating process to preserve as much of the original texture as possible.
Frequently Asked Questions
-
Can I prepare the vegetables and assemble the skewers ahead of time?
Yes, absolutely! You can prepare your vegetables and thread them onto the skewers several hours in advance. Store the assembled skewers, covered, in the refrigerator to keep them fresh and prevent them from drying out. It’s a good practice to lightly brush them with olive oil just before placing them on the grill to ensure they cook beautifully and don’t stick.
-
What are the best types of vegetables to use for grilled skewers, and how do I ensure they cook evenly?
The beauty of grilled veggie skewers is their versatility. Excellent choices include bell peppers of all colors, zucchini, red onion, cherry tomatoes, mushrooms, broccoli florets, and asparagus. The key to even cooking is cutting all vegetables into uniform, bite-sized pieces. This ensures that each piece, regardless of its type, will cook at approximately the same rate on the grill, leading to a perfectly tender-crisp result across the entire skewer.
-
Why is it recommended to brush the garlic-herb sauce on after grilling, and what is the role of balsamic vinegar?
Brushing the garlic-herb sauce on after grilling is crucial for preserving the fresh, vibrant flavors of the herbs and the pungency of the garlic. Applying it too early can cause these delicate ingredients to scorch or lose their bright aroma over the high heat of the grill. The balsamic vinegar, if used, is a finishing touch that adds a delightful sweet and tangy contrast. It cuts through the richness of the grilled vegetables and herbs, providing a complex layer of flavor that ties everything together beautifully.