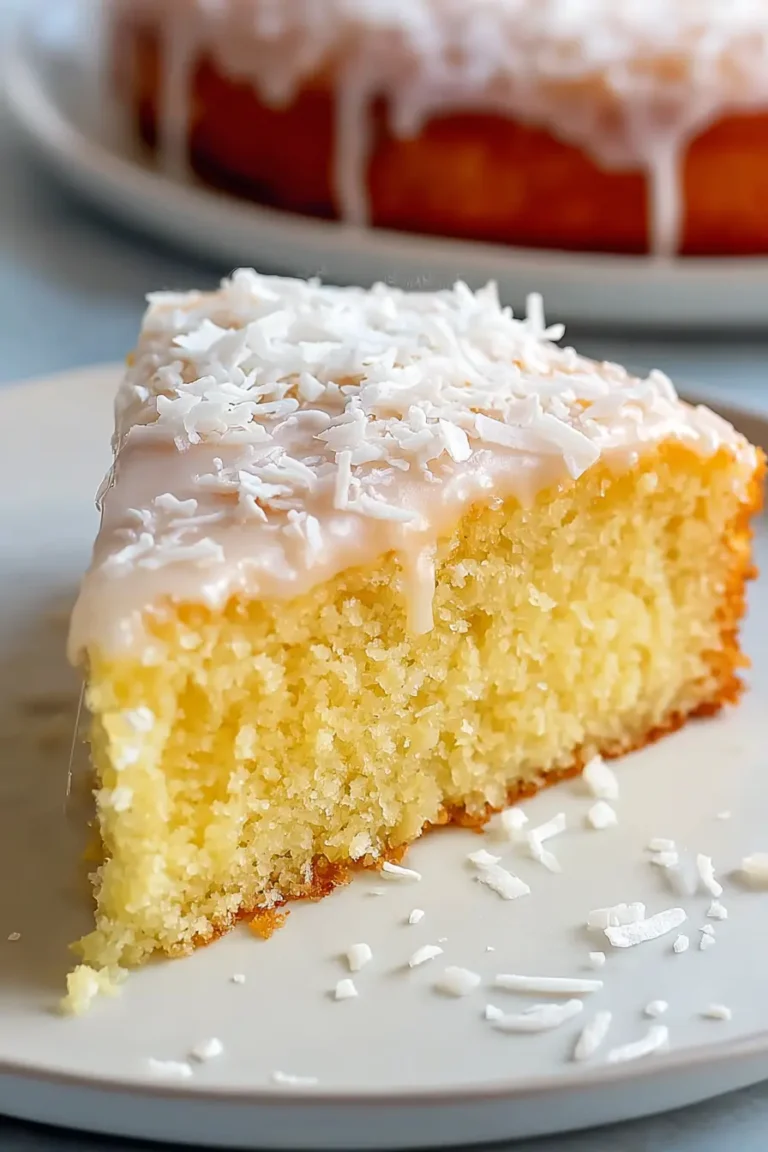
Creamy Chilled Coconut Cake
Coconut cake is a delightful dessert that promises a creamy, make-ahead experience with a wonderfully soft and moist crumb.
Its rich coconut flavor, combined with a cool, whipped topping, makes it an ideal choice for gatherings or simply a treat for yourself. The real magic happens after a good chill in the refrigerator, which truly elevates its texture and taste.
Why You Will Love This Recipe
- Effortless Assembly: Utilizing a cake mix as a base significantly simplifies the preparation process, allowing for quick and easy assembly without compromising on flavor or texture.
- Intense Coconut Flavor: The strategic use of coconut milk and cream of coconut infuses the cake with a deep, satisfying coconut essence that permeates every bite, making it a true delight for coconut enthusiasts.
- Perfectly Moist Texture: The unique soaking process with cream of coconut ensures an incredibly tender and moist crumb, creating a melt-in-your-mouth sensation that is utterly irresistible.
- Make-Ahead Convenience: This cake is a baker’s dream for practicality, as it can be prepared in advance and stored overnight in the refrigerator, ready for a beautiful whipped topping and coconut finish when serving.
Ingredients You Need
Choosing high-quality ingredients is paramount for achieving the most delicious and satisfying coconut cake. Freshly shredded coconut, a good brand of cake mix, and full-fat coconut milk will all contribute to a superior final product.
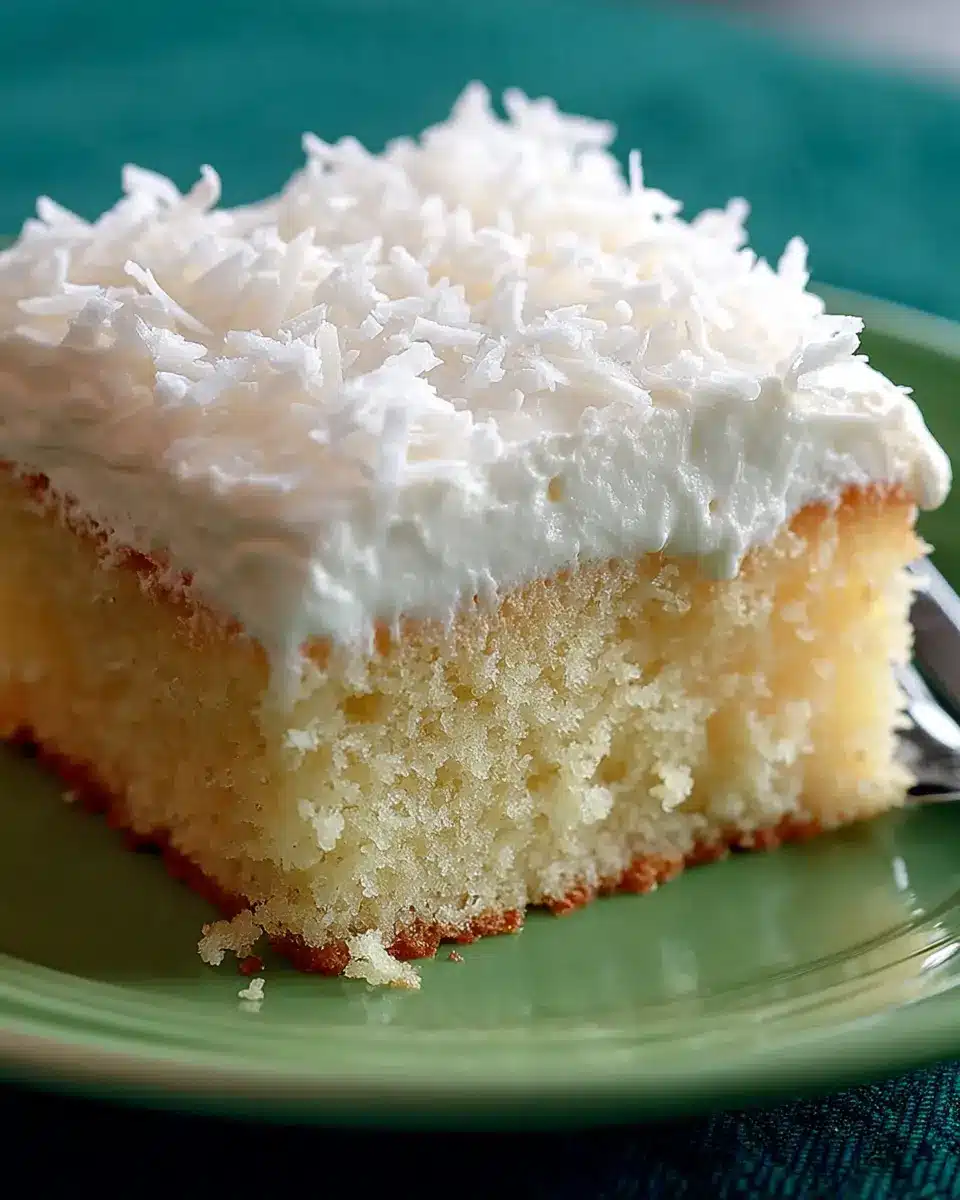
Easy Coconut Cake

A creamy, make-ahead dessert with a soft moist crumb, rich coconut flavor, and a cool whipped finish. Using a cake mix keeps the base simple, while coconut milk and cream of coconut give it a much fuller flavor. The soak creates a tender, rich, and melt-in-your-mouth texture once chilled. It's practical for real-life baking and can be made ahead, refrigerated overnight, and finished with whipped topping and coconut before serving.
- 1 cup sweetened shredded coconut (for the finishing layer)
- 1 box white cake mix
- 8 ounces whipped topping
- 1 1/4 cups coconut milk (to replace the water listed on the cake mix package)
- 1 15-ounce can cream of coconut, for soaking
- 1Prepare the white cake mix according to the package instructions, using 1 1/4 cups of coconut milk in place of the water specified. Mix thoroughly, preferably with a stand mixer, until the batter is smooth and well aerated.
- 2Transfer the batter to a 9 x 13-inch baking dish and bake as directed on the package. Begin checking for doneness about 5 minutes before the suggested baking time, as a slightly less baked surface will better absorb the soaking liquid without becoming dry.
- 3Remove the cake from the oven and, while it is still warm, pierce the top all over with a skewer, toothpick, chopstick, or fork.
- 4Place the cream of coconut in the microwave and heat on HIGH for 1 1/2 minutes. Pour the warmed cream of coconut evenly over the cake, allowing it to flow into the holes and soak into the crumb.
- 5Refrigerate the cake for several hours, or ideally overnight, so the coconut flavor can fully develop and the cake can set properly.
- 6Once chilled, spread the whipped topping evenly across the surface of the cake.
- 7Scatter the shredded coconut evenly over the whipped topping. Keep the cake refrigerated until serving.
Keywords: Coconut Cake, Easy Cake, Make-ahead Dessert, Creamy Cake, Moist Cake, Tropical Dessert
- white cake mix: a foundational element providing a light and airy base for the cake.
- coconut milk: used instead of water, this adds a deeper coconut flavor and extra moisture to the cake batter.
- cream of coconut: this is the secret to the cake’s signature moistness and rich, sweet flavor when used as a soak.
- whipped topping: creates a light, fluffy, and creamy layer that beautifully complements the dense cake.
- sweetened shredded coconut: provides a delightful texture and an additional boost of coconut flavor to the finished cake.
Detailed quantities for each ingredient can be found within the integrated recipe card above.
Variations
To tailor this delightful coconut cake to various dietary needs and flavor preferences, several exciting variations can be explored. These adjustments ensure that everyone can enjoy a slice of this tropical-inspired treat.
For a delightful vegan version, the white cake mix can be substituted with a vegan-friendly alternative, ensuring it’s dairy-free and egg-free. The coconut milk and cream of coconut are naturally vegan, making them excellent choices. For the whipped topping, opt for a store-bought vegan whipped cream or create your own using chilled coconut cream.
A low-carb adaptation can be achieved by using a sugar-free white cake mix and replacing the regular cream of coconut with a sugar-free syrup or a blend of erythritol and coconut cream. Ensure the whipped topping is also sugar-free. This version allows for guilt-free indulgence while sticking to a lower carbohydrate intake.
Adding a burst of citrus can also transform this cake. A bit of lemon or lime zest incorporated into the batter, or even a drizzle of lemon glaze over the finished cake, can provide a bright, zesty contrast to the sweet coconut. This subtle addition offers a refreshing twist that complements the tropical notes beautifully.
How to Prepare coconut cake
Step 1: Preparing the Cake Base
Begin by preheating your oven to the temperature specified on your chosen white cake mix package. This ensures even baking and a perfectly cooked cake. It’s a crucial first step that sets the stage for the entire dessert.
In a large mixing bowl, combine the white cake mix with the specified amount of coconut milk, using it in place of the water called for on the box. Mix these ingredients thoroughly, ideally using an electric mixer on a medium speed. Continue mixing until the batter is smooth, airy, and free of lumps, which is essential for a tender crumb.
Ensure the batter is well-aerated by mixing for the recommended time on the cake mix instructions, or until it appears light and fluffy. This step is vital for achieving that desirable soft texture that will later absorb the coconut soak wonderfully.
Step 2: Baking the Cake
Pour the prepared cake batter evenly into a 9×13-inch baking dish that has been lightly greased and floured, or lined with parchment paper. Ensure the batter is spread to create a relatively even surface for consistent baking.
Place the baking dish into the preheated oven. Bake for the duration recommended on the cake mix packaging, but start checking for doneness a few minutes earlier than suggested. This proactive check prevents the cake from overbaking, which is essential for its ultimate moistness.
To test for doneness, insert a toothpick or a thin skewer into the center of the cake. If it comes out clean or with a few moist crumbs attached, the cake is ready. Avoid baking until the center is completely dry, as a slightly softer center will absorb the soaking liquid more effectively.
Step 3: Creating the Soak Channels
As soon as the cake is removed from the oven, while it is still warm, it is time to prepare it for the soaking liquid. The warmth of the cake is crucial here, as it allows the liquid to penetrate more readily into the crumb.
Using a skewer, a toothpick, a chopstick, or even the tines of a fork, poke holes all over the entire surface of the warm cake. Create a generous number of holes, distributing them evenly from edge to edge. These channels are vital for the cream of coconut to seep deep into the cake.
The goal is to create an intricate network of small tunnels that will allow the liquid to saturate the entire cake, not just sit on the surface. This step is fundamental in achieving the characteristic super-moist texture of this coconut cake. Make sure the holes are deep enough to reach through most of the cake’s thickness.
Step 4: Applying the Coconut Soak
In a separate, microwave-safe bowl, briefly warm the can of cream of coconut. Heat it for approximately 1 to 1.5 minutes on high power, or until it is warm enough to pour easily. Be careful not to overheat it, as it should be warm, not boiling.
Slowly and evenly spoon or pour the warmed cream of coconut over the entire surface of the warm, poked cake. Take your time with this process, allowing the liquid to flow into the holes you created and gradually saturate the crumb. Ensure every part of the cake receives some of the soak.
Continue pouring until all the cream of coconut has been used, making sure it spreads across the entire pan. The warm cake will actively absorb the liquid, drawing it down into the network of holes. This step is where the cake’s signature incredible moisture is developed.
Step 5: Chilling for Flavor and Texture
Once the cream of coconut has been applied, the cake needs time to absorb all the delicious moisture and flavors. Cover the baking dish tightly with plastic wrap or aluminum foil.
Place the covered cake into the refrigerator for at least several hours. For the absolute best results, it is highly recommended to chill the cake overnight. This extended resting period allows the cream of coconut to fully permeate the cake’s structure, enhancing both the coconut flavor and the incredibly tender texture.
The chilling process is where the magic truly happens, transforming the cake into a moist, rich, and cohesive dessert that is easy to slice and serve. Rushing this step will result in a less developed flavor and a less ideal texture, so patience is key here.
Step 6: Finishing with Topping and Coconut
After the cake has chilled sufficiently and is ready to be served, it’s time for the final touches. Remove the cake from the refrigerator and uncover it.
Spread the 8 ounces of whipped topping evenly over the entire chilled surface of the cake. Use an offset spatula or the back of a spoon to create a smooth, even layer. This creamy topping provides a delightful contrast to the moist cake beneath.
Finally, generously sprinkle the 1 cup of sweetened shredded coconut over the whipped topping. Distribute it evenly to ensure a beautiful, snowy appearance and added texture. Return the finished cake to the refrigerator until you are ready to serve it, keeping it nicely chilled.
Pro Tips for coconut cake
Poke While Warm: The key to allowing the cream of coconut to truly saturate the cake lies in poking the holes while the cake is still warm from the oven. This makes the crumb more receptive to the liquid.
Don’t Rush the Chill: Patience is a virtue when it comes to this cake. The chilling process, especially overnight, is what allows the flavors to meld and the texture to become impeccably moist and tender. It transforms from a good cake to an extraordinary one.
Watch the Bake Time: Always start checking your cake for doneness a few minutes before the package suggests. An overly baked cake will resist absorbing the soak, leading to a less moist result. Aim for a cake that’s just set.
Even Soak Distribution: When pouring the cream of coconut, ensure you are covering the entire surface, allowing it to trickle into all the poked holes. A slow, steady pour helps achieve the most even saturation.
Fresh Whipped Topping: For the best texture and presentation, use a fresh, chilled whipped topping. If you are making your own, ensure it is well-stabilized so it holds its shape neatly on top of the cake.
Serving Suggestions for coconut cake
Decoration
The classic topping for this dessert is a generous blanket of sweetened shredded coconut. For an added touch of elegance, you can toast some of the shredded coconut lightly in a dry pan before sprinkling it over the whipped topping; this adds a delightful nutty depth and a beautiful golden hue. Alternatively, a dusting of powdered sugar can offer a simple yet attractive finish.
Consider adding fresh edible flowers or a few carefully placed curls of white chocolate to elevate the visual appeal. A drizzle of toasted coconut syrup or a light dusting of flaked toasted coconut can also provide an extra layer of visual interest and flavor complexity. For a festive touch, consider adding colorful sprinkles that complement the white and cream aesthetic.
Side Dishes
Fresh berries, such as raspberries, strawberries, or blueberries, provide a wonderful burst of freshness and a slight tartness that beautifully cuts through the sweetness of the coconut cake. Their vibrant colors also add a cheerful contrast to the creamy white dessert. A small bowl of fresh pineapple chunks or mango slices offers a tropical complement that enhances the cake’s inherent flavors.
For a beverage pairing, a simple glass of cold milk, iced tea, or even a light coffee beverage works exceptionally well. A warm cup of coffee or espresso served alongside the chilled cake creates a delightful temperature contrast that can enhance the perceived richness of each bite. Consider a light, fruity iced tea to echo the tropical notes.
Creative Serving Ideas
Serve individual portions in elegant parfait glasses, layering the chilled cake with whipped topping and shredded coconut for a sophisticated presentation. This method also ensures that each serving is perfectly formed and beautifully showcased. For a more casual gathering, cut the cake into small squares and arrange them on a tiered dessert stand for an appealing display.
You could also serve this cake as part of a larger dessert buffet, allowing guests to sample a variety of sweets. For a special occasion, consider serving it with a dollop of coconut-infused whipped cream or a scoop of homemade vanilla bean ice cream. The versatility of this cake makes it suitable for both casual weeknight treats and more elaborate celebrations.
Preparation & Storage
Storing Leftovers
To keep this delicious coconut cake fresh, it’s essential to store it properly in the refrigerator. Because of the whipped topping and the moist, soaked crumb, it must remain chilled to maintain its optimal texture and prevent spoilage. Store any leftover cake tightly covered in its original baking dish or transfer it to an airtight container.
The cake will remain at its best when stored this way for up to 3 to 4 days. Ensure the covering is secure to prevent the cake from drying out or absorbing any unwanted odors from other foods in the refrigerator. For the cleanest slices, it is best to cut and serve the cake directly from the refrigerator, as the topping and crumb will be firmer.
Freezing
While this cake is best enjoyed fresh, freezing is possible, though it can slightly alter the texture of the whipped topping. If you choose to freeze it, it’s recommended to freeze individual portions rather than the entire cake. This makes thawing easier and prevents the entire dessert from being compromised if not all of it is eaten.
Wrap each individual slice very well in plastic wrap, followed by a layer of aluminum foil or place them in a freezer-safe bag. Freeze for up to 1 month. For the best thawing experience, remove the frozen slice from the freezer and place it in the refrigerator overnight. This allows it to thaw gradually while remaining chilled, helping the moisture redistribute more evenly.
Reheating
This coconut cake is designed to be served chilled, so reheating is generally not recommended or necessary. The whipped topping will melt if heated, and the moist crumb may become too soft. The beauty of this cake lies in its cool, refreshing qualities.
If you have thawed a frozen slice and it isn’t quite as cold as you prefer, you can allow it to sit at room temperature for about 10-15 minutes before serving. However, it should always be served cold. The reheating process would fundamentally change the intended texture and enjoyment of this particular dessert. Enjoy it as it is meant to be: cool and creamy.
Frequently Asked Questions
-
Can I make this coconut cake the day before I plan to serve it?
Absolutely, and it’s actually highly recommended! Making this cake the day before allows the cream of coconut to fully saturate the cake’s crumb, resulting in an exceptionally moist and flavorful dessert. The extended chilling time also helps the flavors meld together beautifully, creating a more cohesive and satisfying taste experience. It’s the secret to achieving that perfect, melt-in-your-mouth texture that makes this cake so special.
-
How do I know if the cake is baked through but still soft enough to absorb the soak?
You’ll know the cake is ready when a toothpick inserted into the center comes out clean or with a few moist crumbs attached, but not wet batter. It’s crucial to start checking a few minutes before the package suggests, as an overbaked cake will develop a drier crust that won’t absorb the soaking liquid as effectively. Aim for a cake that is set in the middle but still has a slightly yielding surface texture that feels tender to the touch.
-
Does this cake need to be refrigerated at all times, even after it’s fully prepared?
Yes, this coconut cake absolutely must stay refrigerated. Due to the use of whipped topping, which is perishable, and the inherently moist crumb created by the cream of coconut soak, keeping it cold is essential for both food safety and maintaining its optimal texture. Serving it chilled ensures that the whipped topping remains firm and fluffy, and the cake itself has a pleasant, cool consistency.