Ultimate Brown Butter Toffee Bars
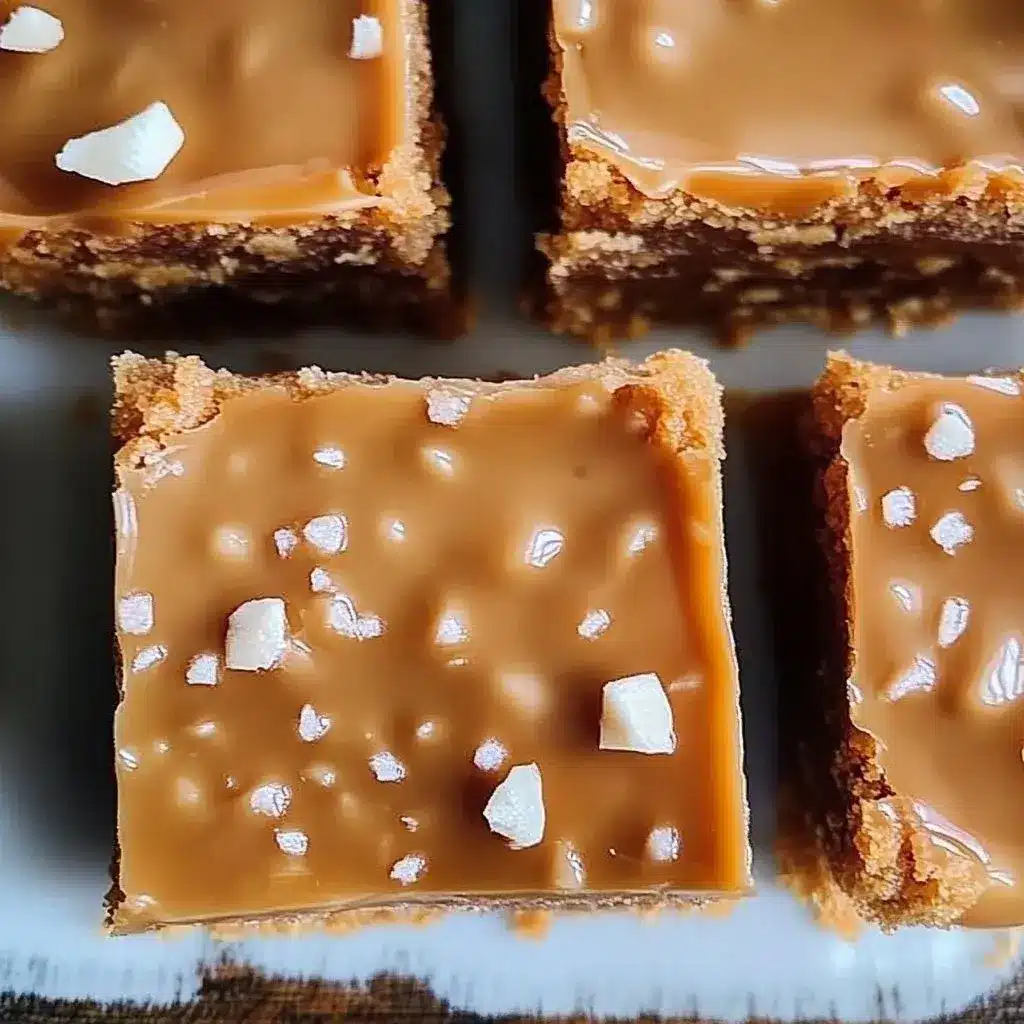
Nothing says comfort like a batch of freshly baked cookies or bars, and if you haven’t experienced the sheer delight of Brown Butter Toffee Bars, you’re truly missing out on a culinary masterpiece. These exquisite treats artfully weave together a fudgy, rich core with the profoundly nutty essence of browned butter and the sweet, satisfying crunch of toffee bits, promising an unforgettable sensory journey with every single bite.
This particular recipe stands out not only for its remarkable ease of preparation but also for how it elevates the humble toffee bar into something truly extraordinary. The secret lies in the magical transformation that occurs when butter is browned, unlocking a luxurious depth of flavor that forms the soul of these bars. Whether you’re planning a grand family reunion or a quiet, intimate evening at home, these bars are guaranteed to be the star of the show, captivating every palate present. The straightforward nature of the ingredients and the crystal-clear, step-by-step instructions ensure that even novice bakers can achieve professional-quality results, proving that exceptional desserts don’t require a culinary degree.
Why You Will Love This Recipe
- Unforgettable Flavor: The deep, nutty notes from browned butter create a flavor profile that is simply unparalleled, making these bars a standout treat.
- Effortless Preparation: With clear, concise instructions, this recipe is accessible to bakers of all skill levels, ensuring success every time.
- Incredible Versatility: Easily customize these bars by adding your favorite nuts, chocolate chips, or other delightful mix-ins to suit any preference or occasion.
- Crowd-Pleasing Appeal: The irresistible combination of chewy texture and rich, sweet flavor makes these bars a guaranteed hit with both children and adults.
- Perfect for Sharing: Cut into convenient squares, these bars are ideal for potlucks, bake sales, or simply sharing with loved ones, spreading joy one bite at a time.
The sheer brilliance of Brown Butter Toffee Bars truly shines through in the nuanced flavor imparted by the browned butter. This seemingly simple step transforms ordinary butter into an aromatic, complex ingredient that elevates the entire bar. Beyond the foundational brown butter, this recipe invites your personal touch, allowing for endless creativity with optional additions like your preferred nuts or a medley of chocolate chips.
These bars are exceptionally well-suited for a wide array of gatherings, fitting seamlessly into everything from casual weeknight dinners to elaborate holiday feasts. Their impressive presentation and delightful taste are sure to leave a lasting positive impression on any guest. For bake sales or potluck dinners, these Brown Butter Toffee Bars are destined to be the highlight, consistently drawing compliments and requests for the recipe.
Ingredients You Need
The success of any great dessert hinges on the quality of its ingredients, and these Brown Butter Toffee Bars are no exception. We aim for simple, readily available items that, when combined with the brown butter technique, create something truly special. Focusing on fresh, good-quality butter, fine sugar, and rich toffee bits will ensure the best possible outcome. Remember, the subtle nuances of each ingredient play a vital role in the final flavor symphony.
Brown Butter Toffee Bars

Delightful bars combining fudgy goodness with the rich, nutty flavor of brown butter and sweet toffee bits, perfect for any occasion.
- 1 cup unsalted butter
- 1 cup brown sugar
- 1/2 cup granulated sugar
- 2 large eggs
- 1 teaspoon vanilla extract
- 2 cups all-purpose flour
- 1/2 teaspoon baking powder
- 1/4 teaspoon salt
- 1 cup toffee bits
- 1 cup chopped nuts (optional)
- 1Gather all ingredients.
- 2Melt unsalted butter in a saucepan over medium heat until golden brown and nutty.
- 3In a mixing bowl, combine brown sugar, granulated sugar, eggs, and vanilla extract until well incorporated.
- 4Slowly pour the browned butter into the sugar mixture, stirring until fully incorporated.
- 5In another bowl, whisk together flour, baking powder, and salt.
- 6Gradually add the dry ingredients to the wet mixture, stirring gently until just combined. Do not overmix.
- 7Fold in the toffee bits and chopped nuts (if using).
- 8Pour the batter into a greased 9x13 inch baking pan and spread evenly.
- 9Bake in a preheated oven at 350°F (175°C) for 25-30 minutes, or until edges are golden brown and a toothpick inserted in the center comes out clean.
- 10Remove from oven and let cool in the pan before cutting into bars and serving.
Keywords: Baking Recipe, Brown Butter Toffee Bars, Dessert Recipe, Easy Dessert, Toffee Bars
- unsalted butter: for that rich, foundational flavor that brown butter is known for.
- brown sugar: provides moisture and a deep, caramel-like sweetness.
- granulated sugar: helps to lighten the texture and balance the sweetness.
- large eggs: act as a binder, adding richness and structure to the bars.
- vanilla extract: enhances the overall flavor profile with its warm, aromatic notes.
- all-purpose flour: forms the base of the bar, providing the structure.
- baking powder: ensures the bars have a slight lift and tender crumb.
- salt: essential for balancing the sweetness and amplifying the other flavors.
- toffee bits: the star ingredient, offering delightful pockets of crunchy, sweet toffee.
- chopped nuts (optional): for added texture and a complementary nutty flavor.
You’ll find precise measurements for all these components within the accompanying recipe card, ensuring you have everything you need for baking success.
Variations
For those seeking a fully plant-based experience, transforming these bars into a vegan delight is remarkably straightforward. Begin by substituting the unsalted butter with a high-quality coconut oil or a rich vegan butter alternative; ensure it has a pleasant flavor that won’t overpower the toffee. To replace the eggs, a simple flax egg, made by combining one tablespoon of ground flaxseed with three tablespoons of water and letting it sit for five minutes, works wonderfully to provide the necessary binding and moisture.
If gluten sensitivity is a concern, fear not! A simple swap of your usual all-purpose flour for a reliable 1:1 gluten-free flour blend will yield equally delicious results. Many brands offer excellent blends specifically designed for baking, which can be used in the same quantities as regular flour. The key is to ensure the blend contains a mix of starches and flours for the best texture, mimicking the chewiness and structure of traditional bars.
Another exciting avenue for variation involves incorporating other flavor elements. Consider adding a generous cup of chocolate chips – semi-sweet, dark, or even white chocolate would be divine – for a classic chocolate-toffee combination. Alternatively, a swirl of creamy peanut butter or a sprinkle of cinnamon can introduce new dimensions of flavor that beautifully complement the toffee and brown butter notes, creating a truly personalized treat.
How to Prepare Brown Butter Toffee Bars
Step 1: The Art of Browning Butter
The journey to extraordinary flavor begins with mastering the browning of butter. Place one cup of unsalted butter into a light-colored, heavy-bottomed saucepan over medium heat. As the butter melts, you’ll see it begin to foam, and then the milk solids will start to separate and settle at the bottom. Continue to cook, swirling the pan gently and occasionally, and you’ll notice the foam subsiding and the milk solids turning a beautiful golden-brown hue. This is the critical moment: a rich, nutty aroma will fill your kitchen, signaling that the butter is perfectly browned. Remove it from the heat immediately to prevent burning.
It’s crucial to watch this process very closely, as browned butter can transition from perfectly toasted to burnt in a matter of seconds. The light color of the saucepan is your friend here, allowing you to easily observe the subtle changes in the butter’s color. This nutty fragrance is precisely what imbues the toffee bars with their signature depth and complexity, setting them apart from ordinary butter-based baked goods.
Once browned to perfection, carefully pour the butter into a heat-safe bowl. This step is important to stop the cooking process and prevent the milk solids from continuing to cook at the bottom of the pan. Let it cool slightly while you prepare the other ingredients; it should still be warm enough to incorporate smoothly but not so hot that it affects the sugar and eggs.
Step 2: Crafting the Sweet Base
In a large mixing bowl, combine one cup of packed brown sugar and half a cup of granulated sugar. These two sugars work in harmony to provide both moisture and structure, contributing to that desirable chewy texture. Add in two large eggs, which are essential for binding the ingredients and giving the bars their structure. A full teaspoon of pure vanilla extract will also be incorporated at this stage, rounding out the flavors with its warm, comforting notes.
Whisk these ingredients together vigorously until the mixture is well combined and begins to lighten slightly in color. The goal here is to dissolve the sugars as much as possible into the eggs and vanilla, creating a smooth, homogenous base. This aeration process also contributes to the final texture of the bars, making them less dense.
The consistency you’re aiming for is a thick, glossy mixture. You should see ribbons form when you lift the whisk. If the mixture appears too dry or crumbly, whisk a little longer to ensure all the sugar has dissolved into the wet ingredients. This step is fundamental to achieving that perfect balance of sweetness and chewiness.
Step 3: Marrying the Flavors
Now, it’s time to introduce the star of the show: your beautifully browned butter. While the browned butter has cooled slightly, it should still be warm. Slowly pour the liquid gold into the sugar and egg mixture. Stir continuously as you pour, ensuring that the warm butter is gradually incorporated into the batter without scrambling the eggs. This gradual addition is key to creating a smooth, emulsified base.
Continue to stir until the butter is completely integrated into the batter, creating a wonderfully fragrant and glossy mixture. Take a moment to inhale that incredible aroma; it’s a preview of the deliciousness to come. The combination of browned butter with the sugars and eggs creates a rich foundation for the toffee bars.
The batter at this stage will be thick and lusciously smooth, indicative of the rich fats from the butter and the emulsifying properties of the eggs. This cohesive blend is what will hold all the other delicious components together as the bars bake to perfection. Properly combining these wet ingredients ensures a uniform distribution of flavor throughout the finished product.
Step 4: The Dry Ingredient Ensemble
In a separate, medium-sized bowl, whisk together two cups of all-purpose flour, half a teaspoon of baking powder, and a quarter teaspoon of salt. Whisking the dry ingredients together first is a crucial step that ensures the leavening agent (baking powder) and the salt are evenly distributed throughout the flour. This prevents pockets of saltiness or uneven rising in your finished bars.
The baking powder is what provides a gentle lift to the bars, contributing to their tender and slightly cakey texture, rather than making them dense. Salt, as always, plays a vital role in balancing the sweetness and enhancing all the other flavors present in the recipe. Properly aerating the flour by whisking also helps to lighten it before it’s incorporated into the wet ingredients, leading to a more tender final product.
Ensure that you don’t see any clumps of baking powder or salt remaining in the flour mixture. A thorough whisking guarantees that these elements will be dispersed uniformly, contributing to a consistent flavor and texture in every single bite of your Brown Butter Toffee Bars. This simple preparation step is foundational for achieving bake-perfect results.
Step 5: Combining Wet and Dry
Now, it’s time to bring the wet and dry ingredients together. Gradually add the whisked dry ingredients to the wet batter you prepared earlier. It’s best to add the flour mixture in two or three additions, mixing gently after each addition. This gradual incorporation helps to prevent overmixing, which is a common pitfall that can lead to tough bars.
Use a spatula or a wooden spoon to gently fold the dry ingredients into the wet ingredients until they are *just* combined. You want to see no streaks of dry flour remaining. However, stop mixing as soon as this point is reached; overmixing develops the gluten in the flour too much, resulting in a chewier, potentially tougher bar rather than the desired tender texture.
The batter will become quite thick at this stage. The goal is a cohesive dough that is thick enough to hold its shape but still pliable. Resist the urge to overwork the dough; a few light folds are all that’s needed to bring it together. This gentle handling is key to maintaining a tender crumb in your finished toffee bars, ensuring they are a delight to eat.
Step 6: The Star Ingredient: Toffee Bits
This is where the magic truly happens and the toffee bars earn their name. Gently fold in one cup of toffee bits into the thick batter. If you’re feeling adventurous and want to add an extra layer of texture and flavor, this is also the time to incorporate about one cup of your favorite chopped nuts, such as pecans or walnuts. These additions provide delightful pockets of crunch and complementary nutty notes.
Use your spatula to distribute the toffee bits and any optional nuts evenly throughout the batter. You want to ensure that each bar will have a good distribution of these crunchy elements. Be gentle during this folding process, as you don’t want to crush the toffee bits or nuts too much, preserving their distinct textures.
The batter will now be studded with generous amounts of toffee goodness, promising a delightful crunch in every bite. This is the point where the bars truly start to take their iconic form, with the glistening toffee bits promising sweet indulgence. Ensure the toffee bits and nuts are spread as uniformly as possible within the dough for consistent flavor distribution across all the baked bars.
Step 7: Preparing for the Oven
Preheat your oven to 350°F (175°C). While the oven heats, prepare a 9×13 inch baking pan. Grease the pan thoroughly with butter or non-stick cooking spray, ensuring that all corners and edges are well-coated. Alternatively, you can line the pan with parchment paper, leaving an overhang on the sides; this makes lifting the baked bars out of the pan much easier for cutting.
Spoon the thick batter into the prepared baking pan. Use a spatula or the back of a spoon to spread the batter evenly across the entire surface of the pan. Press the batter down gently to create a level surface, ensuring consistent thickness throughout. This evenness is crucial for uniform baking and ensures that every bar has the same delightful texture and chewiness.
Make sure the batter reaches all the corners of the pan. Sometimes, the batter can be quite sticky, so a lightly greased spatula or damp fingers can help in achieving a smooth, even layer. This preparation step ensures that your bars bake evenly and are easy to slice into perfect portions once cooled.
Step 8: Baking to Perfection
Place the prepared baking pan into the preheated oven. Bake for 25 to 30 minutes. The exact baking time will depend on your oven, so it’s important to keep an eye on the bars as they approach the 25-minute mark. You’re looking for the edges to turn a beautiful golden-brown color. The center should appear set and no longer wet, though it might still look slightly soft.
To test for doneness, insert a toothpick into the center of the bars. If it comes out clean or with a few moist crumbs attached (not wet batter), they are ready. Avoid overbaking, as this can lead to dry, crumbly bars. The toffee will continue to set up as the bars cool, so a slightly soft center is perfectly fine.
Once baked, carefully remove the pan from the oven and place it on a wire rack to cool completely. This cooling period is essential for the bars to firm up properly, allowing for clean cuts and the best texture. Rushing this step can result in bars that fall apart when you try to cut them.
Step 9: Cooling and Cutting
Allow the Brown Butter Toffee Bars to cool in the pan for at least 1 to 2 hours, or until they have reached room temperature. Patience is key here; the bars need this time to set and firm up properly. Trying to cut them while they are still warm will likely result in a gooey mess and uneven pieces.
Once completely cooled, if you used parchment paper with an overhang, carefully lift the entire slab of bars out of the pan using the parchment paper. Place this slab onto a cutting board. If you did not use parchment paper, you can directly cut the bars within the pan. Use a sharp knife to cut the slab into your desired bar shapes, typically 1.5 to 2 inches wide.
For the cleanest cuts, wipe your knife clean between each cut, especially if the toffee bits start to stick. This ensures that each bar looks as beautiful as it tastes. These perfectly cut bars are now ready to be enjoyed or stored.
Pro Tips for Brown Butter Toffee Bars
Don’t Rush the Browning Process: Take your time when browning the butter. Rushing it can lead to uneven browning or burning. The rich, nutty aroma is your guide to perfection, so be patient and observant.
Measure Flour Accurately: Spoon your flour into the measuring cup and level it off with a straight edge. Scooping directly from the bag can pack too much flour, leading to dry, dense bars.
Avoid Overmixing: Mix the dry ingredients into the wet ingredients only until just combined. Overmixing develops gluten, making your bars tough instead of tender and chewy.
Cool Completely Before Cutting: This is arguably the most critical step for achieving clean cuts. Allowing the bars to cool thoroughly in the pan lets them set properly, preventing them from crumbling or becoming a sticky mess.
Consider a Sprinkle of Sea Salt: For an extra layer of flavor complexity, a sprinkle of flaky sea salt over the bars just before baking can wonderfully balance the sweetness and enhance the toffee notes. This small addition can elevate the overall taste experience.
Serving Suggestions for Brown Butter Toffee Bars
Decoration
While these bars are stunning in their simplicity, a few decorative touches can elevate them even further. A light dusting of powdered sugar provides a classic, elegant finish that contrasts beautifully with the rich brown color of the bars. For a more decadent look, consider a delicate drizzle of melted chocolate, either dark or white, across the top. You could even sprinkle a few extra toffee bits or chopped nuts over the chocolate drizzle while it’s still wet to create a textured, appealing surface.
Side Dishes
Brown Butter Toffee Bars pair exceptionally well with a variety of beverages that complement their rich sweetness. A steaming mug of coffee or a robust espresso provides a delightful contrast to the sweetness, while a glass of cold milk is a timeless and comforting accompaniment for both kids and adults. For a more sophisticated pairing, consider a sweet dessert wine or even a glass of port, which can echo the caramel notes of the toffee.
Creative Serving Ideas
Elevate these bars by serving them warm, perhaps with a scoop of creamy vanilla bean ice cream. The contrast between the warm, slightly gooey bar and the cold ice cream is simply divine. You could also crumble them over a bowl of fruit salad for a delightful crunchy topping, or incorporate them into a trifle for a layered dessert sensation. Another idea is to serve them as part of a dessert charcuterie board, alongside other cookies, fruits, and cheeses for a varied and appealing spread.
Preparation & Storage
Storing Leftovers
To keep your Brown Butter Toffee Bars fresh and delicious, store them in an airtight container at room temperature. They typically maintain their delightful texture and flavor for up to a week. Ensure the container is well-sealed to prevent them from drying out or absorbing unwanted odors from other foods.
If your kitchen tends to be warm, or if you prefer a firmer texture, refrigerating the bars is an option. However, it’s important to allow them to come back to room temperature before serving to enjoy their optimal chewy consistency. Cold bars can become quite hard, diminishing the sensory experience.
For the best results, avoid stacking them too high in the container, as this can cause them to compress and lose their structure. A single layer or minimal stacking will help preserve their individual integrity and appearance.
Freezing
These delightful toffee bars freeze exceptionally well, making them a perfect make-ahead treat. Wrap each bar individually and tightly in plastic wrap to protect them from freezer burn. Once individually wrapped, place the bars into a freezer-safe bag or an airtight container for added protection. They can be stored in the freezer for up to 2-3 months.
When you’re ready to enjoy them again, simply remove the desired number of bars from the freezer. Allow them to thaw completely at room temperature for a few hours. This gradual thawing ensures they retain their desired texture and flavor profile, as if they were freshly baked.
For an extra treat, after thawing, you can briefly warm them in a microwave on low power for a few seconds. This can help to re-soften them and bring back some of that fresh-baked warmth and chewiness, making them indistinguishable from their original state.
Reheating
If your Brown Butter Toffee Bars have been stored at room temperature or refrigerated and you desire that just-baked warmth, reheating is a simple process. Place the desired number of bars on a microwave-safe plate. Heat them on low power in short intervals, about 10-15 seconds at a time. Be very careful not to overheat, as this can cause them to become overly soft or even melt.
Alternatively, if you want a slightly crispier edge, you can gently warm them in a toaster oven at a low temperature (around 250°F or 120°C) for just a few minutes. Keep a close watch on them to prevent burning or overcooking. This method can help revive their texture and aroma.
For the absolute best experience after reheating, consider serving them immediately with a dollop of whipped cream or a scoop of ice cream, as the slight warmth enhances their indulgence. The goal is to gently warm them through, not to cook them further.
Frequently Asked Questions
- Can I prepare the batter for these Brown Butter Toffee Bars ahead of time?
Yes, you can absolutely prepare the batter for these Brown Butter Toffee Bars in advance. Once the batter is made and the toffee bits are folded in, cover it tightly with plastic wrap and refrigerate for up to 24 hours. When you’re ready to bake, allow the batter to sit at room temperature for about 30 minutes to soften slightly, then spread it into the prepared pan and bake as directed. Keep in mind that refrigerated batter might require a slightly longer baking time, so monitor them closely as they bake to ensure they reach that perfect golden-brown stage.
- Is it absolutely necessary to brown the butter for this recipe, or can I use regular melted butter?
While you *can* use regular melted butter, browning the butter is highly recommended and is what truly elevates these bars to a gourmet level. The process of browning butter transforms its flavor, introducing deep, nutty, caramel-like notes that regular melted butter simply cannot provide. These distinct flavors are the hallmark of “brown butter” toffee bars and are crucial to the unique taste profile. Skipping this step will result in a more standard toffee bar, lacking the signature complexity and richness that makes this recipe so special and sought after.
- What are the best substitutions for the toffee bits if I can’t find them or want to try something different?
If toffee bits are unavailable, you have several excellent substitution options that will still result in delicious bars. Chocolate chips, such as semi-sweet or dark chocolate, are a fantastic alternative and create a delightful chocolate-toffee bar. Another option is to chop up Heath bars or Skor bars for a similar toffee crunch. For a different texture, you could try adding chopped nuts like pecans or walnuts, or even dried cranberries for a tart contrast. If you enjoy caramel, a swirl of thick caramel sauce mixed into the batter just before baking can also be a wonderful addition, though it will change the texture significantly.