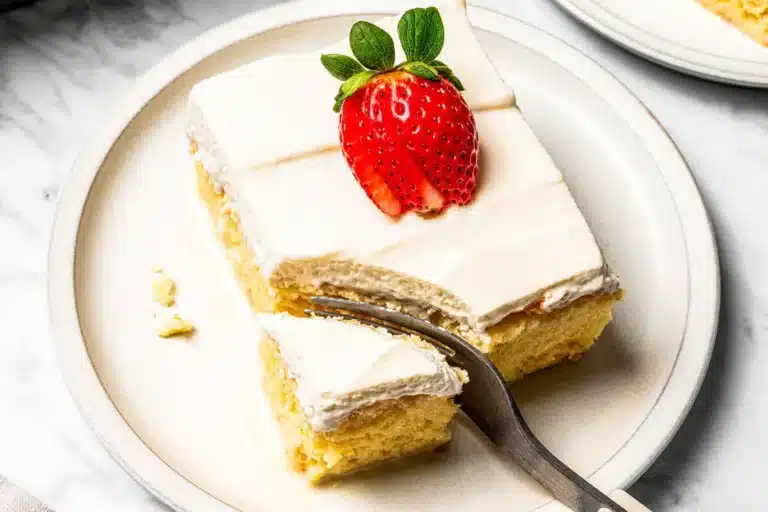
Soft Brazilian Coconut Cake
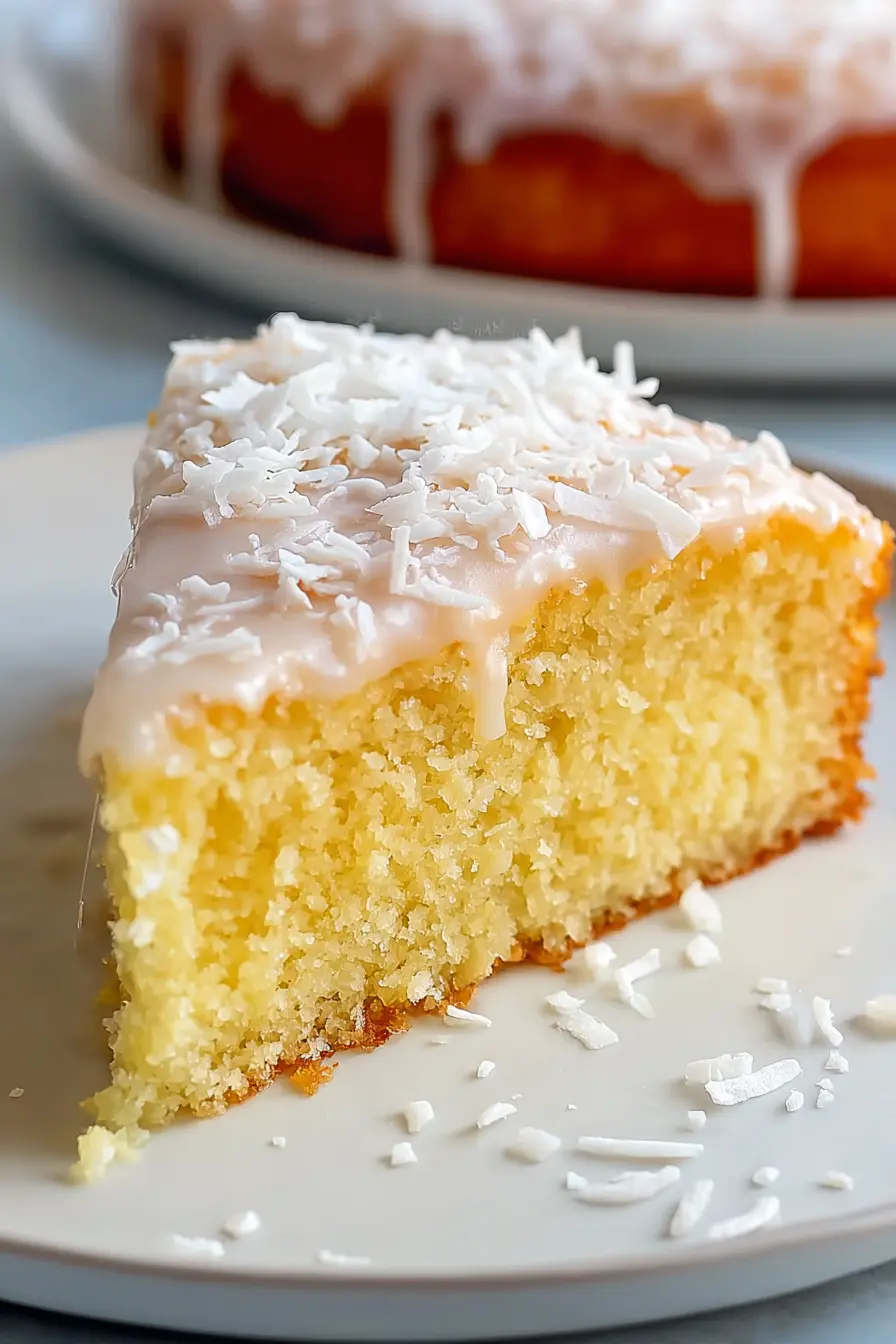
This Brazilian Coconut Cake is a delightful treat that brings a taste of the tropics right into your kitchen. Its airy sponge, infused with a sweet coconut soak, creates a moist and tender crumb that is simply irresistible. This dessert is perfect for any occasion, from a casual coffee break to a more formal gathering, offering a sophisticated yet approachable flavor profile.
The beauty of this cake lies in its simplicity and the wonderful balance of textures and tastes. You’ll experience a light, fluffy cake base that artfully absorbs a luscious, milky glaze, topped with the subtle chewiness of shredded coconut. It’s a dessert that feels both comforting and elegant, making it a guaranteed crowd-pleaser for all ages.
Why You Will Love This Recipe
- Effortless Elegance: This cake boasts a sophisticated tropical flavor with a moist, tender crumb that feels special without requiring complicated techniques.
- Make-Ahead Marvel: It’s designed to be prepared in advance, allowing the flavors to meld beautifully and making it perfect for stress-free entertaining.
- Incredible Moisture: The unique soaking method ensures every bite is supremely moist and flavorful, thanks to the rich condensed milk and coconut milk glaze.
- Light & Airy Texture: The careful preparation of the egg whites creates a wonderfully delicate sponge that perfectly complements the creamy coconut elements.
- Tropical Delight: With its dominant coconut flavor and subtle sweetness, this cake offers a refreshing escape and a taste of sunshine in every slice.
The quality of your ingredients is paramount to achieving the best possible flavor and texture in this Brazilian Coconut Cake. Opting for fresh, good-quality components will elevate the overall experience of this delightful dessert. Paying attention to the details of each ingredient, from the eggs to the coconut, ensures that the cake bakes up perfectly and the glaze develops its characteristic lusciousness.
Brazilian Coconut Cake
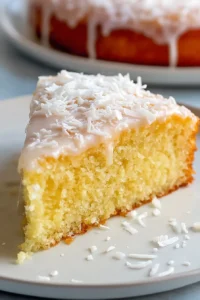
A light, airy Brazilian-style coconut cake soaked with a rich coconut and condensed milk glaze, then finished with a generous layer of shredded coconut for a moist and flavorful dessert.
- 1/2 cup unsweetened coconut milk
- 3/4 cup granulated sugar
- 1 teaspoon baking powder
- 4 large eggs, separated
- 3/4 cup plain all-purpose flour
- 1 teaspoon vanilla essence
- 3/4 cup sweetened condensed milk
- 1/3 cup unsweetened coconut milk
- 3/4 cup sweetened shredded coconut
- 1Preheat the oven to 350°F (175°C). Lightly grease a 9x9-inch cake pan, or a pan of similar size.
- 2In a medium bowl, sift together the all-purpose flour and baking powder until evenly combined. Set aside.
- 3Separate the eggs, placing the yolks in a small bowl and the whites in a large mixing bowl or the bowl of a stand mixer. Beat the egg whites on medium-high speed until stiff peaks form.
- 4Reduce the mixer speed to low and gradually incorporate the yolks and sugar, alternating between one yolk and a portion of the sugar. With the final addition, mix in the vanilla essence. Continue beating until the sugar has dissolved and the mixture appears smooth.
- 5Add the sifted dry ingredients gradually to the egg mixture, mixing after each addition until the batter is uniform and free of lumps. Stir in the coconut milk until fully blended.
- 6Transfer the batter to the prepared pan and bake for 25 to 30 minutes, or until a toothpick inserted into the center comes out clean.
- 7While the cake bakes, prepare the glaze by stirring together the sweetened condensed milk and the coconut milk in a medium bowl until smooth.
- 8Once the cake is out of the oven, use a skewer or toothpick to poke holes all over the surface. Make plenty of holes so the glaze can soak in thoroughly.
- 9Pour the glaze evenly over the warm cake and allow it to absorb for at least 10 minutes at room temperature, or chill longer in the refrigerator for a more deeply soaked texture.
- 10When the cake has absorbed the glaze, scatter the shredded coconut evenly over the top. Slice and serve.
- unsweetened coconut milk: Use full-fat for the richest flavor and creaminess in both the cake batter and the glaze.
- granulated sugar: This provides sweetness and helps in creating a light, airy cake structure when combined with the eggs.
- baking powder: Essential for providing lift and ensuring a light, tender crumb that doesn’t feel dense.
- large eggs (separated): Crucial for the cake’s airy texture; the whites are beaten separately to achieve maximum volume.
- plain all-purpose flour: Forms the structural base of the cake, keeping it tender and delicate.
- vanilla essence: Adds a warm, aromatic note that complements the coconut and sweet flavors beautifully.
- sweetened condensed milk: The backbone of the rich, sweet glaze that makes this cake so wonderfully moist.
- sweetened shredded coconut: Adds a delightful texture and enhances the tropical coconut theme as a topping.
The precise measurements for these ingredients are detailed in the accompanying recipe card, ensuring you have all the necessary quantities for success.
Variations
For those seeking a vegan version of this delightful cake, simple substitutions can yield a equally scrumptious treat. The eggs can be replaced with a flax egg mixture or a commercial egg replacer, and the condensed milk can be swapped for a vegan condensed milk alternative, often made from coconut or soy. Ensure your coconut milk is full-fat for the best texture and richness, and use a good quality vegan shredded coconut for the topping. This adaptation allows everyone to enjoy the tropical flavors of this moist cake.
If you’re following a low-carb or keto lifestyle, this Brazilian Coconut Cake can be adapted with a few smart ingredient swaps. For the flour, you can use almond flour or coconut flour, which are significantly lower in carbohydrates. The granulated sugar can be substituted with a sugar-free sweetener like erythritol or xylitol, ensuring the sweetness is maintained without the carbs. The condensed milk in the glaze also needs a sugar-free alternative, many of which are readily available, or can be made at home by reducing unsweetened coconut milk with a sweetener. This makes the cake accessible to a wider range of dietary preferences.
Adding a touch of citrus can bring a bright, zesty contrast to the rich coconut flavor. Consider zesting half a lime or a small lemon into the cake batter before baking. The subtle tang from the citrus will cut through the sweetness of the glaze and add a refreshing dimension to each bite. You could also serve the cake with a dollop of lime-curd or a sprinkle of candied lime zest for an extra pop of flavor and visual appeal, enhancing the tropical theme.
How to Prepare Brazilian Coconut Cake
Step 1: Oven and Pan Preparation
Begin by preheating your oven to the specified temperature, typically around 350°F (175°C). This ensures the oven is at the optimal temperature when the batter is ready to bake, promoting even cooking and a consistent rise. A properly preheated oven is fundamental for achieving the desired cake texture.
Next, prepare your cake pan. A 9×9 inch square pan is commonly used, but a similarly sized round or rectangular pan will also work. Lightly grease the pan thoroughly with butter, oil, or cooking spray, ensuring all corners and edges are covered. This step is crucial for preventing the cake from sticking, making it easy to remove or slice cleanly after it has been baked and soaked.
Some bakers also like to lightly flour the greased pan, tapping out any excess. This creates an additional barrier and ensures a perfectly clean release of the finished cake. Taking these few moments for pan preparation saves potential frustration later on and contributes to a professional-looking dessert.
Step 2: Combining Dry Ingredients
In a medium-sized bowl, combine the all-purpose flour and the baking powder. Sifting these ingredients together is a highly recommended step. Sifting helps to aerate the flour and remove any lumps, ensuring a lighter cake texture and a more even distribution of the leavening agent.
Whisk the sifted flour and baking powder together thoroughly. This ensures that the baking powder is evenly dispersed throughout the flour. Consistent distribution of baking powder is key to a uniform rise and a tender cake crumb, preventing any pockets of denser cake or uneven baking.
Once combined and whisked, set this dry mixture aside. It will be incorporated into the wet ingredients later in the process, forming the main structure of your delicious Brazilian Coconut Cake.
Step 3: Whipping the Egg Whites
This is a pivotal step for achieving the signature airy texture of this cake. Carefully separate the eggs, ensuring that absolutely no yolk contaminates the egg whites. Even a tiny speck of yolk can prevent the whites from whipping to their full potential.
Place the egg whites in a large, clean, and dry mixing bowl. Using an electric mixer (stand mixer or hand mixer), begin beating the egg whites on medium-high speed. Gradually increase the speed as the whites start to foam.
Continue beating until stiff peaks form. This means that when you lift the whisk or beaters, the egg whites stand up straight and hold their shape without collapsing. This stage is critical for incorporating air, which is what gives the cake its characteristic lightness and sponge-like quality.
Step 4: Incorporating Yolks and Sugar
With the mixer still running on low speed, begin to gradually add the egg yolks to the whipped egg whites. Add them one at a time, allowing each yolk to incorporate slightly before adding the next. This helps maintain the airy volume you’ve worked hard to create.
Next, gradually add the granulated sugar to this mixture. It’s beneficial to do this in stages, alternating with the egg yolks if preferred, or adding it after the yolks have been incorporated. The sugar not only sweetens the cake but also stabilizes the egg foam and contributes to a smooth, glossy texture.
Continue beating until the sugar has fully dissolved and the mixture appears smooth and airy, often described as ribbon-stage or glossy. You should not feel any grittiness from the sugar when you rub a small amount between your fingers. Finally, gently mix in the vanilla essence, ensuring it is evenly distributed to impart its warm aroma throughout the batter.
Step 5: Combining Wet and Dry Mixtures
Now, it’s time to bring the batter together. Gradually add the sifted dry ingredients (flour and baking powder mixture) to the wet ingredients in stages. It’s best to add them in two or three additions, mixing gently after each addition.
Use a spatula or the mixer on its lowest speed to gently fold or mix the dry ingredients into the wet. The goal here is to combine them just until no streaks of flour remain. Overmixing at this stage can develop the gluten in the flour too much, resulting in a tougher cake.
Once the dry ingredients are incorporated, gently stir in the unsweetened coconut milk until the batter is smooth and uniform. Ensure you scrape the sides and bottom of the bowl to incorporate all ingredients properly. The batter should have a smooth, slightly thick but pourable consistency, ready for baking.
Step 6: Baking the Cake
Pour the prepared batter evenly into the greased and prepared cake pan. Gently spread the top with a spatula to ensure an even layer, which will promote even baking.
Place the pan in the preheated oven and bake for the specified time, typically around 25 to 30 minutes. The exact baking time can vary depending on your oven, so it’s important to monitor the cake.
The cake is ready when the top is lightly golden brown and springs back when lightly touched. To confirm it’s fully baked, insert a toothpick or a thin skewer into the center; it should come out clean, without any wet batter clinging to it. Avoid overbaking, as this can lead to a dry cake.
Step 7: Glazing and Finishing
While the cake is baking, prepare the luscious glaze. In a medium bowl, combine the sweetened condensed milk and the 1/3 cup of unsweetened coconut milk. Stir them together thoroughly until they are well blended and form a smooth, creamy mixture.
As soon as the cake comes out of the oven, and while it is still warm, use a skewer, a fork, or a toothpick to poke numerous holes all over the surface of the cake. Be generous with the holes, ensuring they reach deep into the cake. This step is crucial for allowing the glaze to be fully absorbed into the warm cake crumb.
Slowly and evenly pour the prepared glaze over the warm cake, letting it seep into the holes. Allow the cake to rest and absorb the glaze for at least 10 minutes at room temperature. For an even richer, more intensely soaked texture, you can then refrigerate the cake for a longer period.
Step 8: Adding the Coconut Topping
Once the cake has had a little time to absorb the initial pour of glaze, and before the glaze fully sets, scatter the sweetened shredded coconut evenly over the entire surface of the cake. Press it down very gently if you want it to adhere a bit more firmly, but it will naturally stick as the glaze cools.
Allow the cake to cool completely in the pan or on a wire rack. As it cools, the glaze will continue to absorb and set, creating that signature moist texture. The shredded coconut will provide a beautiful, snowy finish and a delightful textural contrast.
Once fully cooled, the cake is ready to be sliced and served. The combination of the airy cake, the rich, sweet glaze, and the textured coconut topping creates a truly delightful dessert experience that is both comforting and exotic.
Pro Tips for Brazilian Coconut Cake
Warm Cake, Warm Glaze: It is highly advantageous to pour the glaze over the cake while it is still warm from the oven. The heat from the cake opens up its crumb structure, making it more receptive to absorbing the liquid glaze evenly and deeply. This direct heat transfer is key to achieving that wonderfully moist interior.
Generous Holing: Don’t be shy with the skewer or toothpick when making holes in the cake. Aim for a grid-like pattern across the entire surface, ensuring plenty of openings. This allows the glaze to reach every corner of the cake, guaranteeing a consistent moistness in every single slice rather than just in the center.
Patience for Perfection: While the cake can be served shortly after glazing, it truly benefits from an extended resting period. Allowing the cake to sit for several hours, or even overnight in the refrigerator, gives the glaze ample time to fully meld with the crumb, enhancing both the flavor and the supremely tender texture. This is where the magic of make-ahead desserts truly shines.
Quality Coconut is Key: For the best flavor and texture, use good quality sweetened shredded coconut for the topping. The fine shreds will adhere beautifully to the glaze, creating a soft, inviting appearance. If you prefer a less sweet topping, unsweetened shredded coconut can be used, but be mindful that it won’t be as visually striking or as integral to the overall sweetness.
Embrace the Simplicity: This cake is a testament to how simple ingredients and techniques can create something truly spectacular. Resist the urge to overcomplicate it with excessive decorations or frosting. The beauty of the Brazilian Coconut Cake lies in its honest, pure flavors and its elegantly moist, unadorned finish. It’s a celebration of coconut in its most delightful form.
Serving Suggestions for Brazilian Coconut Cake
Decoration
The classic decoration for this cake is a generous scattering of sweetened shredded coconut over the glazed surface. This provides a beautiful, snowy aesthetic and a delightful textural contrast to the moist cake beneath. For an extra touch, you can lightly toast some of the shredded coconut before sprinkling it on top to add a deeper, nuttier flavor and a more golden hue.
Another simple yet elegant option is to adorn the cake with a few delicate curls of fresh coconut or even edible flowers, if available. A light dusting of powdered sugar can also be used, but be mindful that the cake is already quite sweet from the glaze, so a little goes a long way. The key is to keep the decoration relatively simple to let the cake’s natural beauty and tropical flavor shine.
For a slightly more sophisticated presentation, consider a very light drizzle of melted white chocolate or even a contrasting dark chocolate over the coconut topping. This adds a touch of visual interest and a complementary flavor profile. Alternatively, serving with a small quenelle of whipped cream or a scoop of coconut ice cream can enhance the visual appeal and the overall tropical experience.
Side Dishes
This Brazilian Coconut Cake pairs wonderfully with a simple cup of strong coffee. The bitterness of the coffee acts as a perfect counterpoint to the sweetness of the cake, cleansing the palate and enhancing the overall flavor experience. It’s a classic combination that is both comforting and sophisticated.
Fresh tropical fruits also make an excellent accompaniment. Slices of ripe mango, pineapple chunks, or a medley of berries can add a bright, refreshing, and slightly tart contrast to the rich sweetness of the cake. This combination creates a balanced dessert that feels both indulgent and invigorating, perfect for warmer weather.
For a more decadent dessert experience, consider serving the cake with a scoop of high-quality vanilla bean ice cream or a creamy coconut sorbet. The cold temperature and creamy texture of the ice cream or sorbet beautifully complement the moist cake and the rich glaze, creating a truly delightful sensory contrast.
Creative Serving Ideas
Individual portions can be presented elegantly by slicing the cake and serving each piece slightly chilled. This allows the glaze to firm up a bit, making the slices neater and the cake incredibly refreshing. A small dollop of softly whipped cream or a spoonful of tangy passion fruit curd on the side adds an extra layer of flavor and visual appeal.
For a more informal gathering, consider cutting the cake into small bite-sized squares or “fingers.” These are perfect for a dessert buffet or as part of a platter of assorted sweets, allowing guests to sample multiple treats. They are also wonderfully easy to handle and enjoy while mingling.
Another fun idea is to create a deconstructed version of the cake. Serve a slice of the moist sponge separately from a pool of the coconut glaze and a small mound of shredded coconut. This allows guests to assemble their own perfect bite and highlights the individual components of the dessert in a modern way.
Preparation & Storage
Storing Leftovers
Given the rich, milky glaze, this Brazilian Coconut Cake is best stored in the refrigerator. Once the cake has cooled completely, cover the pan tightly with plastic wrap or aluminum foil, or transfer individual slices to an airtight container. This prevents the surface from drying out and keeps the cake fresh for consumption.
The cake will remain delicious for approximately 3 to 4 days when stored properly in the refrigerator. In fact, the texture often improves after a few hours or overnight, as the glaze has more time to fully penetrate the cake crumb, making it even more moist and flavorful.
It is generally not recommended to leave this cake at room temperature for extended periods due to the dairy content in the glaze. Always opt for refrigeration to maintain both safety and quality.
Freezing
This moist and delicious cake freezes remarkably well, making it an excellent candidate for making ahead of time for future enjoyment. For best results, it’s recommended to freeze individual slices rather than the entire cake. This allows for easy thawing and portion control.
Wrap each slice tightly in a layer of plastic wrap, ensuring there are no air gaps, and then place the wrapped slices into a freezer-safe airtight container or a heavy-duty freezer bag. This double-layer protection helps prevent freezer burn and preserves the cake’s texture and flavor.
When stored properly, the Brazilian Coconut Cake can be kept frozen for up to 1 month. The quality remains quite good during this period, though the texture of the coconut topping might be slightly less fluffy after thawing.
Reheating
There is typically no need to reheat this Brazilian Coconut Cake, as it is designed to be enjoyed at room temperature or slightly chilled. The moistness from the glaze ensures it remains tender and delicious even when cold.
However, if you prefer a softer, more yielding texture, you can let a slice sit at room temperature for about 10 to 15 minutes before serving. This gentle warming allows the glaze to soften slightly and the cake to reach a more tender consistency without cooking it further.
Avoid reheating in a microwave or oven, as this can quickly dry out the delicate sponge and alter the texture of the glaze. The natural cooling process is usually the best way to enjoy its delightful moistness and flavor.
Frequently Asked Questions
-
Can I make this cake ahead of time?
Absolutely, and this is one of its greatest advantages! The Brazilian Coconut Cake is an ideal make-ahead dessert. In fact, letting it rest for several hours or overnight in the refrigerator allows the coconut and condensed milk glaze to fully absorb into the cake’s crumb. This resting period significantly enhances the moisture and melds the flavors, often resulting in an even more delicious cake than when freshly made. It makes it a perfect option for entertaining, as you can prepare it a day in advance and have one less thing to worry about on the day of your event.
-
Why are the egg whites beaten separately for this cake?
The separate beating of egg whites is a crucial technique that contributes significantly to the signature airy and light texture of this Brazilian Coconut Cake. By whipping the egg whites until stiff peaks form, you incorporate a substantial amount of air into the batter. This air expands during baking, creating a delicate, sponge-like structure that is wonderfully tender and has a good rise. Without this step, the cake would be much denser and heavier, lacking the characteristic soft crumb that makes this dessert so delightful and easy to eat.
-
Can I use unsweetened shredded coconut for the topping?
Yes, you can certainly use unsweetened shredded coconut for the topping if you prefer a less sweet finish or if that’s what you have on hand. The cake itself and the glaze are already quite sweet due to the condensed milk, so unsweetened coconut provides a nice textural element without adding extra sugar. While it might not be as visually striking as sweetened coconut, as it won’t have that slight golden hue from the sugar caramelizing, it still offers the classic coconut flavor and texture that complements the cake beautifully. The choice ultimately depends on your personal preference for sweetness and the desired overall flavor profile of the dessert.