Irresistible Blueberry Chocolate Cake Recipe – A Delicious Delight
When the sun begins to warm the kitchen, I find myself drawn to baking—there’s just something about that comforting mix of heat and sweet that lifts my spirits. Enter the star of my latest culinary adventure: Blueberry Chocolate Cake.
Picture this: the rich decadence of chocolate, lightened by the vibrant taste of fresh blueberries, all wrapped up in a luscious frosting that makes each slice look like a work of art. It’s a cake that’s not only perfect for birthdays and celebrations but also an irresistible treat for an afternoon pick-me-up or a cozy dinner party.
Why You Will Love This Recipe
- Unique Flavor Profile: The surprising blend of rich chocolate and fresh blueberries creates a taste sensation that’s worthy of any celebration.
- Decadent Yet Light: Despite its indulgent nature, the fruity frosting balances the richness, giving a delightful lightness to each bite.
- Visual Appeal: Each slice is a feast for the eyes, adorned with vibrant blueberries and optional edible flowers.
- Quick and Easy: With minimal baking skills required, you can whip up this show-stopper in no time, making it perfect for spontaneous gatherings!
- Crowd Pleaser: Whether it’s a birthday party or a casual get-together, this cake is sure to impress guests and leave them asking for your recipe!
Ingredients You Need
To create this delicious cake, gathering high-quality ingredients is key. Using fresh, vibrant blueberries and a good quality cocoa powder will elevate the overall flavor profile of your dessert, making each bite an unforgettable experience. Paying attention to the details, such as using room temperature dairy and eggs, ensures a beautifully emulsified batter.
Blueberry Chocolate Cake
Indulge in this delightful Blueberry Chocolate Cake, a perfect fusion of rich chocolate and vibrant blueberries, creating a taste sensation that's both decadent and light. This recipe is surprisingly easy to make, making it an ideal treat for celebrations or a delightful afternoon pick-me-up. Its moist texture and captivating flavors are sure to impress.
- For the Cake:
- 2 cups all-purpose flour
- 1.5 cups granulated sugar
- 0.75 cups Dutch-processed unsweetened cocoa powder
- 1 tbsp baking powder
- 0.5 tsp baking soda
- 1 tsp fine sea salt
- 0.5 cups vegetable or avocado oil
- 2 large eggs
- 1 cup whole milk
- 0.5 cups sour cream
- 1 tbsp vanilla extract
- 1 cup hot coffee or water
- For the Blueberry Frosting:
- 1 cup blueberries (fresh or frozen)
- 1 tbsp lemon juice
- 0.5 cups unsalted butter, softened
- 2.5 cups powdered sugar
- 1Cake Preparation: Preheat the oven to 350°F (175°C). Prepare two 8-inch cake pans by greasing and flouring them well.
- 2Whisk together the dry ingredients in a mixing bowl: flour, cocoa powder, sugar, baking powder, baking soda, and salt.
- 3Combine wet ingredients in a large mixing bowl. Whisk together the oil and eggs until smooth, then add milk, sour cream, and vanilla.
- 4Mix dry and wet ingredients by adding the dry mixture to the wet ingredients. Stir until combined, then carefully add hot coffee or water. The batter will be thin.
- 5Pour the batter evenly into the prepared cake pans. Bake for 25 to 30 minutes, or until a toothpick inserted comes out clean.
- 6Cool the cakes in their pans for about 10 to 20 minutes. Then, gently remove them from the pans and let them cool completely on a wire rack.
- 7Frosting Preparation: Combine blueberries, lemon juice, and a little water in a saucepan. Cook over medium heat until it simmers, then reduce heat until the blueberries are soft.
- 8Strain the blueberry mixture using a mesh sieve over a bowl, pressing down on the fruit to release juices. Discard seeds and skins. Allow the blueberry sauce to cool completely.
- 9Beat the softened butter with an electric mixer until smooth. Gradually add powdered sugar, mixing on low speed until combined, then whip on medium until creamy and fluffy.
- 10Incorporate about 4 tablespoons of the cooled blueberry sauce into the butter mixture. Add the remaining powdered sugar, mixing until smooth and fluffy.
- 11Assembly: Frost the first layer of cake with blueberry frosting, smoothing it out evenly. Carefully place the second layer on top, flipped upside down for a flat surface.
- 12Decorate the top and sides of the cake generously with blueberry frosting. Enhance the presentation with fresh blueberries and optional edible flowers.
Keywords: Blueberry, Chocolate, Cake, Dessert, Baking, German
- all-purpose flour: The base for this cake, giving it structure and a delightful crumb.
- granulated sugar: Sweetness that complements the rich chocolate flavor beautifully.
- Dutch-processed unsweetened cocoa powder: Adds deep chocolate flavor without acidity, enhancing the cake’s richness.
- baking powder: Provides lift, ensuring the cake rises perfectly.
- baking soda: This works with the acids in the cake to create a soft texture.
- fine sea salt: A pinch balances flavors and enhances the sweetness.
- vegetable or avocado oil: Keeps the cake moist and adds richness.
- large eggs: Essential for binding and provide a tender crumb.
- whole milk: Adds moisture and richness to the batter.
- sour cream: Contributes to the cake’s tenderness and a slight tang that complements the chocolate.
- vanilla extract: Enhances the overall flavor profile.
- hot coffee or water: Intensifies the chocolate’s depth; you can use hot coffee for an extra kick!
- blueberries (fresh or frozen): The star of the frosting, imparting a lovely fruity flavor that pairs beautifully with chocolate.
- lemon juice: Brightens the blueberry flavor and adds a zing.
- unsalted butter: Creates a smooth and creamy texture in the frosting.
- powdered sugar: Sweetens the frosting and gives it that perfect spreadable consistency.
You will find the precise quantities for each ingredient listed in the recipe card provided for your convenience.
Variations
This Blueberry Chocolate Cake is wonderfully versatile, allowing for numerous creative twists to suit different dietary needs and flavor preferences. For those seeking a dessert option that aligns with specific dietary choices, several simple modifications can be made.
Consider a delightful vegan version by substituting the eggs with flax eggs or unsweetened applesauce and using a plant-based milk like almond or soy. The butter in the frosting can be replaced with vegan butter or a rich coconut cream for a decadent, dairy-free finish. This ensures that everyone can partake in the deliciousness without compromise.
For individuals managing carbohydrate intake, a low-carb adaptation is achievable with strategic ingredient swaps. Employing a blend of almond flour and coconut flour can replace all-purpose flour, significantly reducing the net carb count. A sugar substitute like erythritol or stevia can then be used in place of granulated and powdered sugar, maintaining sweetness without the sugar spike. You might also find inspiration for other low-carb treats by exploring recipes on sites like Pinterest.
Enhancing the existing flavors is another avenue for creative variation. Adding a touch of orange zest to the cake batter alongside the blueberries can introduce a bright citrus note that beautifully complements both the fruit and the chocolate. Similarly, incorporating a tablespoon of your favorite liqueur, such as raspberry or a dark rum, into the frosting can add a sophisticated adult twist to this already beloved cake.
How to Prepare Blueberry Chocolate Cake
Step 1: Preparing the Cake Batter
Begin by preheating your oven to a consistent 350°F (175°C). This crucial first step ensures that your cake bakes evenly from the moment it enters the oven, leading to a perfectly risen and tender crumb. Simultaneously, prepare your two 8-inch round cake pans by generously greasing them with butter or cooking spray and then lightly dusting them with flour. For an extra insurance policy against sticking, you can also line the bottoms with parchment paper.
In a large mixing bowl, whisk together all the dry ingredients: the all-purpose flour, granulated sugar, Dutch-processed unsweetened cocoa powder, baking powder, baking soda, and fine sea salt. Whisking them thoroughly ensures that the leavening agents and flavorings are evenly distributed throughout the flour mixture. This even distribution is vital for achieving a uniform rise and preventing any pockets of unsweetened or overly sweet cake.
In a separate, larger mixing bowl, combine all the wet ingredients. Whisk together the vegetable or avocado oil and the large eggs until the mixture is smooth and well emulsified. Gradually whisk in the whole milk, sour cream, and vanilla extract until everything is completely combined and homogenous. The sour cream is particularly important here, as it contributes significant moisture and a subtle tang that beautifully balances the richness of the chocolate.
Now, it’s time to combine the wet and dry ingredients. Gradually add the dry ingredient mixture to the wet ingredients, stirring with a spatula or wooden spoon until *just* combined. Be careful not to overmix at this stage, as this can develop the gluten in the flour too much, resulting in a tougher cake. The batter will still be quite thick at this point.
The next addition is what will make this cake exceptionally moist: hot coffee or hot water. Slowly pour the hot liquid into the batter while stirring gently until the batter is smooth and appears thin. The hot liquid helps to bloom the cocoa powder, intensifying its chocolate flavor, and the thin consistency is characteristic of a very moist chocolate cake. This might seem unusual, but it is precisely what contributes to the cake’s luxurious texture.
Step 2: Baking the Cake Layers
Carefully pour the prepared batter evenly into the two prepared cake pans. Distribute the batter as evenly as possible between the two pans to ensure that both cakes bake at the same rate and achieve a similar height. A kitchen scale can be helpful here if you want absolute precision, but simply eyeballing it will generally yield good results for home baking.
Place the filled cake pans into the preheated oven. Bake for approximately 25 to 30 minutes. The exact baking time can vary depending on your oven, so it’s essential to check for doneness towards the end of the baking period. A toothpick inserted into the center of each cake should come out clean, or with a few moist crumbs attached. Avoid leaving a wet batter when testing.
Once baked, remove the cakes from the oven. Allow them to cool in their pans on a wire rack for about 10 to 20 minutes. This initial cooling period in the pan helps the cakes to firm up slightly, making them easier to remove without breaking. Resist the temptation to unmold them too soon, as they are still quite delicate at this stage.
After the initial cooling, gently invert the cakes onto the wire rack to cool completely. Ensure that the wire rack allows for air circulation all around the cake, preventing the bottoms from becoming soggy. Cooling the cakes completely is a critical step before frosting; a warm cake will melt the frosting, leading to a messy and unappealing appearance.
As the cakes cool, you can begin preparing the luscious blueberry frosting. This component is where the delightful tang and vibrant color of blueberries truly shine, creating a beautiful contrast to the deep chocolate cake. The process involves creating a concentrated blueberry puree that will be incorporated into a classic buttercream base, offering both flavor and visual appeal.
Step 3: Crafting the Blueberry Frosting Base
To start the frosting, combine the blueberries (whether fresh or frozen), lemon juice, and a small amount of water in a medium saucepan. Place the saucepan over medium heat and bring the mixture to a gentle simmer. Continue to cook, stirring occasionally, until the blueberries begin to break down and soften, typically about 5-7 minutes. The lemon juice not only adds a bright flavor note but also helps to preserve the vibrant blue color of the fruit.
Once the blueberries are soft, carefully strain the mixture through a fine-mesh sieve set over a heatproof bowl. Use the back of a spoon or a spatula to press down firmly on the solids in the sieve, extracting as much of the flavorful blueberry juice as possible. Discard the seeds and skins that remain in the sieve; these are not desired in the smooth frosting. This process yields a concentrated blueberry sauce that is intensely flavored and beautifully colored.
Allow this strained blueberry sauce to cool completely. This is a very important step; adding warm or hot liquid to butter will cause it to melt and separate, ruining the texture of your frosting. You can speed up the cooling process by placing the bowl in the refrigerator, but ensure it is fully cooled before proceeding. The cooled sauce will thicken slightly as it chills.
While the blueberry sauce is cooling, begin preparing the base for your frosting by beating the softened unsalted butter in a large bowl using an electric mixer. Beat the butter on medium speed until it becomes light, creamy, and pale yellow. This aerates the butter, which is essential for creating a fluffy frosting texture.
Gradually add about half of the powdered sugar to the beaten butter, mixing on low speed until it is just incorporated. Then, increase the mixer speed to medium and beat until the mixture is smooth and creamy. This initial incorporation of sugar helps to build the structure of the buttercream.
Step 4: Finishing the Blueberry Frosting
Now, it’s time to introduce the star ingredient: the cooled blueberry sauce. Add approximately 4 tablespoons of the cooled blueberry sauce to the butter and sugar mixture. Beat on medium speed until the sauce is thoroughly incorporated and the frosting begins to take on a lovely pale purple or pink hue. You will notice a subtle fruity aroma starting to develop.
Gradually add the remaining powdered sugar (about 1 ½ cups), mixing on low speed until it is combined, then increase to medium speed and beat until the frosting is smooth, fluffy, and spreadable. If the frosting seems too thick, you can add a tiny bit more blueberry sauce or a teaspoon of milk until it reaches your desired consistency. Conversely, if it’s too thin, add a little more powdered sugar, one tablespoon at a time.
Taste the frosting at this stage. Adjust the sweetness or tanginess as needed. If you prefer it sweeter, add more powdered sugar. If you desire more blueberry flavor and a slightly less sweet profile, add a bit more of the cooled blueberry sauce. The goal is a balanced flavor that complements the chocolate cake without being overwhelmingly sweet or too tart.
Ensure your cake layers are completely cool before you begin the assembly process. If the cakes are even slightly warm, the frosting will melt and slide off, creating a messy and unprofessional finish. This is a common pitfall, so patience is key here.
Step 5: Assembling and Decorating the Cake
Once your cake layers are fully cooled and your blueberry frosting is perfectly prepared, it’s time to assemble the cake. Place the first cake layer, flat-side up, onto your serving plate or cake stand. If one of your cake layers has a domed top, you can carefully level it with a serrated knife to create a flatter surface for stacking, although this is optional if the dome is not too pronounced.
Using an offset spatula or a butter knife, spread a generous and even layer of the blueberry frosting over the top of the first cake layer. Aim for a thickness that provides a good balance of frosting to cake. This layer of frosting will act as a delicious filling and also provide a stable base for the second cake layer.
Carefully place the second cake layer on top of the frosted first layer. It’s often best to place the second layer upside down so that the flat bottom of the cake faces upwards, creating a perfectly level top surface for your cake. Gently press down to ensure the layers are stable and adhere well to the frosting.
Begin frosting the top and sides of the entire cake. Use your offset spatula to spread the blueberry frosting smoothly over the top surface and then down the sides. Work your way around the cake, applying even pressure to create a sleek finish. You can achieve smooth sides by using a bench scraper or a large spatula.
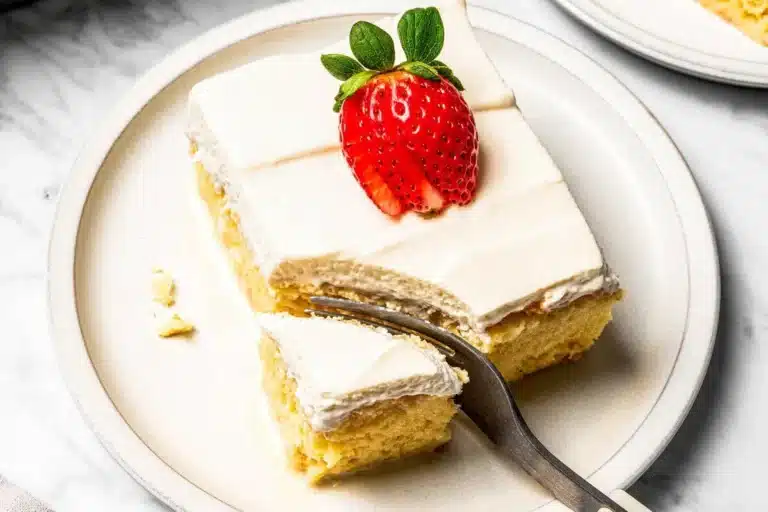
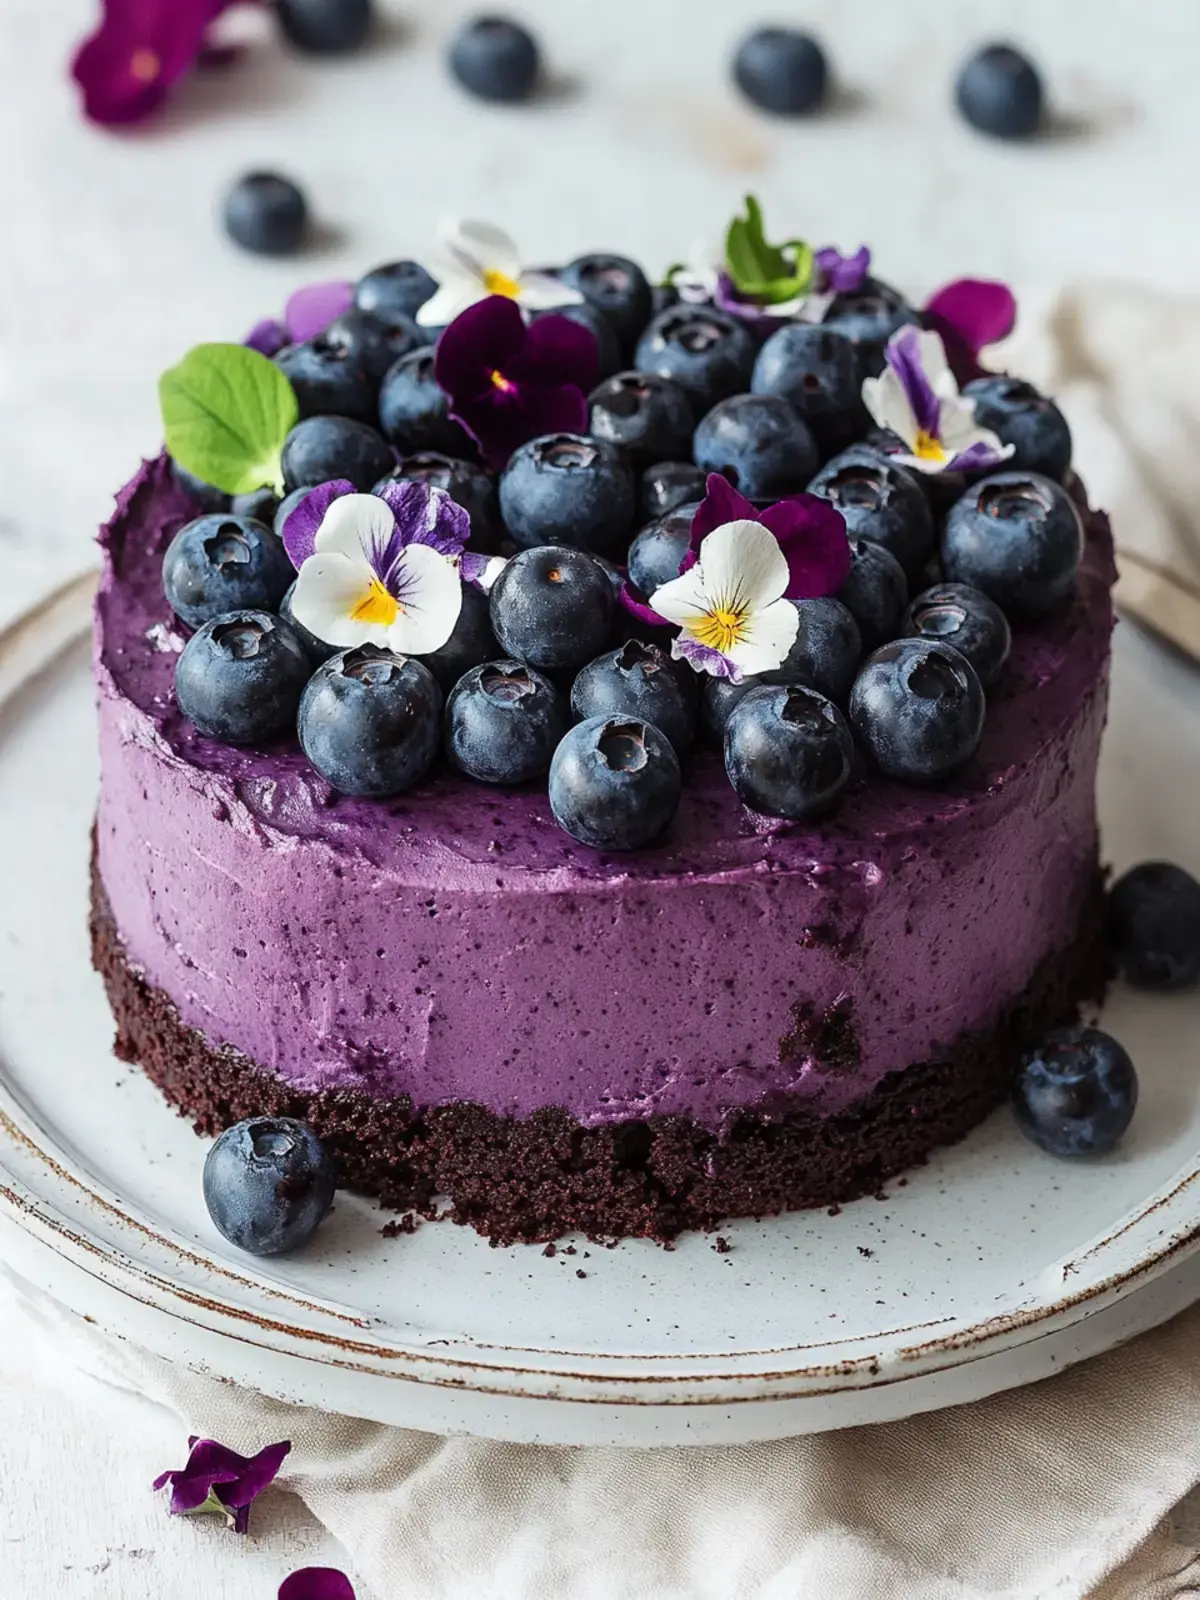
For the final decorative touches, you have many options. You can pipe decorative swirls or borders around the edges of the cake using a piping bag and a star tip. Arrange fresh blueberries artfully on top of the cake, allowing their natural vibrant color to stand out against the frosting. If you have edible flowers on hand, scattering a few petals or small blossoms can add an elegant and whimsical touch, elevating the cake’s visual appeal significantly.
Step 6: Final Touches and Presentation
Consider adding a sprinkle of lemon zest over the top of the cake for an extra burst of freshness and a subtle aromatic enhancement. The zest provides a bright counterpoint to the sweetness of the frosting and the richness of the chocolate cake. This small addition can make a noticeable difference in the overall sensory experience of the cake.
Ensure that all your frosting is evenly distributed, covering the cake completely. The goal is to create a visually appealing dessert that looks as good as it tastes. Take a moment to admire your creation before slicing and serving.
If you have any leftover frosting, you can store it in an airtight container in the refrigerator for later use, perhaps for cupcakes or cookies. This ensures that no part of this delightful creation goes to waste.
Serve the cake at room temperature for the best texture and flavor. Allowing it to sit out for about 30 minutes before slicing can make it even more enjoyable, as the frosting will soften slightly and the cake will be at its most tender.
This Blueberry Chocolate Cake is a showstopper that is sure to impress your friends and family. Its unique flavor combination and beautiful presentation make it suitable for any occasion, from a casual afternoon tea to a grand celebration.
Pro Tips for Blueberry Chocolate Cake
Room Temperature Ingredients: Always ensure that your eggs, milk, and butter are at room temperature before you begin mixing. This is crucial for creating a smooth, well-emulsified batter and frosting, leading to a tender and evenly baked cake with a creamy, lump-free frosting. Cold ingredients do not incorporate well.
Sift Your Dry Ingredients: Sifting the flour, cocoa powder, baking powder, and baking soda together is a small step that makes a big difference. It aerates the dry ingredients, removes any lumps, and ensures that the leavening agents are evenly distributed, promoting a lighter, fluffier cake texture. This prevents dense spots in your cake.
Measure Flour Correctly: Avoid scooping flour directly from the bag with your measuring cup, as this can lead to overpacking and a dense cake. Instead, spoon the flour into your measuring cup and then level it off with a straight edge, like the back of a knife. This ensures you’re using the correct amount for a tender crumb.
Don’t Overmix the Batter: Once you combine the wet and dry ingredients, mix only until the ingredients are just incorporated. Overmixing develops the gluten in the flour too much, resulting in a tough and dry cake. A few small lumps in the batter are perfectly fine and often preferable to overmixing.
Cool Cakes Completely Before Frosting: This cannot be stressed enough. Warm cakes will melt the frosting, causing it to slide off and creating a messy cake. Allow your cake layers to cool entirely on a wire rack before you even think about applying frosting. Patience here will save you a lot of frustration and ensure a beautiful final product.
Taste Your Frosting: Before you frost the cake, take a small spoonful of the blueberry frosting and taste it. Does it have the right balance of sweetness and tanginess for your preference? You can easily adjust it by adding a little more powdered sugar if it’s too tart, or a touch more blueberry sauce if it’s too sweet. This ensures the flavor is perfect for your palate.
Serving Suggestions for Blueberry Chocolate Cake
Decoration
Elevate the visual appeal of your Blueberry Chocolate Cake with thoughtful decoration. A simple yet elegant approach is to arrange a fresh scattering of blueberries around the top edge of the cake, creating a natural, rustic border. For an added touch of sophistication, a light dusting of powdered sugar can mimic a gentle snowfall, especially lovely for autumn or winter gatherings. Edible flowers, such as violas or pansies, introduce vibrant colors and a delicate, whimsical charm, transforming the cake into a true centerpiece.
Side Dishes
When considering what to serve alongside this decadent treat, think about complementary flavors and textures that enhance the cake’s profile. A classic scoop of high-quality vanilla bean ice cream provides a cool, creamy contrast that melts beautifully into the warm notes of chocolate and blueberry. A light and airy dollop of freshly whipped cream adds a delicate sweetness and a fluffy texture that balances the richness of the cake without overpowering its distinct flavors.
For those who appreciate a more intense chocolate experience, a drizzle of warm, rich chocolate ganache over each slice amplifies the chocolate notes and adds an extra layer of indulgence. A small side of fresh berries, such as raspberries or strawberries, offers a burst of tartness and freshness that cuts through the sweetness of the cake, cleansing the palate with each bite. This pairing is particularly effective when the cake itself is very rich.
Creative Serving Ideas
Move beyond the traditional slice with some inspired serving suggestions. Consider serving individual mini cakes or cupcakes made from the same batter and frosting for elegant single-portion desserts. For a more interactive experience, set up a “build-your-own” dessert bar where guests can customize their slices with various toppings like chocolate shavings, extra berries, or a small pitcher of raspberry coulis. This adds a fun, personalized element to any event.
Another creative idea is to transform the cake into a trifle. Layer crumbled pieces of the blueberry chocolate cake with the blueberry frosting and perhaps some vanilla pudding or whipped cream in individual glasses or a large trifle bowl. This creates a visually stunning layered dessert that showcases the cake’s flavors and textures in a delightful new way. This method is also excellent for using up any slightly imperfect cake layers.
Preparation & Storage
Storing Leftovers
Should you be fortunate enough to have any Blueberry Chocolate Cake remaining, proper storage is key to maintaining its freshness and deliciousness. For short-term storage, simply place the leftover cake in an airtight container and keep it at room temperature. This method is suitable for cakes that will be consumed within a day or two, as the ambient temperature helps to preserve the cake’s moisture.
If you plan to keep the cake for longer than two days, refrigeration is the best course of action. Transfer the cake to an airtight container and store it in the refrigerator for up to five days. Ensure the container is sealed tightly to prevent the cake from drying out or absorbing any odors from other foods in the fridge. The cooler temperature slows down the staling process.
Freezing
For extended preservation, the Blueberry Chocolate Cake freezes remarkably well, making it an ideal make-ahead dessert. The most effective way to freeze the cake is to first wrap each individual slice tightly in plastic wrap, ensuring no air can penetrate. Once individually wrapped, place the slices into a heavy-duty freezer bag or an airtight freezer-safe container. Properly frozen, the cake can maintain its quality for up to three months.
When you are ready to enjoy a slice from the freezer, it is best to allow it to thaw gradually. Remove the plastic wrap and place the frozen slice on a plate or cooling rack at room temperature. This slow thawing process helps to rehydrate the cake and prevent condensation from making it soggy. For a quicker thaw, you can gently warm the slice in the microwave for about 10-15 seconds on a low power setting.
Reheating
Reheating this delightful cake is straightforward and ensures you can enjoy it at its best, even if it has been stored. If the cake has been refrigerated, the simplest method is to allow it to come to room temperature naturally. This usually takes about 30-45 minutes on the counter and allows the flavors to meld and the texture to become tender again.
For a gentle warming, particularly if you desire a slightly softer, more molten frosting, a brief stint in the microwave can be effective. Place a slice on a microwave-safe plate and heat on low power for very short intervals of about 10 seconds at a time. Be cautious not to overheat, as this can cause the cake to dry out or become rubbery. This method is ideal for enhancing the gooeyness of the frosting.
Frequently Asked Questions
-
How do I choose the right blueberries for the frosting?
When selecting blueberries for your frosting, look for plump, firm berries that have a deep, uniform color. Avoid any berries that appear shriveled, soft, or have mold on them, as these indicate they are past their prime. If you opt for frozen blueberries, ensure they are unsweetened and allow them to thaw completely before using them in the recipe. Thawed blueberries will release their juices more readily, contributing to a more concentrated and flavorful frosting base. The quality of the blueberries you choose will directly impact the vibrant taste and hue of your frosting.
-
How should I store leftover Blueberry Chocolate Cake?
Storing your leftover Blueberry Chocolate Cake properly is essential for maintaining its freshness and delightful texture. For consumption within two days, you can confidently store the cake at room temperature in an airtight container. This protects it from drying out and keeps it readily accessible for snacking. If you anticipate needing to keep the cake for a longer period, up to five days, it is advisable to refrigerate it. Ensure it is well-covered to prevent it from drying out or picking up any unwanted odors from other food items in your refrigerator. The airtight container is crucial in both scenarios.
-
Can I freeze Blueberry Chocolate Cake?
Absolutely! Freezing Blueberry Chocolate Cake is an excellent way to preserve its deliciousness for future enjoyment, making it perfect for make-ahead planning. To freeze, it’s best to wrap each individual slice very securely in plastic wrap to create a barrier against freezer burn. After wrapping, place the individually wrapped slices into an airtight freezer-safe container or a heavy-duty freezer bag. When stored this way, your cake can maintain its optimal quality for up to three months. To enjoy a frozen slice, simply remove it from the freezer, unwrap it, and allow it to thaw completely at room temperature, or give it a quick 10-second warm-up in the microwave on low power.