Teriyaki Chicken Meatballs: 7 Flavorful Secrets to Savor
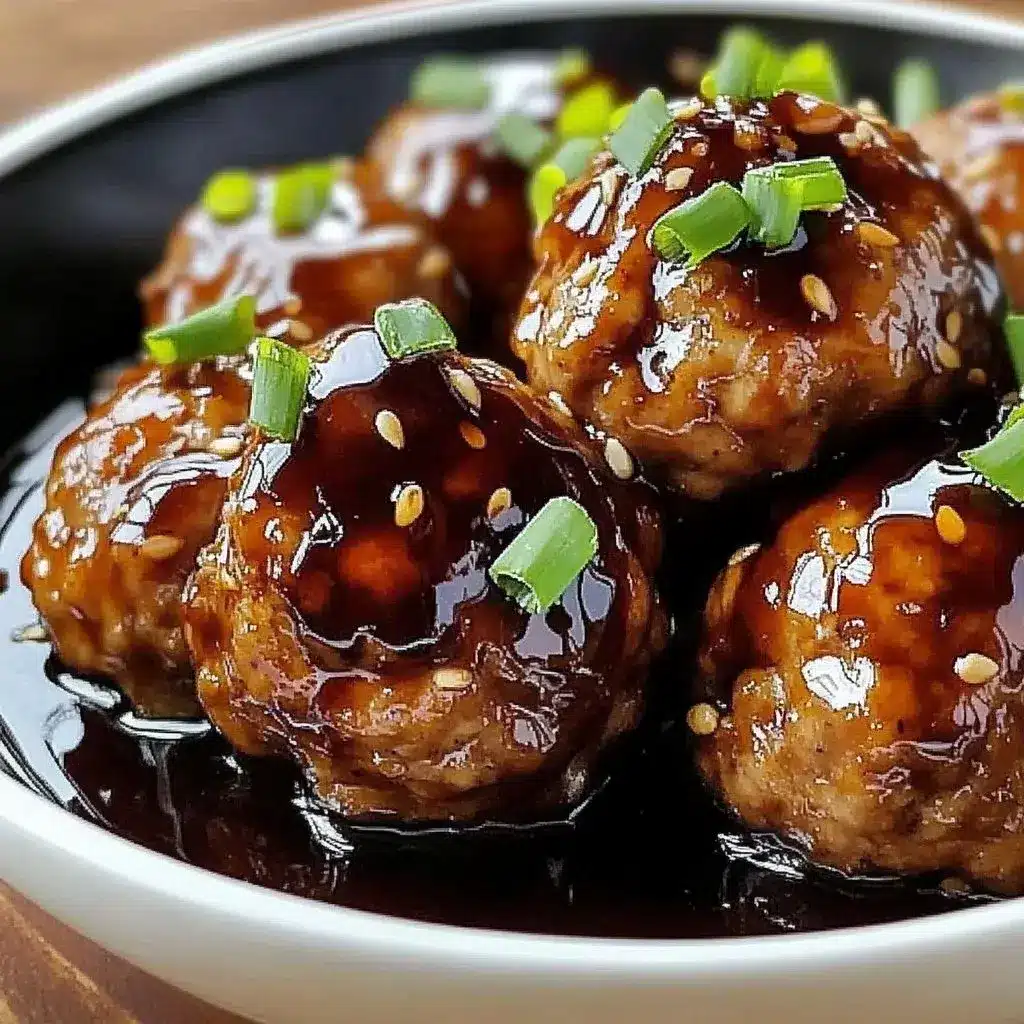
Imagine sinking your teeth into Teriyaki Chicken Meatballs that are not only tender and juicy but bursting with an exquisite balance of sweet and savory flavors. This recipe promises a culinary experience that transforms a simple meal into a memorable event, perfect for any occasion.
Whether you are a novice in the kitchen or a seasoned home cook, you will find this dish surprisingly approachable and incredibly rewarding. It’s a fantastic way to bring your loved ones together around the dinner table for a meal that’s as delightful to create as it is to share.
What truly sets these Teriyaki Chicken Meatballs apart is the ingenious combination of fresh, accessible ingredients and time-tested cooking techniques. The result is a wholesome dish that is not only easy to prepare but also incredibly satisfying. Prepare yourself to discover just how simple and joyful home cooking can be.
Why You Will Love This Recipe
- Flavor Explosion: The rich, homemade teriyaki glaze delivers a perfect harmony of sweet and savory notes that will tantalize your taste buds with every bite.
- Quick Preparation: Despite their impressive flavor, these meatballs are remarkably quick to make, fitting perfectly into busy weeknight schedules or spontaneous gatherings.
- Versatile Presentation: Serve them as a crowd-pleasing appetizer, a hearty main course alongside rice, or even as a delightful addition to a lunchbox for an exciting midday meal.
- Family Favorite: The universally appealing taste profile makes these meatballs a hit with all ages, ensuring that even the pickiest eaters will ask for seconds.
- Customizable Delight: This recipe is wonderfully adaptable, allowing you to easily adjust spice levels, add extra vegetables, or even substitute proteins to suit your personal preferences and dietary needs.
Ingredients You Need
The foundation of any great dish lies in the quality of its ingredients, and this recipe is no exception. Opting for fresh, high-quality components will elevate the final taste and texture, making these Teriyaki Chicken Meatballs truly exceptional. Take a moment to select the best ground chicken, fresh aromatics, and vibrant produce you can find to ensure a superior culinary outcome.
Teriyaki Chicken Meatballs: 7 Flavorful Secrets to Savor

Juicy chicken meatballs glazed with a sweet and savory homemade teriyaki sauce — perfect for appetizers, meal prep, or serving over rice. Discover 7 flavorful secrets to make these meatballs unforgettable.
- Chicken Meatballs:
- 1 lb ground chicken
- 1/2 cup breadcrumbs (panko or gluten-free)
- 1 egg, lightly beaten
- 2 cloves garlic, minced
- 1 tsp ginger, freshly grated
- 2 tbsp green onion, chopped
- 1 tbsp soy sauce (or tamari for gluten-free)
- 1/4 tsp black pepper
- Teriyaki Sauce:
- 1/4 cup soy sauce (or tamari for gluten-free)
- 1/4 cup water
- 2 tbsp brown sugar (or honey)
- 1 tbsp rice vinegar
- 1 tbsp mirin (optional)
- 1 clove garlic, minced
- 1 tsp fresh ginger, grated
- 2 tsp cornstarch mixed with 2 tsp water (slurry)
- 1 tsp sesame oil
- Optional Garnish:
- Sesame seeds
- Chopped green onions
- 1Preheat oven to 400°F (200°C) or heat a large skillet over medium heat with a drizzle of oil.
- 2In a large bowl, mix ground chicken, breadcrumbs, egg, garlic, ginger, green onion, soy sauce, and black pepper until combined. Do not overmix.
- 3Form into 1-inch meatballs and place on a parchment-lined baking sheet (or directly into the skillet).
- 4Bake for 18–20 minutes (or cook in the skillet until browned and fully cooked).
- 5Meanwhile, make the teriyaki sauce: in a small saucepan, combine soy sauce, water, brown sugar, rice vinegar, mirin, garlic, and ginger. Bring to a simmer over medium heat.
- 6Whisk the cornstarch slurry into the simmering sauce and cook for 2–3 minutes until thickened. Stir in sesame oil and remove from heat.
- 7Toss the cooked meatballs in the warm teriyaki sauce until coated evenly.
- 8Garnish with sesame seeds and chopped green onions. Serve over steamed rice or noodles.
Keywords: Chicken, Gluten-Free, meal prep, Meatballs, Teriyaki, Appetizer, Dinner, Asian, Japanese-Inspired
- ground chicken: the lean, tender base for our flavorful meatballs.
- breadcrumbs: crucial for binding and adding a delightful texture.
- green onions: impart a fresh, mild onion flavor and a pop of color.
- garlic: provides essential aromatic depth that complements the chicken.
- soy sauce: the cornerstone of our teriyaki flavor, offering umami richness.
- honey: lends a natural sweetness that beautifully balances the saltiness of the soy sauce.
- sesame oil: adds a distinct nutty aroma and a touch of luxury.
- ginger: offers a bright, zesty counterpoint that awakens the palate.
- cornstarch: used to thicken the glaze, creating that signature glossy finish.
- water: helps achieve the perfect sauce consistency.
Please refer to the integrated recipe card for precise quantities and measurements, ensuring the perfect balance of flavors and textures in your finished dish.
Variations
One fantastic way to adapt this recipe is to infuse it with a touch of heat. For those who love a spicy kick, consider adding a teaspoon of sriracha or a pinch of red pepper flakes directly into the teriyaki sauce mixture. This simple addition transforms the meatballs into a fiery delight, perfect for those who enjoy a bit of spice in their lives.
For a healthier, more nutrient-dense option, think about incorporating finely grated vegetables into the meatball mixture itself. Carrots, zucchini, or even finely chopped spinach can be blended in seamlessly, adding vitamins and fiber without significantly altering the taste or texture. This makes the dish even more appealing for families looking to boost their children’s vegetable intake.
Another exciting variation involves a subtle shift in the glaze’s flavor profile. A splash of rice vinegar in the teriyaki sauce can add a pleasant tanginess, while a tablespoon of mirin (a sweet Japanese rice wine) can enhance the overall sweetness and complexity. These small tweaks can create an entirely new flavor dimension.
Consider also the possibility of adding fruit for a tropical twist. A small amount of crushed pineapple or even a spoonful of mango puree can be stirred into the teriyaki sauce, lending a sweet and slightly tangy fruitiness that pairs surprisingly well with the savory chicken. This offers a unique and refreshing take on the classic teriyaki flavor, perfect for summer gatherings.
For those following specific dietary guidelines, substitutions are readily available. Gluten-free individuals can easily substitute tamari for soy sauce and use gluten-free breadcrumbs. Similarly, if you’re looking for a lower-sugar option, you can replace honey with a sugar-free sweetener alternative, ensuring everyone can enjoy these delicious meatballs.
How to Prepare Teriyaki Chicken Meatballs
Step 1: The Foundation – Mixing the Meatball Base
Begin by gathering all the necessary ingredients for the meatballs. In a spacious mixing bowl, combine the ground chicken, breadcrumbs, finely chopped green onions, minced garlic, and a touch of black pepper. Ensure all these components are at a similar temperature, ideally room temperature, to promote even mixing and prevent the chicken from becoming tough.
Gently mix these ingredients together with your hands or a sturdy spoon until they are just combined. It’s crucial not to overmix the mixture, as this can develop the gluten in the breadcrumbs too much, leading to dense and tough meatballs. The goal is a cohesive mixture that holds together without being overly sticky or overworked.
Once the base is prepared, cover the bowl and set it aside. Allow the mixture to rest for a few minutes; this brief period helps the breadcrumbs absorb some of the moisture, making the meatballs easier to form and ensuring a better texture once cooked. This foundational step is key to achieving tender, flavorful meatballs.
Step 2: Crafting the Flavor – The Teriyaki Glaze
In a separate, medium-sized saucepan, you will begin to construct the star of the show: the teriyaki glaze. Pour in the soy sauce (or tamari for a gluten-free option), followed by the water. These form the liquid base for our flavorful sauce, providing both saltiness and depth.
Next, add the brown sugar (or honey for a natural sweetness) and the rice vinegar. The brown sugar will lend a caramel-like sweetness, while the rice vinegar will introduce a subtle tanginess that cuts through the richness. If you have mirin on hand and desire an extra layer of authentic sweetness and complexity, now is the time to incorporate it.
To further enhance the aromatic profile, add the minced garlic clove and grated fresh ginger to the saucepan. These aromatics are vital for that classic teriyaki flavor, infusing the sauce with their pungent and zesty notes. Whisk all these liquid ingredients together until they are well combined, ensuring the sugar begins to dissolve.
Step 3: Building the Glaze – Thickening and Finishing
Place the saucepan over medium heat and bring the mixture to a gentle simmer. Allow it to bubble softly for a few minutes, letting the flavors meld and deepen. This gentle cooking process is essential for extracting the full essence from the garlic and ginger.
In a small separate bowl, prepare a cornstarch slurry by whisking together the cornstarch and water until perfectly smooth, with no lumps remaining. This slurry is the key to achieving a thick, glossy teriyaki glaze that will beautifully coat each meatball.
Once the teriyaki base is simmering, gradually whisk the cornstarch slurry into the saucepan. Continue to whisk constantly as the sauce heats up. You will notice it begin to thicken quite rapidly, transforming into a rich, syrupy consistency. Cook for an additional 2-3 minutes, stirring continuously, to ensure the cornstarch is fully activated and the sauce is beautifully glossy.
Step 4: Forming and Baking the Meatballs
Preheat your oven to 400°F (200°C). This higher temperature is ideal for achieving nicely browned exteriors and ensuring the meatballs cook through evenly without drying out. Line a baking sheet with parchment paper to prevent sticking and make cleanup a breeze.
Using clean hands, scoop portions of the meatball mixture, roughly the size of a golf ball or a large tablespoon. Gently roll each portion between your palms to form a compact, round meatball. Avoid pressing too firmly, as this can also lead to dense meatballs. Place the formed meatballs onto the prepared baking sheet, ensuring they have a little space between them to allow for even cooking and browning.
Once your baking sheet is full, carefully transfer it to the preheated oven. Bake the meatballs for approximately 18-20 minutes. You’ll know they’re ready when they are firm to the touch, have a nice golden-brown color on the outside, and are cooked through to an internal temperature of 165°F (74°C).
Step 5: The Grand Finale – Coating and Serving
While the meatballs are in their final moments of baking, remove the saucepan with the thickened teriyaki glaze from the heat. Stir in the teaspoon of sesame oil. This final addition imparts a wonderful, nutty aroma and a rich flavor that completes the glaze.
Once the meatballs are baked to perfection, carefully remove the baking sheet from the oven. Transfer the hot meatballs to a large bowl or back into the saucepan containing the warm teriyaki glaze. Gently toss the meatballs using tongs or a spatula until each one is thoroughly and evenly coated in the glossy, delicious sauce.
Serve the Teriyaki Chicken Meatballs immediately while they are warm and the glaze is at its most luscious. Garnish generously with toasted sesame seeds and freshly chopped green onions for added texture, visual appeal, and a burst of fresh flavor. They are wonderful served as is, or spooned over fluffy steamed rice for a complete and satisfying meal.
Step 6: The Art of Perfection – Rest and Refine
After coating the meatballs in the glorious teriyaki glaze, allow them to sit for just a moment. This brief rest allows the glaze to adhere perfectly to the meatballs and the flavors to meld together even further. It’s a small step that makes a noticeable difference in the final presentation and taste.
Observe the beautiful sheen of the glaze coating each meatball. This visual appeal is just as important as the taste, making the dish look incredibly appetizing and professional. The rich, amber hue promises a delightful culinary journey.
Before plating, give them one final gentle toss to ensure every single meatball is wonderfully glazed. This ensures that every bite you take is filled with that irresistible sweet and savory teriyaki goodness. This attention to detail ensures a perfect dining experience from the first bite to the last.
Pro Tips for Teriyaki Chicken Meatballs
Don’t Overmix: When combining the meatball ingredients, resist the urge to overwork the mixture. Overmixing can lead to tough, dense meatballs, whereas gentle combining ensures tender, juicy results.
Room Temperature Ingredients: Using ingredients like ground chicken and eggs at room temperature helps them combine more evenly, contributing to a better texture and more consistent cooking of the meatballs.
The Power of Parchment Paper: Lining your baking sheet with parchment paper not only prevents the meatballs from sticking but also makes the post-cooking cleanup significantly easier. It’s a simple tip that saves valuable time.
Taste and Adjust the Glaze: Before thickening the teriyaki sauce with cornstarch, take a small taste. This is your opportunity to adjust the sweetness, saltiness, or tanginess to perfectly suit your palate. A tiny pinch of sugar or a splash more vinegar can make a world of difference.
Sear for Extra Flavor: For an even deeper flavor profile and a more developed crust, you can opt to pan-sear the meatballs for a few minutes in a hot skillet before baking them in the oven. This adds an extra layer of deliciousness.
Fresh vs. Grated Ginger: While ground ginger can be used in a pinch, freshly grated ginger offers a brighter, more potent flavor that truly elevates the teriyaki sauce. Seek out fresh ginger for the best results.
Serving Suggestions for Teriyaki Chicken Meatballs
Decoration
Elevate the visual appeal of your Teriyaki Chicken Meatballs with simple yet impactful garnishes. A generous sprinkle of toasted sesame seeds adds a delightful nutty crunch and a classic aesthetic. Complement this with a scattering of finely chopped fresh green onions for a vibrant splash of color and a hint of freshness that cuts through the richness.
For an extra touch of sophistication, consider a drizzle of extra teriyaki glaze over the top just before serving. This enhances the glossy finish and reinforces the irresistible flavor profile. A few thin slices of red chili can also be added for those who appreciate a visual cue of spice and a pop of bold color.
Consider adding a small sprig of fresh cilantro for a contrasting herbaceous note and a beautiful green accent. Alternatively, a light dusting of paprika can provide a subtle warmth and a rich, earthy red hue. These decorative touches transform a delicious dish into a feast for the eyes.
Side Dishes
The quintessential accompaniment to Teriyaki Chicken Meatballs is, of course, fluffy steamed rice. The slightly sticky grains are perfect for soaking up every last drop of the delectable teriyaki glaze, making each mouthful a harmonious blend of textures and flavors. White, brown, or even jasmine rice work beautifully.
A vibrant vegetable stir-fry makes an excellent partner, adding a spectrum of colors, crisp textures, and essential nutrients to the meal. Consider incorporating broccoli florets, bell pepper strips, snap peas, and thinly sliced carrots for a delightful medley. A quick sauté with a touch of soy sauce and garlic will complement the meatballs perfectly.
For a lighter, more refreshing option, a crisp green salad tossed with a light vinaigrette provides a welcome contrast to the richness of the meatballs. Think mixed greens, cucumber slices, cherry tomatoes, and perhaps some shredded carrots. This adds a palate-cleansing element to the meal, balancing the savory flavors beautifully.
Noodles offer another fantastic avenue for serving. A simple bowl of cooked ramen, udon, or even spaghetti can be tossed with the teriyaki-glazed meatballs for a satisfying and comforting noodle dish. This transforms the meatballs into a complete and hearty meal with minimal extra effort.
A cool, crisp cucumber salad, perhaps with a light dressing of rice vinegar, sugar, and a touch of sesame oil, offers a delightful coolness that pairs exceptionally well with the savory teriyaki glaze. This side dish provides a refreshing counterpoint and adds a pleasant textural variation to your meal.
Creative Serving Ideas
Transform these meatballs into impressive appetizers by serving them on small skewers, perhaps alternating with chunks of grilled pineapple or sweet bell peppers. This makes them easy to handle and perfect for mingling at parties.
Consider creating “Teriyaki Meatball Sliders” by serving them on miniature buns with a crisp lettuce leaf and a thin slice of cucumber. This playful presentation is a guaranteed hit at casual gatherings and children’s parties, offering a fun twist on a beloved classic.
Another creative idea is to incorporate them into a bento box. The portion-controlled nature of meatballs makes them ideal for a balanced and visually appealing packed lunch. Pair them with rice, edamame, and some fresh fruit for a complete and delightful meal.
For a more sophisticated presentation, arrange the glazed meatballs artfully on a platter and surround them with small bowls of dipping sauces, such as a spicy mayo or a sweet chili sauce, offering guests variety and an interactive dining experience. This allows guests to customize their flavor journey.
You could also serve them as a topping for baked sweet potatoes or as a filling for wraps or spring rolls, demonstrating their incredible versatility beyond the traditional rice pairing. This showcases their adaptability and encourages culinary exploration.
Preparation & Storage
Storing Leftovers
Once your delicious Teriyaki Chicken Meatballs have cooled down to room temperature, it’s essential to store them properly to maintain their freshness and flavor. Transfer the cooled meatballs and any remaining glaze into an airtight container. Ensure the container is sealed tightly to prevent air from entering, which can accelerate spoilage.
These refrigerated leftovers are best consumed within three to four days. During this period, they will retain most of their original taste and texture, making them a convenient and satisfying option for quick meals. Always check for any signs of spoilage before reheating and consuming.
If you plan to store them for a longer duration, freezing is the recommended method. Ensure they are completely cooled before packaging them for the freezer to prevent ice crystal formation. Proper storage is key to enjoying your homemade meatballs even days after they are first made.
Freezing
Freezing these Teriyaki Chicken Meatballs is an excellent strategy for long-term storage and meal preparation. To freeze them effectively, arrange the cooled meatballs in a single layer on a baking sheet lined with parchment paper. This prevents them from sticking together in one large clump, ensuring you can easily retrieve individual portions later.
Once the meatballs are frozen solid, typically within 1-2 hours, transfer them into a heavy-duty freezer bag or an airtight freezer-safe container. Squeeze out as much air as possible from the bag before sealing to minimize freezer burn. Properly sealed, they can maintain their quality for up to 2-3 months.
Label the container or bag with the date of freezing and the contents. This helps you keep track of your frozen items and ensures you use them within their optimal quality timeframe. Freezing is a fantastic way to always have a delicious meal on hand.
Reheating
When you’re ready to enjoy your stored Teriyaki Chicken Meatballs, reheating them properly is crucial for optimal taste and texture. If they have been refrigerated, the easiest method is to place them in a small saucepan with a splash of water or a bit of extra teriyaki sauce and gently reheat over low to medium-low heat until warmed through.
Alternatively, you can reheat them in the microwave on a microwave-safe plate. Heat them in short intervals, stirring occasionally, to ensure even warming and prevent them from becoming rubbery. Aim for a temperature that is hot to the touch, typically about 1-2 minutes.
For frozen meatballs, you have a couple of options. You can thaw them overnight in the refrigerator and then reheat them as described above. Or, for a quicker approach, you can reheat them directly from frozen in a saucepan over low heat with a little added liquid, stirring frequently until they are heated through. Adding a touch more sauce during reheating will help revive their delicious glaze.
Another effective reheating method for both refrigerated and frozen meatballs is in the oven. Arrange them on a baking sheet and warm them in a preheated oven at around 350°F (175°C) for 10-15 minutes, or until heated through. This method helps to maintain their texture and prevent them from becoming mushy.
Regardless of the method chosen, it’s always a good idea to add a little extra teriyaki sauce or a splash of water during reheating, especially if the meatballs seem dry. This helps to revive the glossy glaze and ensures they are as flavorful as when they were first made.
Frequently Asked Questions
-
Can I prepare the Teriyaki Chicken Meatballs ahead of time, and if so, how should they be stored?
Absolutely! These meatballs are an excellent candidate for meal preparation. You can prepare the meatball mixture and form the meatballs a day in advance, storing them covered in the refrigerator. Once cooked and cooled, they can be stored in an airtight container in the refrigerator for up to 3-4 days. For longer storage, freezing is recommended. This makes them incredibly convenient for busy weeks when you need a quick and delicious meal.
-
What are the best substitutions for the ingredients, especially if I have dietary restrictions or preferences?
This recipe is quite adaptable. For a gluten-free version, simply substitute tamari for soy sauce and use gluten-free breadcrumbs. If you prefer a different protein, ground turkey or even ground pork can be used, though cooking times might slightly vary. For those seeking a vegetarian or vegan option, consider using a plant-based ground meat substitute, or finely mashed lentils or chickpeas combined with the other binders and seasonings; adjust cooking times accordingly. You can also swap honey for maple syrup or a sugar-free sweetener if you’re reducing sugar intake.
-
How can I ensure my Teriyaki Chicken Meatballs are extra juicy and flavorful, and what are common mistakes to avoid?
To achieve maximum juiciness and flavor, avoid overmixing the meatball ingredients, as this can toughen the meat. Using a combination of lean and slightly fattier ground chicken (around 85/15) can also contribute to moisture and flavor. Grating fresh garlic and ginger instead of using powders provides a more vibrant taste. A common mistake is not preheating the oven sufficiently, which can lead to pale and less flavorful meatballs. Another pitfall is not tasting and adjusting the teriyaki glaze before thickening it; this is your chance to perfect the sweet, savory, and tangy balance.