Buttery Pineapple Loaf Cake

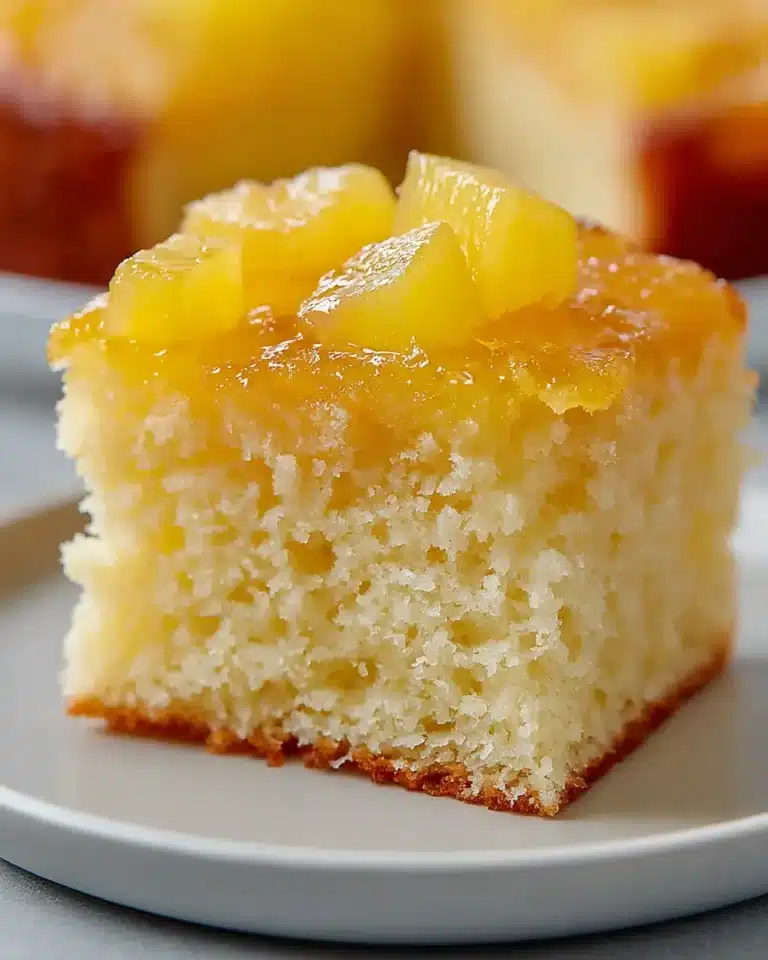
Quick, tender, and full of bright fruit flavor, Pineapple Loaf Cake is a simple bake that delivers a soft crumb, juicy pineapple pieces, and a buttery brown sugar topping with caramelized appeal. It is a great make-ahead dessert for brunch spreads, snack tables, or casual weekend baking.
This is the kind of loaf cake that feels familiar right away; the batter is straightforward, the ingredient list is manageable, and the pineapple brings both sweetness and moisture without making the cake heavy. It’s a delightful treat that truly embodies the ease of home baking with a touch of tropical sunshine.
Why You Will Love This Recipe
- Effortless Preparation: This recipe is designed for simplicity, allowing even novice bakers to achieve impressive results with minimal fuss. The steps are clear and easy to follow, ensuring a smooth baking experience from start to finish.
- Moist and Tender Crumb: The inclusion of pineapple juice and fresh pineapple ensures that every bite of this loaf cake is incredibly moist and tender. It avoids the dryness that can sometimes plague quick breads, delivering a consistently delightful texture.
- Delicious Buttery Topping: The brown sugar and butter topping caramelizes beautifully during baking, adding a delightful crunch and a rich, sweet contrast to the soft cake beneath. It’s a simple addition that elevates the entire loaf.
- Versatile Appeal: Perfect for a variety of occasions, this pineapple loaf cake shines at brunches, as a satisfying afternoon snack, or a comforting dessert. Its appeal is broad, making it a go-to recipe for many different events.
- Aromatic and Inviting: The moment this cake bakes, your kitchen will fill with an irresistible aroma of warm pineapple and butter, creating an instantly cozy and inviting atmosphere. This sensory experience is part of the joy of baking it.
Ingredients You Need
The success of any baked good hinges on the quality of its ingredients, and this pineapple loaf cake is no exception. Opting for fresh, high-quality components will elevate the final flavor and texture, ensuring a truly memorable treat. Paying attention to the freshness of your pineapple, the richness of your butter, and the accuracy of your measurements will make a noticeable difference in the final outcome.
Pineapple Loaf Cake
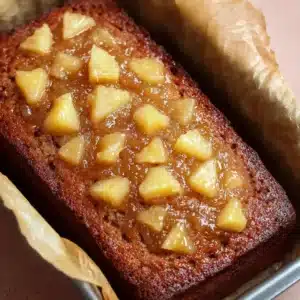
A tender, fruit-filled loaf cake prepared with pineapple juice and diced pineapple, then finished with a buttery brown sugar topping for added texture and caramelized sweetness. It's a great make-ahead dessert for brunch spreads, snack tables, or casual weekend baking.
- For the cake:
- 3/4 cup granulated sugar (preferably cane sugar for a finer crumb)
- 1/4 cup pineapple juice
- 1 cup all-purpose flour
- 2 large eggs (at room temperature)
- 1/4 teaspoon salt
- 1/4 cup milk
- 3/4 teaspoon baking powder
- 1/2 cup diced pineapple (fresh or canned and thoroughly drained)
- 1/4 cup unsalted butter (melted and slightly cooled)
- 1/4 teaspoon baking soda
- For the topping:
- 1/4 cup all-purpose flour
- 1/4 cup lightly packed brown sugar
- 1/2 cup diced pineapple
- 1/8 cup cold unsalted butter (cut into small pieces)
- 1Preheat the oven to 350°F (175°C). Line a 9x5-inch loaf pan with parchment paper, leaving enough excess on the sides to lift the cake out easily after baking.
- 2In a mixing bowl, whisk together the flour, baking powder, baking soda, sugar, and salt until the dry ingredients are evenly combined.
- 3Add the melted butter, milk, eggs, and pineapple juice to the dry mixture. Stir until the batter becomes smooth and fully incorporated.
- 4Fold in the diced pineapple gently so the fruit is distributed evenly throughout the batter.
- 5Transfer the batter to the prepared loaf pan and spread the top evenly. Bake for 30 minutes.
- 6While the cake is in the oven, prepare the topping. In a small bowl, combine the brown sugar and flour. Cut in the cold butter with a fork or pastry cutter until the mixture resembles coarse crumbs, then stir in the diced pineapple.
- 7After the initial 30 minutes of baking, remove the loaf pan carefully from the oven and scatter the topping evenly over the surface of the cake.
- 8Return the pan to the oven and continue baking for 25 to 30 minutes more, or until the top is golden and a toothpick inserted into the center comes out clean.
- 9Remove the loaf from the oven and let it rest in the pan for several minutes. Lift it out using the parchment overhang and transfer it to a wire rack to cool completely before slicing and serving.
Keywords: Pineapple Loaf Cake, Fruit Loaf, Easy Bake, Make-ahead Dessert, Brunch Cake, Tea Cake
Quantities for each ingredient can be found in the recipe card below, ensuring you have precisely what you need.
Variations
This versatile pineapple loaf cake serves as a fantastic base for numerous creative variations, allowing you to tailor it to specific dietary needs or flavor preferences. Imagine transforming this classic into something entirely new with a few simple adjustments, making it suitable for everyone at your table.
For a vegan option, you can easily swap out the dairy components. Replace the butter with a good quality vegan butter or coconut oil, and substitute the milk with your favorite plant-based milk like almond or soy. The eggs can be replaced with a flax egg (one tablespoon of ground flaxseed mixed with three tablespoons of water, left to sit for five minutes) or a commercial egg replacer. The resulting cake will still be wonderfully moist and flavorful, proving that deliciousness knows no dietary boundaries.
If you’re looking for a low-carb or keto-friendly version, the modifications are equally rewarding. You’ll want to replace the all-purpose flour with a blend of almond flour and coconut flour. Sugar can be substituted with a keto-friendly sweetener like erythritol, xylitol (use with caution around pets), or stevia, adjusting the amount to your taste. While fresh pineapple is naturally sweet, a small amount is generally acceptable in moderation for those following a low-carb lifestyle, or you could use a sugar-free pineapple extract for flavor.
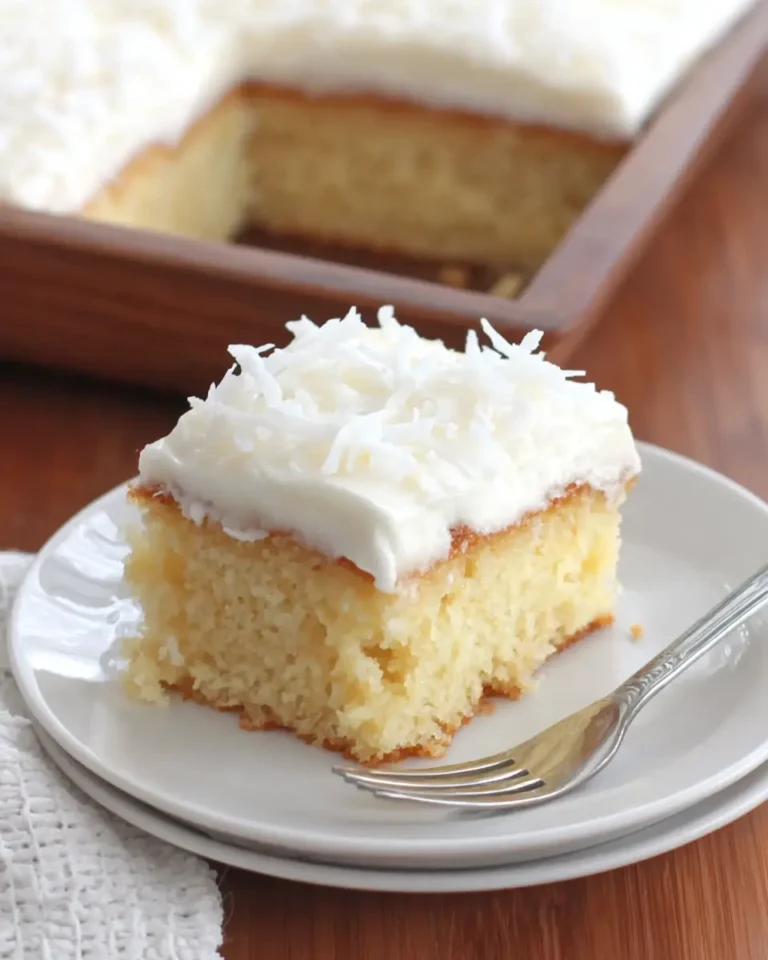
Another exciting variation involves infusing the cake with complementary flavors. Consider adding a teaspoon of finely grated ginger to the batter for a subtle spicy warmth that pairs beautifully with pineapple. You could also incorporate a hint of coconut by using coconut milk instead of regular milk and adding a tablespoon or two of shredded unsweetened coconut to the batter. These additions can transform the cake into a more complex and nuanced dessert, perfect for impressing guests or simply indulging your own culinary curiosity.
How to Prepare Pineapple Loaf Cake
Step 1: Oven Preparation and Pan Lining
Begin by preheating your oven to the specified temperature, typically around 350°F (175°C). This ensures that the oven is at the optimal, stable heat when the cake is ready to bake, promoting even cooking and a proper rise. A properly preheated oven is foundational for successful baking, preventing the cake from baking too quickly on the outside while remaining undercooked inside.
Next, prepare your loaf pan by lining it meticulously with parchment paper. Ensure the parchment extends beyond the edges of the pan, creating “handles” or an overhang. This thoughtful step makes removing the finished loaf from the pan significantly easier, especially when dealing with a potentially delicate or sticky topping, preventing any breakage and preserving the cake’s beautiful shape.
This initial preparation is crucial for a smooth baking process. Having the oven ready and the pan lined before you even start mixing the batter means you can move efficiently through the recipe, minimizing the time the batter sits around before baking. This efficiency helps maintain the correct leavening action and ensures the cake’s structure develops optimally from the moment it enters the heat.
Step 2: Combining Dry Ingredients
In a large mixing bowl, combine all the dry ingredients: all-purpose flour, baking powder, baking soda, granulated sugar, and salt. These ingredients form the structural foundation of your loaf cake and provide its leavening. Ensuring they are well-mixed before adding wet ingredients is key to an even crumb and a consistent rise.
Whisk these dry components together thoroughly until they are completely uniform. This step is critical for several reasons. It evenly distributes the leavening agents (baking powder and baking soda), which are responsible for the cake’s lift and light texture. An uneven distribution can lead to pockets of dense cake or an uneven dome. Furthermore, it ensures the salt and sugar are dispersed, preventing any overly salty or sugary spots.
Take your time with this stage, as it lays the groundwork for the entire cake’s texture. A well-aerated mixture of dry ingredients will contribute to a lighter, more tender crumb in the finished product. This simple act of whisking is a small but significant step that directly impacts the final quality of your pineapple loaf cake, ensuring a delightful eating experience.
Step 3: Incorporating Wet Ingredients
To the bowl containing your perfectly combined dry ingredients, add the wet components. This typically includes melted butter (slightly cooled), milk, eggs (preferably at room temperature for better emulsification), and pineapple juice. These ingredients introduce moisture, richness, and binding properties to the batter.
Mix these wet ingredients into the dry mixture using a spatula or a wooden spoon. The goal here is to combine everything until the batter is just smooth and fully incorporated. It is crucial not to overmix the batter at this stage. Overmixing can develop the gluten in the flour too much, leading to a tougher, denser cake texture instead of the desired tender crumb.
A few small lumps in the batter are perfectly acceptable and often a sign that you haven’t overworked the mixture. The batter should look homogenous, with no streaks of dry flour visible. This gentle incorporation ensures that the fats and liquids bind effectively with the dry ingredients without compromising the tenderness of the final loaf. A smooth, but not overbeaten, batter is your ticket to a wonderfully moist and tender cake.
Step 4: Gently Folding in Diced Pineapple
Once your batter has reached a smooth, combined state, it’s time to introduce the star of the show: the diced pineapple. This fruit not only adds bursts of sweet, tangy flavor but also contributes significant moisture to the cake, ensuring its tender texture.
Carefully fold the diced pineapple into the batter. Use a gentle, sweeping motion with your spatula. The objective is to distribute the pineapple pieces evenly throughout the batter without mashing or breaking them down too much. You want distinct little chunks of pineapple to be present in every slice of the finished cake, offering delightful pockets of juicy sweetness.
Avoid vigorous stirring or beating at this point, as you would have with the initial batter mixing. Gentle folding preserves the delicate structure of the pineapple and ensures that it disperses evenly without sinking to the bottom of the pan. This careful incorporation guarantees that each bite offers a balanced taste of cake and fruit, maximizing the overall flavor and textural experience.
Step 5: Initial Baking and Topping Preparation
Transfer the prepared batter into the parchment-lined loaf pan, spreading it evenly across the surface. At this stage, you will bake the loaf for an initial period, typically around 30 minutes. This partial baking is a clever technique designed to set the cake’s structure just enough to support the topping that will be added later.
While the loaf is undergoing its first baking phase, prepare the delectable topping. In a separate small bowl, combine the ingredients for the topping, which usually include all-purpose flour, lightly packed brown sugar, and cold unsalted butter cut into small pieces. You may also incorporate additional diced pineapple into the topping mixture for an extra burst of fruit and texture.
The key to a great crumble topping is the texture of the butter. You will likely be instructed to cut the cold butter into the flour and sugar mixture using a fork, a pastry blender, or your fingertips. The goal is to create a coarse, crumbly texture that resembles small pebbles or coarse sand. This crumbly mixture will then be scattered over the partially baked cake, creating a wonderfully crisp and caramelized crust.
Step 6: Completing the Bake with Topping
After the initial baking period, carefully remove the loaf pan from the oven. Now, evenly scatter the prepared crumb topping over the surface of the partially baked cake. Ensure the topping is spread out as uniformly as possible to provide a consistent layer of deliciousness across the entire loaf.
Return the loaf pan to the oven to continue baking. The additional baking time, usually around 25 to 30 minutes, allows the cake to finish cooking through and the topping to bake into a golden-brown, slightly crisp layer. The brown sugar in the topping will caramelize, adding a wonderful depth of flavor and a delightful textural contrast to the soft cake.
You’ll know the cake is done when the top is golden and a toothpick inserted into the center comes out clean or with just a few moist crumbs clinging to it. The sides of the cake should be pulling away slightly from the pan, and the internal temperature should register around 200-205°F (93-96°C) if you are using a thermometer. This final bake is where the magic happens, transforming simple ingredients into a beautifully finished loaf cake.
Step 7: Cooling and Resting
Once the pineapple loaf cake has finished baking and appears perfectly golden and set, remove it from the oven. It’s important to let the cake rest in the loaf pan for a few minutes before attempting to remove it. This brief resting period allows the cake to firm up slightly, making it more stable and less prone to breaking.
Utilize the parchment paper overhang that you created earlier to carefully lift the entire cake out of the loaf pan. Transfer the lifted cake to a wire cooling rack. Allowing the cake to cool completely on a wire rack is essential. This permits air to circulate around all sides of the cake, preventing the bottom from becoming soggy and ensuring an even cooling process.
Resist the urge to slice into the cake while it’s still warm. Cooling is a critical step in the baking process as it allows the crumb structure to fully set and stabilize. Slicing a warm cake can result in a gummy texture and messy cuts. Patience during this cooling phase will be rewarded with perfectly clean slices and the optimal texture of your delicious pineapple loaf cake.
Pro Tips for Pineapple Loaf Cake
Drain Pineapple Thoroughly: Always ensure your diced pineapple, whether fresh or canned, is very well-drained. Excess moisture from the pineapple can make the cake batter too wet, leading to a gummy texture or a cake that doesn’t bake through properly. Pressing it gently between paper towels can remove any lingering juice.
Room Temperature Ingredients: For the smoothest batter and best rise, ensure your eggs and milk are at room temperature. Cold ingredients don’t emulsify as well with the fats, potentially leading to a less cohesive batter and a denser cake. A quick way to warm eggs is to place them in a bowl of warm water for about 5-10 minutes.
Gentle Mixing is Key: As mentioned in the preparation steps, overmixing the batter after adding the wet ingredients is a common pitfall. Mix just until combined to avoid developing the gluten, which results in a tough cake. A tender crumb is the ultimate goal here.
Watch the Topping: Keep an eye on the topping during the final baking stage. If it starts to brown too quickly before the cake is fully cooked, you can loosely tent the loaf with a piece of aluminum foil. This protects the topping from burning while allowing the cake inside to finish baking.
Don’t Skip the Cooling Rack: Cooling the cake on a wire rack is non-negotiable. This allows air to circulate underneath the loaf, preventing condensation and a soggy bottom. It ensures the entire cake cools evenly and retains its desired texture.
Serving Suggestions for Pineapple Loaf Cake
Decoration
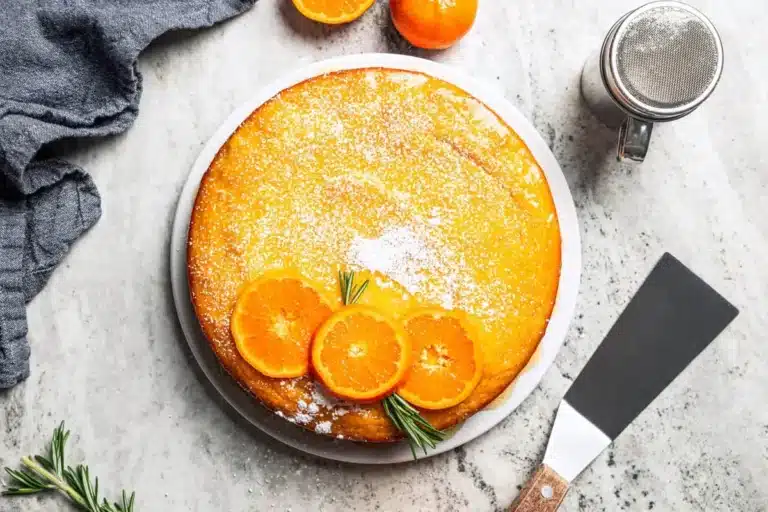
While the caramelized brown sugar topping provides a beautiful rustic charm, you can enhance its visual appeal further. A light dusting of powdered sugar can add a touch of elegance, creating a lovely contrast with the golden-brown topping. For a more vibrant presentation, consider garnishing with a few small, fresh pineapple wedges or a sprinkle of toasted shredded coconut just before serving. A few fresh mint leaves can also add a pop of color and a hint of freshness, making the cake look even more inviting.
Side Dishes
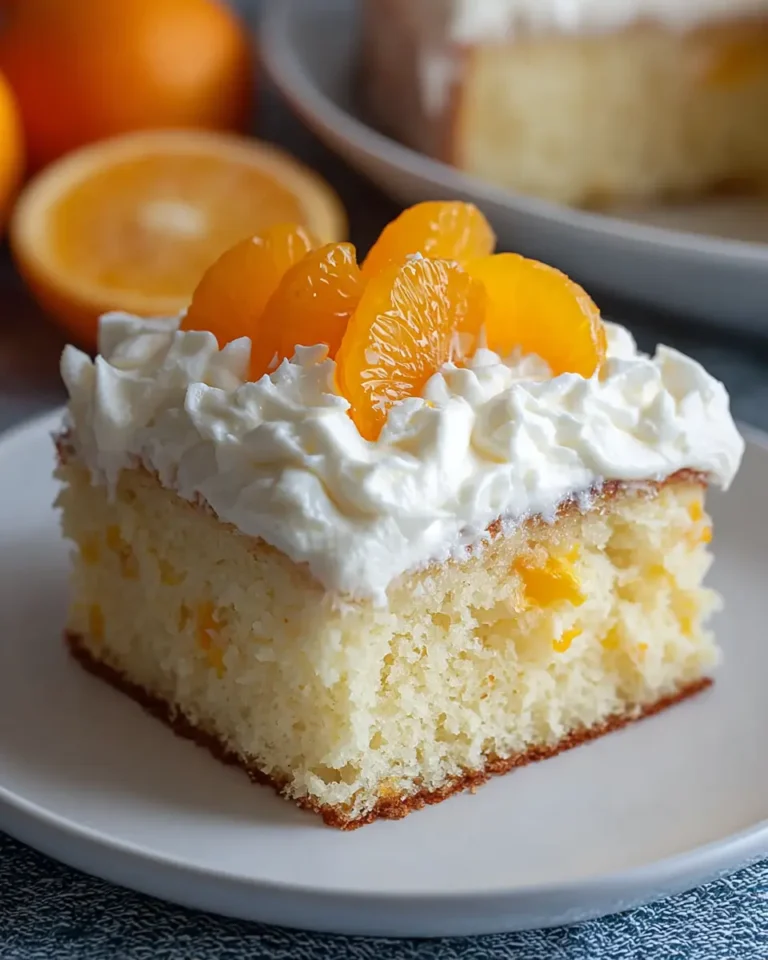
This pineapple loaf cake pairs wonderfully with a variety of beverages and simple accompaniments. A warm cup of coffee or a fragrant black tea makes an excellent companion, as their straightforward flavors complement the cake’s sweetness without overwhelming it. For a more decadent dessert experience, serve a slice with a dollop of lightly sweetened whipped cream or a small scoop of premium vanilla bean ice cream. The cool, creamy texture and classic flavor of ice cream provide a delightful contrast to the warm, buttery cake and its fruity notes.
Creative Serving Ideas
Elevate your brunch spread by featuring slices of this pineapple loaf cake alongside a fresh fruit salad. A medley of berries, melon, and citrus segments will add color and a refreshing counterpoint to the richness of the cake. You could also transform it into a more elaborate dessert by creating a trifle. Layer chunks of the cooled loaf cake with vanilla custard, whipped cream, and perhaps some more fresh pineapple or passion fruit pulp for an exotic twist. For an afternoon tea, serve small, elegantly cut squares alongside delicate finger sandwiches and other small pastries, offering a tropical highlight to your selection.
Preparation & Storage
Storing Leftovers
To keep your delicious pineapple loaf cake fresh for enjoying later, proper storage is key. Once the cake has cooled completely, it can be stored at room temperature. It’s best to keep it tightly covered to prevent it from drying out. You can use plastic wrap, foil, or a cake keeper with a lid. In a typical kitchen environment, it will remain fresh and delicious for up to two days. However, if your home tends to be warmer, or if you’re concerned about humidity, refrigerating it is a safer option.
When storing at room temperature, ensure the loaf is in an area away from direct sunlight or heat sources, as these can accelerate spoilage and affect the texture. The buttery topping can sometimes soften slightly in warmer conditions, so a cooler spot is always preferable. If you plan to consume it within a day or two, room temperature storage is generally perfectly adequate for maintaining its delightful crumb and flavor.
Freezing
For longer-term storage, freezing is an excellent method to preserve the flavor and texture of your pineapple loaf cake. Once the cake has cooled completely, it’s important to wrap it very well to protect it from freezer burn. You can wrap the entire loaf tightly in plastic wrap, followed by a layer of aluminum foil, or place it in a heavy-duty freezer bag, squeezing out as much air as possible. This double-layer protection ensures that the cake stays moist and retains its quality for an extended period.
You can also freeze individual slices if you prefer. Wrap each slice separately in plastic wrap and then place them together in a freezer-safe bag or container. This allows you to thaw only the portion you need at any given time. Properly frozen, the pineapple loaf cake can retain its excellent quality for up to two months, making it a convenient treat to have on hand whenever a craving strikes.
Reheating
When you’re ready to enjoy your stored or frozen pineapple loaf cake, a brief reheating can bring back its wonderful aroma and soft texture. For slices that have been stored in the refrigerator, allow them to come to room temperature for about 15-20 minutes before serving. If you’ve retrieved a slice from the freezer, it’s best to thaw it overnight in the refrigerator, then let it sit at room temperature for a bit before enjoying.
To revive the warmth and buttery notes of the cake, a short stint in the microwave is usually sufficient. Aim for about 10 to 15 seconds for a single slice. This is typically enough to gently warm the crumb and release the delightful buttery and pineapple scents without overcooking or drying out the cake. If you prefer not to use a microwave, you can also gently warm a slice in a low oven (around 300°F or 150°C) for a few minutes, being careful not to let it get too hot.
Frequently Asked Questions
-
Can I use fresh pineapple instead of canned?
Absolutely! Fresh pineapple can be used, and some bakers prefer its brighter flavor and texture. Ensure that you dice it finely and drain it extremely well, just as you would with canned pineapple. You may want to gently press the diced fresh pineapple between paper towels to remove as much excess moisture as possible before adding it to the batter and topping. This is crucial to prevent the cake from becoming too wet and affecting its final texture and bake.
-
My loaf cake’s topping sank into the batter. What went wrong?
A sinking topping is often a result of the batter being too liquid or the topping being added too early in the baking process. Ensure your pineapple is well-drained and that you haven’t overmixed the batter, which can incorporate too much air that then collapses. The technique of baking the loaf for an initial period before adding the topping is specifically designed to prevent this; the cake’s structure needs to be somewhat set before the topping is introduced. Also, ensure the butter in your topping is cold; this helps it stay crumbly and bake up on top rather than melting too quickly into the batter.
-
How can I ensure my loaf cake is evenly baked and not dry?
Achieving an evenly baked and moist loaf cake involves a few key factors. First, ensure your oven temperature is accurate; an oven thermometer can be invaluable. Avoid overmixing the batter, as this can lead to a dry, tough cake. The pineapple itself is a fantastic natural moisture provider, so don’t skimp on it! Use room temperature ingredients, as they incorporate more smoothly. Lastly, rely on the toothpick test for doneness; if it comes out with moist crumbs, it’s done. Overbaking is the quickest way to dry out any cake, so pull it out as soon as it passes the test.