Easy Garlic Butter Oven Baked Tilapia – Quick & Delicious!
Craving a dinner that’s both incredibly delicious and remarkably quick to prepare? This Garlic Butter Oven Baked Tilapia recipe is your answer. It transforms simple ingredients into a culinary delight that’s perfect for busy weeknights or whenever you need a healthy, flavorful meal without the fuss.
Imagine tender, flaky tilapia bathed in a rich garlic butter sauce, brightened with fresh lemon. It’s a dish that satisfies on every level, proving that healthy eating can indeed be exciting and deeply enjoyable.
Why You Will Love This Recipe
- Effortless Preparation: This recipe requires minimal hands-on time, allowing you to get a healthy meal on the table with ease.
- Flavorful Simplicity: A classic combination of garlic, butter, and lemon creates an irresistible taste that complements the delicate tilapia perfectly.
- Healthy and Wholesome: Tilapia is a lean protein source, and this preparation avoids heavy coatings, making it a great option for health-conscious diners.
- Quick Cooking Time: From start to finish, this dish is ready in under 25 minutes, ideal for those evenings when time is of the essence.
- Versatile Appeal: Its clean flavors make it a crowd-pleaser, even for those who might typically be hesitant about fish.
Ingredients You Need
The beauty of this Garlic Butter Oven Baked Tilapia lies in its simplicity and the quality of its core ingredients. Opting for fresh, high-quality tilapia fillets will truly elevate the final dish, ensuring a tender and moist result. The accompanying aromatics and citrus are equally important for building that classic, delightful flavor profile. Remember that the exact quantities and specific types of seasonings can be adjusted to your personal preference, but sticking to fresh ingredients is key to achieving the best outcome.
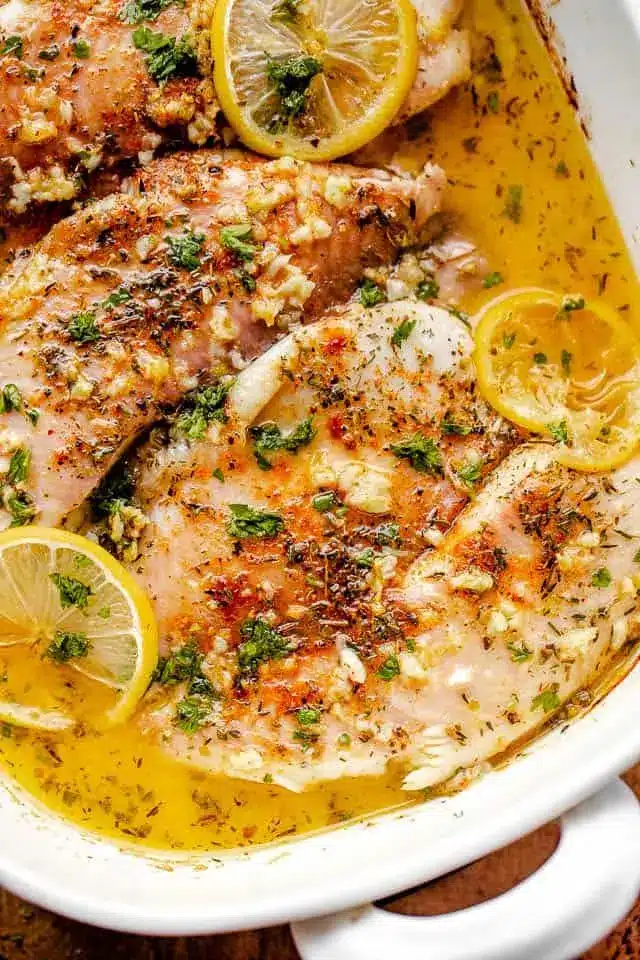
Garlic Butter Oven Baked Tilapia

Light, nutritious tilapia fillets are seasoned with garlic, butter, and lemon and baked to perfection. This recipe is quick, easy, and flavorful, making it a perfect weeknight dinner. It's also low-carb, gluten-free, and Keto-friendly.
- 4 tilapia fillets
- Salt and freshly ground black pepper, to taste
- ½ teaspoon paprika
- ½ teaspoon dried thyme
- ½ teaspoon dried oregano
- 4 tablespoons butter, melted
- 4 cloves garlic, minced
- 2 tablespoons lemon juice
- ¼ teaspoon lemon zest
- 1 lemon, sliced into rounds, for garnish
- Red pepper flakes, for garnish
- Chopped fresh parsley, for garnish
- Lemon slices, for garnish
- 1Preheat oven to 400°F.
- 2Season tilapia with salt, pepper, paprika, thyme, and oregano; arrange fish in a 9x13 baking dish.
- 3In a mixing bowl, whisk together melted butter, garlic, lemon juice, and lemon zest; pour over tilapia.
- 4Bake tilapia for 10 to 12 minutes, or until fish flakes and is fork-tender.
- 5Garnish with pepper flakes, parsley, and lemon slices. Serve.
Keywords: tilapia, baked fish, seafood, garlic butter, lemon, quick dinner, easy recipe, low carb, gluten free, keto
The precise measurements for all these components are detailed within the accompanying recipe card, ensuring you have everything you need for a perfect bake.
Variations
To cater to different dietary needs and taste preferences, this Garlic Butter Oven Baked Tilapia recipe offers wonderful avenues for customization. Embracing these variations ensures that everyone can enjoy a version of this delightful dish, no matter their culinary journey.
For those following a low-carb or Keto lifestyle, this recipe is already a fantastic starting point. You can further enhance its appeal by adding a sprinkle of finely chopped celery or bell peppers to the baking dish alongside the tilapia. These vegetables add a subtle crunch and additional nutrients without significantly increasing the carb count. Ensure they are cut small enough to cook through in the same time as the fish.
A vibrant vegan or vegetarian twist can be achieved by substituting the tilapia with thick slices of firm tofu or portobello mushrooms. Marinate the tofu in a similar garlic butter-lemon mixture before baking, or roast the mushrooms until tender. While the texture will differ, the aromatic flavors will still shine through, offering a plant-based alternative that’s just as satisfying. Consider serving these with a hearty grain like quinoa for a complete meal.
Introducing a hint of spice can also be a delightful variation. A pinch of cayenne pepper added to the butter mixture or a generous topping of red pepper flakes before baking will introduce a pleasant heat. This can be particularly appealing when paired with the richness of the butter and the tang of the lemon, creating a more complex flavor profile. For an even more pronounced kick, you could also incorporate some finely diced jalapeño into the garlic butter.
How to Prepare Garlic Butter Oven Baked Tilapia
Step 1: Prepare the Oven and Baking Dish
Begin by preheating your oven to a consistent 400°F (200°C). This moderate heat is crucial for cooking the tilapia evenly without drying it out. A perfectly preheated oven ensures that the moment the fish enters, it starts cooking effectively, leading to that desirable flaky texture.
Next, select a suitable baking dish, a 9×13 inch pan is ideal for four fillets. Lightly grease the dish with a touch of olive oil or cooking spray. This simple step prevents the fish from sticking to the pan, making cleanup significantly easier and ensuring that the fillets retain their shape when served.
Ensure the dish is large enough to accommodate the tilapia fillets without them overlapping too much. Adequate spacing allows the heat to circulate properly around each piece, promoting even cooking and a beautiful, golden-brown sear on the edges.
Step 2: Season the Tilapia Fillets
Pat the tilapia fillets completely dry with paper towels. This step is essential for achieving a better sear and allowing the seasonings to adhere properly to the fish. Moisture on the surface can lead to steaming rather than baking, resulting in a less desirable texture.
In a small bowl, combine the salt, freshly ground black pepper, paprika, dried thyme, and dried oregano. These herbs and spices form the foundational flavor profile of the dish, offering a warm and aromatic base that complements the mild tilapia. Ensure the seasonings are well-mixed to distribute them evenly.
Generously season both sides of each tilapia fillet with this mixture. Take your time to ensure each piece is coated evenly, paying attention to the edges. This thorough seasoning is what will infuse the fish with delightful flavor as it bakes.
Step 3: Arrange Tilapia in the Baking Dish
Carefully place the seasoned tilapia fillets into the prepared baking dish. Arrange them in a single layer, ensuring there is a little space between each fillet. This allows for optimal air circulation around the fish, promoting even cooking and preventing them from steaming.
If any of your fillets are significantly thicker than others, you might consider placing the thicker ones towards the edges of the dish, as they may require a slightly longer cooking time. Alternatively, you can arrange them so the thicker parts are more towards the center of the dish where heat is most intense. This thoughtful arrangement helps to ensure all fillets are perfectly cooked simultaneously.
Once arranged, you can perform a quick visual check to ensure everything looks evenly distributed and ready for the next stage of preparation. The goal here is a neat, organized layout that sets the stage for a successful baking process.
Step 4: Prepare the Garlic Butter Sauce
In a separate medium-sized mixing bowl, combine the melted butter, minced fresh garlic, fresh lemon juice, and lemon zest. The melted butter acts as the rich base for the sauce, carrying the vibrant flavors of garlic and lemon throughout the dish. Fresh garlic is preferred for its pungent aroma and sharp taste, which mellows beautifully during baking.
Whisk these ingredients together vigorously until they are thoroughly combined and emulsified. The lemon juice and zest add a crucial brightness and acidity that cuts through the richness of the butter, creating a balanced and zesty sauce. The aroma at this stage should be intensely fragrant and inviting.
Ensure the garlic is finely minced or put through a press for maximum flavor distribution. Small, evenly sized pieces will disperse evenly throughout the sauce, infusing every part of the tilapia with its delicious essence. This sauce is the star that will bring the entire dish together.
Step 5: Pour Sauce Over Tilapia and Bake
Carefully and evenly pour the prepared garlic butter sauce over the arranged tilapia fillets in the baking dish. Make sure to distribute the sauce so that each fillet is generously coated. You can use a spoon or a brush to ensure every nook and cranny of the fish is touched by this flavorful mixture.
Once the sauce is applied, transfer the baking dish to the preheated oven. Bake for approximately 10 to 12 minutes. The exact cooking time will depend on the thickness of your tilapia fillets and the accuracy of your oven’s temperature. It’s always best to start checking around the 10-minute mark.
The tilapia is done when it flakes easily with a fork and is opaque throughout. Avoid overcooking, as this can lead to dry, tough fish. The goal is a tender, moist, and perfectly cooked fillet that melts in your mouth. You can check for doneness by inserting a fork into the thickest part of a fillet; it should separate into flaky pieces with minimal resistance. An internal temperature of 145°F (63°C) is the ideal target.
Step 6: Garnish and Serve
Once the tilapia is perfectly cooked and has reached that ideal flaky texture, carefully remove the baking dish from the oven. The aroma filling your kitchen at this point will be absolutely incredible, a testament to the simple yet powerful flavors at play.
Before serving, garnish the fillets generously with fresh parsley, red pepper flakes (if you enjoy a hint of heat), and fresh lemon slices. The vibrant green of the parsley adds a pop of color and a fresh herbaceous note, while the red pepper flakes offer a subtle warmth. The lemon slices can be squeezed over the fish for an extra burst of citrusy flavor just before eating.
Serve the Garlic Butter Oven Baked Tilapia immediately while it’s hot and fresh. This dish is a complete meal on its own but pairs wonderfully with a variety of sides, as discussed in the serving suggestions. Enjoy this delightful and remarkably easy seafood dinner!
Pro Tips for Garlic Butter Oven Baked Tilapia
Use Fresh, High-Quality Tilapia: The fresher your tilapia fillets, the better the final dish will be. Look for fillets that are firm, moist, and have a mild, clean scent. If using frozen, ensure it has been thawed properly and patted dry thoroughly. This ensures optimal texture and flavor.
Don’t Overcrowd the Pan: Ensure your tilapia fillets have a little breathing room in the baking dish. Overcrowding can lead to steaming rather than baking, resulting in a less desirable texture. Give each fillet space for the heat to circulate evenly around it.
Mince Garlic Finely: For the most potent flavor distribution in the garlic butter sauce, mince your garlic as finely as possible or use a garlic press. This ensures that the garlic essence permeates the sauce and the fish evenly, creating a consistent flavor throughout.
Watch the Cooking Time Closely: Tilapia cooks very quickly, and overcooking is the main culprit for dry fish. Start checking for flakiness around the 10-minute mark. It’s better to slightly undercook and return it to the oven for a minute or two than to overcook it initially.
Taste and Adjust Seasonings: Before pouring the sauce over the fish, you can always taste a tiny bit (carefully!) to adjust the salt, pepper, or lemon juice to your preference. This ensures the flavor profile is exactly to your liking. Personal preference is key to a truly satisfying dish.
Serving Suggestions for Garlic Butter Oven Baked Tilapia
Decoration
Garnishing is key to making this simple dish visually appealing. A generous sprinkle of fresh, finely chopped parsley adds a vibrant green contrast to the golden-baked fish, bringing a touch of freshness and elegance. For those who enjoy a little heat, a scattering of red pepper flakes offers a beautiful visual cue of the subtle spice within. Thinly sliced lemon rounds, artfully arranged on top or served alongside, not only enhance the visual appeal but also provide an optional burst of extra citrus flavor.
Side Dishes
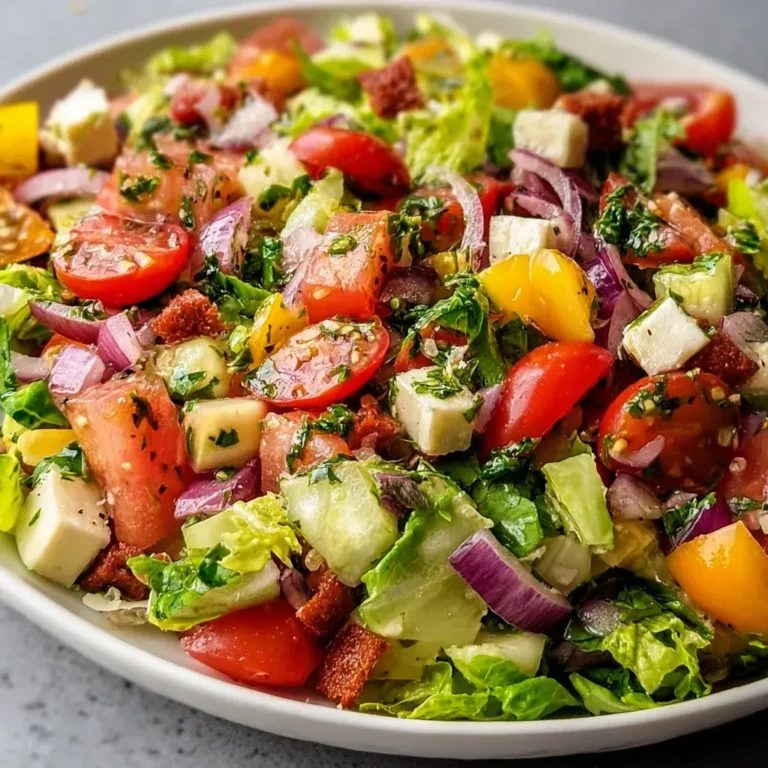
This Garlic Butter Oven Baked Tilapia pairs beautifully with a variety of complementary side dishes. Roasted asparagus, with its slightly earthy flavor and tender-crisp texture, is a classic and healthy choice that bakes wonderfully alongside the fish. A simple green salad tossed with a light vinaigrette offers a refreshing counterpoint to the richness of the butter sauce. For a more substantial meal, consider serving it with fluffy rice, tender mashed potatoes, or a side of quinoa.
Creative Serving Ideas
Elevate your presentation by serving the tilapia fillets over a bed of creamy risotto or alongside a vibrant quinoa salad. For a light and healthy lunch option, flake the cooled tilapia and mix it into a fresh green salad, creating a delicious protein-boosted meal. You could also serve it as part of a seafood platter, alongside shrimp or scallops, for a more elaborate dining experience. Consider wrapping individual portions in parchment paper with some mixed vegetables and herbs for a charming, single-serving presentation that makes cleanup a breeze.
Preparation & Storage
Storing Leftovers
To properly store any leftover Garlic Butter Oven Baked Tilapia, allow the fish to cool completely at room temperature before transferring it to an airtight container. Ensure the container is well-sealed to prevent the fish from drying out or absorbing any unwanted odors from the refrigerator. Refrigerate the container promptly. Properly stored, leftover tilapia will maintain its best quality for up to 2 to 3 days.
Freezing
Freezing this baked tilapia is a good option for longer-term storage, though the texture might be slightly softer upon reheating. First, allow the cooked fillets to cool completely. Then, place them in a single layer on a baking sheet lined with parchment paper and freeze until solid. Once frozen, transfer the fillets into heavy-duty freezer bags, removing as much air as possible before sealing. Frozen tilapia can be stored for up to 3 weeks for optimal quality.
Reheating
When you’re ready to reheat your stored tilapia, it’s best to do so gently to retain moisture. If frozen, allow the fish to thaw in the refrigerator overnight first. Preheat your oven to 350°F (175°C). Place the tilapia fillets in a lightly greased baking dish and cover loosely with aluminum foil. Bake for about 8 to 10 minutes, or until the fish is heated through. Avoid reheating in the microwave, as this can make the fish tough and rubbery.
Frequently Asked Questions
-
Can I use other types of white fish instead of tilapia?
Absolutely! This garlic butter sauce is wonderfully versatile and pairs well with many other types of mild white fish. Cod, haddock, flounder, or even sole fillets would make excellent substitutes. The cooking time might need slight adjustments depending on the thickness of the fillets you choose, so always check for flakiness with a fork. The key is to select fish that has a similar delicate texture to tilapia, ensuring it cooks through evenly in the oven without becoming dry.
-
How can I ensure my tilapia doesn’t become dry?
The most critical factor in preventing dry tilapia is not to overcook it. Tilapia is a lean fish and cooks very quickly. Start checking for doneness at the lower end of the recommended cooking time (around 10 minutes). The fish is ready when it flakes easily with a fork and is opaque throughout. Using a meat thermometer to check for an internal temperature of 145°F (63°C) in the thickest part is also a reliable method. Ensuring the fillets are well-coated with the garlic butter sauce before baking also helps to keep them moist during the cooking process.
-
What are the best herbs and spices to use with tilapia?
While the recipe calls for paprika, thyme, and oregano, tilapia is quite adaptable to various seasonings. For a Mediterranean flair, consider adding dried dill or a pinch of red pepper flakes to the spice mix. A touch of garlic powder can boost the garlic flavor if you desire. For a more robust profile, a hint of smoked paprika can add a wonderful depth, or you could experiment with a sprinkle of lemon pepper seasoning. Fresh herbs like rosemary or chives, added towards the end of baking or as a garnish, also complement tilapia beautifully.