Juicy Oven Roasted Chicken – No More Dry Chicken!
There’s nothing quite like a perfectly roasted chicken breast – tender, juicy, and infused with savory herbs and spices. It’s a culinary cornerstone that graces dinner tables across the globe, offering a wholesome and delicious meal that can be both simple and elegant.
For many, the quest for that ideal roasted chicken breast often ends in disappointment, a dry, flavorless outcome that leaves much to be desired. However, achieving poultry perfection is not an elusive dream; it’s a tangible reality with the right techniques and a few key ingredients. This guide aims to demystify the process, transforming your oven-roasted chicken breast from a potential culinary gamble into a guaranteed triumph.
Why You Will Love This Recipe
- Incredibly Juicy: Experience chicken breasts that remain unbelievably moist and tender, even after resting.
- Effortless Preparation: With minimal active time, this recipe is perfect for busy weeknights or relaxed weekends.
- Versatile Flavor Profile: The foundational seasoning blend can be adapted to suit a wide array of culinary preferences and global cuisines.
- Foolproof Method: Brining and precise cooking temperatures ensure consistent, delicious results every single time you make it.
- Healthy & Wholesome: A lean protein source, this dish is a fantastic base for countless nutritious meals.
Ingredients You Need
The foundation of any great dish lies in the quality of its ingredients. For this oven-roasted chicken breast recipe, we focus on fresh, high-quality components that work harmoniously to deliver exceptional flavor and texture. Using good quality chicken breasts will significantly impact the final outcome, ensuring a tender and succulent bite.
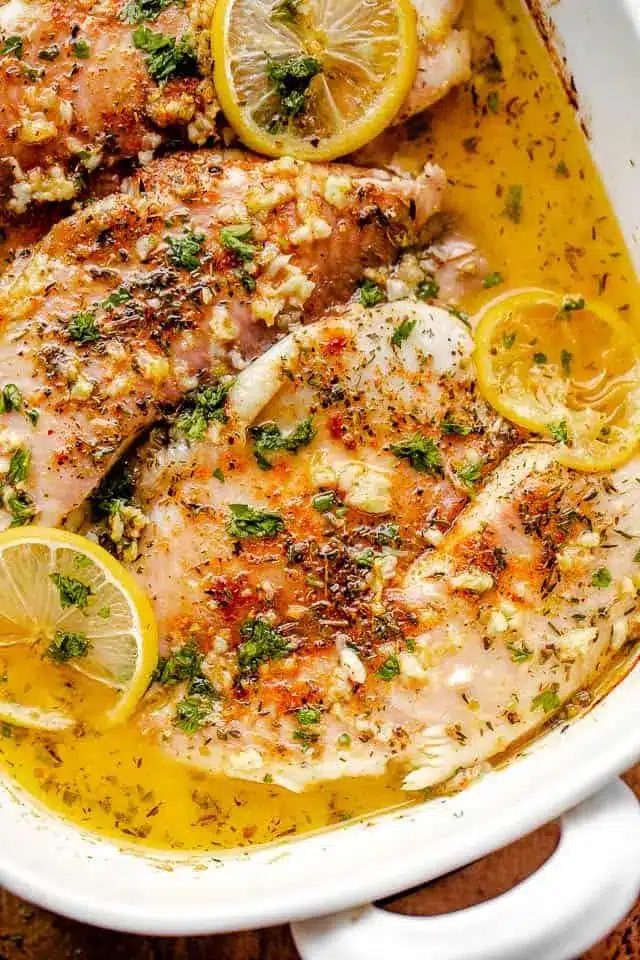
Oven Roasted Chicken Breast

Juicy and tender, this tasty oven roasted chicken breasts recipe comes out perfect each and every time! No more dry chicken with this easy recipe, which uses a quick soak in salt water and a delicious homemade mix of spices.
- 1 to 1.5 pounds boneless, skinless chicken breasts
- 4 cups lukewarm water
- 1 tablespoon olive oil
- fresh chopped parsley, for garnish
- 1Preheat the oven to 425°F.
- 2Place the chicken breasts in a large bowl. In a large measuring cup or mixing bowl, combine lukewarm water and salt; stir, then pour over chicken breasts. Let brine for 20 to 30 minutes. You can also cover the bowl and refrigerate for 2 hours.
- 3While the chicken is brining, prepare the seasoning blend. Combine salt, pepper, paprika, garlic powder, onion powder, dried thyme, dried basil, dried rosemary, dried parsley, and cayenne pepper in a small bowl; stir until thoroughly incorporated.
- 4Pour out the salt water and rinse each chicken breast under cold water. Pat them dry with paper towels.
- 5Place the chicken in a baking dish and rub the olive oil all over each chicken breast.
- 6Sprinkle the seasoning blend evenly over the chicken breasts on all sides.
- 7Transfer to the oven and bake for 22 to 25 minutes, or until internal temperature reaches 165°F. Use an instant-read meat thermometer to check for doneness.
- 8For a browned, crispy top, set your oven to broil on HIGH for the final 3 to 4 minutes and broil until golden on top.
- 9Remove the chicken breasts from the oven and transfer them to a serving plate to rest for 10 minutes before cutting and serving.
- 10Garnish with fresh chopped parsley and serve.
Keywords: chicken breast, roasted chicken, baked chicken, juicy chicken, easy recipe, brining chicken
Quantities for each ingredient are detailed within the recipe card for your convenience.
Variations
The beauty of this oven-roasted chicken breast recipe lies in its inherent adaptability. You can easily transform the flavor profile to suit specific dietary needs or taste preferences, creating a whole new dish with minimal effort.
For a plant-based alternative, consider a “Vegan Chicken” using king oyster mushrooms. Marinate thick slices of the mushroom stems in a mixture of soy sauce, nutritional yeast, smoked paprika, garlic powder, and a touch of liquid smoke. Roast them on a baking sheet until tender and slightly caramelized. This offers a satisfying, umami-rich vegetarian option that mimics the texture and savory notes of chicken.
If you’re aiming for a low-carb, keto-friendly meal, embrace bold, spicy flavors. Incorporate extra cayenne pepper into the spice blend for a fiery kick, or add a teaspoon of cumin and chili powder for a Tex-Mex twist. Serve these spiced chicken breasts alongside a vibrant cauliflower rice pilaf or a fresh avocado salad for a complete low-carb experience. The natural fat content in avocado complements the lean protein wonderfully.
Experiment with global influences by infusing Mediterranean or Asian flavors. For a Mediterranean flair, add dried oregano, lemon zest, and a pinch of red pepper flakes to the spice mix, and serve with a side of roasted vegetables like zucchini, bell peppers, and cherry tomatoes. For an Asian-inspired twist, create a glaze with soy sauce, ginger, garlic, and a touch of honey or maple syrup (if not strictly low-carb), and serve with steamed broccoli and jasmine rice. The possibilities are truly endless.
How to Prepare oven roasted chicken breast
Step 1: Brining the Chicken for Ultimate Juiciness
The first crucial step to achieving exceptionally moist and tender oven-roasted chicken breast is the brining process. This simple technique, often overlooked, is a game-changer for lean meats like chicken breast, which can easily dry out.
Begin by preparing the brine solution. In a large bowl or a resealable plastic bag, combine four cups of lukewarm water with a quarter cup of salt. Stir this mixture until the salt is fully dissolved, creating a saline bath that will work its magic on the chicken.
Carefully submerge your boneless, skinless chicken breasts into the brine. Ensure they are fully covered by the liquid. Allow them to soak for at least 20 minutes, but no longer than two hours. This short period is sufficient to allow the salt to penetrate the meat, enhancing its moisture-retention capabilities and seasoning it from within. For longer brining, especially if you’re preparing ahead of time, you can cover the bowl and refrigerate it for up to two hours.
Step 2: Preparing the Aromatic Seasoning Blend
While your chicken breasts are brining, it’s the perfect time to assemble the flavor-packed seasoning blend that will give your roasted chicken its signature taste. This mix of herbs and spices is both classic and customizable, providing a delicious foundation for your meal.
In a small bowl, combine a quarter teaspoon of salt (this is optional, as the chicken will have absorbed some salt from the brine), a quarter teaspoon of fresh ground black pepper, half a teaspoon each of smoked or sweet paprika, garlic powder, onion powder, dried thyme, dried basil, and dried rosemary. Add a quarter teaspoon of dried parsley and a sixth of a teaspoon of cayenne pepper for a hint of warmth.
Whisk these dry ingredients together thoroughly with a fork until they are evenly distributed. This blend will ensure that every surface of the chicken breast is coated in a symphony of savory, aromatic notes, contributing significantly to the overall deliciousness of the final dish. Remember, you don’t have to use the entire blend; adjust to your preference.
Step 3: Seasoning and Preparing for the Oven
Once the brining time is complete, it’s time to get the chicken ready for its flavorful transformation in the oven. This step involves rinsing, drying, and coating the chicken before applying the spice blend.
Gently pour out the salty brine solution from the bowl or bag. Rinse each chicken breast under cold running water to remove any excess salt from the brining process. Pat the chicken breasts thoroughly dry with paper towels; this is an essential step to ensure the oil and seasonings adhere properly, leading to a better sear and crust.
Transfer the dried chicken breasts to a baking dish. Drizzle a tablespoon of olive oil over them, and use your hands or a brush to ensure each breast is evenly coated. This oil acts as a binder for the spices and helps to create a beautiful golden-brown exterior during baking. Generously sprinkle the prepared seasoning blend evenly over all sides of the chicken breasts, pressing gently to help it stick.
Step 4: Baking to Golden Perfection
Now, the magic happens as the seasoned chicken breasts are introduced to the heat of the oven. The goal here is to cook the chicken through while developing a wonderfully tender interior and a slightly caramelized exterior. A precise cooking time and temperature are key to achieving this balance.
Preheat your oven to 425°F (220°C). Place the baking dish containing the seasoned chicken breasts into the preheated oven. Bake for approximately 20 to 22 minutes. The exact cooking time will vary slightly depending on the thickness of your chicken breasts; thinner breasts will cook faster, while thicker ones may require a few extra minutes.
To ensure the chicken is perfectly cooked and safe to eat, use an instant-read meat thermometer. Insert the thermometer into the thickest part of a chicken breast. It should register an internal temperature of 165°F (74°C). For an extra touch of golden deliciousness and a slightly crispier top, you can switch your oven to the broil setting on high for the final 3 to 4 minutes of cooking, watching closely to prevent burning.
Step 5: The Crucial Resting Period
This is perhaps the most underestimated step in achieving truly juicy roasted chicken, yet it is paramount. Allowing the chicken to rest after baking is what ensures those flavorful juices are reabsorbed into the meat, rather than escaping onto the plate.
Once the chicken reaches its target internal temperature, carefully remove the baking dish from the oven. Transfer the roasted chicken breasts from the hot dish to a clean cutting board or a plate. Resist the urge to slice into them immediately; this can lead to all the accumulated juices running out, resulting in dry chicken.
Let the chicken rest for at least 5 to 10 minutes. During this time, the muscle fibers relax, allowing the juices to redistribute evenly throughout the breast. This resting period is non-negotiable for tender, succulent chicken every single time. A well-rested chicken is the secret weapon in your culinary arsenal.
Step 6: Serving and Enjoying Your Masterpiece
With the resting period complete, your perfectly oven-roasted chicken breasts are ready to be served and savored. Whether you’re enjoying it as a main course or incorporating it into another dish, the results will be outstanding.
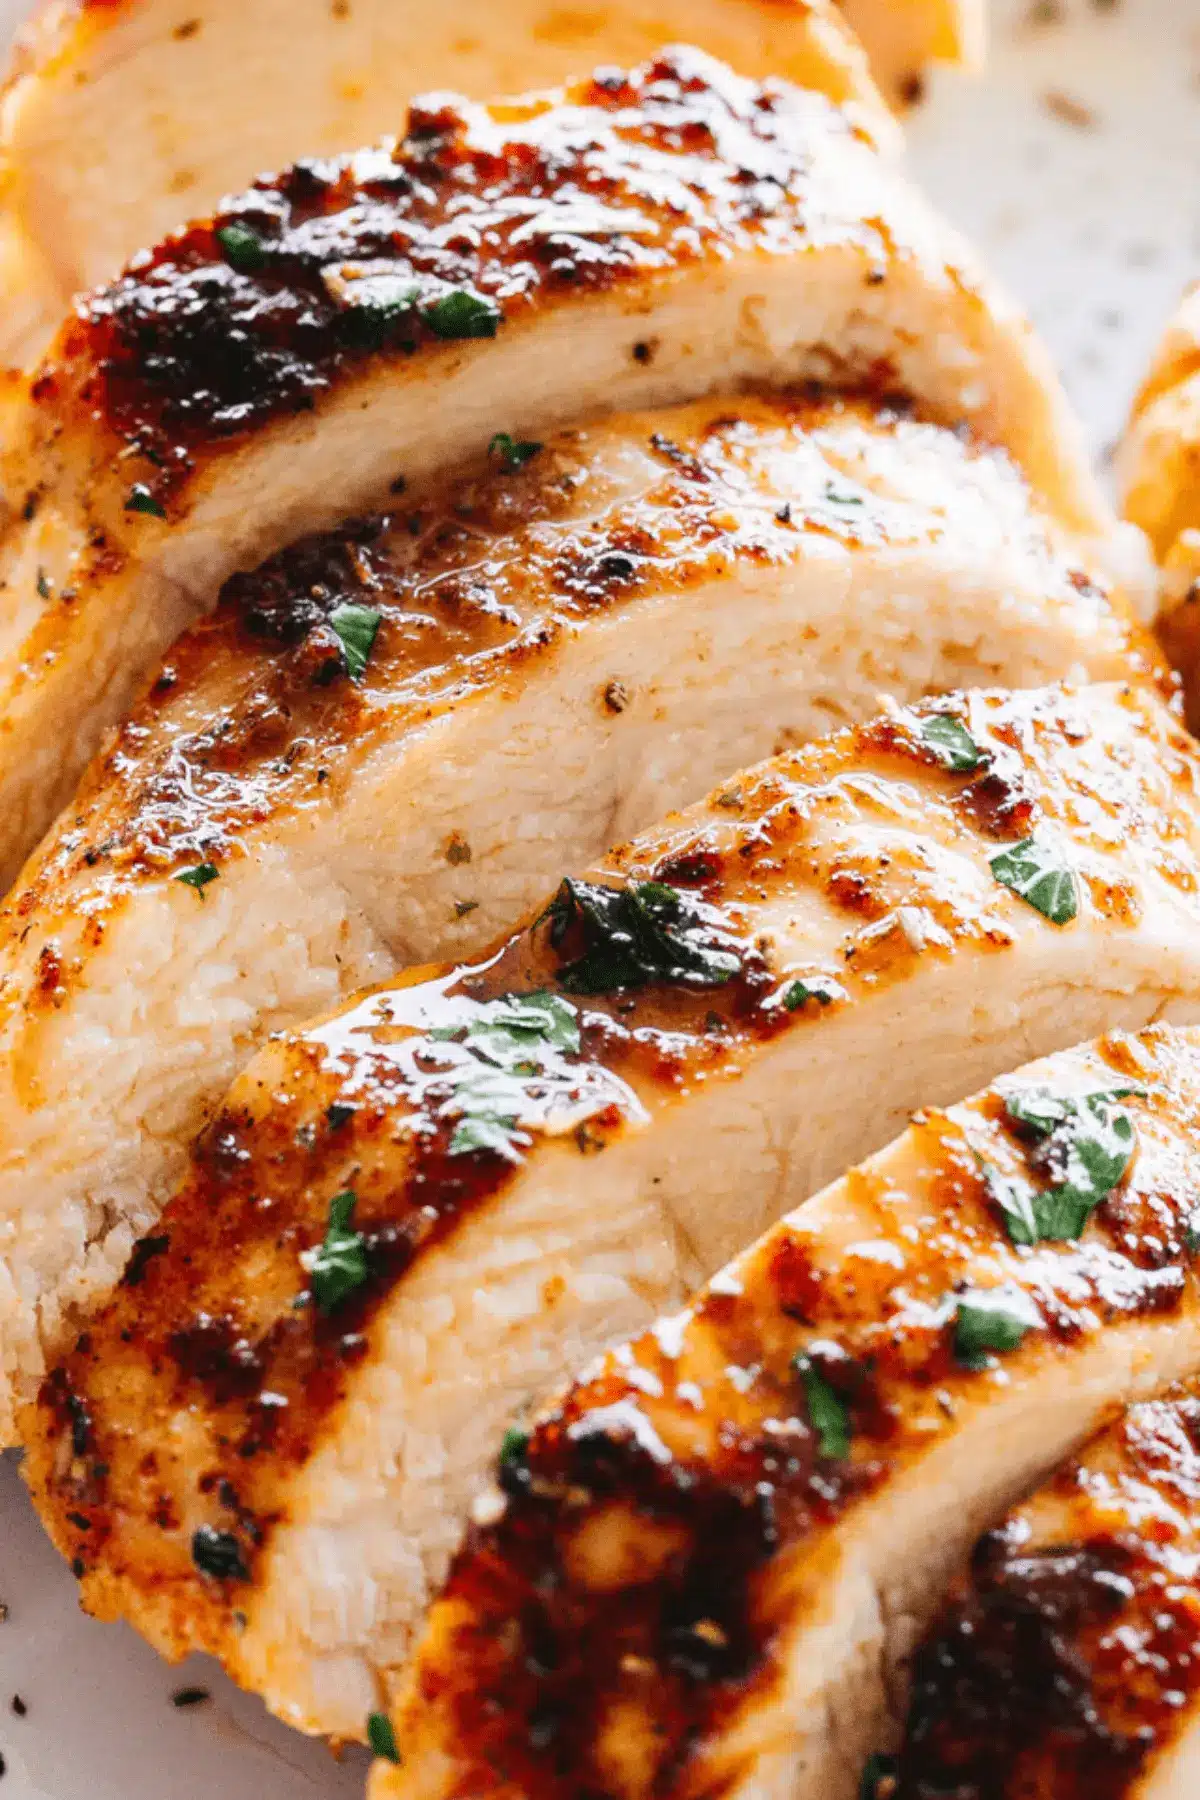
Slice the chicken breasts against the grain for maximum tenderness. You can serve them whole, or slice them into medallions or strips depending on your meal. Garnish with fresh chopped parsley for a pop of color and freshness, if desired.
Enjoy this versatile dish as is, or use the perfectly cooked chicken as a protein base for salads, sandwiches, wraps, or a variety of other culinary creations. Its savory flavor and tender texture make it an ideal component for countless meals throughout the week. The preparation is complete, and the delicious reward awaits.
Pro Tips for oven roasted chicken breast
Achieving consistently perfect oven-roasted chicken breast involves understanding a few key principles that elevate the dish from good to extraordinary. These expert tips will help you navigate the nuances of cooking poultry to perfection.
Invest in an Instant-Read Thermometer: This is not just a suggestion, but a requirement for foolproof chicken. Unlike time estimates, a thermometer provides an accurate, real-time reading of the chicken’s internal temperature. Chicken is safely cooked and at its most tender when it reaches 165°F (74°C) in the thickest part. Checking early and often prevents overcooking and drying out, ensuring every bite is succulent.
Embrace the Rest: As highlighted in the preparation steps, resting the chicken post-cooking is vital. Aim for a minimum of 5-10 minutes, allowing the juices to redistribute. This simple step dramatically impacts the final moisture and tenderness of the meat. Think of it as allowing the chicken to “finish cooking” in its own juices.
Uniform Thickness is Key: Chicken breasts often vary in thickness, leading to uneven cooking. If you notice significant differences, gently pound the thicker parts with a meat mallet or rolling pin to achieve a more uniform thickness. This ensures that all parts of the chicken cook at the same rate, preventing some pieces from drying out while others are still undercooked.
Don’t Fear Flavor Variations: While the provided spice blend is excellent, this recipe serves as a fantastic canvas for experimentation. Feel free to explore different spice combinations. Consider a smoky paprika and cumin mix for a Southwestern twist, or add a touch of curry powder and garam masala for an Indian-inspired flavor. Lemon pepper seasoning, Italian herbs, or even a simple blend of garlic powder and onion powder work wonderfully.
Consider Chicken Thighs for Extra Moisture: If you find yourself consistently struggling with dryness, or simply prefer a richer flavor and even more forgiving cooking process, boneless, skinless chicken thighs are an excellent alternative. They contain more fat, making them naturally more moist and less prone to overcooking. Adjust the cooking time as needed; they may require a few extra minutes compared to breasts.
Serving Suggestions for oven roasted chicken breast
Decoration
Elevate the visual appeal of your oven-roasted chicken breast with simple yet effective garnishes. A sprinkle of fresh, vibrant herbs like chopped parsley, chives, or cilantro adds a burst of color and a touch of freshness. A few thin slices of lemon or lime placed artfully on the plate can also enhance the presentation and offer a zesty aroma.
Side Dishes
The versatility of roasted chicken breast makes it a perfect partner for a wide array of side dishes. For a wholesome and balanced meal, consider pairing it with fluffy quinoa or brown rice. Roasted vegetables such as asparagus, broccoli, or Brussels sprouts offer a delightful crunch and earthy flavors.
Creamy mashed potatoes or sweet potato mash provide a comforting and classic accompaniment. A crisp, refreshing salad, like a mixed green salad with a light vinaigrette or a Greek salad with olives and feta, offers a pleasant contrast to the richness of the chicken. For those seeking lighter options, steamed green beans or a simple side of sautéed spinach are excellent choices.
Creative Serving Ideas
Transform your roasted chicken breast into exciting new dishes throughout the week. Slice it thinly and use it as the protein in vibrant lunch bowls, layering it with grains, vegetables, and your favorite dressing. Shredded chicken is perfect for tacos, enchiladas, or as a topping for loaded baked potatoes.
Dice the cooled chicken and mix it into a flavorful chicken salad for sandwiches or wraps. It can also be added to soups, stews, or pasta dishes to boost protein content and add savory depth. Consider incorporating it into a hearty chicken pot pie filling or using it as a base for a quick and easy stir-fry with your favorite vegetables and sauce.
Preparation & Storage
Storing Leftovers
Leftover oven-roasted chicken breast is a culinary treasure, perfect for repurposing into delicious meals. To store them properly, allow the chicken to cool completely before transferring it to an airtight container. Ensure the container is sealed tightly to prevent air exposure, which can lead to drying out. Refrigerate the leftovers promptly.
When stored correctly in an airtight container in the refrigerator, your roasted chicken breast should remain fresh and retain its quality for up to 3 to 4 days. This makes it an ideal option for meal prepping lunches or dinners for the upcoming days, saving you time and effort.
Freezing
For longer-term storage, freezing is an excellent option to preserve the quality of your roasted chicken breast. After the chicken has cooled completely, wrap individual portions tightly in plastic wrap, then in aluminum foil, or place them in heavy-duty freezer bags. Removing as much air as possible before sealing will help prevent freezer burn.
When properly frozen, oven-roasted chicken breast can be stored for up to 3 to 4 months. For the best results when you’re ready to use them, thaw the frozen chicken breasts overnight in the refrigerator. Avoid thawing at room temperature to maintain food safety standards.
Reheating
Reheating oven-roasted chicken breast requires a gentle approach to maintain its moisture and tenderness. The key is to avoid overcooking, which can quickly turn the succulent meat dry and tough. A slow, moist heating method is recommended for the best results.
In a skillet, add a tablespoon of butter or a splash of water or chicken broth. Place the refrigerated or thawed chicken breast in the skillet, cover it with a lid, and heat over low to medium-low heat. This steaming effect helps to rehydrate the chicken and keep it moist. Another method is to reheat it gently in the oven at a low temperature (around 300°F / 150°C) for about 10-15 minutes, perhaps with a little added liquid in the baking dish.
Frequently Asked Questions
-
Can I brine the chicken breast for longer than two hours, or overnight?
While brining for up to two hours is ideal for optimal moisture retention without negatively impacting texture, brining for extended periods, such as overnight, can sometimes lead to a mushy texture in chicken breasts. This is because the salt can break down the proteins too much. If you need to prepare ahead, brining for 2 to 4 hours is generally safe, but closely monitor the texture. For even longer preparation, consider a dry brine, where salt is rubbed directly onto the chicken and left to cure in the refrigerator for several hours or overnight; this method draws out moisture initially but then reabsorbs it with the salt, leading to a more seasoned and firm result.
-
Why is my oven-roasted chicken breast still dry even after following the recipe?
Several factors could contribute to dry chicken, even with a good recipe. Firstly, the accuracy of your oven’s temperature is crucial; an oven that runs hotter than indicated can easily overcook the chicken. Using an oven thermometer can help verify your oven’s calibration. Secondly, the thickness of the chicken breasts can be a significant issue; uneven thickness leads to uneven cooking. Pounding them to a uniform thickness before cooking is a vital step often overlooked. Lastly, and perhaps most importantly, is overcooking. Relying solely on time instead of an instant-read thermometer is a common mistake. Always trust the thermometer’s reading of 165°F in the thickest part, and remember to factor in the carryover cooking that happens during the resting period.
-
What is the best way to use leftover roasted chicken breast in other dishes?
Leftover roasted chicken breast is incredibly versatile. For quick lunches or dinners, shred or dice it and add it to salads, wraps, or sandwiches. It’s a fantastic protein boost for pasta dishes, stir-fries, or quesadillas. You can also incorporate it into hearty soups like chicken noodle soup or chili. If you’re planning to use it in a dish that requires further cooking, like enchiladas or casseroles, adding it towards the end of the cooking process can help prevent it from drying out further. Consider mixing it with a bit of sauce or dressing before adding it to dishes to ensure it stays moist.