Easy Maki Roll Recipe – Make Your Own Sushi
Embarking on the journey of making sushi at home can feel like a culinary expedition into uncharted territory. Yet, with a few key techniques and a dash of patience, you’ll discover that crafting delicious maki rolls is not only achievable but incredibly rewarding. This recipe breaks down the process, demystifying sushi-making for even the most novice home cooks.
Imagine the satisfaction of presenting beautifully rolled sushi, bursting with fresh flavors and vibrant colors, all made by your own hands. This guide is designed to lead you through every step, ensuring your maki rolls are a triumph, whether for a casual weeknight dinner or a special gathering. Let’s dive in and create something truly delicious!
Why You Will Love This Recipe
- Effortless Assembly: Despite the sophisticated appearance, the rolling process is straightforward, especially with the provided tips to guide you. You’ll be surprised at how quickly you can master the technique.
- Customizable Fillings: While this recipe features a classic combination, it’s a fantastic canvas for your creativity. Feel free to swap ingredients to suit your taste preferences or dietary needs.
- Impressive Presentation: Maki rolls are visually stunning, making them perfect for entertaining guests or adding a touch of elegance to any meal. They’re a guaranteed crowd-pleaser.
- Healthy and Satisfying: Packed with fresh vegetables and lean protein (or its delicious imitation), these rolls offer a balanced and wholesome meal that’s both filling and nutritious.
- Fun for All Ages: The interactive nature of rolling sushi makes it a delightful activity for families and friends. It’s a meal that’s as much fun to make as it is to eat.
Ingredients You Need
The foundation of any great maki roll lies in the quality of its ingredients. Opting for the freshest produce and good quality sushi rice will elevate your creation from good to extraordinary. Ensuring your imitation crab is flavorful and your avocado is perfectly ripe will significantly contribute to the overall taste and texture.
Maki Roll Recipe

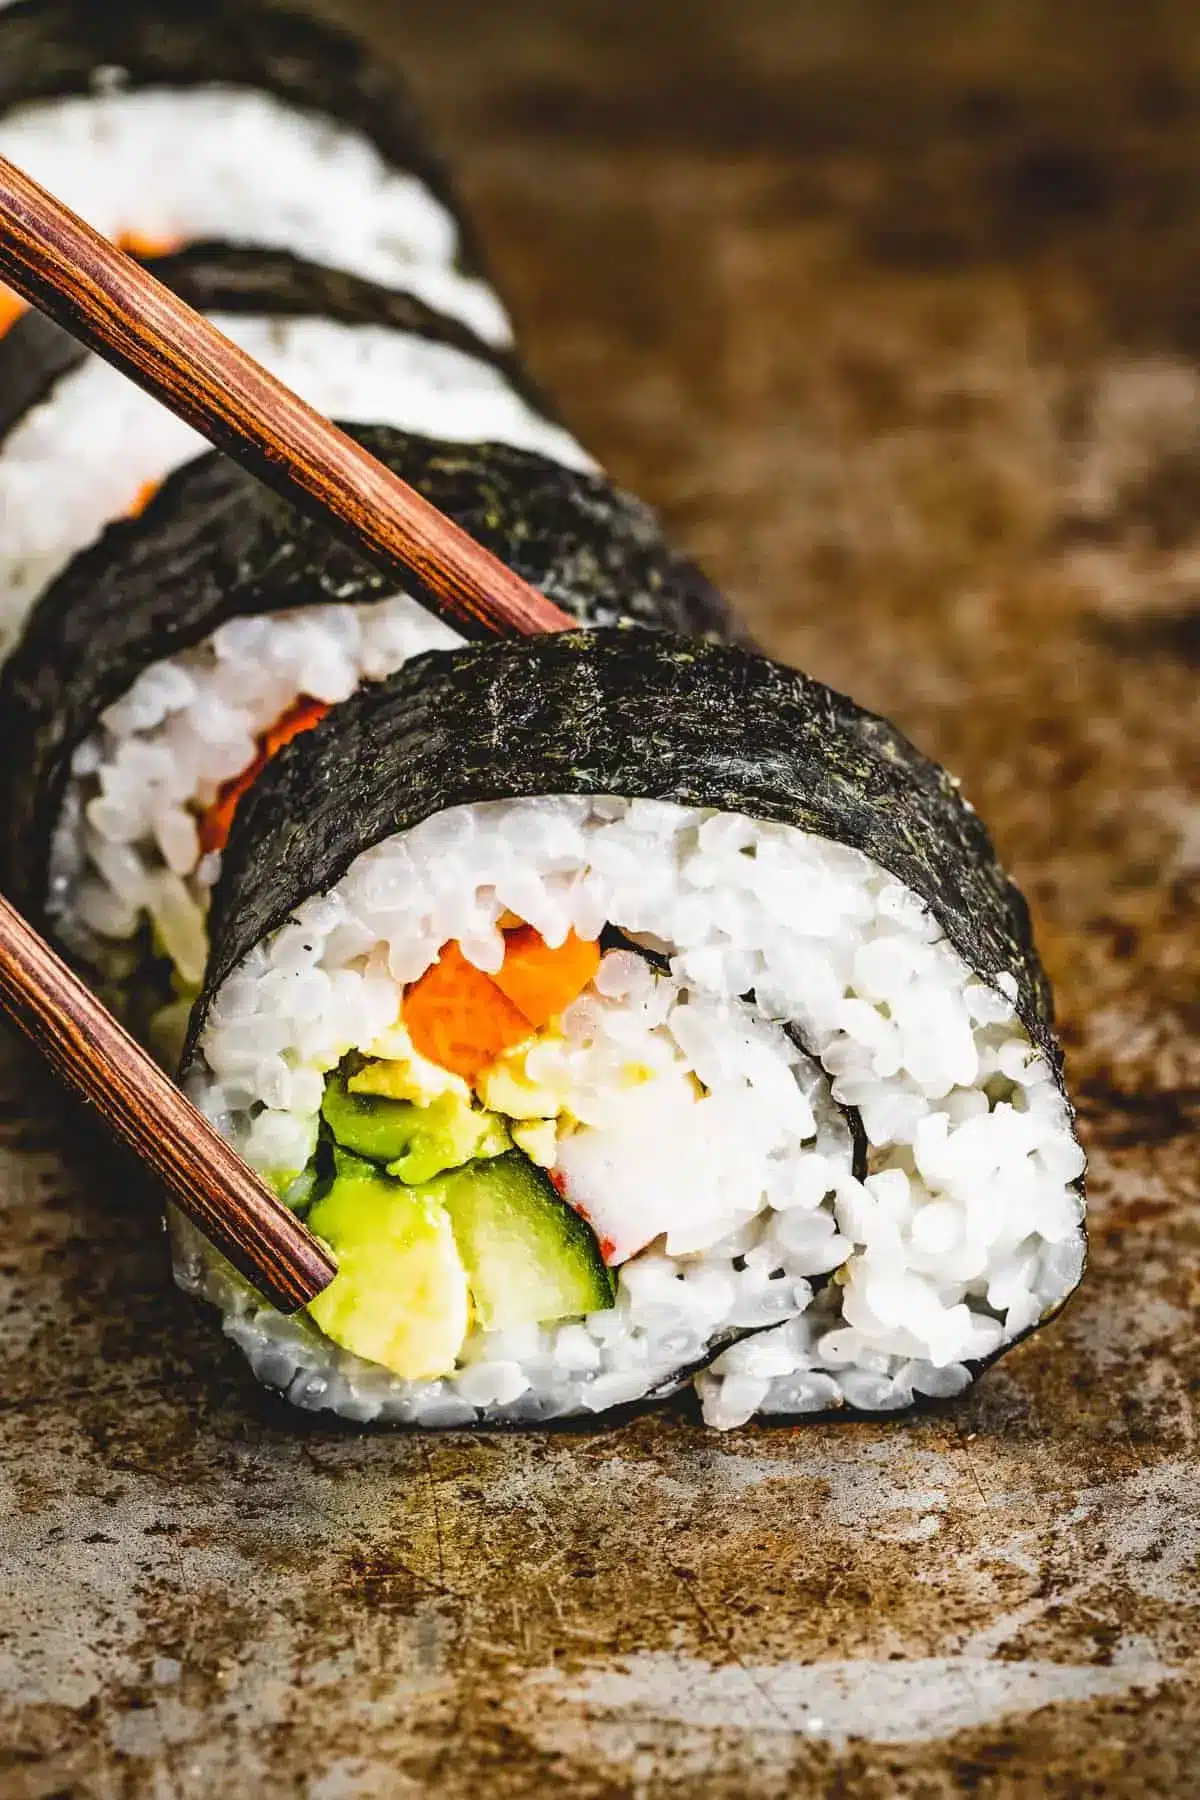
Master the art of homemade sushi with this easy Maki Roll recipe! Featuring nori and perfectly cooked sushi rice wrapped around a colorful combo of imitation crab, cucumber, avocado, and carrots, these rolls promise a fun and flavorful dining experience! Forget going out. Make your own maki sushi!
- 1½ cups sushi rice
- 1½ cups water
- ¼ cup rice wine vinegar
- 1½ tablespoons granulated sugar
- 4 sheets sushi Nori
- 1 English cucumber, peeled and sliced into thin strips
- 1 medium carrot, peeled and sliced into thin strips
- 1 avocado, sliced
- 4 sticks imitation crab, cut in half, longwise
- 1For the sushi rice: Rinse the rice until the water runs clear. Combine the rice and water in the bowl of an Instant Pot. Seal and cook on high pressure for 10 minutes. Allow pressure to release naturally for 12 minutes before opening and fluffing with a fork. Meanwhile, combine rice wine vinegar and sugar in a small saucepan and cook over medium heat until sugar dissolves. Fold the vinegar mixture into the prepared sushi rice. Allow to cool to just above room temperature.
- 2To assemble: Place a sheet of nori over a bamboo sushi mat. Wet your fingers with warm water. Press about ¾ cup of sushi rice over the nori into an even layer. Layer 1 row of English cucumbers, 1 row of carrots, 1 row of imitation crab, and 1 row of avocado slices on top of each other at one end of the mat.
- 3Fold the nori and rice over the filling. Squeeze the bamboo mat to create a tight cylinder. Continue folding, squeezing after each fold, until you reach the end of the roll. Repeat with remaining ingredients.
- 4Cut and serve: Wet a sharp knife with warm water and slice the rolls into ½ inch slices, wetting the knife between slices. Serve with your favorite sushi dipping sauce(s).
Keywords: Maki Rolls, Sushi, Japanese, Seafood, Vegetarian Option, Easy
The specific quantities for each item are detailed within the recipe card for your convenience.
Variations
One of the most exciting aspects of maki rolls is their incredible versatility. This recipe serves as a perfect starting point, inviting you to experiment with a myriad of flavor combinations. Consider a vibrant dessert-inspired roll for a sweet treat. Think thinly sliced strawberries, a touch of cream cheese, and perhaps a drizzle of honey, all rolled in a soy paper wrapper for a delightful twist.
For those seeking a lower-carbohydrate option, a “no-rice” maki roll is an excellent alternative. Instead of sushi rice, you can use thinly sliced cucumber strips or even finely shredded daikon radish as your base. Fill these with your favorite proteins like grilled shrimp, teriyaki chicken, or seasoned tofu, along with crisp vegetables. This method drastically reduces the carbohydrate count while maintaining the satisfying textures and flavors of a traditional roll. You could even incorporate some spicy mayonnaise for an extra kick.
Another fantastic variation involves infusing your sushi rice with unique flavors. Try adding finely chopped cilantro and a hint of lime zest to the rice for a refreshing, zesty kick. Alternatively, a touch of toasted sesame oil stirred into the cooled rice can impart a wonderful nutty aroma and depth of flavor. These subtle additions can transform a simple maki roll into a gourmet experience, showcasing your culinary creativity and palate.
How to Prepare maki roll recipe
Step 1: Preparing the Sushi Rice
The heart of any successful maki roll is perfectly cooked sushi rice. It needs to be sticky enough to hold its shape but not mushy. Begin by rinsing your sushi rice thoroughly in a fine-mesh strainer under cold running water. Continue rinsing until the water runs completely clear, which removes excess starch and prevents gummy rice.
Once rinsed, combine the rice with the specified amount of water in your cooking vessel. Whether using an Instant Pot or a stovetop method, follow the instructions carefully for the perfect texture. While the rice cooks, prepare the seasoning mixture. In a small saucepan, gently heat the rice wine vinegar and granulated sugar until the sugar is fully dissolved. Do not boil; just warm it enough to achieve a smooth liquid.
After the rice has finished cooking and has been fluffed, immediately fold in the warm vinegar mixture. Gently combine these until the rice is evenly coated and glossy. Allow the rice to cool to just above room temperature before you start assembling your maki rolls. Warm rice can make the nori sheets tear and will make the rolling process more challenging. Patience here is key to achieving that signature sushi rice consistency.
Step 2: Prepping the Fillings
While the sushi rice cools, focus on preparing your fillings. This is where you can really customize your maki rolls to your liking. For the classic California-style filling, begin by peeling and thinly slicing the English cucumber into long, uniform strips. The goal is to have pieces that are easy to roll and distribute evenly within the sushi.
Next, peel and julienne the carrot into similar thin strips. If your carrot is particularly thick, you might want to blanch it for a minute or two to soften it slightly, making it easier to bite into. Prepare your avocado by halving it, removing the pit, and then slicing it into neat strips. To prevent the avocado from browning, you can toss it gently with a tiny bit of lemon or lime juice immediately after slicing.
Lastly, prepare your imitation crab sticks. These are typically pre-cooked and ready to use. You can either leave them whole or, as this recipe suggests, cut them in half lengthwise. This makes them easier to arrange and ensures they don’t overpower the other ingredients. Having all your fillings prepped and ready will make the assembly process much smoother and more enjoyable.
Step 3: Assembling the Maki Roll
Now for the part that brings everything together: assembly! Lay your bamboo sushi mat flat on a clean, dry surface. Place a sheet of nori, shiny side down, onto the mat. It’s crucial to have a small bowl of warm water nearby; dipping your fingers into this water frequently will prevent the sticky sushi rice from adhering to your hands, making the spreading process much cleaner and easier.
Take about three-quarters of a cup of the cooled sushi rice and gently spread it evenly over the nori sheet. Leave about a one-inch border at the top edge of the nori. This border will help seal the roll when you close it. Use your fingers to press the rice into a compact, even layer, ensuring there are no bare spots on the nori within your working area. Don’t press too hard, as you don’t want to mash the rice.
Arrange your prepared fillings in a neat line across the rice, about one inch from the bottom edge of the nori sheet (the edge closest to you). Layer one row of cucumber strips, followed by a row of carrot strips, then a row of imitation crab, and finally, a row of avocado slices. Try to keep the fillings somewhat compact and even, so the roll doesn’t become lopsided.
Step 4: Rolling the Maki
With all your delicious ingredients neatly arranged, it’s time to roll! This is where the bamboo mat truly shines. Using your thumbs and forefingers, lift the edge of the bamboo mat closest to you, curling it up and over the filling. As you begin to roll, tuck the edge of the nori and rice tightly around the fillings.
Gently squeeze the mat to form a compact cylinder. Continue rolling the mat forward, applying even pressure. After each fold, squeeze the mat again to maintain the cylindrical shape and to ensure the roll is tight. This squeezing action is crucial for creating a well-formed maki roll that won’t unravel.
When you reach the end of the nori sheet, use the moistened border to help seal the roll. Continue to roll until the entire nori sheet is used. You can then use the bamboo mat to give the roll a final gentle squeeze, ensuring it’s firm and uniformly shaped. Repeat this entire process with the remaining nori sheets, rice, and fillings until all your ingredients are used, creating multiple delicious maki rolls.
Step 5: Cutting and Serving
The final, crucial step before enjoying your homemade maki rolls is cutting them into bite-sized pieces. This requires a very sharp knife. It’s essential to keep the knife blade moist; dip it in warm water and wipe it clean with a damp cloth between each cut. This technique prevents the rice from sticking to the knife and ensures clean, neat slices, rather than squashed or torn rolls.
Begin by slicing the roll in half. Then, take each half and cut it into thirds or quarters, depending on your preferred slice size. Aim for approximately half-inch to three-quarter-inch thick pieces. Take your time and make deliberate, smooth cuts to showcase the beautiful layers of your maki roll. The visual appeal of the cut roll is as important as the taste.
Arrange the sliced maki rolls attractively on a serving platter. Serve immediately with your favorite accompaniments such as soy sauce, pickled ginger, and wasabi. The fresh, vibrant flavors are best enjoyed right after preparation. This step is where your culinary artistry truly comes to fruition, presenting a dish that looks as good as it tastes. For inspiration on accompaniments, consider a delightful German pancake as a unique starter, or explore other options on Pinterest.
Step 6: Enjoying Your Creation
Take a moment to admire the beautiful maki rolls you’ve created. The vibrant colors of the vegetables, the clean lines of the nori, and the perfectly cooked rice all come together to form a visually appealing dish. This is the culmination of your effort and a testament to your culinary skills.
Dip a piece into your soy sauce, add a touch of wasabi if you like a bit of heat, and savor the delightful combination of textures and flavors. The slight chewiness of the nori, the stickiness of the rice, the crispness of the cucumber and carrot, and the creamy smoothness of the avocado all meld together beautifully. Each bite offers a burst of freshness that is incredibly satisfying.
Whether you’re enjoying this for a light lunch, a satisfying dinner, or sharing it with friends, the experience is sure to be memorable. Remember that practice makes perfect, and with each batch, you’ll become even more adept at making these delicious rolls. Don’t hesitate to experiment with different fillings and sauces on future occasions to discover new favorite combinations.
Pro Tips for maki roll recipe
Master the Rice: The key to perfect sushi rice is using the correct type (short-grain sushi rice) and rinsing it thoroughly. Proper cooking and seasoning with rice vinegar, sugar, and salt are essential for that signature sticky texture and slightly sweet, tangy flavor profile. Undercooked or overcooked rice will significantly impact the final outcome.
Keep it Cool and Moist: Always have a bowl of warm water handy when assembling your maki rolls. Dipping your fingers in this water will prevent the sticky rice from clinging to your hands, allowing for a much cleaner and easier spreading process. Similarly, wetting your knife blade before cutting the rolls ensures clean, distinct slices without tearing.
Don’t Overfill: While it’s tempting to stuff your rolls with as many delicious ingredients as possible, resist the urge to overfill. Too much filling will make the roll difficult to close and prone to breaking. Aim for a balanced ratio of rice to filling for the best structural integrity and flavor distribution.
Roll with Gentle Firmness: When using the bamboo mat to roll your maki, apply firm but gentle pressure. The goal is to create a compact cylinder that holds together well, but excessive force can mash the rice and filling. Squeeze the mat between each fold to ensure the roll is uniformly shaped and tightly secured.
Embrace the Nori: Ensure your nori sheets are fresh and crisp. If they seem a bit brittle, a quick exposure to steam can sometimes soften them slightly, making them easier to work with. When spreading the rice, leave a small border of nori at the top edge. This border acts as a “glue” to seal the roll once it’s fully formed, preventing it from unraveling during cutting or serving.
Serving Suggestions for maki roll recipe
Decoration
Elevate the visual appeal of your maki rolls with simple yet effective garnishes. A sprinkle of toasted sesame seeds over the top of the rolls adds a delightful nutty crunch and an attractive speckled appearance. For a pop of color, consider adding a few finely chopped chives or a delicate arrangement of microgreens alongside the rolls. These small touches can transform a homemade dish into something that looks professionally prepared, inviting guests to dig in.
Side Dishes
Maki rolls pair wonderfully with a variety of Japanese-inspired side dishes. A classic accompaniment is pickled ginger (gari), which offers a palate-cleansing sweetness and slight spice between bites. Wasabi, a potent green paste, provides a sharp, pungent kick that complements the richness of the sushi. For a more substantial meal, consider serving your maki rolls with a light and refreshing easy lobster bisque recipe for a seafood pairing or a simple miso soup.
Other excellent side dish options include a crisp and tangy Asian cucumber salad, edamame (steamed soybeans), or a light seaweed salad. These sides not only add variety in flavor and texture but also contribute to a well-rounded and satisfying meal. They provide a delightful contrast to the primary flavors of the maki rolls, creating a harmonious dining experience that engages all the senses.
Creative Serving Ideas
Beyond the traditional platter, think outside the box for serving your maki creations. Arrange the rolls on a long, narrow board for a dramatic presentation, reminiscent of a sushi bar. You could even serve them in bento boxes, creating individual, beautifully curated meals for each person. This is particularly fun for packed lunches or picnics.
For a fun, interactive experience, set up a “make-your-own-maki” station at a party. Provide all the prepared fillings, rice, and nori, and let your guests assemble their own unique rolls. This fosters engagement and allows everyone to customize their sushi to their exact liking. It’s a fantastic way to make a meal an event, encouraging conversation and shared creativity among your guests. Explore more delightful recipes on dinner.
Preparation & Storage
Storing Leftovers
If you find yourself with leftover maki rolls, proper storage is key to maintaining their quality and ensuring food safety. Wrap each individual roll tightly in plastic wrap to prevent them from drying out. Then, place the wrapped rolls in an airtight container. This double layer of protection helps to preserve the texture of the rice and nori.
Store the container in the refrigerator. Maki rolls are best consumed within 24 to 48 hours of preparation. While they can technically last longer, the texture of the rice and nori may degrade, and the fillings might not be as fresh. For optimal taste, try to enjoy them as soon as possible after they’ve been made.
Freezing
Unfortunately, maki rolls are generally not suitable for freezing. The freezing and thawing process can significantly alter the texture of the sushi rice, making it mushy and unappealing. The nori also tends to become soggy and lose its crispness. It’s best to prepare only what you intend to consume within a day or two to avoid disappointing results.
Reheating
Maki rolls are meant to be enjoyed fresh and are not typically reheated. They are designed to be eaten at room temperature or slightly chilled. If your rolls have been refrigerated, it’s recommended to let them sit at room temperature for about 15-20 minutes before serving. This allows the rice to return to a more pleasant texture. Attempting to reheat them in a microwave or oven would likely result in a loss of texture and flavor.
Frequently Asked Questions
- Can I use brown rice instead of sushi rice for my maki rolls?
While it is possible to use brown rice, it is generally not recommended for traditional maki rolls. Sushi rice is a short-grain variety with a high starch content, which makes it naturally sticky and ideal for holding the rolls together. Brown rice has a different texture and stickiness; it tends to be drier and less cohesive, making it much more challenging to work with for rolling sushi. If you are looking for a healthier option, you might consider a mix of brown and white sushi rice, or explore recipes specifically designed for brown rice sushi bowls rather than rolls.
- What is the difference between maki and nigiri sushi?
Maki and nigiri are two distinct forms of sushi. Maki, as we’ve discussed, refers to sushi rolls where rice and fillings are rolled up inside a sheet of nori (seaweed) and then sliced. The word “maki” itself means “rolled” in Japanese. Nigiri, on the other hand, consists of a hand-pressed ball of sushi rice topped with a slice of raw fish or seafood. There is no nori involved in the traditional nigiri preparation, although sometimes a thin band of nori is used to secure the topping to the rice. Nigiri focuses on the purity of the topping and the perfectly seasoned rice.
- Is it safe to eat imitation crab in sushi?
Yes, imitation crab, often called “surimi,” is generally safe to eat in sushi and other dishes. It is typically made from processed white fish, such as pollock, that is mashed and mixed with starches, flavorings (like crab extract), and sometimes egg whites or soy. Because it is made from cooked fish, imitation crab is safe to consume even if you are avoiding raw seafood. It’s a popular and affordable ingredient in many Western-style sushi rolls, like the California roll, offering a mild, slightly sweet, crab-like flavor and a flaky texture.