Delicious Italian Zucchini Scarpaccia for Easy Summer Evenings

There I was, standing in my kitchen, with a bounty of fresh zucchini just waiting to be transformed into something magical. Enter the Italian Zucchini Scarpaccia, a delightful savory bake that elegantly showcases this humble vegetable in a way that feels both rustic and incredibly sophisticated.
With its crispy golden crust and tender, aromatic filling of nutty Parmesan and fresh thyme, this dish embodies the heart of traditional Tuscan cooking. Whether you are searching for a new favorite dinner idea or a simple lunch to brighten your day, this recipe is a versatile companion for any home cook.
Why You Will Love This Recipe
- Quick Preparation: You can have this dish ready for the oven in mere minutes, making it an ideal choice for a busy weeknight.
- Decadent Flavor Profile: The combination of salty, nutty Parmesan cheese and the earthy, lemony notes of fresh thyme creates a sophisticated flavor experience.
- Versatile Serving Options: This Scarpaccia is equally delicious when served warm as a savory appetizer or enjoyed cold as a quick, healthy snack.
- Garden-Fresh Delight: It is the perfect way to utilize an abundance of summer zucchini, turning a simple vegetable into a gourmet masterpiece.
- Crowd-Pleasing Texture: The contrast between the crunchy top layer and the soft, moist interior ensures that everyone at the table will reach for seconds.
Ingredients You Need
Quality ingredients are the secret to the success of this traditional bake, so choose firm, fresh zucchini whenever possible. The beauty of this recipe lies in its simplicity, relying on pantry staples like flour, cornmeal, and high-quality olive oil to create structure and depth. For those looking to elevate the dish further, ensure your herbs are aromatic and your cheese is freshly grated.
Italian Zucchini Scarpaccia
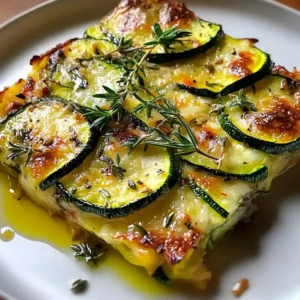
A delightful savory bake that elegantly showcases fresh zucchini with a crispy golden crust and a tender, aromatic filling of nutty Parmesan and fresh thyme, embodying the heart of Tuscan cooking.
- 4 cups Zucchini, shredded
- 1 cup All-Purpose Flour
- 1/2 cup Cornmeal
- 2 teaspoons Baking Powder
- 1 teaspoon Salt
- 1/2 teaspoon Black Pepper
- 3 large Eggs
- 1 cup Whole Milk
- 1/4 cup Olive Oil
- 1 cup Parmesan Cheese, grated
- 1 tablespoon Fresh Thyme
- 1/4 cup Pine Nuts (optional)
- 2 cloves Garlic, minced
- 1 tablespoon Olive Oil (for drizzling)
- 1Preheat your oven to 375°F (190°C) and grease a 9x13-inch baking pan.
- 2In a large bowl, whisk together the flour, cornmeal, baking powder, salt, and pepper.
- 3In a separate bowl, beat the eggs, then mix in the milk and olive oil until combined.
- 4Pour the wet ingredients into the dry and stir gently until just combined.
- 5Fold in the zucchini, garlic, Parmesan, thyme, and pine nuts.
- 6Pour the batter into the prepared pan, spread evenly, and drizzle with the extra olive oil.
- 7Bake for 35-40 minutes until golden brown.
- 8Cool for 10 minutes before slicing into squares.
Keywords: zucchini, scarpaccia, tuscan, vegetarian, appetizer, bake
- zucchini: the star of the show, providing essential moisture and a tender, mild base for the entire bake.
- all-purpose flour: acts as the structural foundation, though you can easily swap this for a gluten-free blend if needed.
- cornmeal: provides that signature golden color and a slight, pleasant crunch that makes the texture so addictive.
- baking powder: essential for achieving a light, airy rise that prevents the batter from becoming too heavy or dense.
- salt: necessary to brighten the flavor of the vegetables and balance the richness of the cheese.
- black pepper: adds a subtle, warming depth that cuts through the creaminess of the dairy.
- eggs: serve as the primary binding agent, helping to hold all of your beautiful ingredients together during the baking process.
- whole milk: creates a rich, smooth batter that ensures the final result remains moist and satisfying.
- olive oil: contributes a fruity undertone and aids in creating those perfect, crispy brown edges we all love.
- parmesan cheese: delivers the crucial umami punch that gives this dish its distinctly Italian soul.
- fresh thyme: imparts a woodsy, floral aroma that pairs perfectly with summer vegetables.
- pine nuts: optional, but highly recommended for adding a delicate buttery crunch and extra layers of flavor.
- garlic: provides an aromatic backbone that elevates the profile of the zucchini without becoming the focus.
- olive oil for drizzling: essential for the final touch, ensuring the top achieves that stunning, crispy golden finish.
Please note that the specific quantities and measurements for each of these ingredients are conveniently located in the recipe card above.
Variations
The Vegan Twist: You can easily adapt this dish to be entirely plant-based by using a flax-egg substitute and your favorite dairy-free milk. Simply replace the Parmesan cheese with a high-quality vegan alternative or a sprinkle of nutritional yeast to maintain that essential savory depth.
Low Carb Adaptation: If you are monitoring your carbohydrate intake, try replacing the all-purpose flour and cornmeal with almond flour and a touch of coconut flour. This keeps the bake tender while significantly reducing the starch content, allowing you to enjoy your favorite lunch guilt-free.
The Mediterranean Infusion: For a more robust flavor profile, fold in some sun-dried tomatoes or chopped Kalamata olives along with the zucchini. These additions introduce a tangy, salty brightness that complements the nutty Parmesan perfectly and gives the dish a vibrant, rustic flair.
How to Prepare Italian Zucchini Scarpaccia
Step 1: Preheat and Prepare
The First Step: Begin by preheating your oven to 375°F (190°C) to ensure the heat is perfectly distributed when you slide your pan inside. A hot oven is the secret to getting those edges crispy while keeping the center perfectly moist.
Pan Preparation: Grease your 9×13-inch baking pan thoroughly with a high-quality olive oil or line the bottom with parchment paper. This simple step guarantees that your Scarpaccia will release cleanly without leaving any delicious crust stuck to the bottom.
Step 2: Mix Dry Ingredients
Creating the Base: In a large mixing bowl, combine your all-purpose flour, cornmeal, baking powder, salt, and freshly ground black pepper. Whisk these together until they form a perfectly uniform mixture, which is essential for an even rise.
Pro Tip: Ensure your baking powder is fresh, as this is the primary agent responsible for the light texture. Once mixed, set this bowl aside while you prepare your wet components to keep your workstation organized.
Step 3: Combine Wet Ingredients
Emulsifying the Liquids: In a separate bowl, crack your eggs and beat them vigorously until they are completely smooth and slightly foamy. Gradually add the whole milk and the olive oil, whisking consistently to create a cohesive, rich liquid base.
Developing Flavor: The process of whisking these together helps incorporate air, which translates to a lighter final bake. Ensure the olive oil is fully emulsified into the milk and eggs before moving to the next step.
Step 4: Incorporate the Wet into the Dry
The Marriage: Carefully pour your wet mixture into the dry ingredients you set aside earlier. Using a spatula or wooden spoon, gently stir the components until they are just combined.
Consistency Matters: It is crucial not to overmix the batter, as this can develop excess gluten and lead to a dense, chewy texture. A few small lumps are perfectly fine and will disappear during the baking process, resulting in a much more tender slice.
Step 5: Fold in the Vegetables and Cheese
The Final Additions: Delicately fold in your shredded zucchini, minced garlic, grated Parmesan, and fresh thyme leaves. If you are choosing to use pine nuts, now is the ideal time to fold them into the batter for an even distribution.
Handling the Zucchini: Because zucchini holds a lot of moisture, ensure it is folded gently to maintain the structure of the batter. The fragrance released at this stage—the combination of earthy herbs, sharp cheese, and fresh garlic—is the hallmark of true Tuscan cooking.
Step 6: Pour and Drizzle
Perfecting the Surface: Pour your prepared batter into your greased baking dish and use a spatula to spread it evenly into the corners. A flat, even layer ensures that the Scarpaccia bakes at the same rate across the entire surface.
The Golden Finish: Before sliding it into the oven, drizzle a thin stream of high-quality olive oil across the top. This oil acts as a conductive medium, helping the surface to brown into a beautiful, crispy crust while adding a luxurious richness to every bite.
Pro Tips for Italian Zucchini Scarpaccia
The Freshness Factor: Always select zucchini that is firm to the touch and bright in color; avoid any that feel soft or show signs of wrinkling. Fresh zucchini contains the ideal amount of moisture to keep your Scarpaccia succulent and flavorful.
Texture Control: Do not be tempted to overmix the batter, as a gentle fold is the secret to a delicate, cake-like crumb. If you find the batter feels too thick, add a splash more milk, but remember that the zucchini will release more liquid as it heats up.
The Cooling Window: While it is hard to wait, allowing the dish to cool for at least ten minutes after removing it from the oven is non-negotiable. This resting period allows the structure to firm up, ensuring that when you slice it, you get perfect, clean squares.
Oven Calibration: Keep a close eye on the dish during the final minutes of baking, as every oven behaves slightly differently. You are looking for a deep golden-brown hue on the top, which indicates that the cornmeal has toasted to perfection.
Serving Suggestions for Italian Zucchini Scarpaccia
Decoration
For a beautiful presentation, garnish the top of your Scarpaccia with a few extra leaves of fresh, vibrant thyme before serving. A light dusting of finely grated Parmesan or a drizzle of infused chili oil can also add a visually appealing touch that hints at the flavors within.
Side Dishes
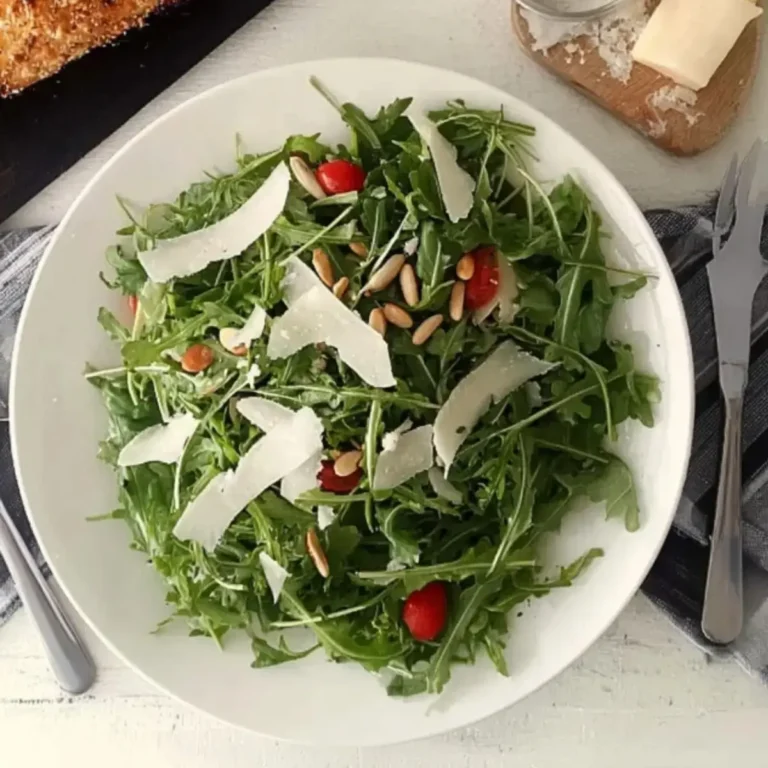
This dish pairs beautifully with a crisp mixed green salad tossed in a sharp balsamic vinaigrette. The acidity of the salad cuts through the richness of the cheese, making it a fantastic addition to your table, similar to how one might serve sides with baked lemon chicken.
Creative Serving Ideas
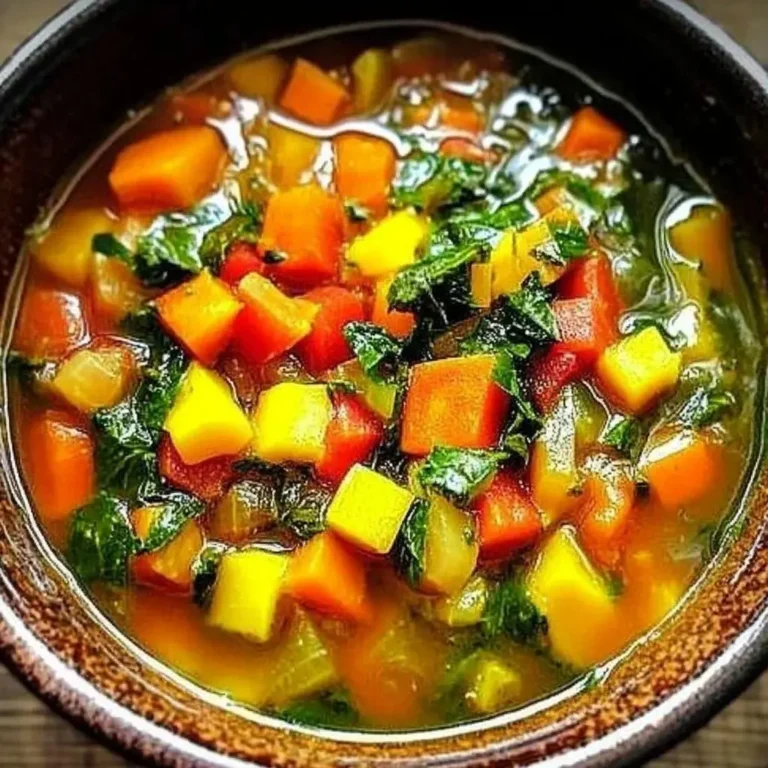
Try serving small squares of Scarpaccia on a platter during a garden party, perhaps alongside other appetizers like my easy lobster bisque recipe. You can also turn this into a heartier meal by serving it alongside a warm, roasted vegetable medley for a satisfying vegetarian experience.
Preparation & Storage
Storing Leftovers
If you find yourself with leftovers, store them in an airtight container in the refrigerator to keep them fresh. They will maintain their quality for up to three to four days, making this a perfect candidate for meal prep.
Freezing
For longer storage, cut your Scarpaccia into individual squares and wrap each one tightly in plastic wrap, followed by a layer of aluminum foil. This double-wrapping technique prevents freezer burn and allows you to enjoy your bake for up to two months.
Reheating
When you are ready to serve, reheat your frozen or chilled squares in a conventional oven or toaster oven at 350°F (175°C). This method is far superior to the microwave, as it helps restore the signature crispy edges that make this recipe so special.
Frequently Asked Questions
- How do I ensure my zucchini does not make the dish soggy?
It is all about the selection of the zucchini and not over-salting the batter beyond the recipe requirements. If you prefer a drier texture, you can lightly squeeze the shredded zucchini in a clean kitchen towel before folding it in, but usually, the flour and cornmeal absorb the moisture perfectly. - Can I substitute the Parmesan for another cheese?
Certainly, you can experiment with Pecorino Romano for a sharper, saltier kick or even use a mild mozzarella if you prefer a stretchier, creamier melt. Each cheese will subtly change the personality of the Scarpaccia, so feel free to mix and match according to your personal taste. - Is this recipe suitable for those with dietary restrictions?
Yes, it is highly adaptable; you can make it gluten-free with a high-quality all-purpose flour substitute and dairy-free by using plant-based milk and vegan cheese. If you enjoy making other flexible comfort foods, you might also love my German pancake recipe for another simple, crowd-pleasing dish.
Remember to follow me on Pinterest for more inspiration and to keep up with all my latest culinary experiments. There is always something new and delicious to discover in the kitchen!