Smoky Beer Can Chicken Marinade
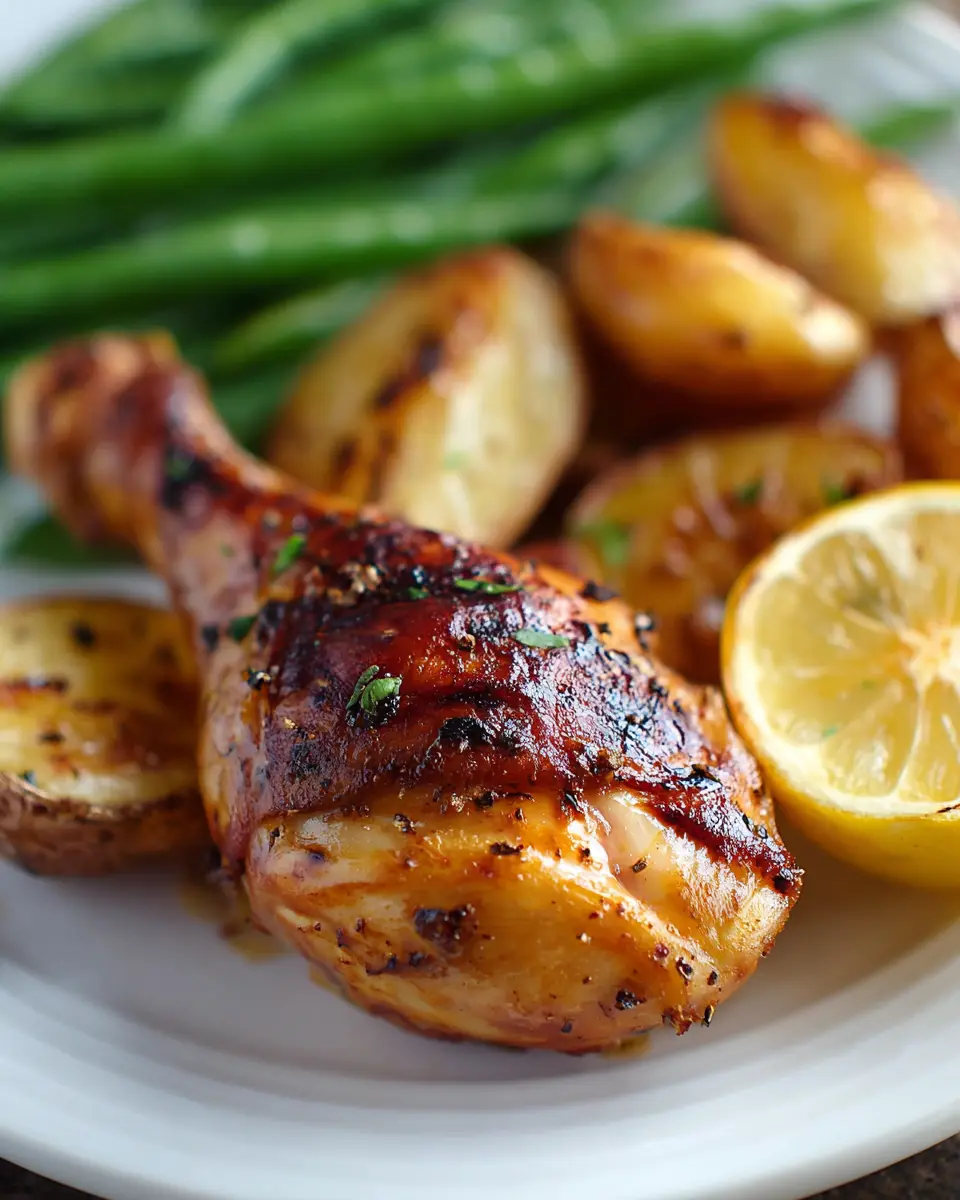
Quick, bright, and full of flavor, this Smoky Grilled Beer Can Chicken Marinade delivers exceptionally juicy grilled chicken with a delightful citrusy depth. It boasts savory seasoning and a beautifully lightly charred finish, making it an ideal choice for weeknight dinners, relaxed cookouts, and convenient make-ahead summer meals.
This is the kind of marinade that quickly becomes a kitchen staple. It utilizes a surprisingly short ingredient list yet consistently produces abundant, delicious flavor. The subtle malty notes from the beer, the vibrant zest of the lemon, and the rich, glossy finish provided by the butter all contribute to its success.
Why You Will Love This Recipe
- Effortless Preparation: Simply whisk the ingredients together, marinate the chicken, and let the grill work its magic for a fantastic meal with minimal fuss.
- Exceptional Flavor: The combination of beer, lemon, garlic salt, and lemon pepper creates a complex and savory profile that perfectly complements grilled chicken.
- Juicy Results: The marinade, along with the grilling process, ensures the chicken remains incredibly moist and tender throughout.
- Beautiful Presentation: A light char and glossy finish make this grilled chicken visually appealing and irresistibly appetizing.
- Versatile Meal: This recipe is perfect for casual weeknight dinners, backyard barbecues, or even for preparing ahead for summer gatherings.
Ingredients You Need
The beauty of this marinade lies in its simplicity, relying on readily available ingredients that come together to create something truly special. Opting for fresh, good-quality components will always elevate the final dish, ensuring vibrant flavors and optimal results.
Smoky Grilled Beer Can Chicken Marinade
A bright, savory marinade that blends light lager, lemon juice, melted butter, garlic salt, and lemon pepper to season chicken pieces before grilling. The result is tender, juicy chicken with a lightly smoky, charred finish.
- 1/3 cup melted butter
- 1 can beer (preferably a light lager)
- 1 teaspoon lemon pepper seasoning
- 4 pounds chicken pieces
- 1 1/2 cups lemon juice
- 1 teaspoon garlic salt
- 1In a mixing bowl, whisk together the melted butter, beer, lemon juice, garlic salt, and lemon pepper seasoning until the marinade is thoroughly combined and evenly seasoned.
- 2Arrange the chicken pieces in a large zip-top bag or a shallow container. Pour the marinade over the chicken, making certain every piece is well coated. Seal the bag, or cover the dish securely, then refrigerate for 4 to 6 hours.
- 3Preheat the grill to medium heat so the chicken cooks evenly and develops crisp, golden skin while remaining moist inside.
- 4Remove the chicken from the marinade and place it on the hot grill. Cook the pieces, turning them every 15 to 20 minutes so each side grills evenly. As the chicken cooks, brush it generously with the remaining marinade to build flavor and help retain moisture.
- 5Continue grilling until the chicken reaches an internal temperature of 165掳F (75掳C) and the juices run clear. Once cooked through and lightly charred, transfer the chicken from the grill and let it rest for several minutes before serving.
Keywords: Smoky Grilled Beer Can Chicken Marinade, grilled chicken, beer marinade, lemon chicken, quick dinner, cookout food
- melted butter: provides richness and helps the chicken brown beautifully.
- light lager beer: adds a subtle, mellow maltiness without bitterness.
- lemon juice: brings a bright, zesty freshness that cuts through richness.
- garlic salt: delivers a quick and effective savory depth of flavor.
- lemon pepper seasoning: reinforces citrus notes and adds a gentle peppery kick.
- chicken pieces: the hearty base that absorbs all the wonderful marinade flavors.
Specific quantities for these ingredients can be found within the detailed recipe card provided above.
Variations
To explore different flavor profiles, consider a few creative twists on this classic marinade. For those seeking a plant-based option, a simple tofu or tempeh marinade could mimic the flavor dynamics, though the grilling time would need significant adjustment.
For a low-carb approach, you could omit the beer entirely and increase the lemon juice slightly, perhaps adding a splash of chicken broth for liquid volume. This would intensify the citrus and savory notes for a lighter, yet still flavorful, dish.
Experimenting with different herbs, like fresh rosemary or thyme, can also introduce new dimensions. Adding a teaspoon of smoked paprika to the marinade mixture would further enhance the smoky characteristics of the grilled chicken, creating an even deeper, more complex flavor profile.
How to Prepare Smoky Grilled Beer Can Chicken Marinade
Step 1: Combine the Marinade Base
In a generous mixing bowl, begin by whisking together the core liquid components. This includes the light lager beer, ensuring it’s not too hoppy or dark to maintain a delicate flavor profile. Pour in the freshly squeezed lemon juice, which provides that essential bright, acidic counterpoint to the savory elements.
Next, incorporate the melted butter into the liquid mixture. The butter adds a luxurious richness and will help the chicken achieve a beautifully golden-brown exterior when grilled, while also contributing to its moistness. Ensure all these liquids are thoroughly combined before moving on to the dry seasonings.
Finally, add the garlic salt and lemon pepper seasoning to the bowl. Whisk everything together with vigor until the marinade appears uniformly blended. This initial step is crucial for ensuring that every piece of chicken will receive an even distribution of flavor when it’s submerged.
Step 2: Marinate the Chicken
Select a large, sturdy zip-top bag or a shallow, non-reactive dish to hold the chicken pieces. Place your chicken cuts into the chosen vessel, ensuring there’s ample space for them to move around freely. This allows for easier coating and more uniform marination.
Carefully pour the prepared marinade mixture entirely over the chicken pieces. Using your hands or a pair of tongs, gently toss and turn each piece of chicken. The goal here is to ensure that every single surface of the chicken, from every angle, is thoroughly coated with the flavorful marinade.
Once the chicken is completely coated, securely seal the zip-top bag, pressing out as much air as possible to prevent oxidation. If using a dish, cover it tightly with plastic wrap or a lid. Place the marinating chicken in the refrigerator for a minimum of four hours, allowing the flavors to penetrate deeply into the meat.
Step 3: Prepare the Grill for Cooking
When it’s time to move from marinating to cooking, your grill needs to be brought to the right temperature. Preheat your grill to a medium heat setting. This consistent, moderate temperature is key to achieving perfectly cooked chicken that is both juicy inside and nicely browned outside.
A medium heat ensures that the chicken has enough time to cook through to the safe internal temperature without the exterior charring too rapidly. This balanced cooking process is essential for maintaining the tender texture of the meat and allowing the marinade’s flavors to meld beautifully with the smoky essence from the grill.
Ensure the grill grates are clean before you start cooking to prevent sticking and to promote even heat distribution. A clean grill is the first step towards achieving that beautiful char and preventing unwanted flavors from transferring to your delicious chicken.
Step 4: Grill the Chicken Evenly
Carefully remove the marinated chicken pieces from the refrigerator and their marinade. Arrange the chicken directly onto the preheated grill grates. It’s important to leave a little space between each piece, preventing them from steaming rather than grilling, which is vital for developing that desirable crust.
Begin the grilling process, and plan to turn the chicken periodically. Aim to flip the pieces approximately every 15 to 20 minutes. This regular turning ensures that all sides of the chicken are exposed to the heat source, promoting even cooking and developing a lovely, consistent color all around.
Consistent turning not only helps with browning but also allows the chicken to cook through uniformly. This methodical approach prevents any single side from becoming overcooked while others remain underdone, leading to a more satisfying eating experience.
Step 5: Baste and Build Flavor
As the chicken progresses through its grilling time, you have an opportunity to further enhance its flavor and appearance. Reserve a portion of the marinade from the marinating bag or dish before you started grilling. This reserved marinade will be used for basting.
Using a quality basting brush, generously coat the chicken pieces with the reserved marinade as they cook. Applying the marinade multiple times throughout the grilling process helps to layer in more of those delicious citrusy and savory notes. It also contributes to that beautiful, glossy finish that makes grilled chicken so appealing.
The basting action not only adds flavor but also helps to keep the surface of the chicken moist. This is particularly important for grilled meats, where moisture retention is key to achieving that succulent, tender texture we all desire in perfectly grilled chicken.
Step 6: Check for Doneness and Rest
The final stage of grilling involves ensuring the chicken is cooked to a safe and delicious temperature. Use an instant-read meat thermometer to check the thickest part of the largest chicken pieces. The target internal temperature for safely cooked chicken is 165°F (75°C).
Once the chicken has reached this safe internal temperature and the exterior has developed some appealingly charred spots, it is time to remove it from the grill. Resist the urge to cut into it immediately, as this can cause precious juices to escape, leading to drier meat.
Instead, transfer the cooked chicken to a clean cutting board or serving platter. Tent it loosely with foil and allow it to rest for at least 5 to 10 minutes. This resting period is critical for allowing the juices to redistribute throughout the meat, resulting in more tender and flavorful chicken with every bite.
Pro Tips for Smoky Grilled Beer Can Chicken Marinade
Marinating Time is Key: While you can marinate the chicken for longer, aim for about 6 hours for this specific marinade to achieve a fuller lemon-beer flavor. Going much beyond this timeframe, especially with citrus-heavy marinades, risks the acidity affecting the texture of the chicken, making it mushy or overpowering the other flavors.
Uniform Chicken Pieces: For the most consistent cooking results, try to select chicken pieces that are similar in size and thickness. This ensures that all the pieces will reach their optimal doneness at roughly the same time, preventing some from becoming dry while others are still undercooked.
Resting Enhances Juiciness: Never skip the resting period after grilling. Even a short 5-10 minute rest allows the juices within the chicken to settle and redistribute. This crucial step significantly contributes to the overall tenderness and moistness of the final dish.
Monitor Grill Temperature Closely: Grills can fluctuate in temperature. Keep an eye on your heat source and adjust as needed to maintain that medium heat. This vigilance prevents flare-ups and ensures the chicken cooks evenly without burning.
Serving Suggestions for Smoky Grilled Beer Can Chicken Marinade
Decoration
Garnish your beautifully grilled chicken with fresh sprigs of parsley or cilantro for a pop of color and freshness. A few lemon wedges artfully arranged around the platter can also enhance the visual appeal and offer a bright, citrusy aroma.
Consider adding a sprinkle of toasted sesame seeds for a subtle nutty crunch and visual texture. Thinly sliced red onion or bell peppers, grilled alongside the chicken, can also serve as both a decorative element and a flavorful accompaniment.
Side Dishes
A classic potato salad, perhaps with a creamy dill dressing, makes for a comforting and satisfying side. Its cool, creamy texture is a wonderful contrast to the warm, savory chicken.
Grilled corn on the cob, brushed with a little butter and a pinch of salt, perfectly echoes the smoky flavors of the chicken. For a lighter option, a crisp, refreshing coleslaw or a simple mixed green salad with a light vinaigrette complements the richness of the chicken beautifully.
Consider pairing it with a side of baked beans or grilled asparagus for a complete outdoor feast. The variety of textures and flavors will make for a memorable meal.
Creative Serving Ideas
Shred the leftover grilled chicken and use it in tacos or quesadillas for an exciting second meal. Its smoky, marinated flavor will add an incredible depth to these dishes.
Dice the chicken and toss it with pasta and a light lemon-herb sauce for a quick and flavorful pasta salad. This transforms the grilled chicken into a versatile ingredient for lunches or light dinners.
Consider serving the chicken over a bed of fluffy rice or quinoa, drizzled with a touch of the reserved marinade or a simple pan sauce. This elevates the dish to a more substantial main course, perfect for a family gathering.
Preparation & Storage
Storing Leftovers
Once the grilled chicken has cooled down completely, transfer any leftovers to an airtight container. Store these containers in the refrigerator, ensuring they are sealed tightly to maintain freshness and prevent the chicken from drying out.
Properly stored leftover chicken should remain safe to eat for up to 3 to 4 days. Always check for any signs of spoilage, such as off-odors or changes in texture, before consuming.
It is advisable to avoid leaving cooked chicken at room temperature for extended periods, as this can promote bacterial growth. Prompt refrigeration is key to food safety.
Freezing
For longer-term storage, cooked grilled chicken can be frozen. Ensure the chicken is well-wrapped in plastic wrap or aluminum foil, then placed inside a freezer-safe bag or container. This double-layer of protection helps prevent freezer burn.
Frozen grilled chicken can maintain its quality for up to 2 to 3 months. Labeling the container with the date of freezing is a good practice to ensure you use it within its optimal timeframe.
It’s best to freeze chicken in portion sizes that you are likely to use at once. This makes thawing and reheating more convenient and helps to maintain the quality of the unfrozen portions.
Reheating
To reheat leftover chicken, the oven is often the best method for preserving moisture. Preheat your oven to a moderate 325°F (160°C) and place the chicken in an oven-safe dish. Cover it loosely to help steam the chicken and keep it moist.
Reheat until the chicken is heated through, which typically takes about 15-20 minutes depending on the size of the pieces. Avoid overheating, as this can lead to dry chicken.
For quicker reheating, the microwave can be used for individual portions. Place the chicken on a microwave-safe plate, cover loosely, and heat in short intervals, checking for doneness between each burst. This method requires more attention to avoid drying out the meat.
Frequently Asked Questions
-
Can I marinate the chicken overnight?
While you can marinate chicken overnight, this particular Smoky Grilled Beer Can Chicken Marinade is quite balanced with lemon. For this recipe, marinating for 4 to 6 hours is generally considered the sweet spot. Going for a full 24 hours might lead to the lemon juice breaking down the chicken’s proteins too much, potentially affecting the texture and making it mushy, especially with smaller chicken pieces. It’s best to stick to the recommended timeframe for optimal results, as the citrus can become quite potent if left for too long.
-
What type of beer works best for this marinade?
A light lager is the most recommended type of beer for this marinade. Its mild, clean flavor profile complements the other ingredients without introducing any unwanted bitterness or overwhelming the subtle notes of lemon and seasoning. Avoid dark beers, stouts, or heavily flavored craft beers, as these can significantly alter the final taste of the chicken, potentially making it too strong or even bitter. The goal is a subtle malty undertone that supports, rather than dominates, the other flavors in the marinade.
-
Can I use boneless, skinless chicken breasts or thighs instead of bone-in pieces?
Yes, you absolutely can use boneless, skinless chicken breasts or thighs. However, you will need to adjust your cooking time significantly as these cuts tend to cook much faster than bone-in pieces. Keep a very close eye on them once they hit the grill to prevent them from drying out. Boneless breasts are prone to drying out quickly, so consider removing them from the grill a few minutes earlier if they reach the target internal temperature of 165°F (75°C). Thighs are a bit more forgiving and will retain moisture better.