Irresistible Green Chicken Enchiladas for a Delicious Meal
There’s something truly comforting about a plate of Green Chicken Enchiladas, especially when the week has been long and demanding. After a particularly stressful day, I found solace in a family recipe that brings a touch of warmth and zest to my table. The moment you bite into these enchiladas, you’re met with a delightful combination of tender chicken, smoky roasted chiles, and a creamy queso fresco that dances on your palate.
I remember the first time I prepared these for a gathering—I had friends who were skeptical of homemade enchiladas, used to the convenience of takeout. But as soon as the aroma filled the room, all doubts were cast aside. What I love most about this recipe is its simplicity; it not only pleases a crowd but also makes weeknight dinners feel special. Join me as we whip up this vibrant dish that’s perfect for any occasion, guaranteed to banish bland fast food from your life. Let’s dive into the comforting world of Green Chicken Enchiladas that are sure to become a family favorite.
Why You Will Love This Recipe
- Effortless Preparation: With straightforward steps and readily available ingredients, you can whip up these flavorful enchiladas in minimal time, making them ideal for busy weeknights.
- Explosion of Flavor: The harmonious blend of tender, seasoned chicken, the distinct smoky heat from roasted Hatch chiles, and the cooling, creamy queso fresco creates a complex and utterly delicious taste profile.
- Ultimate Crowd-Pleaser: These enchiladas consistently receive rave reviews, making them a reliable choice for family dinners, potlucks, or entertaining guests who appreciate authentic, home-style cooking.
- Remarkably Versatile: Easily adaptable to various dietary needs, you can swap the chicken for hearty beans or a medley of sautéed vegetables, ensuring everyone can enjoy this delightful dish.
- Perfect for Meal Prep: The make-ahead potential of these enchiladas means you can prepare them in advance, ensuring you have a satisfying and delicious meal ready to heat and serve throughout the week.
Ingredients You Need
The success of any great dish hinges on the quality of its components. For these Green Chicken Enchiladas, selecting fresh, vibrant ingredients is key to achieving that authentic, craveable flavor. Utilizing ripe produce and well-sourced staples will truly elevate the final result, transforming simple components into a memorable meal.
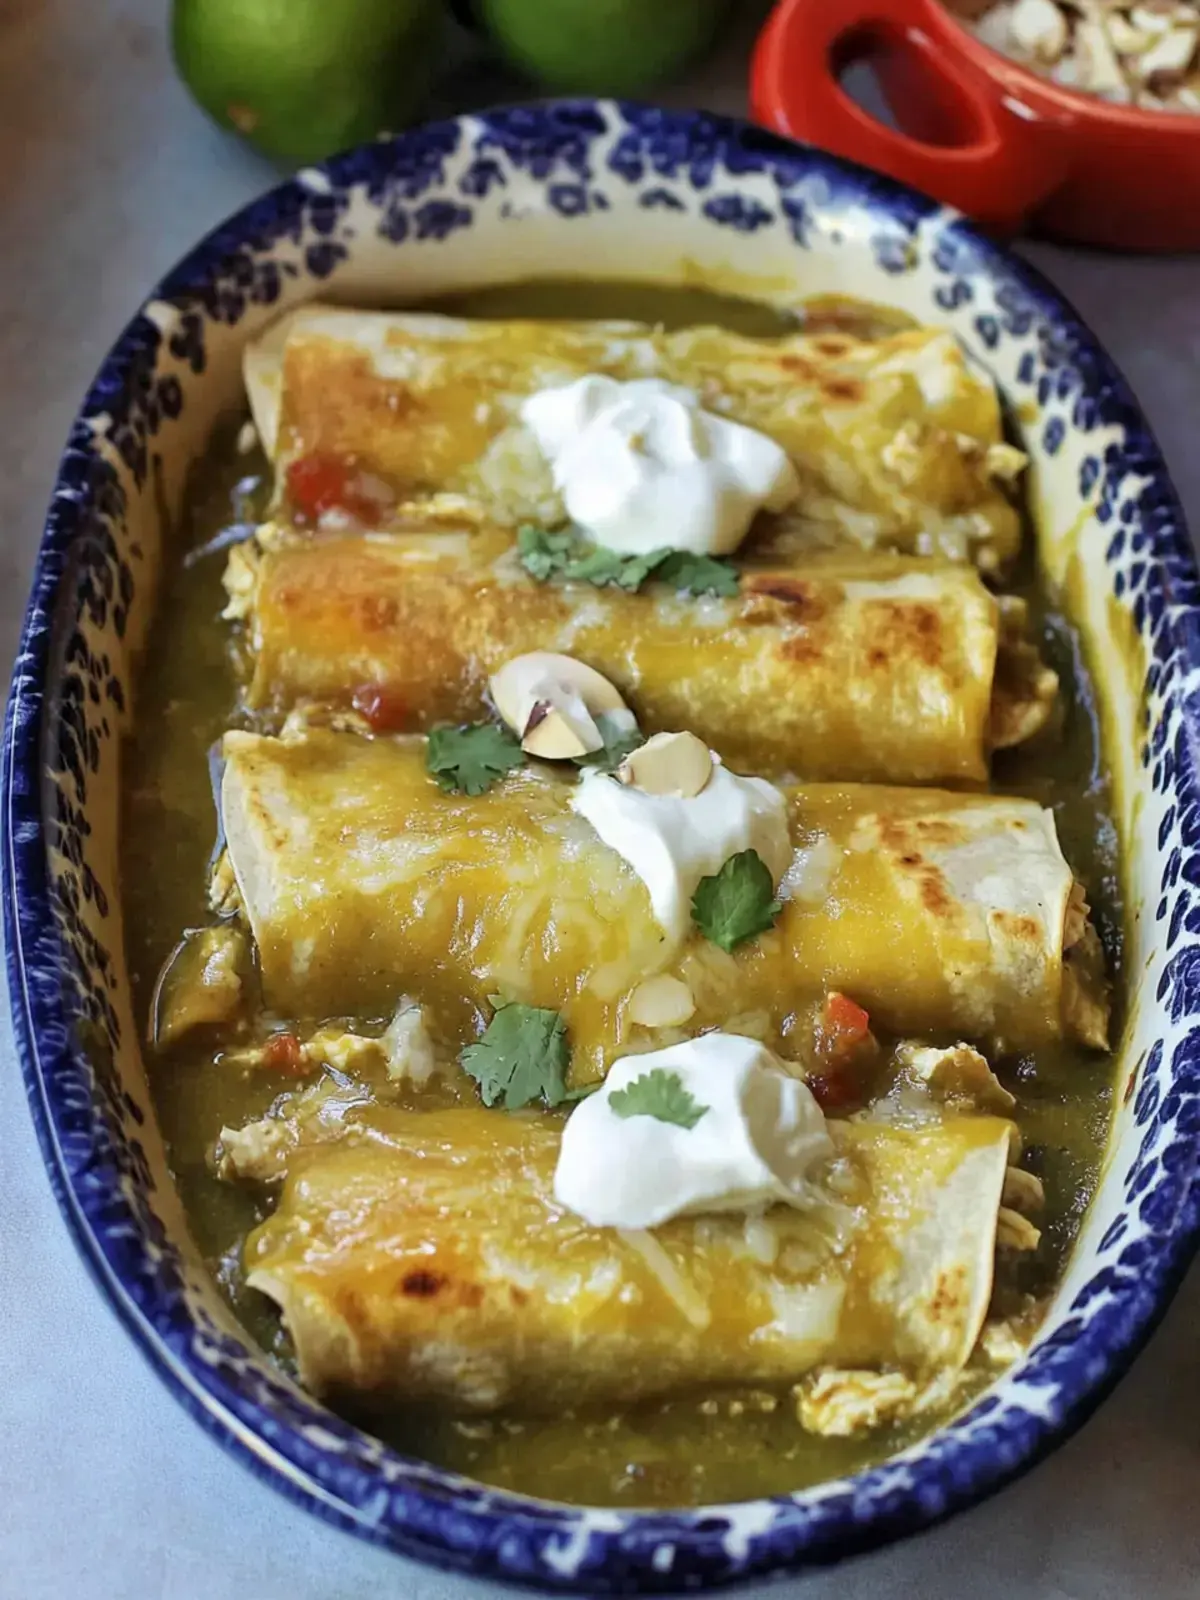
Delicious Green Chicken Enchiladas

Discover the comforting and flavorful Green Chicken Enchiladas that are simple to prepare and perfect for any occasion. Experience a delightful balance of flavors and textures that are sure to satisfy!
- 2 tablespoons extra virgin olive oil
- 1 cup green pepper
- 1 medium onion
- 2 cloves garlic
- 1 tablespoon chili powder
- 3 medium Roma tomatoes
- 2 cups chicken broth
- 1 pound chicken breast or thighs
- 1 teaspoon sea salt
- 1/2 teaspoon black pepper
- 1 medium onion
- 2 cloves garlic
- 1 teaspoon salt
- 1 teaspoon Mexican oregano
- 1 teaspoon cumin
- 2 cups Hatch roasted chiles
- 10 corn or flour tortillas
- 1 cup queso fresco
- 1Sauté the onion, green pepper, and garlic over medium-high heat until the onion is translucent. Add the chili powder and puréed tomatoes, cooking for another five minutes until well combined.
- 2Pour in the chicken broth, bringing the mixture to a gentle simmer. Add your chicken breast or thighs and cook.
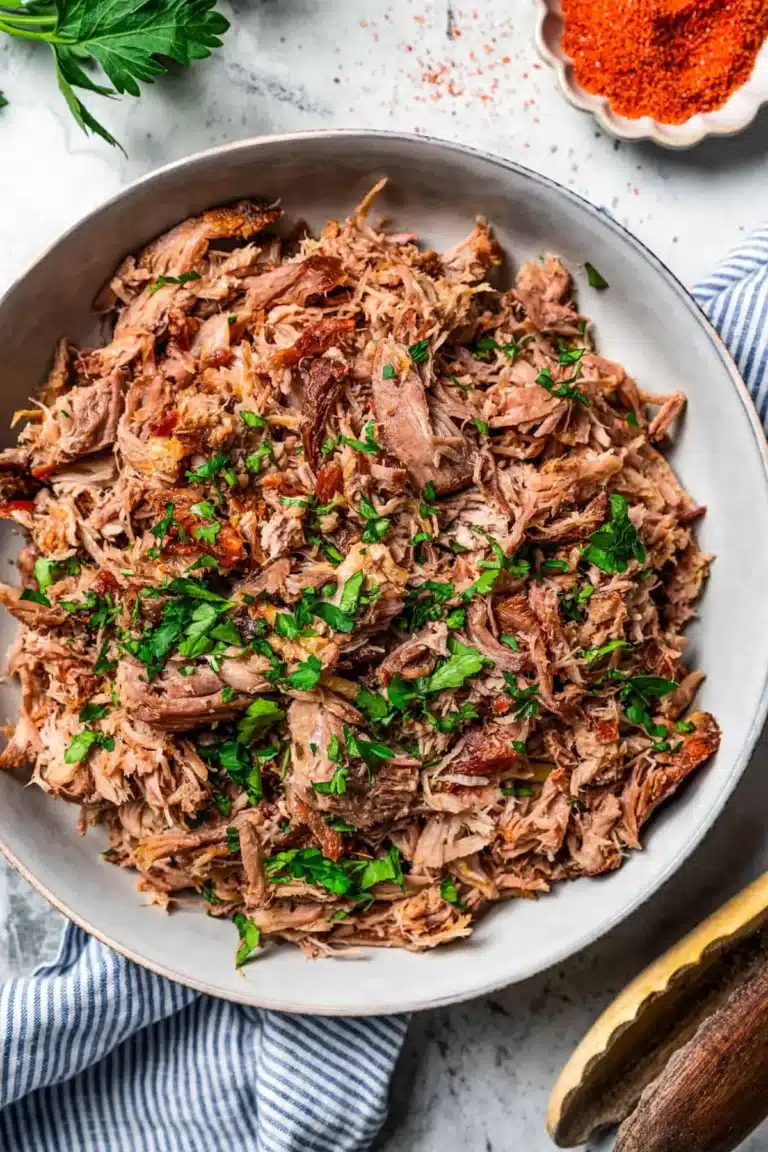
- 3Let it simmer for about 25 minutes until the chicken is tender. Shred the chicken using two forks while it's still in the pot for maximum flavor absorption.
- 4In a separate pan, sauté onion and salt in a little extra virgin olive oil over medium heat. Then stir in the oregano and cumin for that fragrant aroma.
- 5Once the onion is soft and translucent, add the stock and spices, blending together with the Hatch chiles until the mixture is smooth and luscious.
- 6Preheat the oven to 375˚F (190˚C) to get it ready for baking your enchiladas.
- 7Set up your enchilada-making station by frying each tortilla in oil for about 30 seconds on both sides for perfect pliability, then dip them in your Hatch chile sauce.
- 8Take about ⅙th of the chicken filling and some queso fresco, place it onto the tortilla, and roll it tightly. Place the enchilada seam side down in your 9'x13' baking dish.
- 9Continue with the remaining tortillas and filling until everything is used up. Spoon any leftover sauce over the enchiladas, and sprinkle with more queso fresco for that delightful cheesy touch.
- 10Bake for about 20 minutes, or until the cheese is melted, golden, and the dish is bubbling with goodness.
Keywords: enchiladas, chicken, green chile, Mexican, comfort food, dinner, weeknight meal
- extra virgin olive oil: a foundational element for sautéing aromatics and adding a subtle richness to the sauce.
- green pepper: provides a fresh, slightly sweet vegetal note and a pleasing crunch to the initial sauce base.
- onion: a staple for building aromatic depth, it sweetens and softens as it cooks, forming the flavor backbone.
- garlic: essential for its pungent, savory character, infusing the sauce with warmth and complexity.
- chili powder: adds a gentle warmth and depth of flavor, contributing to the overall savory profile of the sauce.
- Roma tomatoes: chosen for their balanced acidity and meaty texture, they create a robust tomato purée for the sauce.
- chicken broth: serves as the liquid base, carrying flavors and ensuring the enchiladas remain moist and tender during baking.
- chicken breast or thighs: the primary protein, offering a tender and absorbent canvas for the vibrant sauce and seasonings.
- sea salt: a fundamental seasoning that enhances all the other flavors, bringing balance and brightness to the filling.
- black pepper: provides a subtle, aromatic spice that complements the other ingredients without overpowering them.
- medium onion: another aromatic base, this one specifically for the Hatch chile sauce, adding sweetness and depth.
- cloves garlic: crucial for adding that signature savory punch to the Hatch chile sauce, enhancing its overall flavor profile.
- salt: used to season the Hatch chile sauce, balancing its flavors and bringing out the unique notes of the chiles.
- Mexican oregano: imparts an earthy, herbaceous, and slightly floral aroma that is characteristic of authentic Mexican cuisine.
- cumin: contributes a warm, earthy, and slightly peppery undertone that is indispensable in many Mexican dishes.
- Hatch roasted chiles: the star ingredient, offering a distinctive smoky, slightly sweet, and mildly spicy flavor profile unique to this pepper.
- corn or flour tortillas: the vessels for our delicious filling, providing a soft or slightly crisp texture depending on preparation preference.
- queso fresco: a fresh, mild, and crumbly cheese that adds a delightful creamy counterpoint to the rich enchilada flavors.
The precise quantities for each ingredient are detailed within the recipe card.
Variations
Embark on a culinary adventure by infusing these classic Green Chicken Enchiladas with exciting new twists. Consider infusing a gentle heat by finely dicing a fresh jalapeño and incorporating it directly into the chicken filling. This small addition can dramatically elevate the spice level for those who crave a more intense flavor experience.
For a vegetarian delight that doesn’t compromise on flavor, substitute the shredded chicken with a generous portion of seasoned black beans. Alternatively, a medley of roasted vegetables such as zucchini, bell peppers, and corn can create a wonderfully robust and satisfying meat-free filling. These substitutions ensure that everyone can enjoy the comfort of enchiladas.
Elevate the cheesy goodness by mixing in some shredded Monterey Jack or spicy pepper jack cheese directly into the chicken filling before rolling the tortillas. This ensures an even more melty, gooey texture throughout each bite. For a lighter, yet equally creamy option, consider using a homemade cashew cream or a high-quality dairy-free cheese alternative. This makes the dish accessible for those with lactose intolerance or following a vegan diet.
How to Prepare green chicken enchiladas
Step 1: Building the Flavorful Sauce Base
Begin by gathering your aromatics for the initial sauce. Finely dice one medium onion and one green bell pepper, ensuring they are of a similar size for even cooking. Mince two cloves of garlic, releasing their potent aroma and flavor.
Heat two tablespoons of extra virgin olive oil in a large skillet or Dutch oven over medium-high heat. Once shimmering, add the diced onion and green pepper. Sauté these vegetables for approximately 5-7 minutes, stirring occasionally, until the onion becomes translucent and slightly softened, and the pepper begins to tenderize.
Introduce the minced garlic to the skillet and cook for another minute until fragrant, being careful not to burn it. Next, add one tablespoon of chili powder, stirring it into the sautéed vegetables to toast the spice and release its deep color and aroma. Cook for about 30 seconds, allowing the chili powder to bloom in the hot oil.
Add three medium Roma tomatoes, which have been puréed or finely diced. Stir this tomato mixture into the skillet, ensuring all the vegetables and spices are well combined. Continue to cook this mixture for an additional five minutes, allowing the flavors to meld and the tomato base to thicken slightly. This initial sautéing step is crucial for developing a rich and complex foundation for your enchilada sauce.
Step 2: Simmering the Chicken in Broth
Once your aromatic sauce base is well-established, it’s time to incorporate the liquid and the star protein. Pour two cups of chicken broth into the skillet with the sautéed vegetables and tomato mixture. Stir everything together to ensure the broth is evenly distributed and integrated into the sauce.
Bring this liquid to a gentle simmer over medium heat. Now, carefully add your chosen chicken pieces – either one pound of chicken breast or boneless, skinless thighs. Ensure the chicken is submerged as much as possible in the simmering broth and sauce mixture.
If you are using pre-cooked, shredded chicken, a shorter simmering time will suffice, typically around 15 minutes, just to heat through and absorb the flavors. However, for raw chicken, the simmering process is essential for cooking it thoroughly and tenderizing it. This step is critical for achieving that succulent, melt-in-your-mouth texture.
Step 3: Tenderizing and Shredding the Chicken
Allow the chicken to simmer gently in the flavorful broth and sauce mixture for approximately 25 minutes. This duration ensures that the chicken is cooked through to perfection, becoming incredibly tender and juicy. The low and slow simmer allows the chicken to absorb the complex flavors of the sauce, creating a more integrated and delicious filling.
Once the chicken is tender, remove the skillet from the direct heat. Using two forks, begin to shred the chicken directly in the pot. This method is highly recommended as it allows the shredded chicken to soak up any remaining sauce and seasonings, maximizing flavor absorption and ensuring each strand is infused with deliciousness.
Continue shredding the chicken until it is in bite-sized pieces, distributed evenly throughout the sauce. This shredded chicken mixture will form the succulent heart of your green chicken enchiladas. The residual heat will help to keep the chicken warm while you prepare the Hatch Chile Sauce.
Step 4: Crafting the Authentic Hatch Chile Sauce
In a separate skillet, begin preparing the vibrant Hatch Chile Sauce, which provides the signature flavor of this dish. Finely chop one medium onion and mince two cloves of garlic. Add a small amount of extra virgin olive oil to this second skillet over medium heat.
Once the oil is warm, add the chopped onion and sauté it until it becomes soft and translucent. This process draws out the natural sweetness of the onion, creating a smooth flavor base for the sauce. After the onion has softened, add the minced garlic and cook for about one minute until fragrant. Be attentive to prevent the garlic from burning, as this can impart a bitter taste.
Stir in one teaspoon of salt, one teaspoon of Mexican oregano, and one teaspoon of cumin. Cook these spices for about 30 seconds, stirring constantly, allowing their aromas to bloom in the warm oil and release their complex, earthy notes. The fragrant spices are integral to the authentic flavor profile of the sauce.
Introduce two cups of Hatch roasted chiles to the skillet. Stir them into the onion, garlic, and spice mixture. Now, add about half a cup of chicken broth (or water) to help create a smooth sauce. Carefully transfer this entire mixture to a blender. Blend until the sauce is smooth and luscious, achieving a vibrant green hue and a creamy consistency. Adjust seasoning with salt if necessary, ensuring a balanced flavor.
Step 5: Assembling and Baking the Enchiladas
Preheat your oven to 375°F (190°C). This consistent temperature is crucial for evenly cooking and melting the cheese, ensuring your enchiladas are perfectly baked.
Set up your enchilada assembly line. Briefly fry each corn or flour tortilla in a lightly oiled skillet for about 30 seconds on each side. This process, known as “pliable frying,” makes the tortillas soft and flexible, preventing them from tearing when rolled. Immediately after frying, dip each warm tortilla into your prepared Hatch Chile Sauce, coating both sides lightly.
Place a coated tortilla on a clean surface. Spoon approximately 1/6th of the shredded chicken filling onto the center of the tortilla. Add a small amount of crumbled queso fresco over the chicken. Carefully roll the tortilla up tightly, enclosing the filling.
Place the rolled enchilada seam-side down into a 9×13 inch baking dish. Continue this process with the remaining tortillas and filling, arranging them snugly in the baking dish. You should be able to fit about 10-12 enchiladas, depending on their size and how tightly they are rolled.
Spoon any remaining Hatch Chile Sauce over the tops of the rolled enchiladas, ensuring they are generously coated. Sprinkle an additional half cup of crumbled queso fresco over the entire dish for a delightful cheesy finish. Bake in the preheated oven for approximately 20 minutes, or until the cheese is fully melted, golden brown in spots, and the dish is bubbling with deliciousness.
Step 6: Resting and Serving
Once the enchiladas have finished baking and the cheese is perfectly melted and bubbly, remove the baking dish from the oven. It is important to let the enchiladas rest for about 5-10 minutes before serving.
This resting period allows the sauces to settle and the cheese to firm up slightly, which makes serving much easier and prevents the enchiladas from falling apart when plated. It also allows the intense heat to subside slightly, making them more pleasant to eat immediately.
Serve the warm green chicken enchiladas immediately after the resting period. They are traditionally enjoyed with a side of fluffy Mexican rice and hearty refried beans, creating a complete and satisfying meal that is sure to impress.
Pro Tips for green chicken enchiladas
- Prioritize Ingredient Freshness: Always aim for the freshest ingredients available. Ripe tomatoes contribute more sweetness and depth to the sauce, while fresh Hatch chiles offer unparalleled smoky flavor.
- Avoid Overstuffing: Resist the urge to overload each tortilla with filling. A moderate amount, about 1/6th of the chicken mixture per tortilla, ensures they roll neatly and won’t burst during baking.
- Embrace Make-Ahead: These enchiladas are perfect candidates for meal preparation. Assemble them completely, cover, and refrigerate for up to 24 hours before baking to save time on busy weeknights.
- Serve at the Right Temperature: Allow the enchiladas to cool for a few minutes after baking. This brief period lets the cheese set, making them easier to serve without losing their structural integrity.
- Customize Your Heat Level: Adjust the quantity of chili powder and Hatch chiles to perfectly match your spice preference. This allows you to tailor the dish from mildly warm to quite spicy.
Serving Suggestions for green chicken enchiladas
Decoration
Elevate the visual appeal of your Green Chicken Enchiladas with thoughtful garnishes. A sprinkle of freshly chopped cilantro adds a burst of vibrant green and a fresh, herbaceous aroma that complements the savory flavors. Thinly sliced avocado or a dollop of creamy guacamole provides a beautiful contrast in color and texture, adding a touch of richness.
Side Dishes
Complement the richness of the enchiladas with classic accompaniments that enhance the overall dining experience. Fluffy Mexican rice, seasoned to perfection, offers a neutral yet flavorful base that pairs wonderfully with the enchilada sauce. Creamy refried beans add a hearty, satisfying element, rounding out the meal with a traditional touch.
For a refreshing counterpoint, consider a light and zesty corn salad, perhaps tossed with lime juice and a hint of jalapeño. A side of pickled red onions can provide a bright, tangy contrast that cuts through the richness of the cheese and chicken. These additions create a balanced and complete Mexican feast.
Creative Serving Ideas
Transform your Green Chicken Enchiladas into a delightful brunch item by serving them with a perfectly fried or poached egg on top. The runny yolk will create a luscious sauce that melds beautifully with the enchilada filling. For a lighter, summery option, serve them alongside a crisp, refreshing green salad with a citrus vinaigrette.
Consider creating a “enchilada bar” where guests can customize their plates with various toppings like sour cream, pickled jalapeños, crumbled cotija cheese, and pico de gallo. This interactive approach makes dining fun and personalizes the experience for everyone. You could also serve them with a side of sweet corn salsa for a delightful tropical twist that balances the savory notes.
Preparation & Storage
Storing Leftovers
Properly storing your leftover Green Chicken Enchiladas is key to maintaining their deliciousness for later enjoyment. Ensure the dish has cooled down to room temperature before attempting to store it. This prevents condensation from forming inside the storage container, which can make the enchiladas soggy.
Transfer the cooled enchiladas to an airtight container. If you have a lot of sauce remaining, you can pour a little extra over the enchiladas before sealing the container. This helps to keep them moist. They will stay fresh in the refrigerator for up to 3 days.
For individual portions, you can also wrap individual enchiladas tightly in plastic wrap or aluminum foil before placing them in a larger airtight container. This makes reheating a single serving quick and convenient. Always ensure the container is well-sealed to prevent any unwanted odors from other foods from affecting the enchiladas.
Freezing
Green Chicken Enchiladas freeze exceptionally well, making them a fantastic option for stocking your freezer for future easy meals. It’s best to freeze them before they are baked, or after they have been baked and cooled completely. Freezing unbaked enchiladas preserves their texture slightly better.
To freeze unbaked enchiladas, assemble them in a freezer-safe baking dish. Cover the dish tightly first with a layer of plastic wrap, pressing it directly onto the surface of the enchiladas to minimize air exposure, then add a layer of aluminum foil. Label the dish with the date and contents. They can be frozen for up to 2 months.
If freezing baked enchiladas, allow them to cool completely. Wrap individual portions tightly in plastic wrap, then in aluminum foil. Place these wrapped portions in a freezer-safe bag or container. Frozen baked enchiladas are best consumed within 1-2 months for optimal quality.
Reheating
Reheating Green Chicken Enchiladas is a simple process that brings them back to their delicious, bubbly glory. For unbaked frozen enchiladas, remove them from the freezer, discard the plastic wrap, and cover the baking dish tightly with foil. Bake in a preheated oven at 375°F (190°C) for about 40-50 minutes, or until heated through and the cheese is melted and golden. You may need to remove the foil for the last 10 minutes to allow for browning.
For previously baked and refrigerated enchiladas, preheat your oven to 375°F (190°C). Place the enchiladas in an oven-safe dish, cover with foil, and bake for about 15-20 minutes, or until heated through. Remove the foil for the last few minutes to crisp up the cheese if desired.
If you’re reheating individual portions and are short on time, you can microwave them. Place one or two enchiladas on a microwave-safe plate, cover loosely with a damp paper towel to prevent drying, and heat on medium power for 1-2 minutes, or until warmed through. Be aware that microwaving can slightly alter the texture of the tortillas and cheese compared to oven reheating.
Frequently Asked Questions
-
How do I know if my tomatoes are ripe enough for the sauce?
Ripe tomatoes are essential for a rich and flavorful sauce. Look for tomatoes that feel slightly soft to the touch when gently squeezed, indicating they are yielding but not mushy. Their color should be a deep, vibrant red, without any green or dark, bruised spots. A ripe tomato will also have a pleasant aroma, often fragrant and slightly sweet.
-
What’s the best way to store leftover green chicken enchiladas?
For optimal freshness, cool the leftover enchiladas completely before storing them. Place them in an airtight container, ensuring a tight seal to prevent air exposure, which can lead to drying out. Refrigerate them promptly, and they will remain delicious for up to three days. For reheating, an oven at 375°F (190°C) for about 20 minutes, or until hot and bubbly, is recommended.
-
Can I freeze green chicken enchiladas?
Yes, green chicken enchiladas freeze beautifully, whether baked or unbaked. For unbaked enchiladas, assemble them in a freezer-safe dish, cover tightly with plastic wrap and then foil, and freeze for up to two months. For baked enchiladas, cool them completely, wrap individually in plastic wrap and foil, and then place in a freezer bag or container for up to two months. Thaw in the refrigerator overnight before reheating.