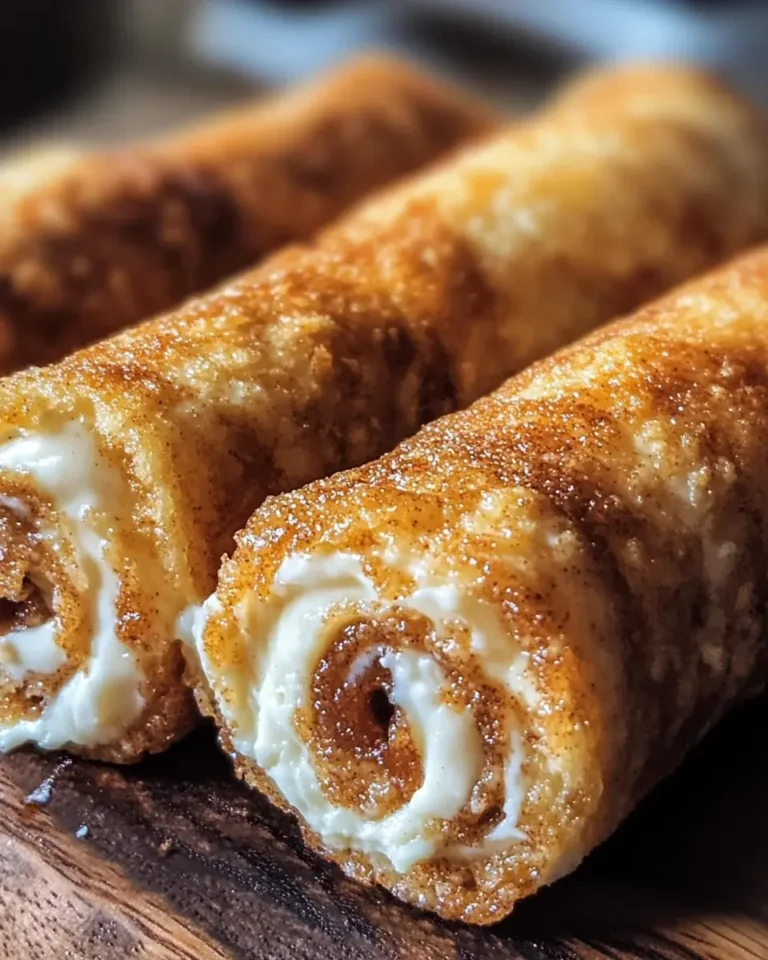
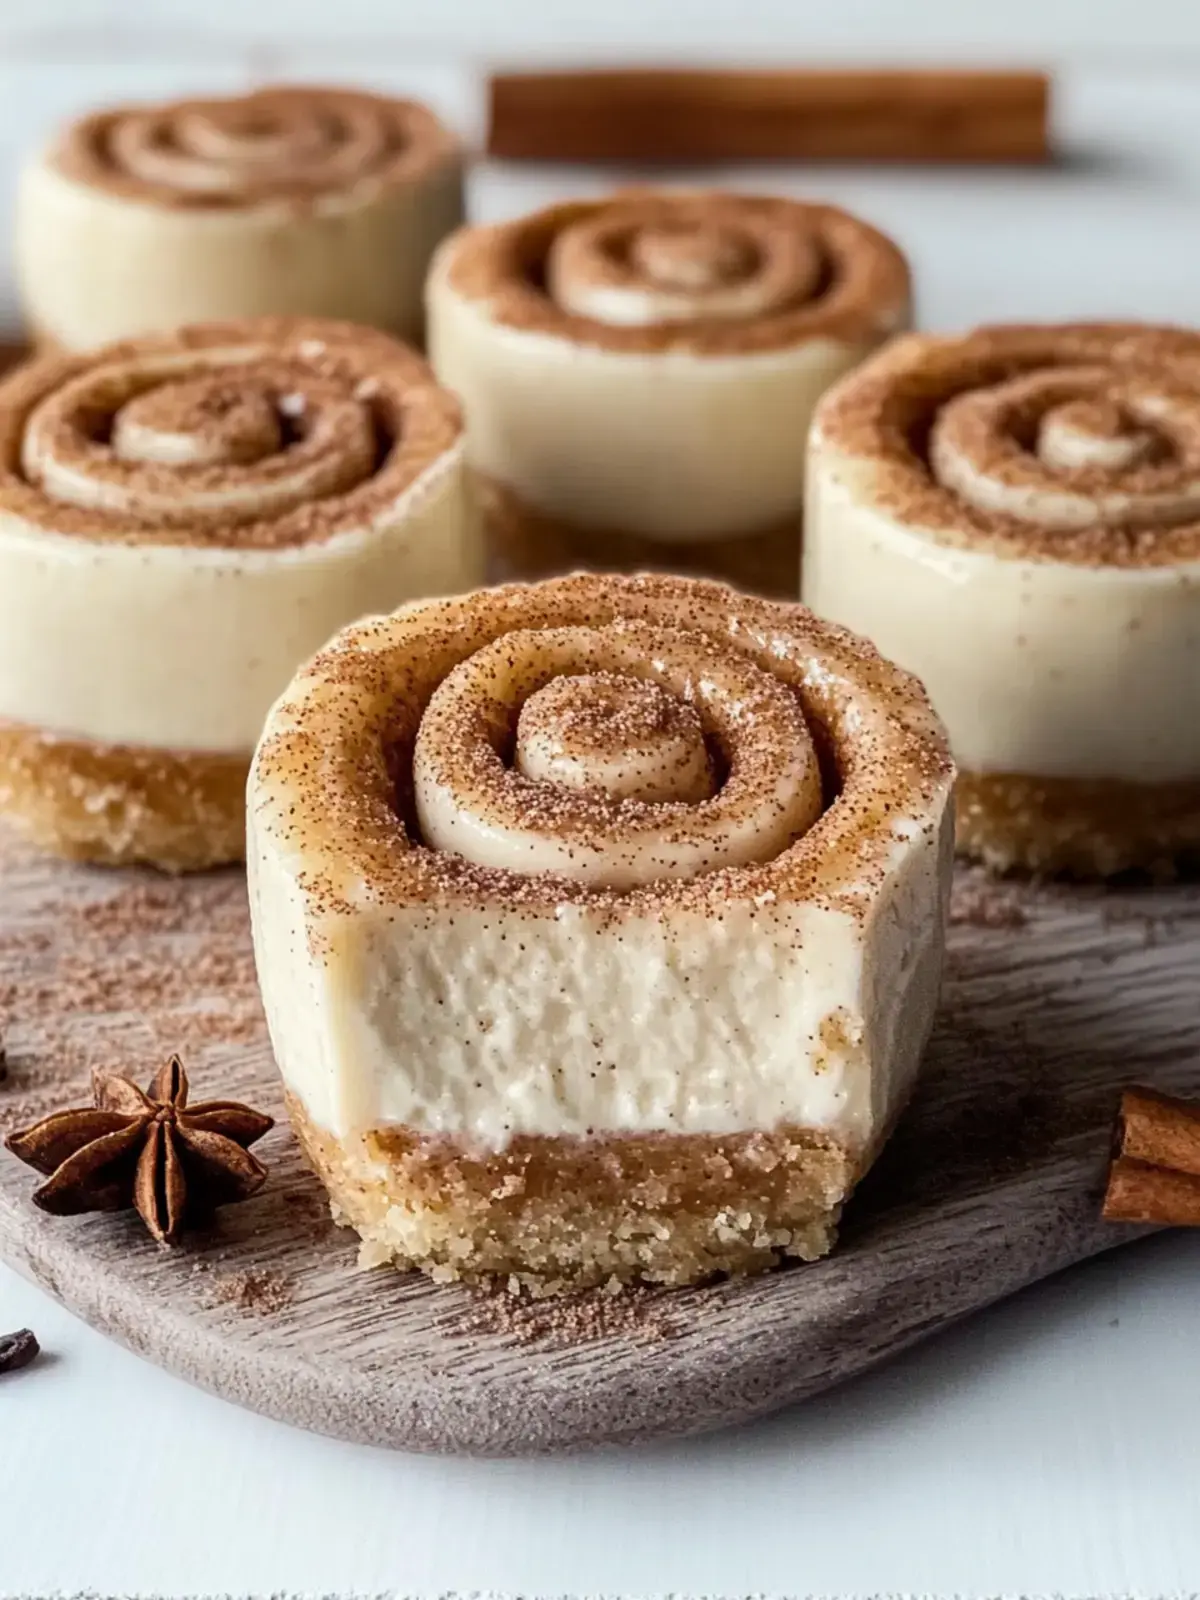
Irresistible Mini Cinnamon Roll Cheesecakes for a Delightful Treat
There’s a special warmth that wafts through the air when cinnamon meets sugar; it instantly transports me to cozy mornings filled with fresh-baked treats. Inspired by the classic cinnamon roll, these Mini Cinnamon Roll Cheesecakes bring together the best of both worlds—creamy cheesecake and the beloved cinnamon swirl.
Whether you’re treating yourself to a delightful breakfast or seeking a showstopper dessert for a gathering, these little indulgences are just the answer. With a straightforward prep time of under an hour, you can whip them up even on a busy day. Plus, their customizable nature means you can adapt them to fit any occasion or preference!
Why You Will Love This Recipe
- Delightful Fusion: Combining the rich, creamy texture of cheesecake with the warm spices of cinnamon rolls creates a unique taste experience that is both comforting and exciting. This blend offers a sophisticated yet familiar flavor profile perfect for any palate.
- Quick Preparation: With only 55 minutes from start to finish, this recipe is a lifesaver for busy schedules or those spontaneous cravings that hit hard. You can enjoy a gourmet treat without spending hours in the kitchen.
- Endless Customization: Top them with fresh fruit, decadent chocolate chips, or your favorite frosting for a truly personal twist. This adaptability ensures the cheesecakes always feel fresh and cater to individual tastes.
- Crowd-Pleasing Appeal: These mini treats are perfectly portioned and ideal for any gathering, from casual brunches to elegant parties, ensuring every guest leaves with a smile and a fond memory. Their charming size makes them a hit for all ages.
- Satisfying Textures: Experience the perfect balance of creamy filling, a delightful crust, and a sweet, spiced topping for a well-rounded and utterly satisfying bite. Each element contributes to a harmonious textural symphony in your mouth.
Ingredients You Need
Crafting these Mini Cinnamon Roll Cheesecakes begins with selecting high-quality ingredients. The success of any baked good hinges on the freshness and type of components used, so choosing wisely will elevate your final product significantly. Opting for full-fat cream cheese, for instance, will yield a richer, creamier cheesecake filling compared to its reduced-fat counterpart.
Mini Cinnamon Roll Cheesecakes
Delightful fusion of creamy cheesecake and cinnamon roll flavors, perfect for breakfast or dessert. These mini treats offer a unique taste experience with a quick prep time and endless customization options.
- 8 oz Cream Cheese
- 1/2 cup Granulated Sugar
- 2 large Eggs
- 1 tsp Vanilla Extract
- 1 tsp Ground Cinnamon
- 1 pkg Pre-made Pie Crust or Cookie Crust
- 1 tbsp Cinnamon-Sugar Mixture
- 1Preheat your oven to 325°F (160°C) and line a muffin tin with cupcake liners.
- 2Combine crushed pie crust or cookies with melted butter, mix until evenly coated, and press into the bottom of muffin tins.
- 3Blend cream cheese, granulated sugar, and eggs until smooth. Stir in vanilla extract and ground cinnamon.
- 4Divide filling among crusts. Sprinkle cinnamon-sugar mixture on top and swirl gently with a toothpick.
- 5Bake for 20-25 minutes until set but slightly jiggly.
- 6Cool in the tin for 10 minutes, then refrigerate for at least an hour before serving.
Keywords: Cheesecake, Cinnamon Roll, Mini, Dessert, Breakfast, Baking, Sweet Treat
- cream cheese: provides a rich, creamy base; consider using full-fat for the best texture.
- granulated sugar: sweetens the filling; brown sugar can be substituted for a deeper molasses note.
- eggs: act as a binder and help the cheesecake set; a flax egg is a suitable vegan alternative.
- vanilla extract: enhances the overall flavor profile with its classic warmth; almond extract offers a delightful nutty variation.
- ground cinnamon: infuses that quintessential cinnamon roll flavor, making these cheesecakes truly authentic.
- pre-made pie crust or cookie crust: forms the base; graham crackers or gingersnap cookies offer excellent alternatives.
- cinnamon-sugar mixture: adds a sweet, spiced topping; the ratio can be adjusted to your personal preference for sweetness and spice intensity.
The precise quantities for each ingredient are detailed within the accompanying recipe card, ensuring you have all the necessary information at your fingertips to recreate this delightful treat.
Variations
For a delightful breakfast twist, consider incorporating a swirl of fruit preserves into the cheesecake batter. A bright raspberry or tangy apricot jam can cut through the richness and add a lovely fruity dimension. This variation transforms the classic cheesecake into a lighter, more vibrant treat.
If you’re aiming for a low-carb option, you can adapt the crust and sweetener. Almond flour mixed with a touch of melted butter and a sugar substitute can create a keto-friendly base. Similarly, using a sugar substitute in the filling will reduce the overall carbohydrate count significantly.
Another exciting variation involves adding a touch of chocolate. Fold in mini chocolate chips into the cheesecake batter, or drizzle melted dark chocolate over the finished cheesecakes for an added layer of indulgence. This combination of cinnamon, cheesecake, and chocolate is a universally loved pairing.
For a truly decadent experience, consider a salted caramel drizzle. After baking and cooling, a warm salted caramel sauce poured over the top adds a luxurious finish. The salty notes perfectly balance the sweet and creamy elements of the cheesecake.
You can also experiment with different spices in the cinnamon-sugar topping. A pinch of nutmeg, cardamom, or even a tiny whisper of ground ginger can introduce new aromatic complexities. These subtle additions can make your mini cheesecakes stand out even more.
How to Prepare Mini Cinnamon Roll Cheesecakes
Step 1: Prepare Your Baking Equipment
Begin by preheating your oven to 325°F (160°C). This moderate temperature is crucial for ensuring the cheesecakes bake evenly without overcooking the edges before the center is set. Having the oven at the correct temperature from the start is a fundamental step for baking success.
Next, prepare your muffin tin by lining it with cupcake liners. Using paper or silicone liners not only makes the removal of the finished cheesecakes incredibly easy but also helps maintain their shape and prevents them from sticking. Ensure the liners are pressed down securely into the muffin cups to create a neat foundation.
Having all your equipment ready before you start mixing the ingredients streamlines the entire process. This organization is key to avoiding last-minute scrambles and ensuring that each step is performed efficiently. A well-prepared workspace contributes to a more enjoyable and successful baking experience.
Step 2: Create the Flavorful Crust
In a medium-sized bowl, combine your crushed pie crust or cookies with melted butter. The goal here is to ensure every crumb is thoroughly coated in butter, creating a cohesive mixture that will hold its shape. Use a fork or your fingertips to thoroughly mix, breaking up any clumps of crushed cookies.
Once the crumbs are evenly moistened, press this mixture firmly into the bottom of each prepared muffin tin liner. You want to create a compact and even layer. Using the bottom of a small glass or a measuring spoon can help you press the crumbs down tightly, forming a solid base for your cheesecakes.
A well-formed crust is essential for both texture and structure, preventing the cheesecake filling from seeping through and providing a satisfying crunch with every bite. Take your time with this step, as a sturdy crust is the foundation of a perfect mini cheesecake.
Step 3: Mix the Creamy Cheesecake Filling
In a separate mixing bowl, begin by blending the cream cheese and granulated sugar together until the mixture is exceptionally smooth and creamy. It’s important to ensure there are no lumps of cream cheese remaining, as this will impact the texture of your final cheesecake. For best results, use softened cream cheese, which will incorporate more easily.
Next, beat in the eggs one at a time, mixing thoroughly after each addition. The eggs are crucial for binding the ingredients and ensuring the cheesecake sets properly. Overmixing at this stage can incorporate too much air, which may lead to cracking, so gentle but thorough mixing is key.
Finally, gently stir in the vanilla extract and ground cinnamon, making sure everything is well incorporated. This is where the magical flavor of cinnamon truly begins to infuse the filling, promising that delightful cinnamon roll essence. The aroma alone at this stage is incredibly inviting, hinting at the deliciousness to come.
Step 4: Assemble and Swirl for the Signature Look
Carefully and evenly divide the prepared cheesecake filling among the crusts in the muffin tin. Aim for equal amounts in each cup to ensure consistent baking and presentation. A small ice cream scoop or a tablespoon can be very helpful for portioning the filling accurately.
Once the filling is distributed, generously sprinkle the cinnamon-sugar mixture evenly on top of each cheesecake. Don’t be shy with the topping; this is where the distinct cinnamon roll character truly shines. Ensure a good amount is spread across the entire surface of the filling.
Now comes the artistic part: use a toothpick or the tip of a small knife to gently swirl the cinnamon-sugar mixture into the cheesecake filling. Create beautiful marbled patterns reminiscent of classic cinnamon rolls. Avoid over-swirling, as you want distinct swirls rather than a uniformly mixed color. This visual element enhances the appeal and anticipation of the treat.
Step 5: Bake to Perfection
Place the filled muffin tin into your preheated oven. The baking time is critical; you want the cheesecakes to be set but still possess a slight jiggle in the center. This indicates they are cooked through but will remain wonderfully moist and creamy after cooling.
Bake for approximately 20-25 minutes. Keep a close eye on them, especially towards the end of the baking time, as ovens can vary. The edges should appear set, and the center should look slightly soft and wobbly, like a delicate custard. Overbaking is the primary cause of dry or cracked cheesecakes, so precision is important here.
Removing them at the perfect moment ensures that classic creamy cheesecake texture that melts in your mouth. The subtle jiggle is your cue that they are ready to be cooled and will firm up as they chill, achieving that desired consistency.
Step 6: Cool and Chill for Optimal Texture
Once baked, remove the muffin tin from the oven and let the cheesecakes cool directly in the tin for about 10 minutes. This initial cooling period allows them to firm up slightly without the shock of immediate temperature change, which can contribute to cracking.
After this brief period, carefully transfer the cheesecakes (still in their liners) to the refrigerator. They need to chill for at least an hour, but two to three hours is even better for achieving the perfect, firm texture. The cold temperature is essential for the cheesecake to set completely and develop its signature creamy consistency.
Chilling is not just about texture; it also allows the flavors to meld together, creating a more harmonious and complex taste experience. Patience during the cooling and chilling phase is rewarded with a superior finished product that is smooth, rich, and utterly delicious.
Pro Tips for Mini Cinnamon Roll Cheesecakes
Avoid Cracks: To minimize the chances of your Mini Cinnamon Roll Cheesecakes developing cracks, it’s highly recommended to mix the batter on a low speed. This technique prevents incorporating too much air into the mixture, which is a common culprit behind unsightly fissures. A gentle mixing approach ensures a smoother, more stable cheesecake.
Room Temperature is Key: Always ensure your cream cheese and eggs are at room temperature before you begin mixing. This allows them to combine more easily and create a uniform, lump-free batter, essential for achieving that signature creamy texture that defines a great cheesecake. Cold ingredients simply won’t emulsify properly.
Monitor Baking Time Closely: Keep a vigilant eye on your cheesecakes as they bake; overbaking is the enemy of tender cheesecake. They should be set around the edges but still possess a slight jiggle in the center, indicating they are perfectly cooked and will firm up as they cool. Trust the jiggle!
Gradual Cooling Strategy: After baking, let the cheesecakes cool gradually at room temperature for about 10 minutes before refrigerating. This gentle transition helps maintain their texture and prevents sudden temperature changes that can lead to cracking or a rubbery consistency. Patience here is truly a virtue.
Oven Accuracy Matters: Consider using an oven thermometer to ensure your oven is calibrated accurately to the specified temperature. Precise heat control is vital for preventing undercooking or overcooking your delicate cheesecakes, leading to consistent and delicious results every time you bake.
Experiment with Toppings: Don’t hesitate to explore different toppings! Fresh berries, a drizzle of chocolate ganache, a dollop of whipped cream, or even a dusting of powdered sugar can elevate your Mini Cinnamon Roll Cheesecakes and cater wonderfully to your guests’ individual preferences. Get creative!
Serving Suggestions for Mini Cinnamon Roll Cheesecakes
Decoration
A delicate dusting of powdered sugar offers a simple yet elegant finish, providing a stark white contrast to the warm cinnamon hues. For a more vibrant look, consider fresh berries like raspberries or blueberries scattered artistically around the base or on top. A light drizzle of a complementary sauce, such as caramel or a cream cheese glaze, can add an extra layer of visual appeal and flavor.
Side Dishes
These delightful mini cheesecakes pair wonderfully with a steaming cup of freshly brewed coffee, its bold notes cutting through the sweetness beautifully. A side of fresh fruit salad, featuring seasonal fruits like melon, berries, and citrus, offers a refreshing counterpoint to the rich dessert. For a more substantial brunch pairing, consider serving them alongside fluffy pancakes or a light yogurt parfait.
Creative Serving Ideas
Present them elegantly on a tiered dessert stand for a party, allowing guests to easily pick and choose their indulgence. You could also arrange them on individual small plates with a sprig of mint for a restaurant-quality presentation. For a fun, interactive experience, create a “topping bar” where guests can customize their own mini cheesecakes with various sauces, nuts, and sprinkles.
Preparation & Storage
Storing Leftovers
To keep your Mini Cinnamon Roll Cheesecakes at their best, store any leftovers in an airtight container. Ensure the container is well-sealed to prevent the cheesecakes from drying out or absorbing odors from other foods in the refrigerator. They will maintain their optimal creamy texture and flavor for up to 4-5 days when stored properly.
Freezing
For longer-term storage, freezing is an excellent option. Wrap each individual cheesecake tightly in plastic wrap, ensuring no air is trapped, and then follow with a layer of aluminum foil. This double-layer protection is crucial for preventing freezer burn and preserving the quality of the cheesecakes for up to 3 months.
Reheating
If you wish to enjoy your frozen or chilled cheesecakes warm, gently reheat them in the microwave for a very short duration, perhaps 10-15 seconds. Be extremely cautious not to overheat them, as this can cause the cheesecake to become watery or alter its delicate texture. A quick, gentle warmth is all that’s needed.
Frequently Asked Questions
-
What are the best practices for ensuring a smooth cheesecake filling without lumps?
Achieving a perfectly smooth cheesecake filling primarily relies on using room temperature ingredients, especially the cream cheese and eggs. Cold cream cheese will resist blending smoothly, leading to lumps. It’s also crucial to beat the cream cheese and sugar together until completely homogenous before adding other ingredients. Mixing on a medium-low speed after adding eggs helps prevent excess air incorporation, which can affect texture and lead to cracks. Thoroughly scraping down the sides and bottom of the bowl during mixing ensures all ingredients are fully incorporated, leading to a consistently creamy, lump-free batter.
-
Can I make the crust for these Mini Cinnamon Roll Cheesecakes ahead of time, and if so, how should I store it?
Yes, you can absolutely prepare the crust for these Mini Cinnamon Roll Cheesecakes in advance, which is a fantastic time-saver. Once you’ve mixed the crushed cookies or pie crust with melted butter and pressed it into the muffin liners, you can cover the muffin tin tightly with plastic wrap. Store the prepared crusts in the refrigerator for up to 24 hours before filling. This allows the butter to firm up the crust, making it more stable and easier to work with when you’re ready to add the cheesecake filling. Ensure the plastic wrap is sealed well to prevent the crust from drying out.
-
What is the ideal way to store leftover Mini Cinnamon Roll Cheesecakes to maintain their freshness and texture?
To best preserve the delightful texture and flavor of any leftover Mini Cinnamon Roll Cheesecakes, it’s imperative to store them in an airtight container. Place the container in the refrigerator. This prevents them from drying out and protects them from absorbing any unwanted odors from other foods. If you plan to keep them for more than a couple of days, consider adding a layer of parchment paper between the cheesecakes to prevent them from sticking together, especially if they have a glaze or topping. For longer storage, freezing is recommended, as detailed in the storage section above.