Ultimate Crispy Cotton Candy Cheesecake Bombs
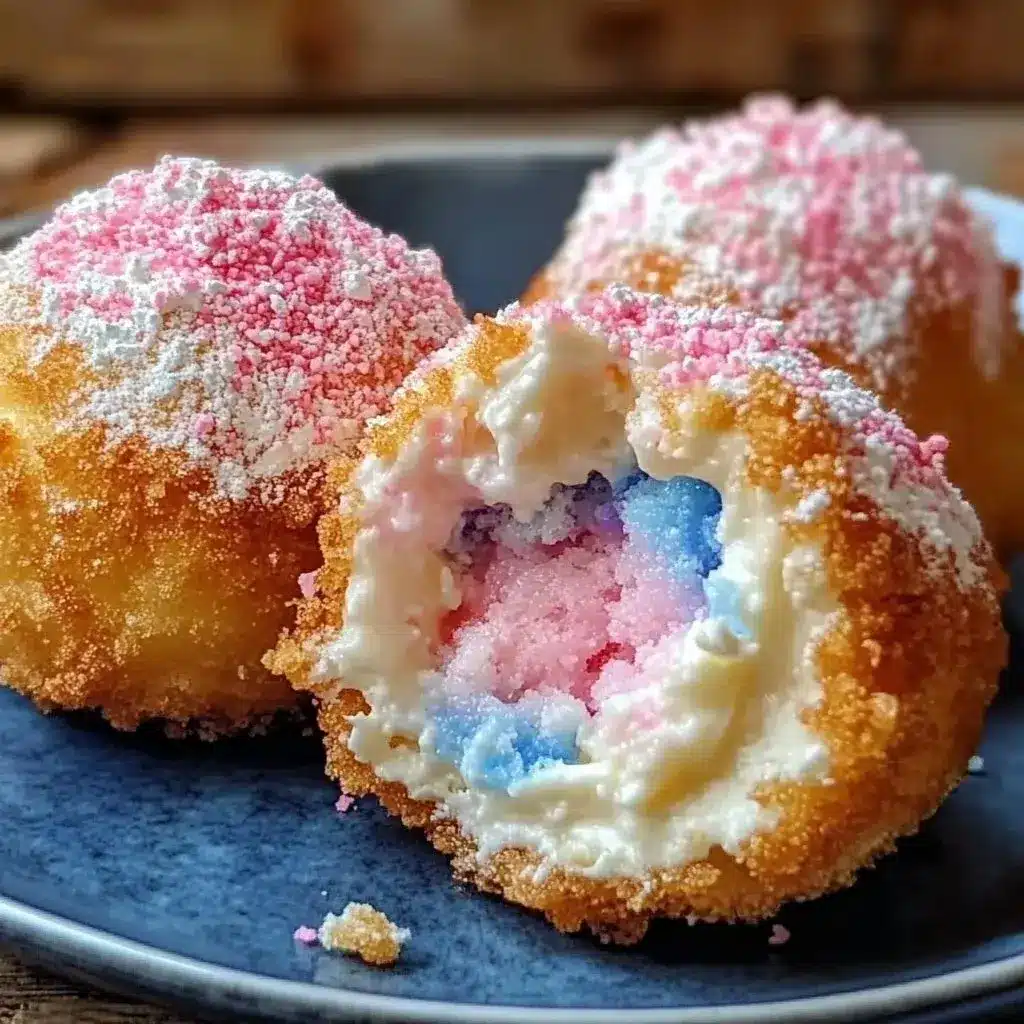
This recipe for Crispy Cotton Candy Cheesecake Bombs is a delightful treat that brings the fun of a carnival right into your kitchen. Have you ever experienced the joy of biting into a warm, crispy shell only to find a creamy and sweet cheesecake filling inside? With these cheesecake bombs, you’ll capture that magical sensation in every delicious bite.
The lightness of the whipped cream mixed with the whimsical flavor of cotton candy makes these treats unforgettable. What makes Crispy Cotton Candy Cheesecake Bombs truly special is their simplicity. In just a few easy steps, you can create a dessert that looks and tastes like it came from a gourmet bakery.
It’s perfect for those spontaneous gatherings where you want to impress your friends or family. Moreover, it’s a unique way to indulge your sweet tooth while also reliving childhood memories associated with cotton candy. Imagine serving a plate of these gorgeous, golden-brown cheesecake bombs, dusted with powdered sugar and topped with fluffy cotton candy.
They’re not just a feast for the taste buds; they’re a feast for the eyes too! Plus, who doesn’t love the combination of crispy and creamy? It’s this contrast that elevates the Crispy Cotton Candy Cheesecake Bombs to a new level of dessert perfection. Are you ready to dive into this sweet adventure?
Why You Will Love This Recipe
- Unique Flavor Fusion: The playful sweetness of cotton candy perfectly complements the rich tang of cream cheese, creating an unexpectedly delightful taste sensation.
- Satisfying Textural Contrast: Experience the joy of a perfectly crisp, golden exterior yielding to a luxuriously smooth and creamy cheesecake center with every bite.
- Effortless Elegance: Despite their impressive appearance, these bombs are surprisingly simple to assemble, making them an ideal choice for bakers of all skill levels.
- Visually Enchanting: With their whimsical color and topping potential, these cheesecake bombs are guaranteed to be a showstopper, adding a touch of magic to any occasion.
- Nostalgic Delight: They evoke fond childhood memories of funfairs and sweet treats, offering a comforting yet exciting culinary experience.
Ingredients You Need
Crafting these delightful Crispy Cotton Candy Cheesecake Bombs begins with selecting high-quality ingredients that ensure both flavor and texture. Using fresh, room-temperature cream cheese is paramount for achieving a smooth, lump-free filling. Similarly, ensuring your whipped topping and heavy cream are cold will help maintain the airy consistency of the cheesecake mixture. The quality of your biscuit dough also plays a significant role; opt for a brand you trust for a tender and golden crust.
Crispy Cotton Candy Cheesecake Bombs

These delightful treats bring the fun of a carnival right into your kitchen. Experience the joy of biting into a warm, crispy shell only to find a creamy and sweet cheesecake filling inside. The lightness of the whipped cream mixed with the whimsical flavor of cotton candy makes these treats unforgettable. They are easy to make, versatile, and a family-friendly dessert that will impress everyone.
- 8 oz cream cheese, softened
- 1/2 cup powdered sugar
- 1 tsp vanilla extract
- 1/2 tsp cotton candy flavoring
- 1/4 cup whipped topping (like Cool Whip)
- 2 Tbsp heavy cream
- 1 package refrigerated biscuit dough (8-count can)
- 2 Tbsp all-purpose flour, for dusting
- 4 cups vegetable oil, for frying
- 1 cup granulated sugar, for coating bombs after frying
- powdered sugar, for dusting
- cotton candy, for topping each bomb
- 1In a bowl, beat the cream cheese until smooth. Add powdered sugar, vanilla, and cotton candy flavoring, and continue beating until well combined.
- 2Fold in the whipped topping and heavy cream until the mixture is light and mousse-like. Chill the filling for about 30 minutes.
- 3While the filling chills, prepare your dough on a lightly floured surface. Separate the biscuit rounds and flatten each one gently.
- 4Scoop about 1-2 tablespoons of the chilled filling and roll into balls. Place each ball in the center of a flattened biscuit round, then carefully pinch and seal the dough around the filling to form a smooth ball.
- 5In a deep pot or fryer, heat the vegetable oil to ~350 °F (175 °C) (use a thermometer if you have one).
- 6Fry the cheesecake bombs in batches, about 1-2 minutes per side, until golden brown. Remove with a slotted spoon and let drain on paper towels.
- 7While the bombs are still warm, roll them in granulated sugar to coat evenly.
- 8Dust each with powdered sugar and top with a small tuft of cotton candy just before serving.
Keywords: Cheesecake, Cotton Candy, Fried Dessert, Whimsical
- cream cheese, softened: This provides the rich, tangy foundation for the delectable cheesecake filling.
- powdered sugar: Sweetens the filling to a perfect balance, ensuring it’s not overly saccharine.
- vanilla extract: Enhances the overall flavor profile, adding depth and warmth to the sweet notes.
- cotton candy flavoring: The whimsical star that infuses the cheesecake with its signature carnival-inspired sweetness.
- whipped topping: Contributes to an incredibly light and airy texture, making the filling melt-in-your-mouth delightful.
- heavy cream: Ensures a luxuriously creamy consistency for the cheesecake filling.
- refrigerated biscuit dough: Forms the crispy, golden-brown outer shell that encases the creamy center.
- all-purpose flour, for dusting: Essential for preventing the biscuit dough from sticking while you shape it.
- vegetable oil, for frying: Creates that irresistible crispy exterior when heated to the correct temperature.
- granulated sugar: Used for coating the warm bombs immediately after frying, adding an extra layer of sweetness and crunch.
- cotton candy and additional powdered sugar, for garnish: These add the final visual flair and a touch of pure sugary joy.
The specific quantities for each ingredient are readily available in the detailed recipe card associated with this dish.
Variations
For the adventurous baker, the possibilities for customizing Crispy Cotton Candy Cheesecake Bombs are truly endless. You can transform these treats into a delightful dessert by simply incorporating cocoa powder into the cream cheese mixture, creating a rich, chocolate-infused core. This addition pairs wonderfully with the subtle sweetness of the fried dough.
Another exciting avenue involves playing with fruit flavors. Imagine replacing the cotton candy essence with a vibrant strawberry or raspberry extract. This would lend a beautiful pink hue and a burst of fruity tang, offering a refreshing counterpoint to the creamy cheesecake. Such a variation would be perfect for a summer gathering.
For those seeking a textural adventure, consider adding finely crushed nuts like pistachios or pecans to the cheesecake filling. This not only introduces an appealing crunch but also adds a sophisticated nutty undertone. You might even consider a sprinkle of edible glitter or colorful sprinkles into the dough before frying for an extra touch of festivity, making them ideal for a birthday celebration.
How to Prepare Crispy Cotton Candy Cheesecake Bombs
Step 1: Crafting the Dreamy Cheesecake Filling
Begin by bringing your softened cream cheese to room temperature. This crucial step ensures that the cream cheese will blend seamlessly, resulting in a smooth, luxurious base for your filling. Place the softened cream cheese into a medium-sized mixing bowl, ready for its transformation.
Using an electric mixer on medium speed, whip the cream cheese until it is exceptionally light and fluffy. This aeration process is key to achieving the melt-in-your-mouth texture that makes these cheesecake bombs so irresistible. You should see it transform into a pale yellow, airy mass.
Next, gradually add the powdered sugar, vanilla extract, and the star ingredient, cotton candy flavoring, to the whipped cream cheese. Continue to beat on low speed until all ingredients are just incorporated, being careful not to overmix. The aroma should already be tantalizingly sweet and inviting.
The consistency of the filling at this stage is vital for easy handling later. The addition of vanilla extract not only enhances the overall flavor but also provides a grounding note that balances the whimsical sweetness of the cotton candy. Ensure there are no pockets of unincorporated sugar.
Step 2: Achieving the Perfect Airy Texture
Now, it’s time to introduce the elements that will give your cheesecake filling its signature light and airy quality. Gently fold in the whipped topping, such as Cool Whip, into the cream cheese mixture. Use a spatula and a gentle folding motion to incorporate it without deflating the air you’ve already whipped into the base.
Following the whipped topping, add the heavy cream. This dairy component will contribute to the overall creaminess and richness of the filling, ensuring it’s decadent yet wonderfully light. Again, use a folding technique to maintain the airy texture. Overmixing at this stage can lead to a denser, less desirable filling.
The goal here is a harmonious blend where the whipped topping and heavy cream are just incorporated, creating a mousse-like consistency. This delicate balance is what allows the filling to remain creamy and light even after frying. The mixture should look smooth, homogeneous, and incredibly inviting.
Once everything is beautifully combined, cover the bowl tightly with plastic wrap. Place the bowl in the refrigerator for at least 30 minutes. This chilling period is essential for the flavors to meld and, more importantly, for the filling to firm up, making it much easier to handle and shape later.
Step 3: Preparing the Golden Outer Shell
While the cheesecake filling is chilling and developing its perfect consistency, turn your attention to the exterior of your cheesecake bombs. On a clean, dry countertop or a large cutting board, lightly dust the surface with all-purpose flour. This prevents the biscuit dough from sticking during the shaping process.
Carefully open your package of refrigerated biscuit dough. You’ll typically find eight rounds in a standard can. Gently separate each biscuit round. It’s important not to overwork the dough at this stage, as this can affect its tenderness when fried.
Using a rolling pin or even your hands, flatten each biscuit round into a thin disc, aiming for a thickness of about 1/8 inch. Ensure the edges are not significantly thicker than the center; a uniform thickness is key for even cooking and a beautiful, rounded final product. This preparation step is straightforward and quick.
The goal is to create a pliable dough that can effectively enclose the creamy filling without tearing. If the dough feels a bit sticky, add a tiny bit more flour to your surface, but avoid using too much, as excess flour can make the outer shell tough or dry. A light dusting is usually sufficient.
Step 4: Encasing the Creamy Core
Now comes the assembly phase, where the creamy filling meets its crispy counterpart. Remove the chilled cheesecake filling from the refrigerator. Using a tablespoon or a small ice cream scoop, portion out 1 to 2 tablespoons of the firm cheesecake mixture. Roll each portion into a smooth, compact ball.
Take one of your flattened biscuit dough rounds and place a cheesecake filling ball precisely in the center. It’s important to center the filling so that the dough can be folded up evenly around it. The dough should be pliable enough to stretch slightly.
Carefully bring the edges of the flattened biscuit dough up and over the cheesecake filling. Pinch the edges together securely to completely seal the filling inside. Ensure there are no gaps or seams where the filling could potentially escape during frying. A good seal is paramount for success.
Once sealed, gently roll the dough in your hands to form a perfectly smooth, round ball. The aim is to create a seamless exterior that will puff up beautifully and turn golden brown when fried. Repeat this process with the remaining cheesecake filling and biscuit dough rounds. You should have a collection of perfectly formed, dough-wrapped cheesecake balls ready for their hot oil bath.
Step 5: The Hot Oil Transformation
The secret to perfectly crispy cheesecake bombs lies in the frying process, and temperature control is absolutely key. In a deep, heavy-bottomed pot or a deep fryer, pour in enough vegetable oil to submerge the cheesecake bombs without overcrowding the pot. Heat the oil over medium-high heat.
It’s crucial to reach the correct temperature of approximately 350°F (175°C). Using a candy or frying thermometer is highly recommended to ensure accuracy. If the oil is not hot enough, the bombs will absorb too much oil and become greasy; if it’s too hot, the exterior will burn before the filling is warmed through.
Once the oil has reached the target temperature, carefully lower 2 to 3 cheesecake bombs into the hot oil at a time. Do not overcrowd the pot, as this can cause the oil temperature to drop significantly, leading to less crispy results. Allow them space to fry evenly.
Fry the cheesecake bombs for about 1 to 2 minutes per side, using a slotted spoon to gently turn them. You are looking for a beautiful, even golden-brown color on all sides. The dough will puff up significantly during this process, creating delightful pockets of crispiness.
Step 6: Draining and Final Flourishes
As soon as the cheesecake bombs achieve that perfect golden-brown hue, carefully remove them from the hot oil using a slotted spoon or a spider strainer. Immediately place them onto a plate lined with paper towels. This step is critical for absorbing any excess oil and preventing a greasy finish, ensuring maximum crispness.
While the bombs are still warm from the fryer, it’s time for the final sweet coating. In a shallow dish, pour the granulated sugar. Gently roll each warm cheesecake bomb in the sugar until it is evenly coated. The residual heat will help the sugar adhere beautifully, creating a delightful crunchy exterior.
For an added touch of whimsy and sweetness, lightly dust each sugar-coated bomb with powdered sugar. This gives them a lovely, delicate finish. Just before serving, add a small tuft of fluffy cotton candy to the top of each bomb. This iconic topping truly captures the carnival spirit of the dessert.
Serve these Crispy Cotton Candy Cheesecake Bombs immediately while they are still warm. This is when the contrast between the hot, crispy shell and the gooey, creamy cheesecake filling is at its absolute best. Enjoy the burst of flavor and texture!
Pro Tips for Crispy Cotton Candy Cheesecake Bombs
Don’t Skip the Chill: Always ensure your cheesecake filling is thoroughly chilled and firmed up before attempting to wrap it in the biscuit dough. This prevents the filling from becoming too soft and messy to handle, making the enclosing process much smoother and preventing leaks during frying.
Temperature is King: Maintaining the correct oil temperature of 350°F (175°C) is non-negotiable for achieving that perfect crispy exterior without burning. Invest in a reliable frying thermometer; it’s a small price to pay for perfectly cooked bombs. Fry in batches to keep the oil temperature stable.
Seal It Tight: When enclosing the cheesecake filling in the biscuit dough, take extra care to pinch and seal the seams thoroughly. A good seal ensures that the molten cheesecake filling stays contained within the dough and doesn’t ooze out into the hot oil, which can cause splattering and make your bombs less appealing.
Gentle Handling: Handle the dough and the formed bombs gently throughout the process. Overworking the biscuit dough can make it tough, and rough handling of the filled balls can compromise the seal. A light touch will yield the best results for a tender crust.
Serve Warm for Best Experience: These cheesecake bombs are at their absolute peak when served immediately after frying and coating. The contrast between the hot, crispy shell and the molten, creamy interior is what makes them so special. While they can be stored, the crispness will diminish over time.
Serving Suggestions for Crispy Cotton Candy Cheesecake Bombs
Decoration
The visual appeal of Crispy Cotton Candy Cheesecake Bombs is a significant part of their charm. For an extra festive touch, consider adding a drizzle of white chocolate or pink candy melts over the powdered sugar dusting. Edible glitter or brightly colored sprinkles can also be scattered over the warm sugar coating for added sparkle. A tiny, decorative umbrella or a playful candy stick inserted into the top can enhance the carnival theme, making them perfect for a child’s birthday party.
Side Dishes
While these bombs are a complete dessert on their own, they pair wonderfully with complementary flavors and textures. A small scoop of vanilla bean ice cream offers a delightful temperature contrast and a classic flavor combination. Fresh berries, such as raspberries or sliced strawberries, provide a refreshing tartness that cuts through the sweetness of the cheesecake and fried dough. For a beverage pairing, a bubbly raspberry soda or a light, fruity punch can enhance the overall festive experience.
Creative Serving Ideas
Imagine a dessert charcuterie board featuring these cheesecake bombs alongside other mini desserts like fruit tarts and chocolate-dipped strawberries. They can also be presented in colorful cupcake liners for an individual, charming presentation. For a truly interactive experience, set up a “decorate your own cheesecake bomb” station with various toppings like sprinkles, chocolate chips, and extra cotton candy. This is a guaranteed hit at any dessert buffet or party, turning a simple treat into a memorable event.
Preparation & Storage
Storing Leftovers
If you find yourself with any leftover Crispy Cotton Candy Cheesecake Bombs, proper storage is key to preserving their quality. It’s best to store them in an airtight container at room temperature for immediate consumption, ideally within 24 hours. This prevents them from becoming stale or absorbing unwanted moisture from the air.
If you anticipate keeping them for longer than a day, refrigeration is the better option. To prevent the bombs from sticking together, place a layer of parchment paper between each layer of bombs within the container. This ensures they retain their individual shapes and prevents the sugary coating from becoming gummy.
Freezing
These delightful treats can also be frozen for future enjoyment, allowing you to enjoy them on demand. Before frying, you can freeze the fully assembled, uncooked cheesecake bombs. Wrap each individual bomb tightly in plastic wrap to prevent freezer burn, and then place them in a freezer-safe bag or container. Ensure the bag is well-sealed to maintain freshness.
When you’re ready to enjoy them, simply remove the desired number of frozen bombs from the freezer. Thaw them completely in the refrigerator overnight before proceeding with the frying process as outlined in the recipe. This ensures they cook through evenly without the exterior becoming overcooked.
Reheating
For the best texture, it is recommended to serve these cheesecake bombs fresh. However, if you need to reheat them, a brief session in the microwave is the quickest method. Microwave one or two bombs at a time for approximately 10-15 seconds. This is usually enough to gently warm the filling without making the exterior soggy.
Alternatively, you can reheat them in a toaster oven or a conventional oven at a low temperature (around 250°F or 120°C) for a few minutes. Keep a close eye on them to prevent any burning or further cooking of the dough. The goal is just to warm them through, retaining as much crispness as possible.
Frequently Asked Questions
-
Can I prepare the cheesecake filling for the Crispy Cotton Candy Cheesecake Bombs ahead of time?
Yes, you absolutely can prepare the cheesecake filling in advance. It’s actually recommended to make the filling at least a few hours before you plan to assemble and fry the bombs. This allows the filling to chill thoroughly in the refrigerator, which firms it up considerably. A well-chilled filling is much easier to scoop and roll into balls, and it’s less likely to leak out of the dough when you’re enclosing it, leading to a neater final product and a more successful frying process.
-
What is the best way to ensure the Crispy Cotton Candy Cheesecake Bombs don’t get soggy after frying?
Achieving and maintaining crispiness is key to these delightful treats. First, ensure your frying oil is at the correct temperature (around 350°F or 175°C) before adding the bombs; if the oil is too cool, they will absorb too much grease and become soggy. Secondly, after frying, it’s crucial to drain them properly on paper towels immediately to wick away any excess oil. Serving them warm also enhances the perception of crispness. If you must store them and reheat, a brief period in a toaster oven at a low temperature is better than a microwave, which tends to steam the exterior.
-
Are there any specific substitutes for the cotton candy flavoring if I can’t find it?
Certainly! If cotton candy flavoring is difficult to source, you have several delicious alternatives. You can opt for other sweet, concentrated flavorings like strawberry, raspberry, blueberry, or even bubblegum extract for a similar whimsical feel. A good quality vanilla extract can also be used, perhaps slightly increased, to provide a rich, classic cheesecake flavor if you prefer something less carnival-like. For a more adult twist, a hint of lemon or lime zest mixed into the filling can offer a delightful tang that complements the sweetness beautifully.