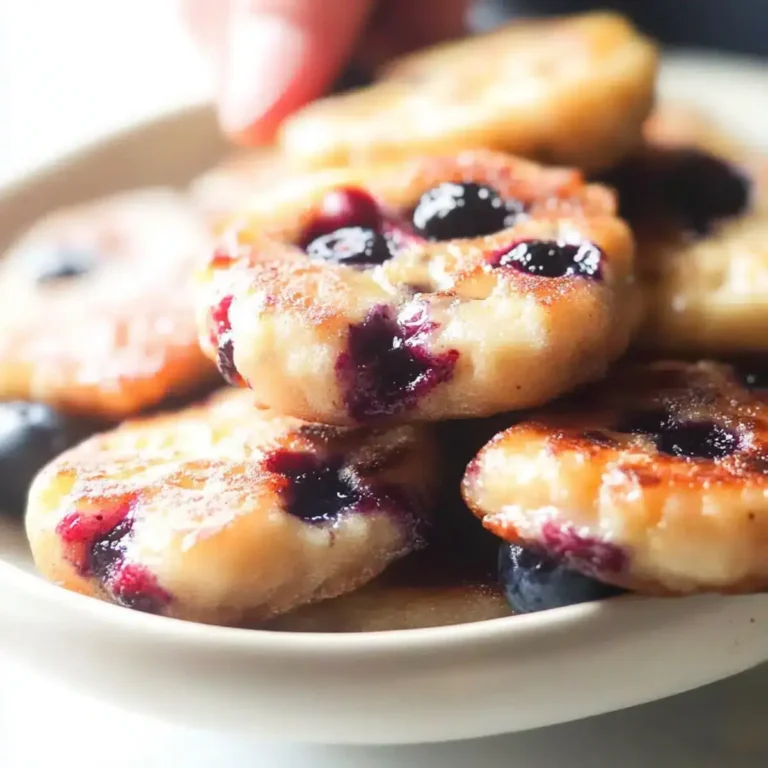
Cranberry Walnut Bread Ultimate recipe
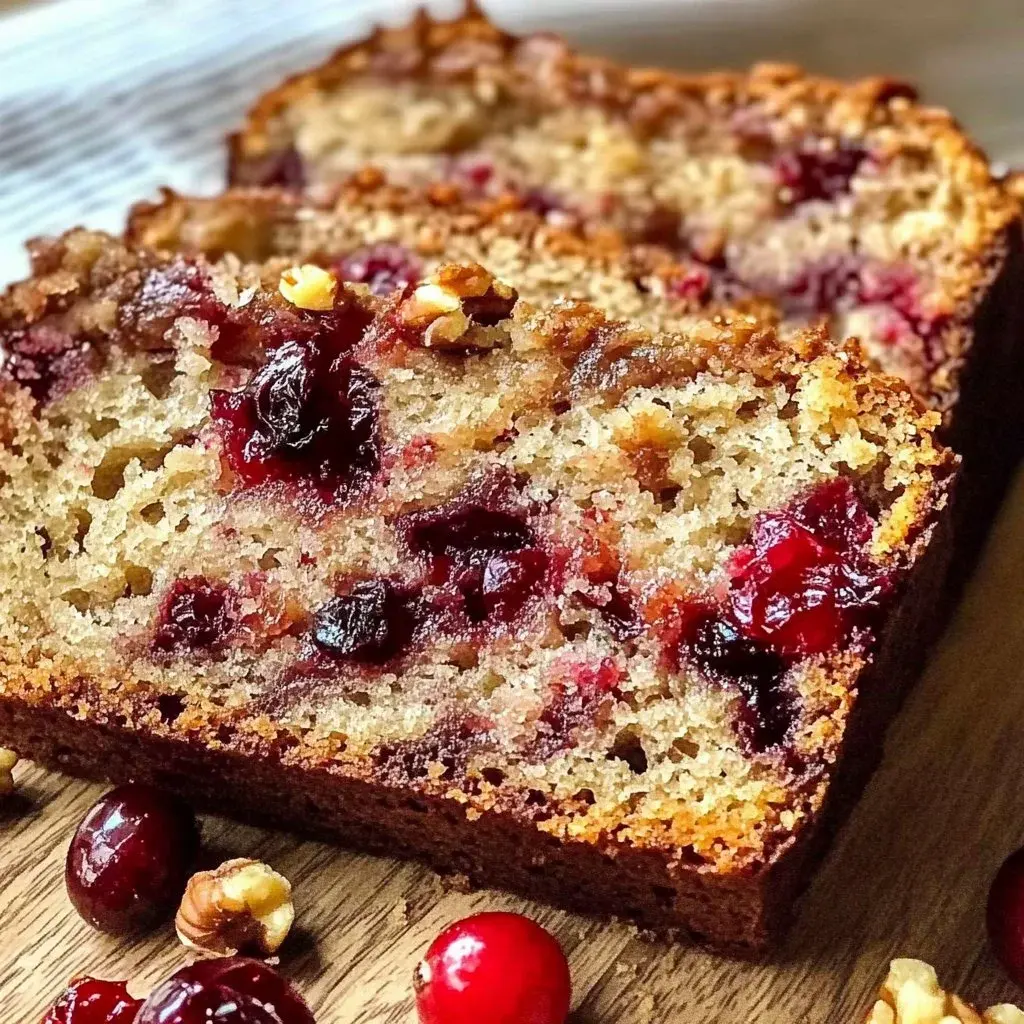
When it comes to baking, a great recipe can bring warmth and joy to any kitchen. Think of the aroma that fills the air as a loaf of Cranberry Walnut Bread bakes—the combination of toasted walnuts and tart cranberries is simply irresistible! This homemade recipe is not just delicious; it’s easy enough for novice bakers to tackle.
Have you ever craved a comforting slice of bread that doubles as a snack, breakfast, or dessert? Cranberry Walnut Bread fits the bill perfectly. This bread is special because it strikes a wonderful balance between sweetness and nuttiness. The walnuts provide a crunch that pairs beautifully with the chewy, tangy cranberries. Imagine slicing into a freshly baked loaf, the steam rising as you prepare to slather on some butter or cream cheese. Can you picture it? This recipe captures those cozy moments, making it a family favorite for years to come.
Why You Will Love This Recipe
- Delicious Flavor Combination: The sweet tartness of cranberries pairs perfectly with the rich, buttery flavor of the walnuts, creating a delightful taste sensation.
- Remarkable Simplicity: Made with common pantry staples, you’ll find it straightforward to whip up this bread without requiring any advanced baking techniques or specialized equipment.
- Unmatched Versatility: This bread is perfect for any time of day, seamlessly fitting into breakfast spreads, afternoon snacks, or even elegant dessert platters.
- Broad Family Appeal: Its comforting flavors and satisfying textures are enjoyed by all ages, making it a guaranteed hit at family gatherings or casual get-togethers.
- Effortless Customization: The recipe is wonderfully adaptable, allowing you to easily adjust ingredients to suit your personal taste preferences or any dietary needs you might have.
This Cranberry Walnut Bread recipe is a beloved tradition for many families, and its originality lies in the perfect blend of ingredients that transform simple elements into a truly remarkable loaf. The key is finding the right balance between sweet and tart—the cranberries offer a delightful zing while the walnuts add a satisfying depth and subtle earthiness. This harmonious marriage of flavors is what sets this bread apart, making each bite a memorable experience.
Customization options also make this recipe shine, offering endless possibilities for personalization. You can substitute or add ingredients based on what you have on hand or your current cravings. Whether it’s adding warm spices like cinnamon or nutmeg for a cozy aroma, or swapping out the traditional cranberries for other berries like blueberries or cherries, the creative potential is truly vast, ensuring you can make this bread uniquely yours.
Perfect for any occasion, this bread shines particularly brightly during the holiday season as a thoughtful edible gift for friends and family, or as a star component of a festive holiday table setting. But don’t feel limited to special events; this loaf is equally delightful on lazy weekend mornings with a cup of coffee, or as a comforting afternoon pick-me-up with a warm mug of tea. Its comforting presence makes any moment feel a little more special.
This recipe brings together the wholesome goodness of nuts and fruits in a way that is both satisfying and visually appealing. The contrast between the deep red of the cranberries and the rich brown of the toasted walnuts creates a beautiful mosaic within the bread’s crumb. It’s a testament to how simple, natural ingredients can combine to create something truly extraordinary and heartwarming. The aroma that wafts from the oven while it bakes is an invitation to pure comfort and joy.
Beyond its exceptional taste and texture, this bread embodies the spirit of home baking. It’s a recipe that encourages connection, whether you’re baking it for yourself to enjoy a quiet moment of indulgence or sharing it with loved ones. The act of creating this bread can be as rewarding as savoring its delicious results. It’s more than just food; it’s an experience that nourishes the soul and brings a touch of sweetness to everyday life.
The satisfaction derived from pulling a golden-brown loaf of Cranberry Walnut Bread from your own oven is unparalleled. It’s a tangible representation of your efforts, a delicious outcome of following simple steps with care. This bread doesn’t require complex pastry techniques or rare ingredients, making it accessible and rewarding for bakers of all skill levels. It’s a true champion of easy yet impressive baking, perfect for any home cook looking to create something special.
Ingredients You Need
Each ingredient in this Cranberry Walnut Bread recipe plays a crucial role in achieving the perfect texture and flavor, so make sure to measure carefully for the best results. The flour serves as the fundamental base, providing structure to the loaf, while the sugar adds essential sweetness that perfectly counteracts the natural tartness of the cranberries, creating a balanced flavor profile. The butter contributes a rich, moist texture, and the buttermilk lends a tender crumb and a slight tang that enhances the overall taste. The combination of baking powder and baking soda ensures a light and airy rise, preventing the bread from becoming dense.
Homemade Cranberry Walnut Bread

This homemade Cranberry Walnut Bread features a delightful balance of sweet cranberries and rich walnuts, making it a perfect treat for any occasion. It's easy enough for novice bakers and incredibly versatile.
- 2 cups all-purpose flour
- 1 cup walnuts, chopped
- 1 cup dried cranberries
- 1/2 cup sugar
- 1/2 teaspoon salt
- 1 tablespoon baking powder
- 1/2 teaspoon baking soda
- 1/2 cup unsalted butter, melted
- 2 large eggs
- 1 cup buttermilk
- 1Preheat your oven to 350°F (175°C) and grease a loaf pan. Gather all your ingredients.
- 2In a large bowl, combine the flour, sugar, salt, baking powder, and baking soda. Stir thoroughly.
- 3In another bowl, whisk together the melted butter, eggs, and buttermilk until combined.
- 4Pour the wet ingredients into the dry ingredients and mix until just combined to avoid overmixing.
- 5Gently fold in the chopped walnuts and dried cranberries.
- 6Transfer the batter to the prepared loaf pan and smooth the top.
- 7Bake for about 50-60 minutes, checking for doneness with a toothpick.
- 8Once baked, allow the bread to cool in the pan for 10 minutes, then transfer to a wire rack. Let cool completely before slicing.
- 9Slice and serve with butter, cream cheese, or your favorite spread.
Keywords: Baking, Cranberry Walnut Bread, Holiday Bread, Homemade Bread, Quick Bread
- all-purpose flour: provides the structure for the bread, ensuring a good crumb.
- sugar: balances the tartness of the cranberries and adds sweetness.
- salt: enhances the overall flavors and balances the sweetness.
- baking powder: acts as a leavening agent for a light and airy texture.
- baking soda: works with acidic ingredients to help the bread rise.
- unsalted butter, melted: adds richness, moisture, and a tender crumb.
- large eggs: bind the ingredients together and contribute to the richness and structure.
- buttermilk: lends a tender crumb and a subtle tanginess to the bread.
- walnuts, chopped: provide a delightful crunch and nutty flavor.
- dried cranberries: offer bursts of tartness and chewy texture throughout the loaf.
You’ll find the specific quantities for each ingredient detailed within the recipe card, which also provides a comprehensive guide for preparing this delicious bread.
Variations
For a burst of vibrant citrus, consider adding a tablespoon of fresh orange zest to the batter along with the wet ingredients. This brightens the overall flavor profile and creates a delightful synergy with the tart cranberries, offering a refreshing twist on the classic recipe. The citrus notes cut through the richness of the bread, making it even more appealing.
If you have a sweet tooth, incorporating a cup of chocolate chips alongside the walnuts and cranberries can transform this bread into a decadent treat. Dark or semi-sweet chocolate chips melt into gooey pockets, adding an extra layer of indulgence that pairs surprisingly well with the fruit and nuts. This variation is perfect for a dessert-style bread or a special weekend indulgence.
For those seeking a more savory experience, you can completely reimagine this recipe by omitting the cranberries and sugar, and instead adding about half a cup of crumbled feta or sharp cheddar cheese. Complement this with a sprinkle of fresh herbs like rosemary or chives folded into the batter. This creates a wonderful savory loaf that’s fantastic served alongside soups or salads, offering a delightful contrast to sweet baked goods.
To make this recipe entirely vegan, you can substitute the eggs with two tablespoons of flaxseed meal mixed with six tablespoons of water, allowed to sit for a few minutes to thicken. For the butter, use your favorite plant-based butter alternative, and for the buttermilk, create a dairy-free version by mixing one cup of unsweetened almond milk with one tablespoon of lemon juice or apple cider vinegar and letting it sit for five minutes. These simple swaps ensure a delicious vegan loaf without compromising on texture or flavor.
If gluten sensitivity is a concern, this Cranberry Walnut Bread can be made gluten-free by using a high-quality 1:1 gluten-free baking flour blend that already contains xanthan gum. Ensure the blend is suitable for quick breads and cakes. The baking time might vary slightly, so keep a close eye on the bread and use the toothpick test to determine doneness. The result is a wonderfully moist and flavorful gluten-free loaf that everyone can enjoy.
How to Prepare Cranberry Walnut Bread
Step 1: Gather and Prepare Your Ingredients
The foundation of any successful baking endeavor lies in meticulous preparation. Begin by preheating your oven to precisely 350 degrees Fahrenheit (175 degrees Celsius). This ensures that the oven is at the optimal temperature from the moment the bread enters, promoting even baking and a perfect rise. Simultaneously, prepare your loaf pan by greasing it thoroughly with butter or cooking spray, and if desired, lightly flouring it; this step is crucial for preventing the bread from sticking and ensuring a clean release after baking, preserving its beautiful shape.
Next, meticulously measure out all your dry and wet ingredients. Accuracy in measuring is paramount in baking, especially for quick breads where the balance of leavening agents, flour, and fat is critical. Ensure your butter is melted but has had a moment to cool slightly; you don’t want it so hot that it starts to cook the eggs when you combine the wet ingredients. Having all components measured and ready, a technique often referred to as “mise en place,” streamlines the entire process and significantly reduces the chances of errors or omissions.
Finally, ensure your walnuts are chopped to your desired size and your dried cranberries are ready to be incorporated. While chopping the nuts, you can toast them lightly in a dry skillet over medium heat for a few minutes until fragrant; this step awakens their flavor and adds a delightful crunch. This initial stage of preparation sets the stage for a smooth and enjoyable baking experience, transforming a list of ingredients into the promise of a delicious, warm loaf.
Step 2: Combine the Dry Ingredients
In a generously sized mixing bowl, the first step is to combine all the dry components of the recipe. This typically includes the all-purpose flour, granulated sugar, salt, baking powder, and baking soda. Whisking these ingredients together thoroughly is essential for several reasons. It ensures that the leavening agents—baking powder and baking soda—are evenly distributed throughout the flour mixture, which is critical for an even rise and a uniform texture throughout the bread. Without proper distribution, you might experience areas that are overly risen or dense.
The act of whisking also helps to aerate the flour, which can contribute to a lighter final texture. It breaks up any clumps that may have formed in the flour or other dry ingredients, ensuring a smooth and homogenous blend. Think of this step as building the structural framework for your bread; a well-mixed dry base is key to the success of the entire bake. This ensures that every bite of your Cranberry Walnut Bread will have the same delightful balance of flavors and textures.
Take your time with this mixing process, using a whisk or a fork to gently but thoroughly combine everything. The goal is a uniform mixture where no single ingredient is visibly concentrated in one area. This careful attention to detail in the initial mixing stages pays dividends when the bread comes out of the oven, presenting a consistent and delightful eating experience from crust to crumb.
Step 3: Mix the Wet Ingredients
In a separate, medium-sized bowl, you will now combine the liquid elements of the recipe. Start by adding the melted, slightly cooled unsalted butter. To this, crack in your two large eggs, ensuring no shell fragments fall in. Finally, pour in the measured amount of buttermilk, which is a key ingredient for lending a tender crumb and a slight tang to the bread.
Using a whisk or a fork, gently beat these wet ingredients together until they are well combined and homogenous. The mixture should be a uniform pale yellow color. It’s important that the melted butter isn’t too hot when you add it to the eggs, as the residual heat could potentially scramble them, leading to an undesirable texture in the final loaf. A gentle whisking motion is all that’s needed here; you’re not aiming for a foamy texture, but rather a smooth, emulsified blend.
This liquid mixture provides the moisture and richness that will bind the dry ingredients together and create the tender, moist crumb characteristic of a well-made quick bread. The buttermilk, in particular, reacts with the baking soda in the dry ingredients to produce carbon dioxide gas, which is essential for the bread’s rise and its delicate texture. This step is about bringing together the elements that will give your Cranberry Walnut Bread its signature moistness and tender bite.
Step 4: Combine Wet and Dry Mixtures
Now comes the exciting part where the two components of your bread come together. Create a well in the center of your bowl of dry ingredients. Pour the combined wet ingredients from the second bowl into this well. Begin to gently fold the wet ingredients into the dry ingredients using a spatula or a wooden spoon. The key here is to mix only until the ingredients are just combined and no dry streaks of flour remain.
It is absolutely crucial to avoid overmixing at this stage. Overmixing develops the gluten in the flour too much, which will result in a tough, dense, and chewy loaf rather than a light and tender one. The batter is ready when it’s still lumpy; some small pockets of unmixed ingredients are actually preferable to a perfectly smooth batter. This slight lumpiness is your indicator that you haven’t overworked the dough, preserving the tenderness that makes quick breads so appealing.
The transition from separate bowls to a cohesive batter is rapid. Work quickly but gently, ensuring all the flour is incorporated without overdoing it. You should be able to see streaks of flour disappearing, but the batter will retain a certain thickness and perhaps a few small lumps. This is the perfect consistency to proceed to the next step, where the star ingredients—cranberries and walnuts—will be added.
Step 5: Fold in the Cranberries and Walnuts
With the batter just combined, it’s time to add the stars of the show: the dried cranberries and chopped walnuts. Add these delightful mix-ins directly to the bowl with the batter. Using your spatula or wooden spoon, gently fold them into the mixture. The objective is to distribute them evenly throughout the batter without overworking the dough.
The motion of folding is a gentle one, scooping from the bottom of the bowl up and over the ingredients. This incorporates the cranberries and walnuts without deflating the batter or further developing the gluten. You want to see the vibrant red of the cranberries and the nutty pieces dispersed throughout, promising bursts of flavor and texture in every slice. The batter will become noticeably thicker and more textured with these additions.
Ensure that the cranberries and walnuts are evenly distributed. This means that each slice of your finished bread will have a delightful balance of the soft bread, chewy cranberries, and crunchy walnuts. A good distribution ensures that you get the full flavor experience with every bite, making the bread incredibly satisfying and enjoyable. Don’t be afraid to gently press down the batter in the pan to ensure these mix-ins are well-incorporated.
Step 6: Prepare the Batter for Baking
Once the cranberries and walnuts are beautifully integrated into the batter, the next step is to transfer this mixture into your prepared loaf pan. Use your spatula to scrape every last bit of this delicious batter from the bowl into the pan. This ensures you’re getting the maximum amount of bread from your efforts and that no precious flavor is left behind.
Once the batter is in the pan, use the back of your spatula or the spoon to gently smooth the top of the batter. This helps to create an even surface, which will promote uniform baking and result in a loaf that has a lovely, flat top or a gently domed crust, rather than an uneven one. While overmixing is the enemy of tenderness, a smooth top surface is visually appealing and aids in proper heat distribution during baking. The goal is a neat, contained shape ready for the oven.
Take a moment to admire the texture of the batter, studded with cranberries and walnuts, a preview of the deliciousness to come. Ensure the batter is distributed evenly within the pan. This preparation ensures that when the bread bakes, the heat penetrates evenly, leading to a perfectly cooked loaf from edge to center. The visual appeal of the batter ready for baking is a promise of the comforting aroma that will soon fill your kitchen.
Step 7: Bake the Bread to Perfection
Carefully place the prepared loaf pan into the center of your preheated oven. Baking typically takes between 50 to 60 minutes, but this can vary slightly depending on your oven’s calibration and the specific pan you use. During the baking process, the leavening agents will react to the heat, causing the batter to rise and form a beautiful, golden-brown crust. The aroma that emanates from your oven during this time is truly intoxicating, a warm and comforting scent that signifies home baking at its finest.
To check for doneness, the most reliable method is the toothpick test. After about 50 minutes, gently insert a wooden toothpick or a thin skewer into the thickest part of the bread, avoiding any large pockets of cranberries or walnuts if possible. If the toothpick comes out clean, meaning it has no wet batter clinging to it, your bread is perfectly baked. If there is still wet batter, continue baking in increments of 5-7 minutes, re-testing each time, until the toothpick emerges clean.
The exterior of the bread should be a deep golden brown, and it may even slightly pull away from the sides of the pan. The top should feel firm to the touch, and when gently tapped, it should sound somewhat hollow. Patience is key during this stage; resisting the urge to open the oven door too frequently, especially in the first 30-40 minutes, will help maintain a consistent oven temperature and ensure a better rise and texture for your Cranberry Walnut Bread.
Step 8: Initial Cooling in the Pan
Once the baking time is complete and your Cranberry Walnut Bread has passed the toothpick test, it’s important to allow it to cool properly before attempting to remove it from the pan. Carefully remove the hot loaf pan from the oven using oven mitts. Place the pan on a heat-resistant surface, such as a wire cooling rack or a sturdy trivet, to begin the cooling process.
Allow the bread to cool in the pan for approximately 10 to 15 minutes. This initial cooling period is critical. During baking, the structure of the bread is still quite delicate. Allowing it to cool slightly in the pan helps to firm up the edges and the bottom of the loaf, making it more stable and less prone to breaking or crumbling when you attempt to unmold it. It allows the internal structure to set slightly.
Think of this step as giving the bread a moment to gather its strength after its fiery journey in the oven. This short cooling period in the pan is a small but significant step in ensuring that your beautiful loaf remains intact and presents perfectly. It’s the transition phase between the intense heat of the oven and the final resting on the cooling rack.
Step 9: Complete Cooling on a Wire Rack
After the initial 10-15 minutes of cooling in the loaf pan, it’s time to fully release your Cranberry Walnut Bread. Gently run a thin knife or spatula around the edges of the pan to loosen the bread, ensuring it’s completely free from the sides. Then, carefully invert the pan onto a wire cooling rack. The bread should slide out easily; if it resists, a few gentle taps on the bottom of the pan might help.
Place the bread directly onto the wire rack, ensuring it is positioned so that air can circulate freely around the entire loaf. This is a vital step for preventing a soggy bottom. If the bread were left to cool in the pan or on a solid surface, steam would become trapped underneath, leading to condensation and a potentially unappealing moist or mushy texture. The wire rack allows moisture to dissipate, ensuring the crust remains crisp and the interior stays perfectly tender.
Resist the temptation to slice into the bread while it’s still warm. Allowing it to cool completely to room temperature, which usually takes at least an hour or two, allows the internal structure to fully set and the flavors to meld. Slicing a warm loaf can result in a gummy texture and can make the bread fall apart. Patience here is rewarded with the perfect slice and the best possible texture and flavor. This final cooling stage is where the bread truly reaches its peak deliciousness.
Step 10: Slice and Serve Your Masterpiece
Once your Cranberry Walnut Bread has reached room temperature and its structure has fully set, it is ready to be sliced and enjoyed. Use a sharp serrated knife for the cleanest cuts, as this type of knife is ideal for slicing through the crust without crushing the soft interior or disturbing the delicate crumb. Slice the loaf into your preferred thickness, typically about 1/2 to 3/4 inch thick slices.
Serve your freshly baked Cranberry Walnut Bread as is, or elevate the experience with your favorite accompaniments. It’s wonderful toasted to a light crisp, or enjoyed at room temperature. Delicious additions include a generous spread of creamy butter, tangy cream cheese, or a drizzle of honey or maple syrup. Each serving is a testament to the simple joys of homemade baking, a perfect balance of sweet, tart, and nutty flavors.
This bread is incredibly versatile and can be enjoyed at any time of day. Whether it’s part of a leisurely breakfast, a satisfying afternoon snack, or a delightful dessert, each slice offers a comforting and delicious experience. Appreciate the textures and flavors, the tender crumb, the chewy cranberries, and the satisfying crunch of the walnuts. You’ve created something truly special.
Pro Tips for Cranberry Walnut Bread
Don’t Overmix: This is perhaps the most critical tip for quick breads. Overmixing develops the gluten in the flour, resulting in a tough, dense loaf. Mix the wet and dry ingredients only until they are just combined, and embrace a few lumps in the batter. A slightly lumpy batter is a sign of a tender loaf.
Measure Accurately: Baking is a science, and precision matters, especially with flour. Use dry measuring cups for flour, spooning it in and leveling off the excess rather than scooping directly from the bag, which can compact the flour. Similarly, measure liquids in liquid measuring cups at eye level. Accurate measurements ensure the correct ratio of ingredients for optimal texture and rise.
Toast Your Walnuts: For an enhanced nutty flavor and a more satisfying crunch, lightly toast your chopped walnuts before adding them to the batter. Spread them on a baking sheet and bake at 350°F (175°C) for about 5-8 minutes, or toast them in a dry skillet over medium heat, stirring frequently, until fragrant. Let them cool before folding them in.
Quality Ingredients Make a Difference: While this is a simple recipe, using good quality ingredients will elevate the final product. Opt for fresh butter, good quality buttermilk, and flavorful walnuts and cranberries. The difference in taste and texture can be quite noticeable, turning a good loaf into an exceptional one.
Watch for Doneness: Ovens can vary, so don’t rely solely on the suggested baking time. Use the toothpick test as your primary indicator. Insert a toothpick into the center of the loaf; if it comes out clean, the bread is done. If it has wet batter, bake for a few more minutes and re-test. This prevents overbaking, which leads to a dry loaf.
Serving Suggestions for Cranberry Walnut Bread
Decoration
For a simple yet elegant presentation, consider dusting the top of the cooled loaf with a light dusting of powdered sugar. This adds a touch of sweetness and a beautiful, snowy appearance, especially fitting for the holiday season. Alternatively, you can prepare a simple glaze by whisking together powdered sugar with a tablespoon or two of milk or lemon juice until smooth and drizzling it artfully over the cooled bread. A few extra chopped walnuts or cranberries sprinkled on top of the glaze before it sets can add a lovely textural and visual contrast.
Side Dishes
Cranberry Walnut Bread makes an excellent accompaniment to a variety of meals. It pairs wonderfully with a hearty seafood chowder or a warm, comforting bowl of vegetable soup. For a lighter meal, serve slices alongside a fresh green salad with a vinaigrette dressing. Its slightly sweet and nutty profile can balance the flavors of savory dishes, making it a versatile addition to any table.
Creative Serving Ideas
Beyond simple slices, consider transforming this bread into French toast for a decadent breakfast or brunch. Soak thick slices in an egg and milk mixture, perhaps with a hint of cinnamon, and pan-fry until golden brown. Another creative idea is to make small, bite-sized cubes and toast them lightly to serve as croutons for a fall harvest salad, adding a unique sweet and savory element. You could also lightly toast slices and top them with a dollop of whipped cream and a few fresh berries for an easy, elegant dessert.
For a truly special occasion, consider making mini loaves or individual muffins from the batter. These are perfect for gifting or for creating a beautiful brunch spread. The individual portions are easier to serve and allow guests to enjoy their own personal treat. They also bake faster, so they can be a great option when you’re short on time but still want to create something special and homemade.
This bread is also fantastic served as part of a cheese board. The combination of sweet, tart, and nutty flavors can complement a variety of cheeses, from sharp cheddar to creamy brie. A slice of toasted Cranberry Walnut Bread provides a wonderful textural contrast and a palate-cleansing element between bites of cheese, making it a sophisticated addition to any entertaining spread.
Preparation & Storage
Storing Leftovers
To keep your Cranberry Walnut Bread fresh and delicious for as long as possible, proper storage is key. Once the bread has cooled completely to room temperature, wrap it tightly in plastic wrap or aluminum foil. Ensure there are no gaps where air can enter, as air exposure is the primary cause of staleness. Place the wrapped loaf in an airtight container. Stored this way at room temperature, the bread should remain fresh and enjoyable for about 2 to 3 days.
Alternatively, you can slice the bread before storing it. If you opt for sliced storage, you can wrap individual slices tightly in plastic wrap and then store them together in an airtight container or a resealable plastic bag. This makes it incredibly convenient to grab just one slice at a time without having to unwrap the entire loaf, preserving the freshness of the remaining slices. This method is particularly useful if you know you won’t finish the entire loaf within a few days.
For optimal freshness, avoid storing the bread in the refrigerator unless absolutely necessary due to extreme humidity or high temperatures. Refrigeration can sometimes dry out baked goods faster. If you do need to refrigerate it, ensure it’s well-wrapped, and be prepared for a slightly drier texture upon removal, which can often be remedied by toasting.
Freezing
Cranberry Walnut Bread freezes exceptionally well, making it a fantastic option for enjoying your homemade treat long after it’s baked. The best way to freeze it is by slicing the cooled loaf first. This allows for convenient portioning and easy thawing of individual servings. Wrap each slice securely in plastic wrap, ensuring it’s completely sealed to prevent freezer burn. For an extra layer of protection, place the wrapped slices into a freezer-safe resealable bag or an airtight container.
When freezing, it’s also a good idea to label the bag or container with the date. Properly wrapped, Cranberry Walnut Bread can maintain its quality in the freezer for up to 3 months. This means you can bake a large batch and have delicious homemade bread on hand whenever a craving strikes, without compromising on taste or texture. It’s a great way to always have a comforting slice ready.
Before freezing, ensure the bread is completely cool. Freezing a warm loaf will lead to condensation inside the packaging, resulting in ice crystals and potential freezer burn, which degrades the quality. Taking these simple steps ensures that when you’re ready to enjoy your frozen bread, it will taste almost as fresh as the day it was baked, offering a convenient solution for long-term enjoyment.
Reheating
When you’re ready to enjoy your frozen Cranberry Walnut Bread, thawing is a simple process. For the best results, remove the desired number of slices from the freezer and place them on a plate or a small baking sheet. Allow them to thaw at room temperature for about 30-60 minutes, or until they reach a soft consistency. This method is gentle and helps maintain the bread’s texture.
If you prefer your bread warm, or if you’re reheating slightly dried-out slices, a toaster or toaster oven is an excellent option. Simply place the slices in the toaster and toast them to your desired level of crispness. This will revive the bread’s texture and bring back its comforting warmth. You can also gently warm slices in a conventional oven preheated to a low temperature (around 300°F or 150°C) for a few minutes until heated through.
For larger portions or a whole loaf that’s been frozen, you can also reheat it in a conventional oven. Wrap the loaf or larger pieces in foil and heat at around 300°F (150°C) for about 10-15 minutes, or until thoroughly heated. This method helps to retain moisture while warming the bread evenly. Avoid using the microwave for reheating, as it can often result in a rubbery texture.
Frequently Asked Questions
-
Can I prepare this Cranberry Walnut Bread ahead of time for a special occasion?
Absolutely! This Cranberry Walnut Bread is an excellent candidate for advance preparation. You can bake the loaf a day or two in advance and store it properly at room temperature in an airtight container. This allows the flavors to meld slightly, often resulting in an even more delicious bread. For longer storage, consider slicing it and freezing it as described above, which can extend its freshness for weeks, ensuring you have a delightful treat ready whenever you need it.
-
What are the best substitutions if I don’t have some of the ingredients on hand, such as buttermilk or walnuts?
If you’re out of buttermilk, you can easily make a substitute by mixing 1 cup of milk (dairy or non-dairy like almond or soy) with 1 tablespoon of lemon juice or white vinegar, letting it sit for 5-10 minutes until it slightly curdles. For walnuts, you can substitute them with pecans, almonds, or even sunflower or pumpkin seeds for a nut-free option. If you have allergies, omitting them entirely is also a perfectly acceptable choice, though it will slightly alter the texture and flavor profile. For those looking for gluten-free options, a 1:1 gluten-free baking flour blend usually works well, but always check the blend’s composition for suitability in quick breads.
-
How can I make this Cranberry Walnut Bread more festive for the holidays or other celebrations?
To give your Cranberry Walnut Bread a festive flair, consider incorporating warm spices like 1/2 teaspoon of cinnamon or a pinch of nutmeg into the dry ingredients. These spices add a cozy aroma and flavor that perfectly complements the holiday season. Another festive touch is to add a tablespoon of orange zest to the wet ingredients; the citrus pairs beautifully with cranberries and adds a bright, celebratory note. For a visually stunning and celebratory finish, consider a simple glaze made with powdered sugar and orange juice, drizzled over the cooled loaf, perhaps with some decorative candied cranberries or chopped nuts sprinkled on top.