Challah French Toast Recipe – Fluffy & Flavorful!
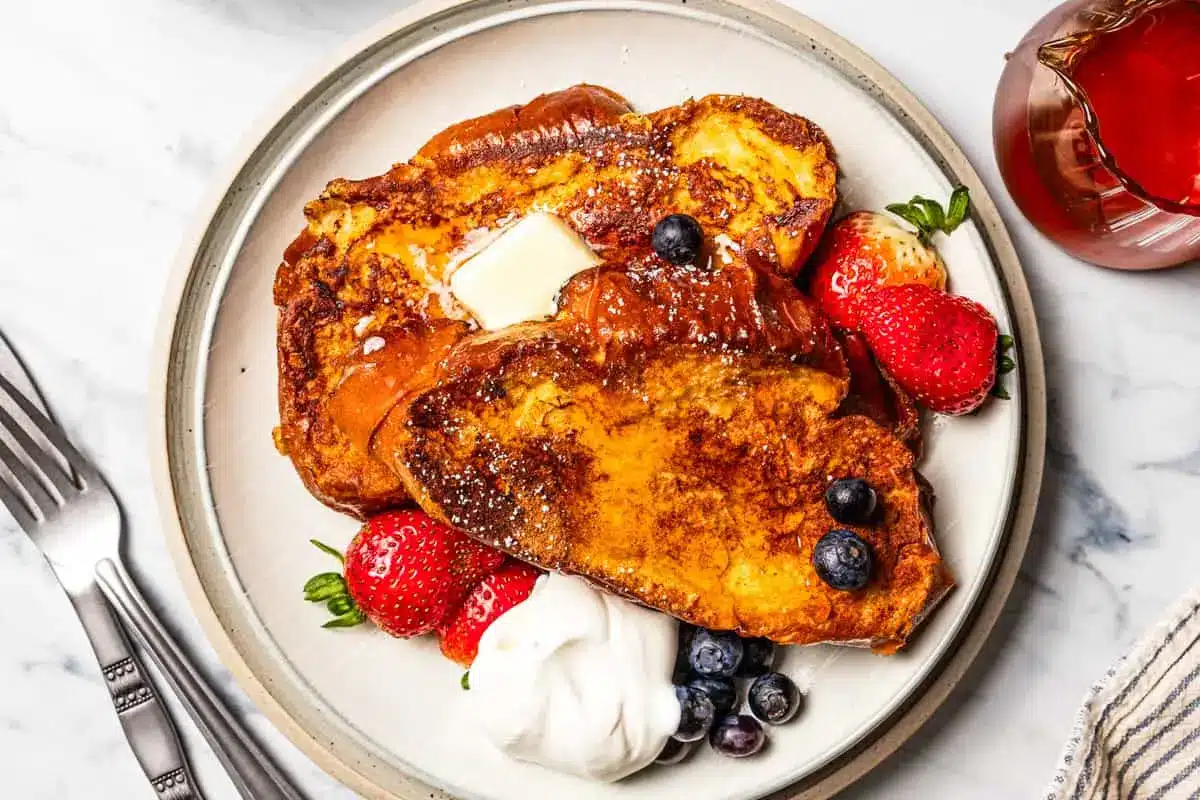
This thick, fluffy challah French toast is the ultimate way to elevate your breakfast game. Soaked in a rich custard infused with cinnamon, vanilla, and freshly grated nutmeg, each slice transforms into a golden, spongy delight. Challah bread, with its naturally sweet and eggy composition, is the secret ingredient that makes this classic dish truly exceptional.
As the days grow shorter and a cozy atmosphere settles in, our weekend mornings become a sanctuary for comforting culinary creations. Imagine a spread featuring baked French toast, fluffy buttermilk pancakes, and generous stacks of challah French toast, all ready to be drenched in sweet maple syrup. This particular recipe, prepared the traditional way with pillowy bread slices enveloped in a creamy, decadent custard and then perfectly grilled, has been a cherished family favorite for years, consistently delivering the most delightful French toast experience.
Why You Will Love This Recipe
- Fluffy Texture: The inherent lightness of challah bread ensures a wonderfully airy French toast that’s never dense or heavy.
- Superior Custard Absorption: Day-old challah bread, when properly dried, acts like a sponge, perfectly soaking up the rich, flavorful custard.
- Quick and Easy Preparation: Despite its impressive taste and texture, this recipe is surprisingly simple to make, perfect for busy mornings.
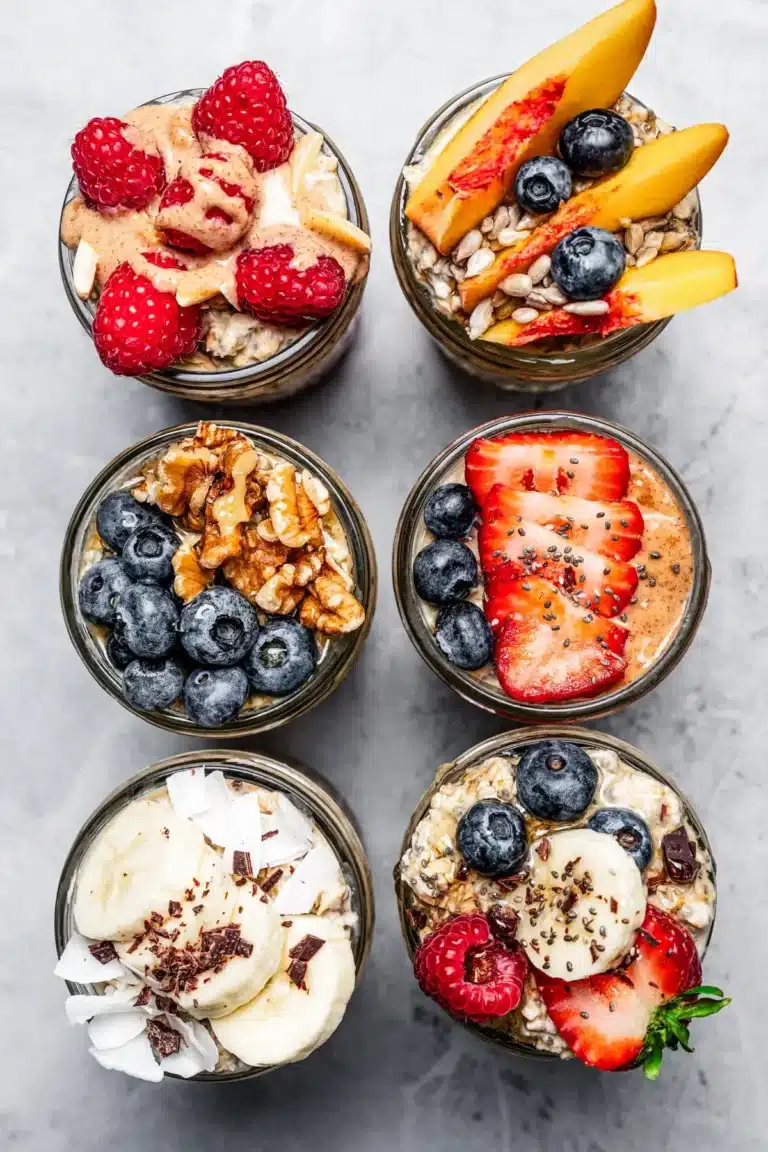
- Versatile Toppings: Whether you prefer classic maple syrup and fresh fruit or something more decadent, this French toast is a fantastic canvas for your favorite toppings.
- Uses Stale Bread: It’s an ingenious and delicious way to repurpose slightly older bread, reducing food waste while creating a delightful meal.
Ingredients You Need
The foundation of truly spectacular French toast lies in the quality of its components, and this recipe is no exception. By selecting fresh, high-quality ingredients, you ensure a depth of flavor and a perfect texture that will tantalize your taste buds. Even simple additions like spices and extracts play a crucial role in creating that comforting, aromatic experience we all crave in a breakfast dish.
Challah French Toast

Thick, fluffy challah French toast soaked in an eggy custard with cinnamon, vanilla, and grated nutmeg. Golden, spongy challah bread is the best way to level up classic French toast!
- 1 loaf of challah bread, stale
- 6 large eggs
- 2 cups half and half (milk or heavy cream are also okay to use)
- 2 teaspoons pure vanilla extract
- pinch of grated nutmeg
- pinch of ground cinnamon
- 3-4 tablespoons unsalted butter, for cooking
- French toast toppings of choice, such a maple syrup, whipped cream, fresh fruit, or confectioners' sugar
- 1Slice the bread and leave out overnight. If your challah is fresh, cut it into thick slices and lay them out on a cooling rack to dry overnight.
- 2Prepare two baking sheets. Line both baking sheets with parchment paper and place wire racks on top of each sheet. You’ll use one to drain the challah after it soaks in the custard. The second rack will be used to keep the cooked toast warm in the oven (make sure at least one of the racks is oven-safe).
- 3Make the custard. In a medium bowl, whisk the eggs, half & half, warm honey, salt, vanilla, nutmeg, and cinnamon until thoroughly combined, then pour into a 9x9 baking dish.
- 4Add the bread. Soak the dried bread slices in the custard, 2 slices at a time, for about 2 minutes per side. Then set the soaked bread on the wire rack (the one outside the oven) so any extra custard can drip off before cooking. Sprinkle each slice with a pinch or two of cinnamon to taste.
- 5Cook. After soaking for about 3 to 4 minutes, cook the soaked bread on a greased griddle or pan, buttered with 1 tablespoon of butter, over medium heat. Don’t overcrowd the pan/griddle (cook two slices at a time). Cook the bread slices on each side for about 2 minutes. Check for doneness judging by color. Each side should be golden brown. Make sure the slices cook through and evenly (rotate them around if your pan or griddle has hot spots). Add 1/2 tablespoon of butter to the griddle after each batch of French toast has cooked, and let it foam and subside before adding the next batch.
- 6Keep warm in the oven. This is optional, but a great way to serve your toast warm. Once they are cooked, place them on the rack that's inside the oven, batch by batch, to keep warm.
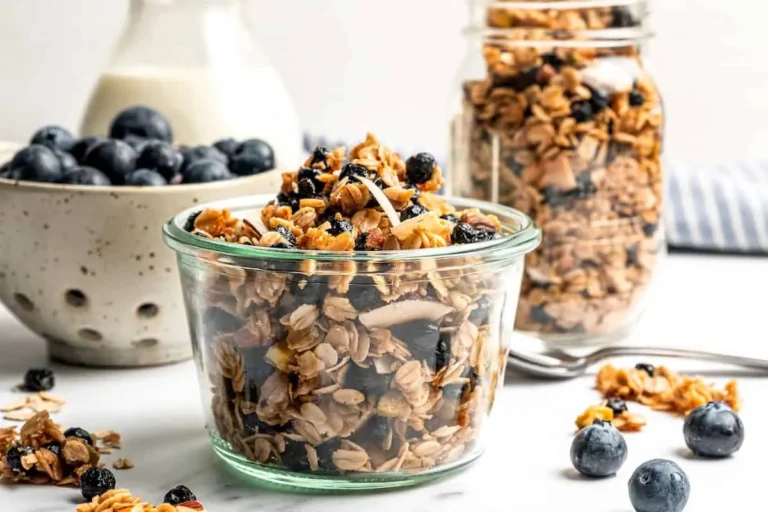
- 7Serve. Serve French toast with homemade whipped cream, maple syrup, and blueberries.
Keywords: French toast, challah, breakfast, brunch, sweet, eggy custard, cinnamon, nutmeg, vanilla
- challah bread, stale: This sweet, rich bread is essential for its soft texture and eggy nature, similar to brioche but typically made without dairy.
- eggs: The binder for our custard, providing richness and structure to the soak.
- half and half: Creates a luxurious, creamy custard; milk or heavy cream can be substituted.
- honey: Adds a subtle sweetness and depth of flavor to the custard; can be warmed slightly to ensure smooth integration.
- kosher salt: A pinch balances the sweetness and enhances the overall flavor profile of the custard.
- pure vanilla extract: Infuses the custard with its classic warm, comforting aroma and taste.
- grated nutmeg: Freshly grated nutmeg offers a vibrant, warm spice that complements the vanilla beautifully.
- ground cinnamon: Used both in the custard and for sprinkling, it adds that quintessential French toast warmth.
- unsalted butter: Crucial for achieving that perfect golden-brown sear and adding a rich flavor during cooking.
- French toast toppings of choice: From maple syrup and whipped cream to fresh berries and powdered sugar, personalize your masterpiece.
Full ingredient quantities and detailed instructions are readily available in the recipe card for your convenience.
Variations
While the classic challah French toast is undeniably divine, the beauty of this recipe lies in its adaptability. You can effortlessly transform it into something new and exciting with a few simple tweaks, catering to different dietary preferences and flavor profiles.
Vegan Delight: For a plant-based version, simply swap the eggs and half-and-half with a rich, unsweetened plant-based milk like almond or soy, and use a flax egg or commercial egg replacer. Ensure your challah bread is dairy-free, as many traditional challah recipes are, then proceed with the rest of the recipe. The result is a surprisingly decadent vegan French toast that’s just as satisfying.
Low-Carb Indulgence: To make this recipe lower in carbohydrates, opt for a keto-friendly bread substitute that mimics the texture of challah. Almond flour or coconut flour-based loaves work wonderfully. For the custard, use a sugar-free sweetener like erythritol or stevia in place of honey, and thicken it with a touch of xanthan gum if needed. This adaptation allows you to enjoy the luxurious flavors without the carb overload.
Savory Twist: Imagine French toast as a base for savory delights. Omit the honey and cinnamon from the custard, and instead, add a pinch of black pepper, a dash of garlic powder, and some finely chopped fresh herbs like chives or parsley. Serve this savory challah French toast with a side of crispy bacon, a fried egg, or even some sautéed mushrooms for a complete breakfast or brunch experience that breaks from the traditional sweet profile.
Spiced Sensation: Elevate the spice profile by adding a pinch of cardamom or a tiny amount of ground ginger to the custard. These warm spices pair beautifully with the cinnamon and nutmeg, creating an even more complex and aromatic flavor. You could also add a hint of citrus zest, like orange or lemon, for a bright, refreshing note that cuts through the richness.
Fruity Infusion: Gently fold in a small amount of fruit puree, such as mashed banana or pumpkin puree, into the custard mixture before soaking the bread. This not only adds a subtle fruity flavor but also contributes to a slightly denser, more moist texture in the finished French toast. Ensure the puree is well-drained to avoid making the custard too watery.
How to Prepare challah french toast
Step 1: Prepare the Bread
The secret to perfect French toast lies in its texture, and for challah, this means ensuring it’s slightly stale and dry. This crucial step allows the bread to absorb the custard without becoming a soggy mess, ensuring a delightful balance between a creamy interior and a perfectly crisp exterior. Take your loaf of challah, and using a serrated knife, carefully slice it into thick pieces, about 1 to 1.5 inches wide.
Once sliced, arrange these challah pieces in a single layer on a wire cooling rack. This allows air to circulate around each slice, facilitating even drying. Place the rack on top of a baking sheet to catch any stray crumbs or moisture. For the best results, leave the bread slices out overnight at room temperature. This slow drying process is ideal.
If you find yourself short on time and didn’t prepare the bread the day before, don’t despair. You can achieve a similar dryness by preheating your oven to a low temperature, around 300°F (150°C). Place the challah slices on a baking sheet lined with parchment paper and bake for approximately 10-15 minutes, flipping them halfway through. The goal is to dry them out, not to toast them to a golden brown. They should feel firm to the touch but not brittle.
Step 2: Craft the Custard
This is where the magic truly begins to happen, as we create the luscious, flavor-packed custard that will transform ordinary bread into extraordinary French toast. In a medium-sized mixing bowl, crack your large eggs. Aim for the freshest eggs you can find, as they will contribute the most to the richness and color of the final dish.
Next, pour in the half-and-half. This dairy component is key to achieving that wonderfully creamy texture, but feel free to experiment with whole milk for a slightly lighter version or heavy cream for an ultra-decadent treat. Add the honey; warming it gently in the microwave for about 30 seconds will ensure it dissolves seamlessly into the mixture, preventing any clumpy residue and enhancing its sweetness.
Now, introduce the flavor enhancers: a generous teaspoon of pure vanilla extract, a pinch of freshly grated nutmeg for that warm, aromatic spice, and a whisper of ground cinnamon. Don’t forget a pinch of kosher salt, which is vital for balancing the sweetness and bringing out the full spectrum of flavors. Whisk all these ingredients together vigorously until the mixture is smooth, homogenous, and shows no streaks of egg white. Once perfectly blended, pour this beautiful custard into a shallow baking dish, one that’s wide enough to accommodate your bread slices comfortably.
Step 3: Soak the Challah
With your dried challah slices ready and your luscious custard prepared, it’s time to bring them together. This soaking process is a delicate dance; you want the bread to absorb the custard’s rich flavor without becoming waterlogged. Working with one or two slices at a time, gently submerge them into the custard mixture. Allow each side to soak for approximately two minutes.
The bread should begin to feel heavier as it draws in the liquid, but it shouldn’t become overly saturated. Once each slice has had its requisite soak, carefully remove it from the custard. As you lift the soaked bread, you’ll notice some excess liquid dripping back into the dish. This is perfectly normal and helps prevent sogginess.
Now, strategically place the soaked challah slices onto a wire rack that is positioned over a baking sheet. This setup allows any remaining excess custard to drip away freely, ensuring that the bread retains an optimal moisture level for cooking. As you continue with subsequent batches, you can use this rack to hold the prepared slices while you work through the rest of the bread, giving them a few extra minutes to drain.
Step 4: Add the Cinnamon Sprinkle
Before these beautifully soaked challah slices meet the heat of the griddle, there’s a small but impactful step that adds an extra layer of aroma and flavor. This is the perfect moment to introduce a delicate dusting of ground cinnamon directly onto the surface of each soaked bread slice. Use your fingertips or a small sieve to lightly sprinkle a pinch or two of cinnamon over the top.
This extra layer of cinnamon will toast slightly as the French toast cooks, releasing an even more intense and comforting aroma. It also adds a visually appealing touch, creating a beautiful speckled finish on the golden-brown toast. Be judicious with your application; you want a noticeable flavor and scent, but not so much that it becomes overpowering.
Once sprinkled, allow the bread slices to rest on the wire rack for an additional 2 to 3 minutes. This short resting period serves a dual purpose. Firstly, it allows any residual excess custard to drip off, further ensuring a less soggy end product. Secondly, it gives the cinnamon a moment to adhere to the damp surface of the bread, preventing it from simply falling off during the cooking process. This small, intentional step contributes significantly to the overall quality of your finished French toast.
Step 5: Cook to Golden Perfection
Now it’s time to bring your challah French toast to life on the heat, aiming for that irresistible golden-brown exterior. Place a large non-stick skillet or a griddle over medium heat. Allow it to heat up properly before adding any butter; a properly heated pan is crucial for achieving an even sear and preventing sticking. Add about 1 tablespoon of unsalted butter to the hot pan.
Let the butter melt and foam; this indicates the pan is ready. Carefully place the soaked and drained challah slices onto the buttered surface. It’s important not to overcrowd the pan, as this can lower the temperature and lead to uneven cooking and steaming rather than searing. Cook two to three slices at a time, depending on the size of your pan.
Cook each side for approximately 2 to 3 minutes, or until a beautiful golden-brown crust has formed. You can check for doneness by gently lifting a corner with a spatula. Once one side is perfectly golden, carefully flip the slices to cook the other side. Continue this process for all your soaked bread slices, adding another half tablespoon of butter to the pan between each batch. This ensures each new batch starts with a fresh, well-buttered surface for optimal browning and flavor. Watch closely to ensure the bread cooks through evenly and doesn’t burn.
Step 6: Keep Warm and Serve
As you masterfully cook each batch of challah French toast to golden perfection, the challenge becomes keeping them warm and ready to serve simultaneously. This is where a simple oven technique comes into play, ensuring that everyone at the table enjoys their French toast at the ideal temperature. Preheat your oven to a low setting, around 190°F (88°C). Line a separate baking sheet with parchment paper and place an oven-safe wire rack on top.
Once a batch of French toast is perfectly cooked, carefully transfer these golden slices to the prepared wire rack in the oven. They will rest there, gently warming, while you finish cooking the remaining batches. This method prevents them from becoming soggy, as the air circulation allows any residual steam to escape.
When all the challah French toast has been cooked and kept warm in the oven, it’s time for the grand finale: serving. Arrange the warm slices attractively on a serving platter. Crown them with your favorite toppings – a generous drizzle of warm maple syrup, a dollop of homemade whipped cream, a scattering of fresh, vibrant berries, or a light dusting of powdered sugar. The combination of the warm, fluffy toast and the delightful toppings creates a breakfast experience that is truly unforgettable and perfect for any occasion.
Pro Tips for challah french toast
Embrace the Stale Bread: The absolute cornerstone of excellent French toast is using day-old, slightly stale bread. Fresh bread will absorb too much custard and turn mushy. If your challah is fresh, slice it and leave it out on a wire rack overnight to dry. For a quicker fix, a short stint in a low oven can also work wonders to achieve that ideal, slightly dry texture, ensuring it soaks up flavor without falling apart.
Whisk with Precision: When preparing your custard, thorough whisking is non-negotiable. Ensure all the egg yolks and whites are completely incorporated with the liquid ingredients. This prevents pockets of uncooked egg white from appearing in your cooked French toast and guarantees a smooth, uniform custard that coats every bite with creamy goodness. A well-emulsified custard is key to a luxurious texture.
Mind the Soak Time: Over-soaking is the enemy of crispy French toast. While challah is designed to absorb, too much time in the custard will lead to a soggy result. Aim for about 2 minutes per side, allowing the bread to become saturated but not waterlogged. Immediately after soaking, letting the slices drain on a wire rack for a few minutes before cooking helps remove any excess liquid.
Medium Heat is Your Friend: Cooking French toast on high heat will result in burnt exteriors and undercooked interiors. Medium heat allows the custard to cook through gently while the exterior develops a beautiful, even golden-brown color. Keep an eye on your pan and adjust the heat as needed, especially when adding more butter for subsequent batches. Patience here yields superior results.
Butter, Butter, Butter: Don’t skimp on the butter when cooking. Each batch of French toast should be introduced to a freshly buttered pan. The butter not only prevents sticking but also contributes significantly to the rich flavor and the coveted golden-brown crust. Using about a tablespoon of butter per batch ensures each slice gets that perfect sear.
Consider a Draining Rack: While not strictly mandatory, using a wire rack placed over a baking sheet after soaking is highly recommended. This simple setup allows excess custard to drip away, leaving the bread at the perfect moisture level for frying. It’s a small detail that makes a noticeable difference in the final texture of your French toast, contributing to that delightful crispness.
Serving Suggestions for challah french toast
Decoration
The visual appeal of your challah French toast can be just as important as its taste. A light dusting of powdered sugar is a timeless and elegant touch, creating a snowy finish that contrasts beautifully with the golden-brown toast. You can achieve this with a fine-mesh sieve for an even distribution. For an extra flourish, consider dusting patterns using a stencil, perhaps a heart or a simple star, for a special occasion.
Fresh berries are not only delicious but also add vibrant pops of color. Arrange a handful of blueberries, raspberries, or sliced strawberries artfully over the top of the French toast. Their bright hues and fresh appearance make the dish look incredibly appetizing. A sprig of fresh mint can also add a touch of green and an aromatic hint.
A swirl of homemade whipped cream or a dollop of Greek yogurt offers a creamy visual contrast and a luxurious feel. If you’re feeling particularly creative, consider using a piping bag with a decorative tip to create elegant swirls or rosettes of whipped cream. Edible flowers can also be a stunning addition for a brunch or special event, adding a sophisticated and unique decorative element.
Side Dishes
To round out your challah French toast experience, consider pairing it with complementary side dishes that balance the sweetness and richness. Crispy bacon or savory sausage links offer a delightful contrast in both flavor and texture, providing a salty counterpoint to the sweet toast. The smoky notes from bacon are particularly harmonious with the cinnamon and nutmeg notes in the French toast.
A light and refreshing fruit salad can also be a wonderful accompaniment. While berries are often used as a topping, a more extensive fruit salad featuring melon, kiwi, and citrus segments can add a zesty freshness that cuts through the richness of the French toast. This provides a healthier, palate-cleansing element to your meal.
For a more substantial brunch, consider adding a savory egg dish like a fluffy frittata or a light spinach quiche. These dishes provide additional protein and flavor, creating a more complete and satisfying meal. Breakfast potatoes, whether roasted or hash-browned, also make for a hearty and classic pairing that complements the sweetness of the French toast beautifully.
Creative Serving Ideas
Think beyond the plate and explore innovative ways to present your challah French toast. For a playful twist, cut the French toast into bite-sized cubes after cooking and thread them onto skewers, alternating with pieces of fresh fruit. This makes for a fun, easy-to-eat option perfect for parties or children. A drizzle of caramel sauce over the skewers adds an extra touch of indulgence.
Consider serving your French toast as part of a larger brunch buffet, offering a variety of toppings in separate bowls, allowing guests to customize their own creations. This interactive approach adds an element of fun and caters to diverse preferences. Jars of homemade jams, bowls of toasted nuts, and small pitchers of various syrups can be arranged attractively.
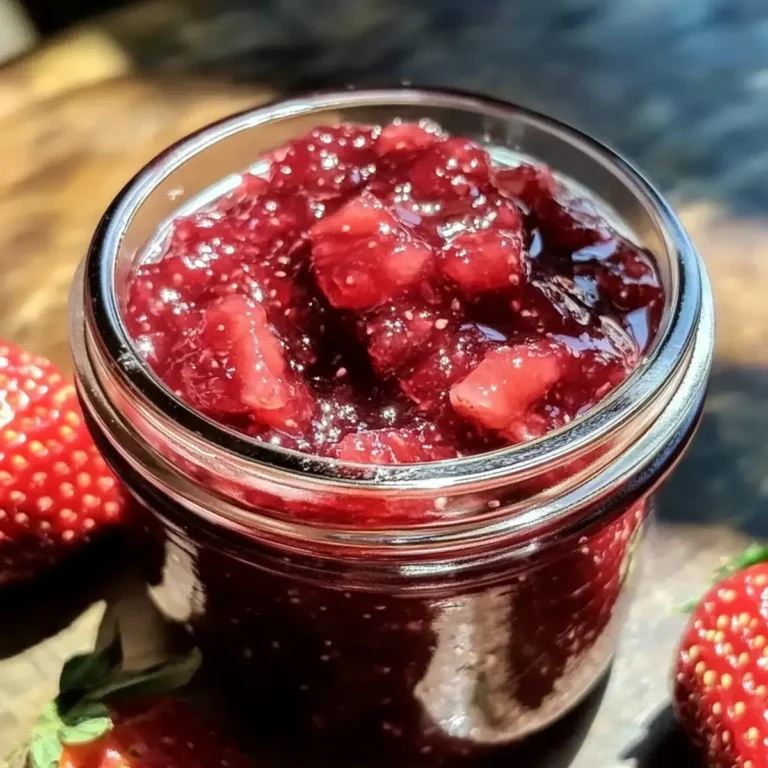
For a truly show-stopping presentation, create a “French Toast Bar” where guests can assemble their own gourmet creations. Offer not only the usual suspects like maple syrup and whipped cream but also more unique options like a warm berry compote, chocolate chips, toasted coconut flakes, or even a savory option like crumbled goat cheese and a drizzle of balsamic glaze. This encourages creativity and makes the meal a memorable experience.
Preparation & Storage
Storing Leftovers
If you find yourself with delicious leftover challah French toast, proper storage is key to maintaining its delightful texture and flavor. Once the French toast has cooled completely to room temperature, carefully arrange the slices in a single layer in an airtight container. This prevents them from sticking together and also shields them from absorbing any odors from other foods in your refrigerator.
You can also place a piece of parchment paper or wax paper between each layer of French toast if you are stacking them in a deeper container. This provides an extra barrier and ensures that when you’re ready to reheat, the slices separate easily without tearing. Properly stored, leftover challah French toast can be kept in the refrigerator for up to 3 to 4 days.
Ensure the lid of your container is sealed tightly to maintain freshness and prevent the toast from drying out further in the cold environment of the refrigerator. Always check for any signs of spoilage before consuming leftovers, such as off-smells or mold, though with proper storage, this is unlikely within the recommended timeframe.
Freezing
Challah French toast freezes exceptionally well, making it a fantastic option for meal prepping and enjoying this comforting dish at a later date. The key to successful freezing is to ensure the French toast is completely cooled and then to package it properly to prevent freezer burn. Lay your cooled French toast slices in a single layer on a baking sheet lined with parchment paper.
Place the baking sheet in the freezer for about 1-2 hours, or until the slices are firm and frozen through. This initial freezing step prevents them from clumping together when you transfer them to a storage bag or container. Once frozen solid, carefully transfer the individual slices into a freezer-safe zip-top bag or an airtight freezer container.
Remove as much air as possible from the bag before sealing it to minimize exposure to oxygen, which can lead to freezer burn. Label the bag or container with the date and contents. Properly frozen challah French toast can be stored for up to 2 months, offering a convenient and delicious breakfast option whenever the craving strikes.
Reheating
Reheating your challah French toast is a straightforward process designed to bring back its delightful warmth and texture. The best method depends on how many slices you are reheating and what equipment you have available. For a single serving or a few slices, the toaster oven or a regular oven is often the preferred choice for achieving a crisp exterior.
Place the refrigerated or thawed French toast slices on a baking sheet lined with parchment paper. Reheat in a preheated oven at around 350°F (175°C) for about 5-10 minutes, or until the toast is heated through and the edges are crisp again. For frozen French toast, you may need to increase the reheating time slightly.
The microwave can also be used for reheating, offering the quickest option. Place the French toast on a microwave-safe plate and heat in short intervals (30-60 seconds), checking for warmth between each interval. While the microwave is fast, it may result in a slightly softer texture compared to oven reheating. If you desire that crispy texture, an oven or toaster oven is the way to go.
Frequently Asked Questions
-
What makes challah bread ideal for French toast compared to other breads?
Challah bread possesses a unique combination of characteristics that make it exceptionally well-suited for French toast. Its rich composition, derived from the liberal use of eggs and a touch of oil or butter, results in a naturally soft, slightly sweet, and tender crumb. This inherent richness allows it to soak up the custard beautifully without becoming gummy or falling apart, a common issue with leaner breads. The structure of challah, which is typically braided, provides nooks and crannies that help distribute the custard evenly. Furthermore, its subtle sweetness means you might need less added sugar in your custard, and its eggy nature contributes to a more decadent final product. Unlike brioche, which often contains dairy, traditional challah is pareve (non-dairy), making it a versatile choice for many dietary needs, though it’s always wise to check the specific recipe. When stale, its texture becomes porous yet firm enough to hold its shape, providing the perfect balance for that delightful contrast between a crispy exterior and a custardy interior.
-
Can I use fresh challah bread instead of day-old bread for this recipe?
While it is certainly possible to use fresh challah bread for this French toast recipe, it is highly recommended to use day-old bread for optimal results. Fresh bread has a higher moisture content and a softer structure, meaning it will absorb the custard much more readily. This increased absorption can easily lead to soggy, mushy French toast that doesn’t hold its shape. The goal of French toast is to have a bread that is moist on the inside but still has a pleasant chew and can develop a beautiful, crisp exterior when cooked. Stale bread achieves this ideal texture because its porous structure has dried out, allowing it to soak up the custard without becoming saturated to the point of collapse. If you absolutely must use fresh challah, you can speed up the drying process by slicing the bread and toasting it lightly in a low oven (around 300°F or 150°C) for 10-15 minutes, flipping halfway through, until it feels dry to the touch but not browned.
-
What are the best ways to prevent my challah French toast from becoming soggy?
Preventing soggy challah French toast involves a multi-pronged approach, starting with the bread itself. Firstly, as emphasized throughout the recipe, using day-old, slightly dried-out challah is paramount. Fresh bread will inevitably lead to sogginess. Secondly, pay close attention to the soaking time; aim for approximately two minutes per side. The bread should feel saturated but not waterlogged. Immediately after soaking, allowing the slices to drain on a wire rack set over a baking sheet for a few minutes before cooking is crucial. This allows any excess custard to drip away, ensuring the bread is at the perfect moisture level for frying. Thirdly, cook the French toast over medium heat; high heat will burn the outside before the inside cooks through, leaving a mushy interior. Don’t overcrowd the pan, as this lowers the cooking temperature and can cause the bread to steam rather than sear, leading to a less crisp result. Finally, ensure your cooking surface is well-greased with butter for each batch to promote even browning and crispiness.