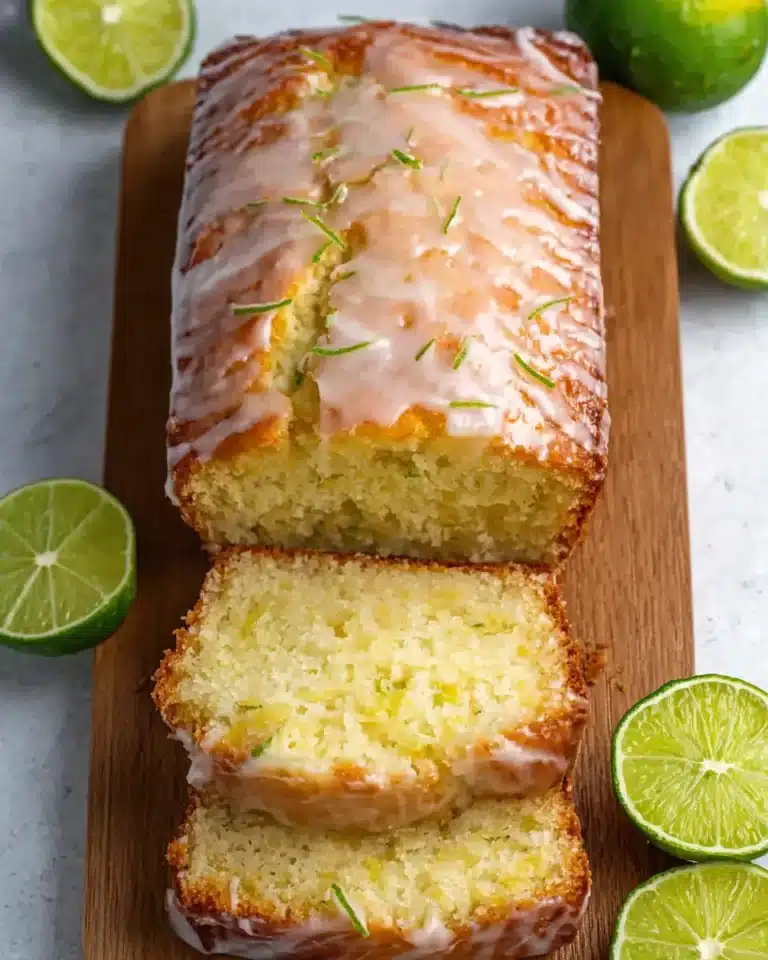
Buttery Coconut Loaf Cake
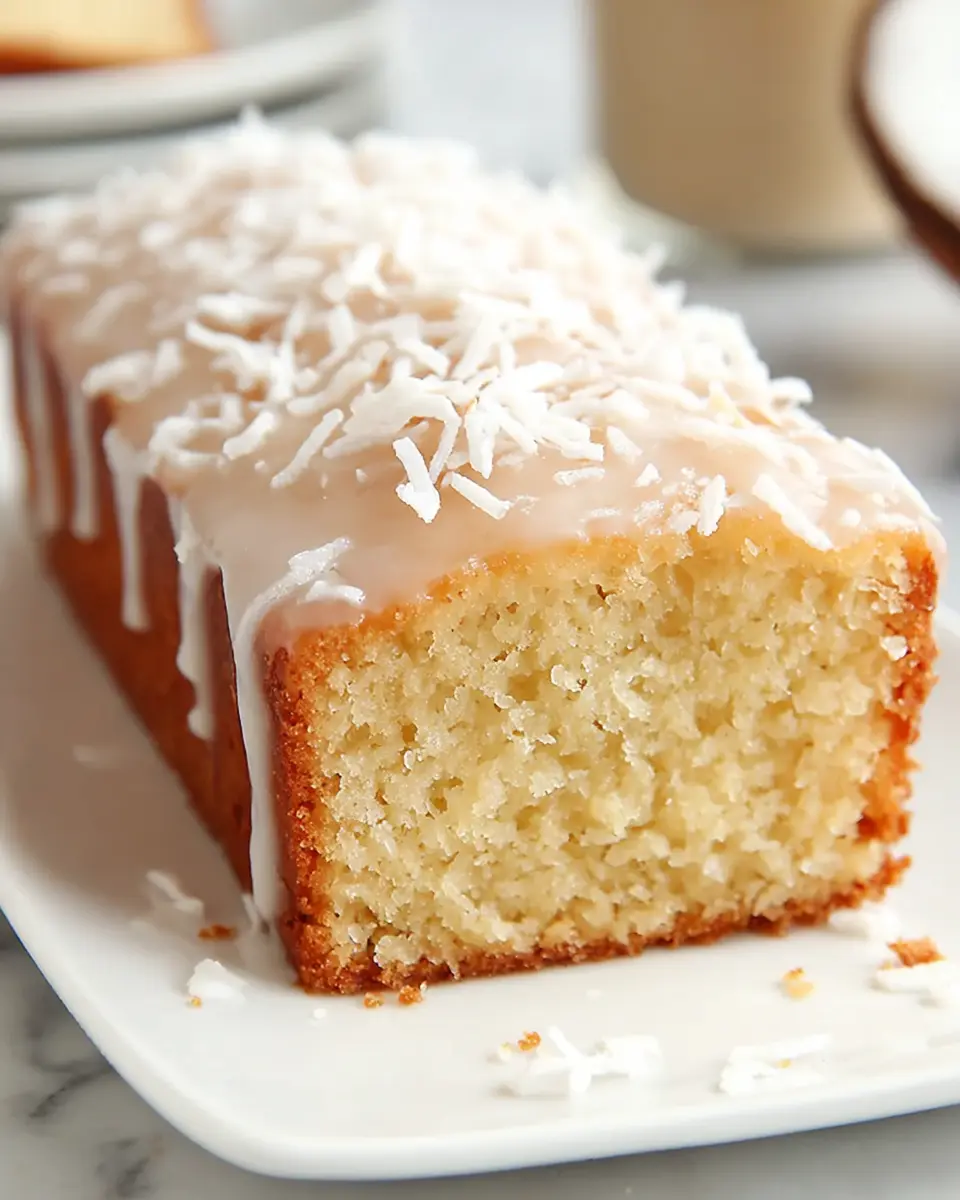
Welcome to a delightful exploration of a bake that promises pure indulgence and effortless charm: the Coconut Loaf Cake. This isn’t just another cake; it’s a sensory experience, a comforting embrace of buttery richness intertwined with the tropical sweetness of coconut, all enveloped in a simple yet elegant glaze.
Imagine a cake that’s incredibly moist, tender, and infused with a flavor profile that’s both familiar and excitingly exotic. It’s the perfect companion for your morning coffee, an elegant answer to an afternoon craving, or even a sweet conclusion to a delightful meal. Get ready to fall in love with every single crumb of this accessible, beginner-friendly masterpiece.
Why You Will Love This Recipe
- Effortless Elegance: This loaf cake looks incredibly sophisticated, with its glossy glaze and delicate texture, yet it requires minimal effort and basic baking skills, making it perfect for any home baker.
- Intense Coconut Flavor: From the rich coconut milk in the batter to the optional extra shredded coconut on top, every bite delivers a satisfyingly pronounced coconut essence that true fans will adore.
- Incredibly Moist Crumb: The combination of softened butter, room-temperature eggs, and the essential canned coconut milk ensures a wonderfully tender and deeply moist cake that stays fresh for days.
- Versatile Delight: Whether served for a special brunch, offered as a welcome dessert, or simply enjoyed with a cup of tea, this loaf cake adapts beautifully to any occasion, bringing smiles all around.
- Quick Assembly: While baking takes time, the actual preparation of the batter is surprisingly swift, allowing you to get this delicious treat into the oven without a fuss.
Ingredients You Need
The secret to an outstanding Coconut Loaf Cake lies in the quality and freshness of its ingredients. Using good quality butter will ensure a rich base, while fresh eggs contribute to the cake’s structure and tender crumb. The star, of course, is coconut milk, which lends its signature moisture and subtle tropical notes, so opt for full-fat canned coconut milk for the best results.
Coconut Loaf Cake

A rich, beginner-friendly Coconut Loaf Cake with a soft, buttery crumb, sweet coconut flavor, and a simple coconut-vanilla glaze. Perfect for brunch, dessert, or an anytime treat.
- 1 cup unsalted butter, softened
- 1 1/2 cups granulated sugar
- 3 large eggs, room temperature
- 1 1/2 cups all-purpose flour
- 1/2 teaspoon baking powder
- 1 teaspoon salt
- 1/2 cup canned unsweetened coconut milk
- 1/2 teaspoon pure vanilla extract
- 1/2 teaspoon almond extract
- 1 cup sweetened shredded coconut
- For the glaze: 1 cup powdered sugar, sifted
- 1/3 cup canned unsweetened coconut milk
- 1 teaspoon vanilla extract
- 1Preheat oven to 350°F (175°C). Butter and line a loaf pan with parchment paper.
- 2In a stand mixer, beat softened butter and granulated sugar until pale and fluffy, about 3 minutes.
- 3In a separate bowl, whisk together flour, baking powder, and salt.
- 4Add eggs one at a time to the butter mixture, beating well after each addition. Stir in vanilla and almond extracts.
- 5On low speed, add the dry ingredients and coconut milk alternately, beginning and ending with the dry ingredients. Scrape bowl as needed.
- 6Fold in shredded coconut until just combined.
- 7Transfer batter to prepared pan and smooth the top.
- 8Bake for 1 hour to 1 hour 30 minutes, or until a toothpick inserted into the center comes out almost clean.
- 9While the cake cools for 10-15 minutes, whisk together glaze ingredients (powdered sugar, coconut milk, vanilla extract) until smooth.
- 10Pour glaze over the warm loaf and sprinkle with extra shredded coconut. Let glaze set before slicing.
Keywords: Coconut Loaf Cake, Coconut Cake, Loaf Cake, Brunch Cake, Dessert Cake, Easy Bake, Beginner Baking
These are the core components that will transform simple pantry staples into an extraordinary loaf. You’ll find the specific measurements detailed within the recipe card for your convenience.
Variations
While the classic Coconut Loaf Cake is a triumph on its own, it’s a wonderfully adaptable recipe that can be tweaked to suit various dietary needs or flavor preferences, opening up a world of delicious possibilities for every palate and lifestyle.
Vegan Delight: To transform this into a fully vegan treat, the eggs can be substituted with a flax egg (1 tablespoon flaxseed meal mixed with 3 tablespoons water, let sit for 5 minutes) or a commercial egg replacer. The butter can be swapped for a high-quality vegan butter or a neutral-flavored oil like refined coconut oil or canola oil. Ensure your shredded coconut is unsweetened and free from any dairy derivatives, and double-check your sugar to confirm it’s vegan-friendly.
Gluten-Free Elegance: For those avoiding gluten, a good quality gluten-free all-purpose flour blend that contains xanthan gum will work beautifully. The key is to use a blend specifically designed for baking, as different blends have varying moisture absorption properties. You might find that a gluten-free version requires a slightly longer baking time, so keep a close eye on the internal temperature and visual cues for doneness.
Zesty Citrus Twist: Elevate the tropical theme by adding a tablespoon or two of fresh lemon or lime zest to the batter. This bright citrus note will complement the coconut beautifully, adding a layer of refreshing complexity. You could even enhance the glaze with a teaspoon of citrus juice or a drizzle of melted white chocolate infused with lemon zest for an extra burst of sunshine.
Spiced Coconut Dream: For a warmer, more aromatic variation, consider adding a pinch of ground cinnamon, nutmeg, or cardamom to the dry ingredients. These spices pair wonderfully with coconut and can give the loaf a comforting, autumnal feel, perfect for cooler months or a cozy afternoon tea. A tiny pinch of ground ginger can also add a delightful subtle warmth.
How to Prepare Coconut Loaf Cake
This section will guide you through the process of creating your delicious Coconut Loaf Cake step-by-step, ensuring a successful and enjoyable baking experience from start to finish.
Step 1: Oven and Pan Preparation
The foundation of any successful bake begins with proper preparation, and this Coconut Loaf Cake is no exception. You’ll want to preheat your oven to the specified temperature, typically around 350°F (175°C). This ensures that the moment your cake batter hits the oven, it starts baking evenly and efficiently, preventing any temperature shock that could affect its rise and texture.
Simultaneously, it’s crucial to prepare your loaf pan. A standard 9×5 inch loaf pan is usually ideal for this recipe. Generously buttering the inside of the pan is the first step, ensuring that no part of the cake sticks. For an extra layer of security and ease of removal, lining the pan with parchment paper is highly recommended. Cut a strip of parchment paper that runs the length of the pan, with a little overhang on either side. This creates a convenient handle, allowing you to lift the entire baked loaf out of the pan smoothly once it has cooled slightly, preventing breakage and preserving its beautiful shape.
Tip: Make sure to get into all the corners and up the sides of the pan with your butter or cooking spray. A little extra care here saves a lot of potential frustration later on, especially when dealing with a delicate crumb like that of a loaf cake.
Step 2: Creaming Butter and Sugar
This is arguably the most critical step for achieving a light and tender cake crumb. You will begin by combining your softened, unsalted butter with granulated sugar in a large mixing bowl, preferably that of a stand mixer fitted with the paddle attachment. The butter should be at room temperature, meaning it should yield slightly to the touch but not be melted or greasy. This allows it to emulsify properly with the sugar.
The creaming process involves beating these two ingredients together for an extended period, typically around 3 to 5 minutes, until the mixture becomes noticeably pale in color and develops a light, fluffy texture. This process incorporates tiny air bubbles into the butter-sugar mixture, which will expand during baking, contributing significantly to the cake’s rise and its ultimately airy, delicate structure. Do not skimp on this step; the quality of your final cake’s texture depends heavily on how well you cream these initial ingredients.
The Best Part: As you cream, watch the color transform from a rich yellow to a pale, almost ivory shade. The texture will change from grainy to smooth and airy, resembling a soft cloud. This visual transformation is your indicator that you’ve achieved optimal aeration.
Step 3: Combining Dry Ingredients
While your butter and sugar are reaching peak fluffiness, it’s time to turn your attention to the dry ingredients. In a separate medium-sized bowl, you will gently whisk together the all-purpose flour, baking powder, and salt. Whisking them together thoroughly ensures that the leavening agent (baking powder) and the salt are evenly distributed throughout the flour.
This even distribution is crucial for several reasons. Firstly, it guarantees that the cake will rise uniformly, without any dense pockets or uneven patches. Secondly, it ensures that the salt, which enhances all the other flavors in the cake, is present in every bite, rather than being concentrated in one area. The baking powder, when activated by moisture and heat, produces carbon dioxide gas, which creates the bubbles that make the cake light and airy.
Expert Tip: Sifting the flour, baking powder, and salt together can further enhance the aeration of the dry ingredients, leading to an even lighter cake. If you don’t have a whisk, a fork works perfectly well for combining these ingredients.
Step 4: Incorporating Eggs and Extracts
Now, it’s time to introduce the eggs to your creamed butter and sugar mixture. It’s important that your eggs are at room temperature; cold eggs can cause the butter mixture to seize or curdle, leading to a less desirable texture. Add the eggs one at a time, beating well after each addition until each egg is fully incorporated into the batter.
This gradual addition helps to create a stable emulsion, ensuring that the fats and liquids blend seamlessly. Once the eggs are incorporated, stir in the vanilla extract and the almond extract. These flavorings are essential for the cake’s characteristic aroma and taste, with the almond extract adding a subtle depth that beautifully complements the coconut without being overpowering. Mix just until the extracts are evenly distributed.
For a Fuller Flavor: The combination of vanilla and almond extracts creates a more complex and sophisticated flavor profile. While you can omit the almond extract if you prefer, its subtle presence really elevates the coconut notes and adds a wonderful warmth to the overall taste experience.
Step 5: Alternating Wet and Dry Ingredients, and Adding Coconut
This stage involves bringing together the wet and dry components to form your cake batter. With your mixer on a low speed, you will add the dry ingredients (flour, baking powder, salt mixture) and the canned coconut milk in alternating additions. It’s typically best to start and end with the dry ingredients. For example, add about one-third of the dry ingredients, mix until just combined, then add half of the coconut milk, mix again, then another third of the dry ingredients, the remaining coconut milk, and finally the last of the dry ingredients.
This method helps to prevent overmixing, which can develop the gluten in the flour and result in a tough cake. Scrape down the sides and bottom of the bowl frequently with a spatula to ensure all ingredients are evenly incorporated. Once the batter is smooth and uniform, gently fold in the sweetened shredded coconut. The goal here is to distribute the coconut evenly throughout the batter without overworking it.
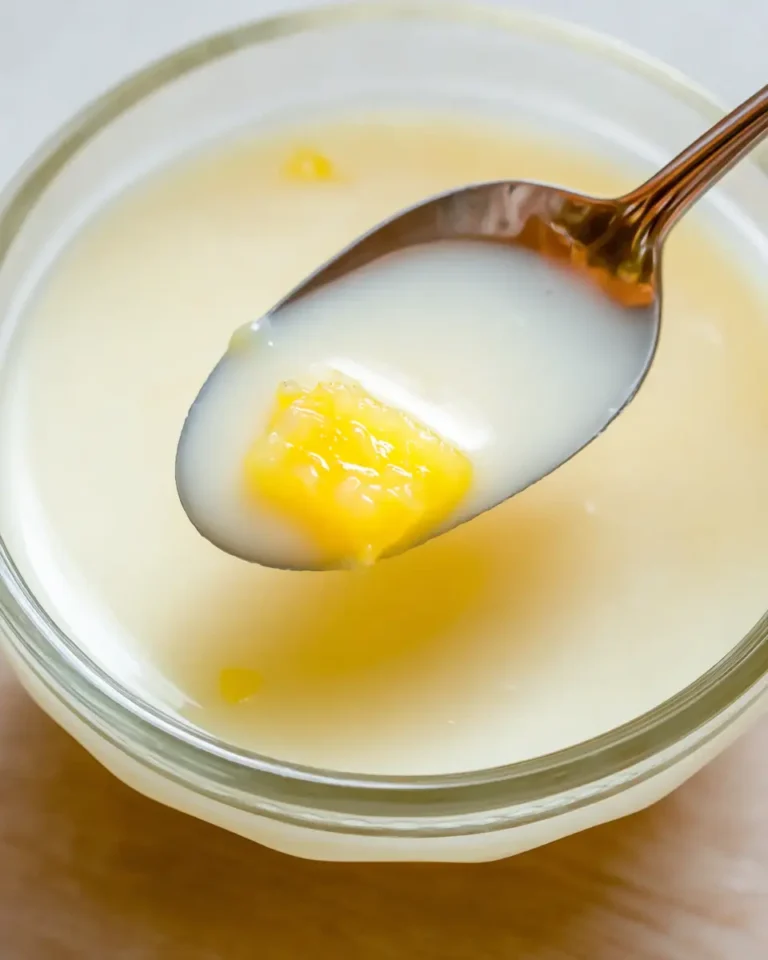
The Magic of Coconut Milk: Using canned, full-fat coconut milk is key. It provides a richer flavor and a more luxurious, moist texture than lighter coconut milks or dairy milk. Its higher fat content contributes to the cake’s tender crumb and prevents it from becoming dry.
Step 6: Baking the Loaf
Carefully transfer the prepared batter into your buttered and parchment-lined loaf pan. Use a spatula to spread the batter evenly, ensuring the top is as smooth as possible for a more uniform bake and presentation. Place the loaf pan in the preheated oven on the center rack.
The baking time can vary depending on your oven and the specific dimensions of your loaf pan, but it typically ranges from 60 to 75 minutes. It’s important to start checking for doneness around the 55-minute mark. To test if the cake is ready, insert a wooden skewer or a toothpick into the center of the loaf. It should come out almost clean, with only a few moist crumbs attached; if there is wet batter, it needs more time.
Watch for Visual Cues: The top of the loaf should be a beautiful golden brown. If the top is browning too quickly before the center is cooked, you can loosely tent the pan with aluminum foil to prevent excessive browning while allowing the inside to continue baking.
Step 7: Glazing and Finishing
Once the loaf is baked to perfection, remove it from the oven and let it rest in the pan on a wire rack for about 10 to 15 minutes. This brief cooling period allows the cake to set slightly, making it easier to remove from the pan without breaking apart. While the cake is resting, prepare the simple yet elegant glaze.
In a small bowl, whisk together the sifted powdered sugar with a small amount of canned coconut milk (start with about 1/3 cup and add more as needed) and a teaspoon of vanilla extract. Continue whisking until you achieve a smooth, pourable consistency. The glaze should be thick enough to coat the back of a spoon but thin enough to drizzle easily over the warm cake.
Gently invert the slightly cooled loaf onto the wire rack. If you used parchment paper, you can easily lift it out. While the loaf is still warm, pour the prepared glaze over the top, allowing it to drip down the sides. For an extra touch of texture and visual appeal, immediately sprinkle a little more sweetened shredded coconut over the wet glaze. Allow the glaze to set for about 15-20 minutes before slicing and serving, which will give you cleaner slices and a more polished presentation.
Pro Tips for Coconut Loaf Cake
Elevating your Coconut Loaf Cake from good to absolutely spectacular is all about paying attention to the finer details. These expert tips are designed to help you achieve consistently delicious results every time you bake this delightful treat.
Room Temperature is Key: Ensure all your dairy and egg ingredients, especially butter and eggs, are at room temperature before you begin. This is crucial for proper emulsification, leading to a smoother batter and a finer, more tender crumb. Cold ingredients can cause the batter to curdle, affecting the cake’s texture negatively.
Don’t Overmix: Once you start adding the flour, mix the batter only until the ingredients are just combined. Overmixing develops the gluten in the flour, which can result in a tough, dense cake instead of the desired light and airy texture. Gentle folding and minimal mixing are your friends here.
Accurate Measuring: Baking is a science, and precise measurements are vital, especially for flour. Spoon the flour into your measuring cup and level it off with a straight edge; do not scoop directly from the bag, as this can compact the flour and lead to too much being used, resulting in a dry cake.
Know Your Oven: Ovens can vary significantly in temperature. Use an oven thermometer to ensure your oven is calibrated correctly. If your oven tends to run hot, you may need to reduce the baking temperature slightly or shorten the baking time to prevent the cake from over-browning or drying out.
The Glaze Consistency: The thickness of your glaze is important. If it’s too thick, it will be difficult to spread; if it’s too thin, it will simply run off the cake. Aim for a consistency that drizzles nicely but still coats the cake well. You can adjust this by adding a tiny bit more powdered sugar to thicken or a touch more coconut milk to thin.
Serving Suggestions for Coconut Loaf Cake
This Coconut Loaf Cake is a versatile dessert that can be enjoyed in many ways, from simple elegance to more elaborate presentations, making it suitable for any occasion and preference.
Decoration
The glaze itself provides a beautiful, glossy finish, but you can enhance its appeal with a sprinkle of toasted shredded coconut for added texture and visual interest. For a touch of color, consider adding a few edible flowers or candied citrus peel. A dusting of powdered sugar just before serving can also create a charming, snow-dusted effect, especially fitting for a more casual presentation.
Side Dishes
Fresh berries, such as raspberries, blueberries, or sliced strawberries, offer a vibrant burst of color and a refreshing tartness that beautifully contrasts with the cake’s sweetness and richness. A dollop of lightly sweetened whipped cream or a scoop of vanilla bean ice cream provides a classic dessert pairing, enhancing the creamy, indulgent notes of the loaf. A spoonful of thick Greek yogurt or a light crème anglaise can also add a sophisticated touch.
Creative Serving Ideas
For a delightful brunch offering, serve slices of the loaf alongside fresh fruit salad and a pot of coffee or tea. As an afternoon tea treat, pair a thin slice with a delicate cup of Earl Grey or a floral infusion. For a more celebratory dessert, consider a deconstructed presentation: serve a slice of cake with a quenelle of fruit sorbet, a scattering of toasted coconut flakes, and a drizzle of berry coulis. You could also cut the loaf into smaller, bite-sized portions for an elegant petit four offering at parties.
Preparation & Storage
Ensuring your Coconut Loaf Cake remains as delicious as the day it was baked is straightforward with proper storage and reheating techniques. Whether you have leftovers or plan to make it ahead, these tips will help maintain its wonderful texture and flavor.
Storing Leftovers
Once the glaze has fully set, you can store the Coconut Loaf Cake at room temperature for up to two days, provided your kitchen is cool. For longer storage, or if your kitchen tends to be warm, it’s best to keep the loaf in an airtight container or tightly wrapped in plastic wrap, and refrigerate it. In the refrigerator, the cake will stay fresh for up to five days. The glaze may become slightly firmer in the fridge, but the cake itself will remain wonderfully moist.
Freezing
This loaf cake freezes exceptionally well, making it a fantastic option for baking ahead of special occasions or for enjoying later. For best results, ensure the cake is completely cooled and the glaze has set. You can freeze the entire loaf or individual slices. Wrap the cake tightly in plastic wrap, then in a layer of aluminum foil, or place it in a freezer-safe airtight container. Properly stored, the cake can be frozen for up to two months. The subtle flavors often deepen and meld beautifully during the freezing process.
Reheating
If you’ve stored your loaf in the refrigerator, simply allow it to sit at room temperature for about 20-30 minutes before serving to soften the crumb and the glaze. If you’re reheating frozen slices, thaw them overnight in the refrigerator or on the counter for a few hours. For a gentle warming, you can place a slice in a low oven (around 300°F or 150°C) for a few minutes until just warmed through. Be cautious not to overheat, as this can dry out the cake or melt the glaze too much. A quick zap in the microwave (10-15 seconds) can also work, but use this method sparingly to preserve the cake’s delicate texture.
Frequently Asked Questions
-
Can I use coconut flour instead of all-purpose flour for a low-carb option?
While coconut flour is a popular choice for low-carb baking, it behaves very differently from all-purpose flour. It is extremely absorbent, meaning you would need to drastically adjust the liquid and egg ratios in this recipe, and the texture would be significantly different – likely more dense and crumbly. For a low-carb or gluten-free option, it’s generally recommended to use a specific gluten-free flour blend or a carefully tested low-carb recipe designed for ingredients like almond flour or coconut flour, rather than attempting a direct substitution in this recipe.
-
What is the best way to ensure the glaze is smooth and not lumpy?
Achieving a smooth glaze is primarily about the powdered sugar and the mixing technique. Always sift your powdered sugar before adding it to the liquid ingredients; this removes any small lumps. When whisking the powdered sugar with the coconut milk and vanilla extract, start with a small amount of liquid and gradually add more until you reach the desired consistency. Whisk vigorously until all the sugar is dissolved and the mixture is uniformly smooth. If you find small lumps persist, passing the glaze through a fine-mesh sieve can help ensure a perfectly silky finish before pouring it over the cake.
-
Why did my loaf cake sink in the middle after baking?
A loaf cake sinking in the middle is a common baking issue that can be attributed to several factors. One primary cause is opening the oven door too early in the baking process; the sudden temperature change can cause the cake to collapse. Overmixing the batter, which overdevelops gluten, or using too much leavening agent can also lead to a rapid rise followed by a fall. Undercooking the cake is another significant reason; the internal structure hasn’t set properly, so it sinks as it cools. Always ensure the cake is fully baked by using the toothpick test and try to avoid opening the oven door until the last third of the baking time.