Oatmeal Protein Cookies: The Perfect Irresistible Snack
Welcome to the delightful world of homemade treats that nourish your body and please your palate! Today, we’re diving into a recipe that perfectly balances health and indulgence, offering a guilt-free way to satisfy those sweet cravings. Get ready to experience the joy of creating something truly special right in your own kitchen.
Imagine sinking your teeth into a soft, chewy cookie, packed with wholesome goodness and bursting with flavor. This recipe is designed to be incredibly versatile, making it an ideal choice for busy mornings, afternoon pick-me-ups, or even a satisfying after-dinner dessert. Prepare to be amazed by how simple and rewarding baking can be when you have the right recipe at your fingertips.
Why You Will Love This Recipe
- Healthy Indulgence: Packed with nutritious oats and protein powder, these cookies offer a guilt-free way to satisfy your sweet tooth while providing sustained energy.
- Quick Preparation: With minimal prep time, you can have warm, delicious cookies ready in under 30 minutes, making it perfect for spontaneous baking sessions or busy weeknights.
- Customizable Flavors: Easily adapt this recipe to your preferences by swapping out nut butters, adding different spices, or incorporating your favorite mix-ins like nuts or dried fruit for endless variety.
- Perfect for Any Occasion: Whether you need a quick breakfast on the go, a post-workout recovery snack, or a healthy dessert option, these cookies seamlessly fit into any part of your day.
- Kid-Friendly Appeal: Naturally sweetened by ripe fruits, these cookies are a hit with children and adults alike, making them a fantastic option for family baking projects.
Ingredients You Need
The foundation of any great recipe lies in the quality of its ingredients. For these oatmeal protein cookies, we’re focusing on wholesome components that contribute to both flavor and nutritional value. Using fresh, high-quality items will ensure the best possible outcome, resulting in cookies that are not only delicious but also satisfyingly wholesome. Always opt for the freshest produce and well-stored pantry staples for optimal results.
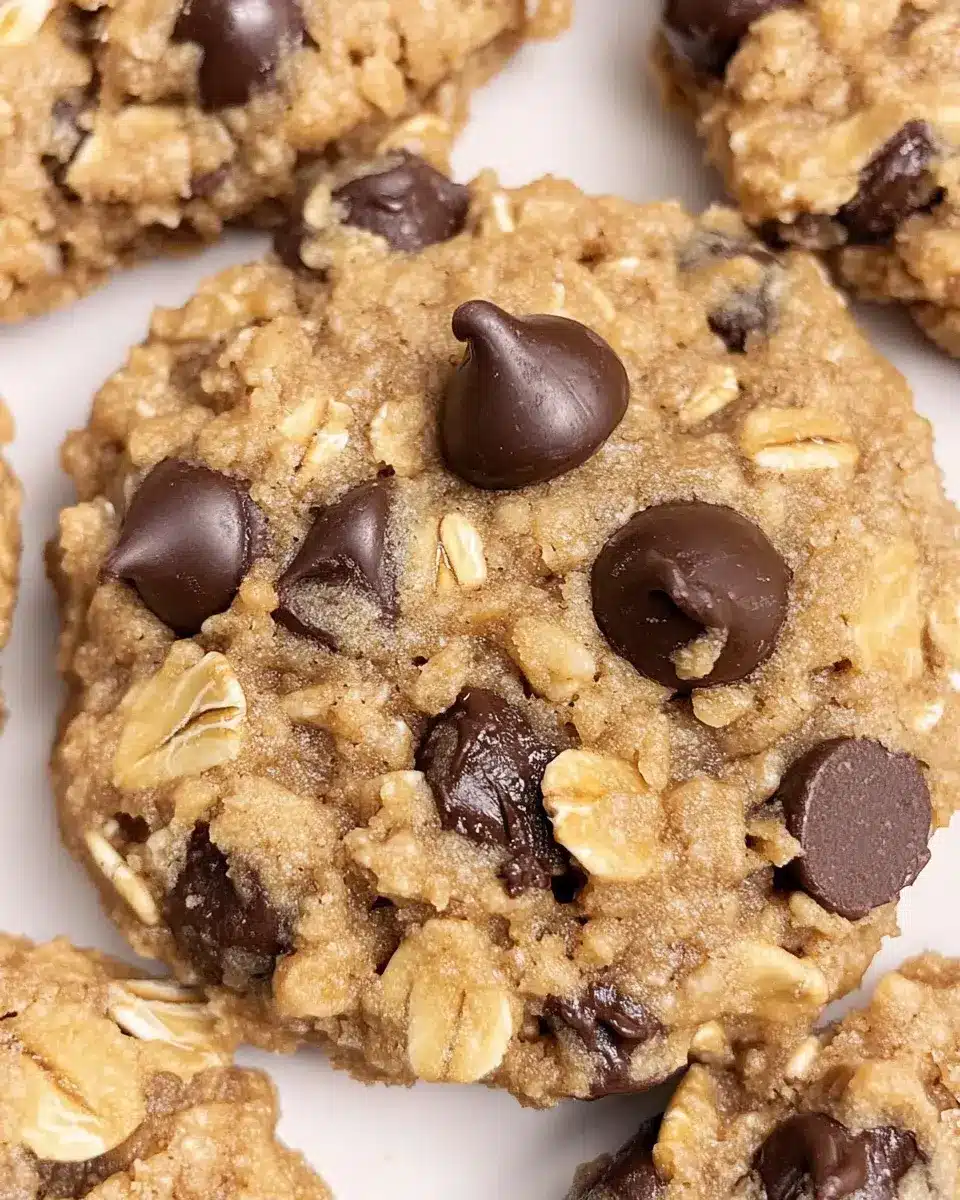
Oatmeal Protein Cookies

Soft, chewy, and irresistibly delicious oatmeal protein cookies, perfect for breakfast, dessert, or a quick snack. Sugar-free and oil-free, these healthy treats are packed with nutritious oats and protein powder for a guilt-free indulgence.
- 1 egg
- 100g ripe banana (mashed) or ½ cup applesauce
- 80g nut butter (peanut or almond)
- 100g granulated sweetener (erythritol or coconut sugar)
- 1 tsp ground cinnamon
- 1 tsp vanilla extract
- 150g rolled oats
- 30g almond flour (or oat flour)
- 30g protein powder
- 1 tsp baking powder
- Chocolate chips (optional)
- 1Preheat oven to 190ºC (400ºF) and line a baking sheet with parchment paper.
- 2In a large mixing bowl, whisk the egg until frothy. Add the mashed banana or applesauce and nut butter. Mix until creamy.
- 3Incorporate the granulated sweetener, ground cinnamon, vanilla extract, and salt. Stir well for about two minutes until fully combined.
- 4Add rolled oats, almond flour, protein powder, and baking powder to the wet mixture. Stir with a spatula or fork until evenly mixed.
- 5Gently fold in chocolate chips if using.
- 6Refrigerate the dough for at least 10 minutes.
- 7Scoop out about 1/3 cup of dough for each cookie and shape into nine individual cookies on the prepared baking sheet, leaving space between them.
- 8Bake for 10 to 12 minutes, or until lightly golden. Allow to cool on a baking rack before enjoying.
Keywords: oatmeal, protein cookies, healthy breakfast, snack, sugar-free, oil-free, chewy cookies, baked goods
- egg: a binder that helps hold the cookie together and adds richness
- ripe banana (mashed): provides natural sweetness, moisture, and a tender crumb
- nut butter (such as peanut butter or almond butter): contributes healthy fats, protein, and a creamy texture
- granulated sweetener (erythritol or monk fruit sweetener): offers sweetness without added sugars, allowing for a healthier cookie
- ground cinnamon: adds a warm, comforting spice that complements the oats and banana beautifully
- vanilla extract: enhances the overall flavor profile and adds a classic sweet note
- salt: balances the sweetness and brings out the individual flavors of the other ingredients
- rolled oats: the star ingredient, providing fiber, texture, and a hearty base for the cookies
- almond flour: adds a delicate texture and healthy fats, contributing to a tender crumb
- protein powder: boosts the protein content, making these cookies more filling and satisfying
- baking powder: acts as a leavening agent, helping the cookies rise and achieve a slightly chewy texture
- chocolate chips (sugar-free if necessary): optional, but adds pockets of deliciousness and a touch of decadence
These are the core components that will bring your oatmeal protein cookies to life, ensuring a delightful culinary experience. Specific quantities for each ingredient are detailed within the accompanying recipe card.
Variations
One of the most exciting aspects of these oatmeal protein cookies is their inherent adaptability. You can effortlessly transform them into a variety of dietary-friendly treats to suit different needs and preferences. This section explores a few creative avenues to explore.
For those following a vegan lifestyle, the substitution process is remarkably straightforward. Simply replace the egg with a flax egg or a commercial egg replacer, ensuring the binder is plant-based. Ensure your protein powder is also vegan-certified. The banana already contributes to a moist texture, so these simple swaps will yield equally delightful results.
If you’re aiming for a low-carb option, you can make a few minor adjustments. While the oats provide essential fiber, you might consider reducing their quantity slightly and increasing the almond flour. Opt for a low-carb sweetener like erythritol or monk fruit. The key is to maintain the structure and moisture balance while minimizing the carbohydrate count.
Exploring different flavor profiles can also lead to exciting variations. Consider adding a teaspoon of instant coffee granules to the dry ingredients for a mocha twist, or incorporate a sprinkle of nutmeg for a warming, autumnal flavor. You can also experiment with different extracts, such as almond or coconut, to create entirely new taste experiences.
How to Prepare oatmeal protein cookies
Step 1: Preheat the Oven and Prepare Baking Sheets
The initial step in crafting these delightful cookies involves setting the stage for optimal baking. It’s crucial to preheat your oven to the specified temperature, ensuring a consistent and even cooking environment from the moment the cookies enter. This temperature is meticulously chosen to achieve that perfect balance of a slightly crisp exterior and a wonderfully chewy interior.
Simultaneously, prepare your baking sheets by lining them with parchment paper. This protective layer serves multiple purposes: it prevents the cookies from sticking directly to the pan, which can lead to breakage and a messy cleanup, and it also aids in even heat distribution across the bottom of the cookies. Using parchment paper is a simple yet effective way to ensure your cookies release beautifully and retain their shape.
The Importance of Preparation: Taking these few moments for preheating and lining the baking sheets might seem minor, but they significantly impact the final texture and presentation of your cookies. A properly preheated oven means the cookies begin baking immediately, developing their structure correctly. Parchment paper guarantees that each cookie, from the first to the last, can be lifted with ease, preserving its delightful form.
Step 2: Meticulously Mix the Wet Ingredients
In a generously sized mixing bowl, begin by whisking a single egg until it achieves a frothy consistency. This initial aeration of the egg is an important step, as it helps to incorporate air, contributing to a lighter cookie texture. Don’t skimp on the whisking; a good froth indicates that the egg is well-aerated and ready to be combined with other elements.
Next, gently add the mashed ripe banana, or its equivalent in applesauce if you’re opting for that substitution, along with your chosen nut butter. Stir these ingredients together until the mixture becomes smooth and creamy. The nut butter should be fully incorporated, creating a luscious base. This stage is where the primary moisture and richness are introduced into the cookie dough.
Follow this by incorporating the granulated sweetener, ground cinnamon, pure vanilla extract, and a pinch of salt. Stir these additions into the wet mixture thoroughly for approximately two minutes. The goal here is to ensure that the sweetener is fully dissolved and that all the spices and flavorings are evenly distributed throughout the creamy base. This thorough mixing ensures consistent flavor in every bite.
Step 3: Skillfully Combine the Dry Ingredients with the Wet Mixture
Now, it’s time to introduce the dry components to your wet mixture. Carefully add the rolled oats, which provide a wonderful texture and wholesome base. Next, incorporate the almond flour, contributing to a tender and slightly crumbly texture that complements the oats beautifully. Finally, add the protein powder and baking powder, ensuring your cookies get a boost of protein and a slight lift.
Using a spatula or a sturdy fork, gently stir all these ingredients together until they are just combined and evenly distributed. The objective at this stage is not to overmix, which can develop the gluten in the oats and flour excessively, leading to tougher cookies. Instead, aim for a cohesive dough where all the dry ingredients are hydrated by the wet components.
Addressing Dough Consistency: It’s important to note that the thickness of your dough can vary slightly depending on the specific brand and type of protein powder you use. Some protein powders absorb more liquid than others. If you find your dough seems excessively thick or dry, don’t hesitate to add a very small splash of milk—dairy or non-dairy—to achieve a more manageable, yet still thick, cookie dough consistency. This minor adjustment ensures your cookies will bake correctly without becoming crumbly.
Step 4: Gently Fold in the Chocolate Chips
This is the moment where you introduce that delightful burst of sweetness and texture that chocolate chips provide. If you are using chocolate chips, gently fold them into the prepared dough. The term “fold” is key here; it means using your spatula to carefully lift and incorporate the chips without aggressively stirring or overmixing the dough.
The aim is to distribute the chocolate chips evenly throughout the cookie dough. This careful folding ensures that each cookie will have delightful pockets of melted chocolate, adding a luxurious touch to your healthy treat. Avoid overworking the dough at this stage, as it can impact the final texture of the cookies. A gentle incorporation is all that’s needed.
The Joy of Mix-ins: While chocolate chips are a classic choice, feel free to use this step to incorporate other delicious additions. Sugar-free chocolate chips are an excellent option for those watching their sugar intake. You could also fold in chopped nuts for added crunch and healthy fats, or dried fruit like cranberries or raisins for a chewy, sweet counterpoint. Ensure any additions are incorporated with the same gentle folding motion.
Step 5: Chill the Dough for Optimal Texture
Refrigerating the cookie dough is a crucial step that significantly impacts the final outcome of your oatmeal protein cookies. Place the bowl of dough into the refrigerator and allow it to chill for at least 10 minutes. This chilling period allows the fats in the nut butter to firm up, which helps prevent the cookies from spreading too much during baking.
A chilled dough is also more cohesive and easier to handle when shaping the cookies. This step helps to develop a better texture, ensuring your cookies are thick and chewy rather than thin and crispy. The brief refrigeration period contributes immensely to the overall delightful eating experience of the finished product.
Understanding the Science: The science behind chilling cookie dough is quite simple. When the dough is cold, the ingredients are more solid. As the cookies bake, the solid fats melt more slowly, giving the dough time to set up. This controlled melting prevents excessive spreading, resulting in cookies that hold their shape and maintain a desirable thickness and chewiness. It’s a small step that yields a big improvement in cookie quality.
Step 6: Shape the Cookies with Precision
Once the dough has had its brief chilling period, it’s time to shape your cookies. Using a cookie scoop or two spoons, portion out approximately 1/3 cup of the chilled dough for each individual cookie. Aim for consistency in portion size so that all your cookies bake evenly, ensuring a uniform deliciousness across the entire batch.
Roll each portion of dough gently into a ball and then flatten it slightly to form a cookie shape. Alternatively, you can simply drop rounded spoonfuls of dough onto the baking sheet. Place these shaped cookies onto the prepared baking sheet, ensuring you leave adequate space between each one. This spacing allows the cookies to spread slightly as they bake without touching each other, maintaining their individual integrity.
Spacing for Success: Proper spacing is essential during baking. Cookies tend to spread outwards as they bake due to the heat melting the fats and activating the leavening agents. Leaving a gap of at least 1-2 inches between each cookie on the baking sheet prevents them from merging into one large cookie mass. This ensures each cookie bakes independently and develops its characteristic shape and texture.
Step 7: Bake to Golden Perfection and Cool
Transfer the baking sheet with the shaped cookies into your preheated oven. Bake for approximately 10 to 12 minutes, or until the edges of the cookies are lightly golden brown and the centers appear set but still slightly soft. It’s important to keep a close eye on them, as oven temperatures can vary, and overbaking can lead to dry cookies. My personal experience shows they often reach perfection at exactly 11 minutes.
Once baked, carefully remove the baking sheet from the oven. Allow the cookies to cool on the baking sheet for a few minutes before attempting to transfer them. This brief cooling period on the hot pan allows them to set up further, making them less likely to break when moved. They will continue to bake slightly from residual heat during this time.
The Art of Cooling: After the initial few minutes on the baking sheet, gently transfer the cookies to a wire cooling rack. Allowing them to cool completely on the rack ensures that air circulates around them, preventing the bottoms from becoming soggy. This final cooling stage is critical for achieving that perfect chewy texture and allows the flavors to meld beautifully before you enjoy your delicious homemade creations. Patience here is rewarded with superior cookie quality.
Pro Tips for oatmeal protein cookies
Achieving perfectly soft and chewy oatmeal protein cookies is an art, and a few expert tips can elevate your baking game. These recommendations focus on enhancing texture, flavor, and overall success in the kitchen. Implementing these suggestions will help ensure your cookies are consistently delightful.
Use Very Ripe Bananas: The riper the banana, the sweeter and more moist it will be. This natural sweetness reduces the need for added sweeteners and contributes significantly to the cookie’s tender texture. Look for bananas with plenty of brown spots; they are ideal for baking. This makes a noticeable difference in flavor and consistency.
Adjust Dough Consistency as Needed: As mentioned, protein powders vary in their absorption properties. If your dough feels too crumbly or dry, add a teaspoon of milk (dairy or non-dairy) at a time until the dough comes together. Conversely, if it feels too wet, you can add a tablespoon of oats or almond flour. The goal is a thick, scoopable dough.
Don’t Overmix the Dough: Overmixing can lead to tough cookies. Mix the wet and dry ingredients only until they are just combined. A few streaks of dry ingredients are often fine, as they will incorporate during the chilling and shaping process. This gentle approach preserves the desired soft and chewy texture.
Chill the Dough Adequately: While a quick 10-minute chill is good, a longer chill of 30 minutes to an hour can further improve texture and prevent spreading. If you have the time, this extra step is highly beneficial for achieving thicker, chewier cookies. Cold dough is easier to handle and bakes with better structure.
Experiment with Add-ins and Spices: Don’t be afraid to get creative! Besides chocolate chips, consider adding chopped walnuts, pecans, shredded coconut, or dried cranberries. For spice variations, try a pinch of nutmeg, cardamom, or even a touch of ginger. These additions can transform the cookies into entirely new flavor experiences.
Watch Baking Time Closely: Ovens vary, so the baking time is a guideline. Cookies continue to cook slightly after being removed from the oven. It’s better to slightly underbake them than to overbake. They should look set around the edges but still slightly soft in the center when you take them out. This ensures their signature chewiness.
Serving Suggestions for oatmeal protein cookies
Decoration
While these cookies are delicious on their own, a touch of simple decoration can elevate their presentation, making them perfect for sharing or special occasions. A light dusting of powdered erythritol can mimic the look of powdered sugar without the added calories. You could also drizzle them with a little melted sugar-free chocolate for an extra indulgent touch.
For a more natural aesthetic, consider arranging a few fresh berries like raspberries or blueberries artistically on top of the cookies before serving. A sprinkle of toasted coconut flakes or a few chopped nuts can add visual interest and a complementary texture. These small touches make a big difference.
Side Dishes
Oatmeal protein cookies pair wonderfully with a variety of beverages and light accompaniments. A tall glass of cold milk, whether dairy or a plant-based alternative like almond or oat milk, is a classic and satisfying pairing. The creaminess of the milk complements the chewiness of the cookie beautifully.
For a refreshing twist, serve them alongside a cup of herbal tea, such as chamomile or peppermint. The warmth of the tea and its subtle flavors can enhance the cookie’s own subtle notes of cinnamon and vanilla. A small bowl of fresh fruit salad, featuring seasonal berries and melon, offers a light and healthy contrast.
Creative Serving Ideas
Transform these cookies into a delightful breakfast parfait by crumbling them over a bowl of Greek yogurt. Layer the yogurt, crumbled cookie, and fresh berries for a visually appealing and protein-packed start to your day. This combination is not only satisfying but also incredibly nutritious, offering a balanced mix of protein, fiber, and healthy fats.
Consider serving them as part of a dessert board alongside other healthy treats. Arrange them with sliced apples, peanut butter for dipping, and perhaps some dark chocolate squares for a more elaborate presentation. This allows guests to customize their own delightful experience, mixing and matching flavors and textures.
Another creative idea is to use them as a base for a mini “ice cream” sandwich. Simply spread a thin layer of your favorite sugar-free ice cream or a thick coconut yogurt between two cookies. This turns a simple cookie into a delightful frozen treat, perfect for a warm afternoon. The combination of the chewy cookie and cold creamy filling is divine.
Preparation & Storage
Storing Leftovers
Proper storage is key to maintaining the freshness and texture of your delicious oatmeal protein cookies. Once completely cooled, transfer the cookies to an airtight container. This is the most crucial step to prevent them from becoming stale or absorbing unwanted odors from the refrigerator or pantry.
If you plan to stack the cookies, it’s a good idea to place a piece of parchment paper between each layer. This simple trick prevents the cookies from sticking together, ensuring that each one can be easily retrieved without damage. They will typically stay fresh and chewy at room temperature for up to 5 days when stored correctly in an airtight container.
Freezing
For longer-term storage, freezing is an excellent option that preserves the quality of your cookies for weeks or even months. First, arrange the cooled cookies in a single layer on a baking sheet. This initial freezing step, known as flash freezing, prevents the cookies from clumping together in the freezer.
Once the cookies are firm to the touch from being in the freezer, transfer them into a freezer-safe bag or an airtight container. Ensure that as much air as possible is removed from the bag to prevent freezer burn. Properly stored, your oatmeal protein cookies can remain delicious for up to 3 months.
Reheating
When you’re ready to enjoy your frozen or previously stored cookies, reheating can bring back their fresh-baked softness. For the best results, preheat your oven to 180°C (350°F). Place the cookies on a baking sheet and warm them for about 5 minutes, or until they are just heated through and soft.
If you’re short on time, a microwave can be used for quick reheating. Place a single cookie on a microwave-safe plate and heat it for 10-15 seconds. Be careful not to overheat, as this can make the cookies tough or rubbery. For a gentle reheat, you can also place them in a skillet over low heat for a few minutes, turning occasionally until warm.
Frequently Asked Questions
-
What makes oatmeal protein cookies a healthy choice compared to traditional cookies?
Oatmeal protein cookies are considered a healthier alternative primarily due to their ingredient composition. They are typically made with wholesome ingredients like rolled oats, which are rich in fiber and complex carbohydrates, providing sustained energy. The inclusion of protein powder significantly boosts their protein content, promoting satiety and muscle repair, which is particularly beneficial for active individuals. Furthermore, these cookies often use natural sweeteners derived from fruits like bananas or employ sugar substitutes like erythritol or monk fruit, drastically reducing or eliminating refined sugars. They are also frequently made without unhealthy fats or oils, relying on nut butters for healthy fats and moisture instead. This combination of high fiber, high protein, and reduced sugar and unhealthy fats makes them a far more nutritious snack option.
-
Can I substitute the nut butter, and what are the best alternatives?
Yes, you can absolutely substitute the nut butter in this recipe, and there are several excellent alternatives depending on your preferences and dietary needs. Peanut butter and almond butter are popular choices, but if you have allergies or want to explore other options, sunflower seed butter is a great nut-free alternative that offers a similar creamy texture and nutty flavor. Cashew butter is another fantastic option, known for its smooth consistency and subtly sweet taste. Tahini, made from sesame seeds, can also be used, though it has a more distinct, slightly bitter flavor profile that might alter the overall cookie taste. When substituting, aim for a natural, unsweetened version of the nut or seed butter to maintain the health benefits and control the sweetness of the final cookies. Ensure the consistency is similar to the original nut butter you would have used.
-
How can I make these cookies more appealing for children, and can they be customized with fun additions?
Making these oatmeal protein cookies appealing for children is quite simple, as their naturally sweet base from ripe bananas is usually a hit. To further enhance their child-friendly nature, you can incorporate fun additions like sugar-free chocolate chips, which children adore. Small, colorful candies or sprinkles (ensure they are sugar-free if you’re aiming for a lower sugar content) can also be folded in during the last step to add a festive touch. You could also shape the cookies into fun, simple shapes using cookie cutters after chilling the dough, though this requires a bit more delicate handling. Consider adding a hint of vanilla or a touch of cinnamon to amplify the dessert-like qualities that children typically enjoy. Additionally, presenting them as “power cookies” or “super snacks” can add to their appeal, framing them as a fun and energizing treat rather than just a cookie.