Ultimate Caramel Apple Dessert Cups
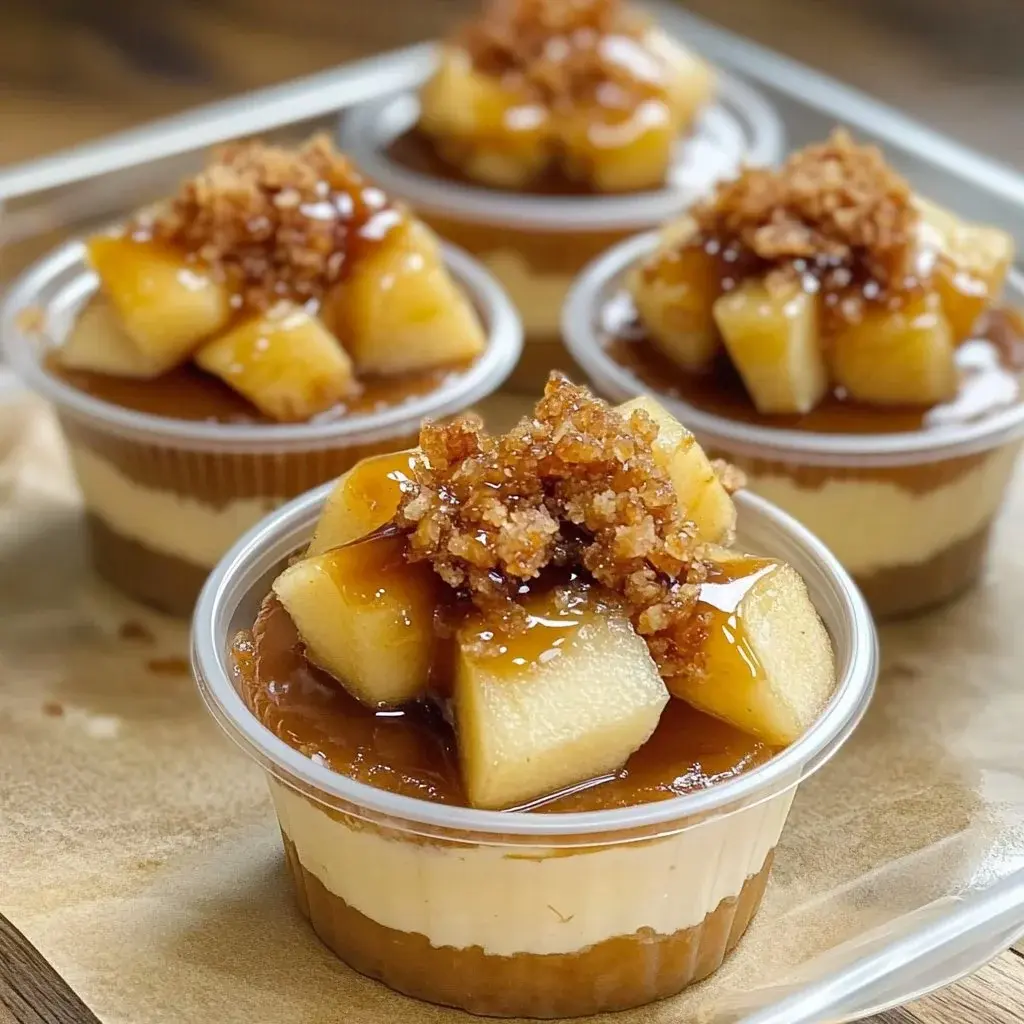
Imagine a dessert that combines the warm, delightful flavors of caramel and apples, all nestled within a cozy cup of whipped cream. Caramel Apple Dessert Cups are the perfect treat for any occasion, bringing together the taste of fall in a comforting, indulgent way.
This recipe is simple enough for beginners and pleasing enough to impress guests at dinner parties, offering a harmonious blend of textures and sweet, comforting notes that evoke cherished memories of autumn gatherings and cozy evenings. The visual appeal alone is enough to make any occasion feel special.
Why You Will Love This Recipe
- Effortless Preparation: These delightful cups come together quickly, making them ideal for busy weeknights or last-minute entertaining.
- Classic Flavors, Modern Twist: Enjoy the beloved taste of caramel apples presented in an elegant and easy-to-eat format.
- Customizable Delight: Easily adapt the recipe with your favorite toppings, nuts, or even a hint of spice for a personalized touch.
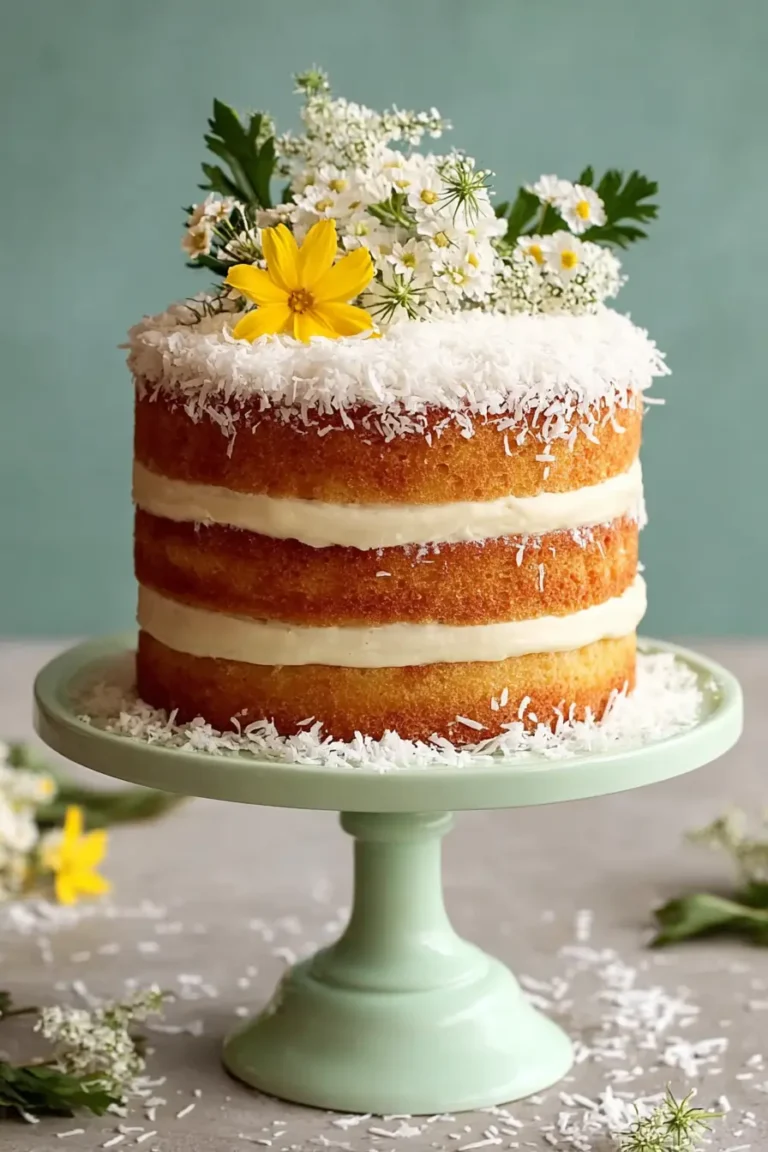
- Visually Stunning: The beautiful layers of creamy whipped cream and glistening caramelized apples make these cups a showstopper on any dessert table.
- Perfect for Any Season: While inspired by fall, the comforting flavors of caramel and apple are universally loved, making these a hit year-round.
Ingredients You Need
The quality of your ingredients plays a significant role in the final outcome of your Caramel Apple Dessert Cups. Opting for fresh, ripe apples ensures a vibrant flavor, while good-quality caramel sauce will add that irresistible depth. Using fresh, cold heavy cream for whipping will guarantee a light and airy texture that perfectly complements the rich apple filling.
Caramel Apple Dessert Cups
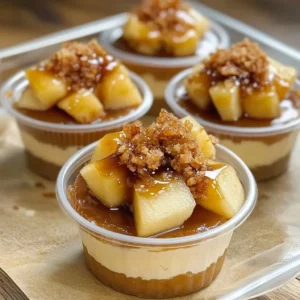
Imagine a dessert that combines the warm, delightful flavors of caramel and apples, all nestled within a cozy cup of whipped cream. Caramel Apple Dessert Cups are the perfect treat for any occasion, and they bring together the taste of fall in a comforting, indulgent way. The recipe is simple enough for beginners and pleasing enough to impress guests at dinner parties. These dessert cups strike that perfect balance! They are not only delicious but also a feast for the eyes, making them the ideal choice for gatherings or cozy nights at home. There’s something about the creamy texture of whipped cream paired with the caramelized apples that just feels right. Caramel Apple Dessert Cups are not just your standard dessert; they are a unique twist on the classic caramel apple that many of us remember from our childhood. Instead of having to bite into an awkwardly shaped apple, the dessert cups offer a refined take that allows each layer to be savored.
- 3 cups peeled and chopped apples
- 1/2 cup brown sugar
- 1/2 teaspoon ground cinnamon
- 1 tablespoon butter
- 4 cups whipped cream
- 1/2 cup caramel sauce
- 1Start by gathering all your ingredients and equipment. Peel and chop your apples into small pieces, and set them aside.
- 2In a skillet, melt the butter over medium heat. Add your chopped apples, brown sugar, and ground cinnamon. Stir occasionally for about 8-10 minutes or until the apples are tender and nicely caramelized.
- 3Remove the skillet from heat and allow the caramelized apples to cool slightly.
- 4If you’re making homemade whipped cream, combine heavy cream with a bit of sugar and vanilla in a mixing bowl. Whip until stiff peaks form.
- 5Once the apples are cooled, layer the caramelized apples in your dessert cups as the base layer.
- 6Spoon a generous layer of whipped cream over the caramelized apples.
- 7Repeat the layering process by adding more caramelized apples and then whipped cream until your cups are filled to the top.
- 8Drizzle the caramel sauce generously over each cup.
- 9Chill your Caramel Apple Dessert Cups in the fridge for at least 30 minutes.
- 10Serve and Enjoy! Garnish with a sprinkle of cinnamon if you wish.
Keywords: Apple, caramel, dessert cups, Fall Dessert, Whipped cream
- apples: crisp, fresh apples like Honeycrisp or Fuji work wonderfully, peeled and chopped into small, bite-sized pieces for even cooking.
- brown sugar: adds a deep, molasses-like sweetness and helps with caramelization, creating a rich base flavor.
- ground cinnamon: a classic spice that pairs beautifully with apples, bringing warmth and a hint of autumnal spice to the filling.
- butter: essential for sautéing the apples, it adds richness and helps in achieving that perfect caramelized texture.
- whipped cream: the creamy, fluffy cloud that balances the sweetness and texture of the apples, forming the bulk of the dessert cup.
- caramel sauce: the crowning glory, drizzled generously to enhance the sweet, buttery notes of the overall dessert.
The precise quantities for these ingredients are detailed in the accompanying recipe card, ensuring you have all the measurements needed for a perfect bake.
Variations
To elevate your Caramel Apple Dessert Cups even further, consider a few creative twists. Imagine a version that caters to those embracing a plant-based lifestyle, where the creamy whipped cream is replaced with luscious coconut whipped cream, and a dairy-free caramel sauce ties it all together beautifully.
For those watching their carbohydrate intake, a low-carb rendition can be achieved by using a sugar substitute in place of brown sugar and opting for a sugar-free caramel sauce. The apples themselves remain a delightful, naturally sweet component in this lighter adaptation.
Another exciting variation involves introducing different flavor profiles. A touch of bourbon or spiced rum can be added to the apples while they cook, infusing them with a warm, adult-friendly kick. Alternatively, incorporating a sprinkle of toasted pecans or walnuts between the layers adds a delightful crunch that contrasts wonderfully with the smooth cream and tender apples, creating a more complex and satisfying dessert experience.
How to Prepare Caramel Apple Dessert Cups
Step 1: Preparing the Foundation
The journey to creating these delightful dessert cups begins with careful preparation of your core ingredients. Start by selecting your favorite variety of apples; a good balance of tartness and sweetness, such as Honeycrisp, Fuji, or Gala, will provide the most flavorful base. Peel each apple meticulously, ensuring no skin remains, and then proceed to chop them into small, uniform pieces, about ¼ to ½ inch in size.
Uniformity in size is key here, as it guarantees that the apples will cook evenly, leading to a consistently tender and delightful texture throughout the dessert. Once chopped, set these apple pieces aside in a bowl; this initial step ensures that when you’re ready to cook, all your components are prepped and waiting, streamlining the entire process.
Simultaneously, gather all other necessary ingredients and your cooking utensils. Ensure your whipped cream is chilled to perfection, as this is crucial for achieving that desirable fluffy consistency. Having all your tools and ingredients at the ready before you begin the cooking process will make the entire experience smoother and more enjoyable, reducing any potential rush or stress.
Step 2: Caramelizing the Apples
In a medium-sized skillet, introduce your tablespoon of butter and place it over medium heat. Allow the butter to melt completely, coating the bottom of the pan in a shimmering pool. Once the butter is melted and gently sizzling, add your prepared chopped apples directly into the skillet. It’s important to ensure the heat is at a consistent medium setting to prevent scorching the apples.
To the apples and butter, add your ½ cup of brown sugar, ensuring it’s packed for accurate measurement, and your ½ teaspoon of ground cinnamon. The brown sugar will begin to dissolve and meld with the butter, creating a rich caramel base, while the cinnamon will infuse the apples with its warm, aromatic essence. Stir the apple mixture gently and consistently, ensuring each piece is coated in the sugary, spiced butter.
Continue to cook and stir the apples for approximately 8 to 10 minutes, or until they reach your desired level of tenderness and a beautiful, rich caramelization has formed. You are looking for apples that are soft but still hold their shape, not mushy, with a glossy, golden-brown coating that signifies perfect caramelization. This cooking phase is where the magic happens, transforming simple apples into a decadent, flavorful filling.
Step 3: Allowing the Apples to Cool
Once the apples have achieved that perfect tender and caramelized state, it is crucial to remove the skillet from the heat source immediately. This prevents the apples from overcooking and becoming too soft. Transfer the beautifully caramelized apple mixture from the hot skillet into a separate bowl or a heatproof container.
Allow the apples to cool down for at least 15 to 20 minutes. This cooling period is an absolutely vital step in the preparation process. Introducing hot apple mixture into cold whipped cream will cause the cream to melt, resulting in a soupy and unappealing texture, completely defeating the purpose of the dessert cups’ structure and aesthetic appeal.
Patience during this cooling phase ensures that when you begin the layering process, the apples are at a temperature that will not compromise the integrity of the whipped cream. This careful attention to temperature will contribute significantly to the final presentation and enjoyable texture of your Caramel Apple Dessert Cups, making them a truly delightful treat.
Step 4: Preparing the Whipped Cream
If you are opting for homemade whipped cream, which offers a fresher taste and lighter texture, begin by ensuring your heavy whipping cream is thoroughly chilled. Place your mixing bowl and whisk attachment in the freezer for about 10-15 minutes prior to starting; this helps the cream whip up faster and to better peaks.
Pour about 4 cups of cold heavy cream into the chilled mixing bowl. You can add a tablespoon or two of granulated sugar or powdered sugar, depending on your preference for sweetness, and a teaspoon of pure vanilla extract for added flavor complexity. Begin whipping the cream on medium-low speed, gradually increasing the speed as the cream thickens.
Continue whipping until stiff peaks form, meaning that when you lift the whisk, the cream holds its shape and the peaks stand upright without drooping. Be careful not to over-whip, as this can turn your cream into butter. If using store-bought whipped cream, ensure it is also well-chilled and ready for immediate use.
Step 5: The Art of Layering – First Foundation
Now, the creative part of assembling your Caramel Apple Dessert Cups begins, transforming individual ingredients into a cohesive dessert. Select your serving vessels; clear glasses, small jars, or even ramekins work beautifully as they allow the colorful layers to be visible, enhancing the visual appeal. Ensure they are clean and dry before you start.
Begin by spooning a generous portion of the slightly cooled caramelized apple mixture into the bottom of each dessert cup. This forms the foundational layer, providing a warm, spiced, and slightly chewy base for the dessert. Aim for an even distribution across all your cups, ensuring each serving gets a good amount of the flavorful apple filling.
The goal is to create distinct layers, so don’t overcrowd the cups just yet; leave ample space for the creamy element that will follow. This initial layer sets the stage for the delightful textural contrasts and flavor combinations that are the hallmark of these charming dessert cups, promising a truly satisfying eating experience with every bite.
Step 6: Adding the Creamy Cloud
Following the apple layer, it’s time to introduce the ethereal whipped cream. Using a spoon or a piping bag fitted with a large tip, gently add a generous layer of whipped cream over the caramelized apples in each cup. A piping bag offers more control and can create a more aesthetically pleasing, decorative finish, but a spoon works just as effectively for a rustic charm.
Ensure the whipped cream covers the apples completely, creating a smooth, white expanse that provides a delightful visual and textural contrast to the richer, darker apple layer beneath. The lightness of the whipped cream will balance the sweetness and warmth of the apples, preventing the dessert from being overly heavy or cloying. This step is about building delicate layers.
Strive for a consistent amount of whipped cream in each cup to maintain uniformity in your dessert presentation. This creamy addition not only enhances the flavor but also contributes significantly to the overall mouthfeel, making each spoonful a harmonious blend of sweet apple and airy cream. It’s a simple step that adds immense appeal and luxuriousness to the final product.
Step 7: Building the Layers for Depth
With the first layers of apple and cream in place, you will now repeat the process to build the characteristic layered structure of these dessert cups. Add another layer of the cooled caramelized apples on top of the whipped cream you just added. Again, ensure you distribute the apples evenly, creating a distinct band of fruit.
This repetition of layers is what gives the dessert cups their appealing visual depth and allows for a delightful mix of textures and flavors with every bite. It’s like a miniature parfait, meticulously constructed for maximum enjoyment. The contrast between the soft apples and the fluffy cream is emphasized with each subsequent layer.
Follow the apple layer with another generous dollop or pipe of whipped cream. Continue this pattern of layering apples and whipped cream until your dessert cups are filled almost to the brim. Leave a small amount of space at the very top, specifically for the final, decadent drizzle of caramel sauce. This methodical layering ensures a balanced flavor profile in every serving.
Step 8: The Finishing Touch – Caramel Drizzle
To complete the visual and flavor masterpiece, it’s time to add the signature caramel drizzle. Take your ½ cup of caramel sauce and warm it slightly if it’s too thick to drizzle easily; a few seconds in the microwave or a brief dip of the bottle in warm water should suffice. Ensure it’s warm enough to pour but not hot, to avoid melting the whipped cream.
Using a spoon or a squeeze bottle, generously drizzle the caramel sauce over the top layer of whipped cream in each dessert cup. Create appealing patterns – zigzags, swirls, or random drizzles – whatever strikes your fancy. The golden-brown caramel sauce cascading down the white whipped cream adds a beautiful, appetizing finish.
This final addition not only enhances the visual allure but also infuses each bite with that distinct, sweet, buttery caramel flavor that is central to the dessert’s identity. It’s the final flourish that ties all the flavors and textures together, promising an explosion of sweet, comforting taste that is both nostalgic and utterly delightful.
Step 9: The Crucial Chill
Before you can indulge in these exquisite Caramel Apple Dessert Cups, a crucial chilling period is required. Carefully place your assembled dessert cups into the refrigerator. This step is not merely optional; it is essential for allowing the flavors to meld together harmoniously and for the dessert to achieve its optimal texture.
The chilling process allows the individual components – the spiced apples, the creamy whipped cream, and the sweet caramel – to integrate, creating a more cohesive and enjoyable flavor profile. Furthermore, the cold temperature makes the dessert refreshing and pleasant to consume, especially if served on a warmer day or after a hearty meal. It also helps the whipped cream to set slightly.
Aim to chill the dessert cups for a minimum of 30 minutes. For an even better melding of flavors and a firmer set, you can extend this chilling time to an hour or even two. This patient waiting period is a small but significant investment that yields a significantly more delicious and satisfying final product, ensuring each bite is a perfectly balanced delight.
Step 10: Presentation and Enjoyment
Once your Caramel Apple Dessert Cups have had ample time to chill and the flavors have wonderfully melded, they are ready to be unveiled and savored. Carefully remove them from the refrigerator, and take a moment to admire their layered beauty. The visual appeal alone is often enough to spark joy and anticipation.
For an extra touch of elegance and to enhance the autumnal theme, you might consider a final garnish. A light dusting of additional cinnamon over the top layer of whipped cream or caramel drizzle can add a subtle aroma and visual flair. Alternatively, a few toasted chopped pecans or walnuts sprinkled on top introduce a delightful crunch and nutty dimension.
Serve these delightful cups to your eager guests or enjoy them as a personal treat. Each spoonful offers a symphony of textures – the tender, spiced apples, the airy, light whipped cream, and the rich, sweet caramel – creating a truly memorable and comforting dessert experience that celebrates the essence of caramel apples in a sophisticated, bite-sized format.
Pro Tips for Caramel Apple Dessert Cups
Select the Right Apples: For the best flavor and texture, choose apples that are firm and hold their shape well when cooked, such as Honeycrisp, Fuji, or Gala. Avoid softer apples that can turn mushy.
Don’t Overcook the Apples: Cook the apples just until tender and nicely caramelized. Overcooking will result in a mushy filling that lacks appealing texture.
Chill Everything for Whipped Cream: For the lightest and fluffiest whipped cream, ensure your heavy cream, bowl, and whisk attachment are very cold. This helps the cream whip up faster and to stiffer peaks.
Layer with Care: When layering, ensure the apple mixture is cooled before adding it to the whipped cream. This prevents the cream from melting and losing its airy texture. Gentle layering also maintains the definition between the layers.
Sweetness Adjustment: Taste your caramelized apples and whipped cream before assembly. Adjust the sugar in the apples or the sweetness of your whipped cream to your personal preference. You can also adjust the amount of caramel sauce drizzled.
Presentation Matters: Using clear serving glasses or jars beautifully showcases the distinct layers of the dessert. This visual element significantly enhances the overall appeal and makes the dessert feel more special.
Serving Suggestions for Caramel Apple Dessert Cups
Decoration
The visual presentation of Caramel Apple Dessert Cups can be enhanced with simple yet effective decorative touches. A final drizzle of extra caramel sauce over the top layer of whipped cream, creating appealing swirls or zigzags, adds a glistening, enticing finish. A light dusting of ground cinnamon or a pinch of nutmeg can echo the warm spices used in the apple filling and introduce a beautiful color contrast.
For added texture and visual interest, consider a sprinkle of toasted chopped nuts, such as pecans, walnuts, or even slivered almonds, over the top. A single, small caramel candy or a thin apple chip placed artfully on top can also serve as an elegant garnish, signaling the delightful flavors contained within the cup. Edible gold stars or glitter can elevate them for festive occasions, making each cup a tiny work of art.
Side Dishes
While these dessert cups are a complete indulgence on their own, they can be complemented by thoughtful additions that enhance the dining experience. A warm mug of spiced apple cider is a classic pairing that harmonizes perfectly with the apple flavors, creating a comforting beverage-dessert duo, especially fitting for cooler weather. A small scoop of high-quality vanilla bean ice cream served alongside can add an extra layer of creamy indulgence, creating a delightful temperature and flavor contrast.
For a simpler beverage, a glass of cold milk (dairy or a non-dairy alternative like almond or oat milk) provides a refreshing counterpoint to the sweetness. If serving as part of a larger dessert spread, these cups can stand proudly alongside cookies or a light fruit salad, offering a rich, decadent option without being overwhelmingly large.
Creative Serving Ideas
Think beyond the standard individual cup for truly unique presentations. Layer the components in a larger trifle bowl, allowing guests to serve themselves, creating a stunning centerpiece. You could also use mini mason jars for a rustic, charming presentation, perfect for outdoor events or casual gatherings. For a more formal affair, consider using elegant martini glasses or small champagne flutes.
Another creative idea is to incorporate them into a dessert bar where guests can customize their own toppings, adding elements like crumbled graham crackers, chocolate chips, or a dollop of extra whipped cream. During the holiday season, tie a festive ribbon around each cup or attach a small decorative charm. For children’s parties, consider adding colorful sprinkles or edible glitter to make them even more whimsical and fun.
Preparation & Storage
Storing Leftovers
Should you find yourself with any leftover Caramel Apple Dessert Cups, proper storage is key to maintaining their delightful texture and flavor. It is best to store any uneaten portions in an airtight container in the refrigerator. This prevents the whipped cream from absorbing odors from other foods and keeps it from drying out.
While these dessert cups are most delicious when freshly made, they can generally be stored for up to three days. However, it is important to note that the texture of the whipped cream may soften slightly over time. For optimal enjoyment, it is recommended to consume them within the first 24-48 hours after preparation.
If you have components that are not yet assembled, such as the cooled caramelized apples and the whipped cream, they can be stored separately for a slightly longer period. The apples can last for up to 4-5 days in an airtight container in the fridge, and the whipped cream can be stored for about 1-2 days. This allows for fresh assembly when desired.
Freezing
Unfortunately, freezing Caramel Apple Dessert Cups in their assembled form is generally not recommended. The primary reason for this is the delicate nature of the whipped cream. When frozen and then thawed, the structure of the whipped cream can break down significantly, leading to a watery, grainy, or deflated texture that is unappealing.
The apples, once thawed, might also release more moisture than desired, potentially making the dessert too soggy. While individual components like the cooked apple mixture *could* potentially be frozen and then thawed and reheated before re-assembly, the overall dessert as a layered cup is best enjoyed fresh. It’s an indulgence best made and consumed relatively soon after preparation.
Therefore, if you anticipate having leftovers, it is far better to plan for refrigeration and consumption within a few days rather than attempting to freeze them for longer storage. This ensures you maintain the intended quality and enjoyment of this delightful treat.
Reheating
These Caramel Apple Dessert Cups are designed to be enjoyed chilled, so reheating is typically not part of the standard preparation or serving process. The whipped cream component is inherently best served cold and will lose its desirable texture if subjected to heat. Therefore, the assembled dessert cups should not be reheated.
However, if you prepared the caramelized apple mixture in advance and wish to serve it warm before layering it with freshly whipped cream, this is a viable option. The apple mixture can be gently reheated in a skillet over low heat or briefly in a microwave until warmed through. It is important that the warmed apples are then allowed to cool slightly before being layered with cold whipped cream to prevent melting.
This approach can add a comforting warmth to the apple component, creating a pleasant temperature contrast with the cool whipped cream. It’s a way to enjoy a slightly different but still delicious variation of the dessert. Always ensure the whipped cream remains cold and is added just before serving if you opt for a warm apple layer.
Frequently Asked Questions
-
Can I prepare the components of Caramel Apple Dessert Cups ahead of time?
Yes, absolutely! You can prepare the caramelized apple mixture a day or two in advance and store it in an airtight container in the refrigerator. Similarly, you can whip the cream ahead of time, but for the best volume and texture, it’s often preferable to whip it closer to assembly. The caramel sauce can also be ready and waiting. The key is to assemble the cups just before serving to ensure the whipped cream remains at its best texture and the apples haven’t made it soggy.
-
What are the best substitutions for ingredients if I have dietary restrictions or preferences?
For a vegan version, swap the butter with coconut oil or vegan butter, use a dairy-free whipped topping (like coconut cream or a commercial vegan whip), and ensure your caramel sauce is dairy-free. To reduce sugar, you can use a sugar substitute in the apple mixture, such as erythritol or stevia blends, and opt for a sugar-free caramel sauce. For a gluten-free dessert, ensure that your caramel sauce and any other packaged ingredients are certified gluten-free, as apples, cinnamon, butter, and most whipped creams are naturally gluten-free.
-
How can I make the Caramel Apple Dessert Cups visually more appealing or festive for special occasions?
To enhance visual appeal, use clear serving glasses or jars to showcase the beautiful layers. You can also pipe the whipped cream using decorative tips for a professional look. For festive occasions, consider garnishes like crushed graham crackers or shortbread cookies around the base of the whipped cream for a “pie crust” effect, or top with a few chocolate shavings, a sprinkle of edible glitter, or even a small festive-themed cookie or candy. Drizzling a contrasting sauce, like chocolate, alongside the caramel can also add visual interest and another flavor dimension, making them perfect for holidays or celebrations.