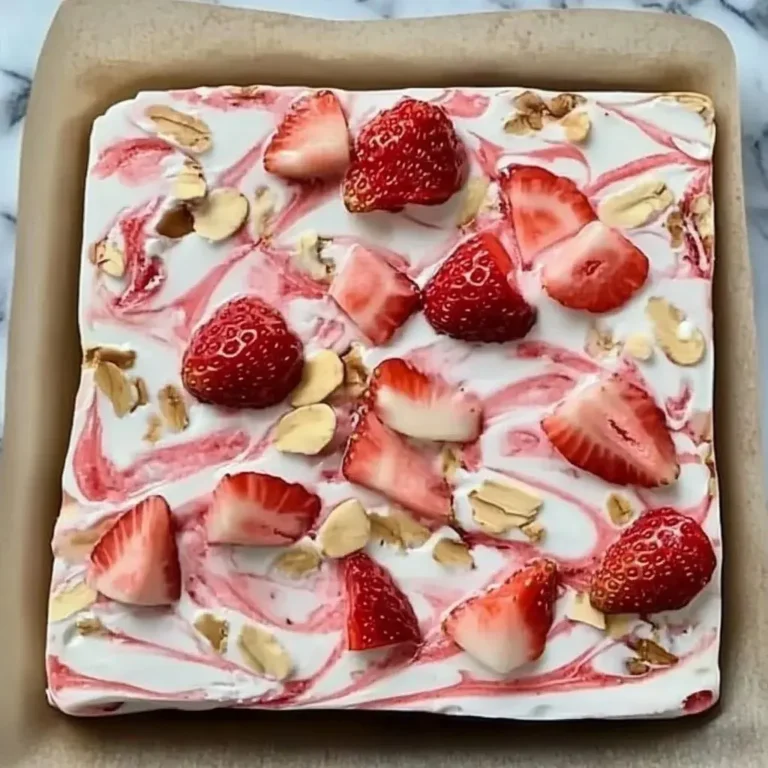
Blueberry Cookies – Soft & Chewy!

The aroma of warm, freshly baked cookies is an undeniable invitation to comfort and joy. Imagine biting into a cookie that’s not just sweet, but imbued with the vibrant, slightly tart essence of real blueberries, perfectly balanced with a tender, chewy texture. These blueberry cookies are a celebration of simple ingredients transformed into something truly special, offering a delightful escape with every bite.
This recipe isn’t just about creating a delicious treat; it’s about crafting an experience. The journey from gathering simple ingredients to the moment of that first warm, flavorful bite is incredibly rewarding. Prepare to fall in love with these delightful cookies that promise to become a staple in your baking repertoire.
Why You Will Love This Recipe
- Bursting with Flavor: Unlike recipes that use artificial extracts, these cookies are packed with the authentic taste of real blueberries, enhanced by a homemade blueberry sauce for an intense fruity punch.
- Perfect Texture: Achieve that coveted soft and chewy cookie center with slightly crisp edges, thanks to a masterful blend of ingredients and techniques like chilling the dough.
- Visually Stunning: The beautiful blue hue, reminiscent of the fruit itself, makes these cookies a feast for the eyes, perfect for sharing at gatherings or simply brightening your day.
- Remarkable Freshness: These cookies are designed to stay soft and delicious for days, a testament to the thoughtful inclusion of cornstarch and proper preparation.
- Customizable Delight: While the recipe is wonderful as is, it offers ample opportunities for personalization, allowing you to tailor it to your preferences, whether through added chocolate or creative variations.
Ingredients You Need
The magic of these blueberry cookies truly lies in the quality of the ingredients and the thoughtful way they are combined. Opting for fresh, vibrant blueberries will ensure the most intense and authentic flavor, while standard pantry staples like flour, sugar, and butter form the perfect foundation for a delightful cookie structure. The addition of cornstarch is a secret weapon for achieving that signature chewy texture and preventing excessive spreading.
Blueberry Cookies

These blueberry cookies are thick, chewy, and bursting with real blueberries! Made with fresh blueberry sauce and a little cornstarch in the dough, these beautiful blue cookies stay soft for days and taste like a bite of blueberry pie.
- For the blueberry sauce:
- 1 cup fresh blueberries, stems removed
- 2 teaspoons granulated sugar
- 1 tablespoon fresh lemon juice, not bottled
- For the cookies:
- 2 cups all purpose flour
- 1½ tablespoons cornstarch
- 1½ teaspoons baking powder
- 1½ cups granulated sugar, divided
- 2 tablespoons milk
- 1 large egg
- 1Make the blueberry sauce. In a medium pot over medium-low heat, combine the fresh blueberries, sugar, and lemon juice. Cook, stirring frequently, until the blueberries break down and the mixture thickens. This will take about 5-8 minutes. Set aside to cool.
- 2Combine the dry ingredients. In a large bowl, combine the flour, cornstarch, baking powder, and salt. Set aside.
- 3Cream the butter and sugar. In another large bowl, cream the butter and 1¼ cups of white granulated sugar until light and fluffy.
- 4Add the blueberry sauce. Scoop 3 tablespoons of the cooled blueberry sauce out of the pot and mix it into the butter and sugar. (If you have extra sauce, put it in a mason jar for later. You can use it on pancakes.)
- 5Add remaining liquid ingredients. Add milk, egg, and dye. Mix until just combined.
- 6Add dry ingredients. Mix until everything is well combined and there are no dry bits of batter.
- 7Chill the dough. Cover your bowl with saran wrap and chill in the refrigerator for 3 hours.
- 8Prep your tools. Preheat your oven to 325ºF. Line a baking sheet with parchment paper or a Silpat. Set aside.
- 9Pour sugar. Place the remaining 1/4 cup of sugar in a shallow plate. Set aside.
- 10Form the cookies. Scoop the chilled cookie dough and roll it into balls, using about 1 heaping tablespoon of dough per cookie.
- 11Roll in sugar. Place the rolled cookie dough into the sugar and roll it around to coat. Place the sugar cookie dough ball onto your prepared baking sheet. You will be able to fit 6 cookies on one standard baking sheet. (There needs to be space between the balls of dough.)
- 12Chill the extra dough. Once you have shaped your 6 cookies, place the cookie dough back in the fridge until you are ready to shape the next batch. Or, if you have two cookie sheets, you can start working on the next batch while the first one bakes. You just don’t want the cookie dough to sit on the counter and warm up.
- 13Bake. Place in the oven and bake for 15 minutes or until cracks form.
- 14Cool. Remove the cookies from the oven and allow them to cool for 10 minutes on the baking sheet before transferring them to a wire rack to finish cooling for another 20 minutes. If you try to move the cookies before 10 minutes, they will be too soft and will break.
Keywords: blueberry cookies, soft cookies, chewy cookies, fruit cookies, homemade cookies
For the precise measurements and specific types of ingredients, please refer to the detailed ingredient list provided within the recipe card.
Variations
Elevating these blueberry cookies can be as simple as introducing a new flavor dimension or adapting them to dietary needs. Consider adding white chocolate chips to the dough; the creamy sweetness of the chocolate beautifully complements the tartness of the blueberries, creating little pockets of indulgence in every bite.
For those seeking a lower-carbohydrate option, you can explore using almond flour or coconut flour as a partial substitute for all-purpose flour, though this may alter the texture slightly. Sugar substitutes can also be employed, but be mindful that they might affect the browning and chewiness of the final cookie.
A delightful vegan adaptation can be achieved by substituting the butter with a high-quality vegan butter alternative and replacing the egg with a flax egg or a commercial egg replacer. Ensure your milk choice is also plant-based, such as almond or soy milk, to maintain the integrity of the vegan preparation.
Another exciting twist involves incorporating spices like cinnamon or a hint of cardamom into the dry ingredients. These warm spices can add an unexpected depth of flavor that harmonizes wonderfully with the blueberry essence, making the cookies perfect for a cozy autumn treat or a festive holiday bake.
For a touch of elegance, a sprinkle of lemon zest in the dough will amplify the natural tang of the blueberries, providing a bright, refreshing counterpoint. This subtle addition can transform the cookie into a more sophisticated dessert, suitable for afternoon tea or a light dessert after a meal.
Think about adding a small amount of lavender extract or dried culinary lavender to the dough; this floral note pairs surprisingly well with blueberries, creating a unique and memorable flavor profile that is both delicate and sophisticated.
Consider a swirl of cream cheese frosting on top once the cookies have completely cooled. The tangy richness of cream cheese frosting cuts through the sweetness of the cookie and enhances the blueberry flavor, making it feel like a miniature blueberry cheesecake in cookie form.
You could also experiment with adding a pinch of nutmeg or allspice to the dough, especially if you’re leaning into a more autumnal flavor profile. These warm spices can add a comforting depth that complements the fruit without overpowering it.
For a textural contrast, toasting some chopped nuts like pecans or walnuts and folding them into the dough can add a delightful crunch. This is particularly good if you’re aiming for a heartier, more substantial cookie experience.
Finally, think about a drizzle of a complementary glaze. A simple lemon glaze, a vanilla glaze, or even a thin chocolate ganache can add an extra layer of flavor and visual appeal, turning these already wonderful cookies into something truly extraordinary.
How to Prepare Blueberry Cookies
Step 1: Crafting the Blueberry Sauce
Begin by preparing the star of our cookie show: the blueberry sauce. In a medium saucepan, combine one cup of fresh blueberries, ensuring any stems have been meticulously removed and any bruised or overripe berries are discarded. Add two teaspoons of granulated sugar to the blueberries; this helps to draw out their natural juices and provides a touch of sweetness.
Next, incorporate one tablespoon of freshly squeezed lemon juice. The lemon juice is crucial not only for its bright flavor that cuts through the sweetness but also for its acidic properties that help the sauce thicken properly. Place the saucepan over medium-low heat. It’s important not to rush this step; a gentle heat allows the blueberries to break down slowly and evenly.
Stir the mixture frequently as it heats. You will observe the blueberries begin to soften and release their vibrant juices. Continue to cook and stir until the mixture thickens into a luscious sauce consistency. This typically takes about five to eight minutes. Once thickened, remove the saucepan from the heat and set the blueberry sauce aside to cool completely. This cooling period is essential before incorporating it into the cookie dough.
As the sauce cools, it will thicken further, achieving a jam-like consistency. If you find the sauce is too thin after cooling, you can return it to the stovetop for a few more minutes of gentle simmering to evaporate any excess moisture. Conversely, if it becomes too thick, a tiny splash of water or lemon juice can help loosen it. Make sure to taste the sauce as it cools; you can adjust the sugar or lemon juice slightly based on your preference, but remember it will be further balanced by the cookie dough ingredients.
Ensure the sauce is thoroughly cool before proceeding to the next steps. If you are in a hurry, you can speed up the cooling process by transferring the sauce to a shallow bowl and placing it in the refrigerator. However, avoid letting it become too cold, as this might affect the creaming process in the subsequent steps.
This homemade blueberry sauce is the key to infusing every bite with authentic blueberry flavor. The combination of fresh berries, sugar, and lemon juice creates a bright, slightly tart, and wonderfully sweet element that makes these cookies truly special and distinct from those made with artificial flavorings.
Remember that you might have a little extra blueberry sauce. This is a delightful bonus! Store any leftover sauce in a clean mason jar in the refrigerator. It’s perfect for drizzling over pancakes, waffles, yogurt, or even using as a topping for your favorite dessert.
Step 2: Combining Dry Ingredients
While your blueberry sauce is cooling, turn your attention to the dry components of the cookie dough. In a large mixing bowl, gather your flour, cornstarch, baking powder, and salt. It is best to use all-purpose flour for a classic cookie texture, but you could experiment with bread flour for a chewier result.
Measure the flour accurately to ensure the correct dough consistency. The most precise method is to weigh the flour using a kitchen scale. If you don’t have a scale, use the spoon-and-level method: lightly spoon the flour into your measuring cup until it’s overflowing, then sweep a straight edge across the top to remove any excess. Avoid scooping directly from the flour bag, as this can compact the flour and lead to too much being added.
Next, add the cornstarch. Cornstarch plays a vital role in achieving the signature soft and chewy texture of these cookies. It helps to tenderize the dough and also contributes to preventing the cookies from spreading too thinly during baking, resulting in a thicker cookie. Add one and a half tablespoons of cornstarch.
Now, add the baking powder. Baking powder acts as a leavening agent, helping the cookies to rise slightly and achieve a desirable texture without becoming too flat. Measure one and a half teaspoons of baking powder carefully.
Finally, add the salt. Salt is crucial for enhancing all the other flavors in the cookie dough, balancing the sweetness and preventing the cookie from tasting flat or one-dimensional. Use half a teaspoon of kosher salt. If you are using table salt, reduce the amount slightly, as it is more potent.
Whisk all these dry ingredients together thoroughly. This ensures that the leavening agents and salt are evenly distributed throughout the flour mixture, which is essential for uniform baking and consistent texture in every cookie. A good whisking will also aerate the flour slightly, contributing to a lighter cookie.
Once whisked, set this bowl of dry ingredients aside. It will be combined with the wet ingredients in a later step to form the cohesive cookie dough. Ensuring the dry ingredients are well combined now prevents any pockets of salt or baking powder in the final cookies.
Step 3: Creaming Butter and Sugar
In a separate, large mixing bowl, begin the process of creaming the butter and sugar. This step is fundamental to creating a tender cookie structure and incorporates air into the dough, which contributes to its texture and helps it to rise. Use softened, room-temperature unsalted butter for the best results; it should yield slightly when pressed with your finger but not be melted or oily.
Add half a cup of unsalted butter to the bowl. To this, add one and a quarter cups of granulated white sugar. Using white granulated sugar here helps with achieving a lighter colored cookie and contributes to a crispier edge. Reserve the remaining quarter cup of sugar for rolling the cookies later. Ensure your sugar is free of clumps.
Using either a stand mixer fitted with the paddle attachment or a hand mixer, cream the butter and sugar together. Begin mixing on a low speed to combine them initially, then increase the speed to medium-high. Continue to beat the mixture until it becomes noticeably light, fluffy, and pale yellow in color. This process can take anywhere from 3 to 5 minutes, depending on the power of your mixer.
Properly creamed butter and sugar should have a fluffy texture, almost like a thick frosting. Scrape down the sides and bottom of the bowl occasionally with a spatula to ensure all the ingredients are incorporated evenly and to prevent butter from sticking to the bowl’s surface. This thorough creaming is what builds the foundation for the cookie’s texture and structure.
The air incorporated during this creaming stage will expand during baking, contributing to the cookie’s lift and preventing it from becoming too dense. If your butter is too cold, it will be difficult to cream effectively, resulting in a greasier dough. If it’s too warm, the mixture will be greasy and won’t achieve the necessary fluffiness.
Once the butter and sugar are perfectly creamed, you should notice a significant difference in volume and texture compared to when you started. This light and airy mixture is ready to embrace the other wet ingredients, bringing us closer to delicious blueberry cookies.
Step 4: Incorporating Blueberry Sauce and Other Wet Ingredients
With your butter and sugar mixture light and fluffy, it’s time to introduce the star flavor: the blueberry sauce. Ensure your blueberry sauce has cooled sufficiently. Carefully scoop out approximately three tablespoons of the cooled blueberry sauce from the saucepan or its storage container.
Add these three tablespoons of thick, flavorful blueberry sauce directly into the creamed butter and sugar mixture. Mix on a low speed initially, then increase to medium, allowing the sauce to incorporate smoothly. The mixture will take on a beautiful, speckled purple hue and a delightful fruity aroma will fill your kitchen. Scrape down the sides of the bowl to ensure the sauce is fully integrated with the butter and sugar.
Next, add the remaining liquid ingredients to the bowl. This includes two tablespoons of milk. Any type of milk will work here, whether it’s whole milk for richness, 2% milk, or even a non-dairy alternative like almond milk or soy milk. The milk helps to bind the dough and contribute to its moisture content.
Now, add one large egg. For best results, ensure the egg is at room temperature. Room temperature eggs emulsify better with the other ingredients, leading to a smoother dough and a more evenly baked cookie. If your egg is cold, you can quickly warm it by placing it in a bowl of warm water for a few minutes.
If you desire a more vibrant blue color, this is also the stage to add the optional purple food coloring. Add about a quarter teaspoon of liquid purple food coloring. Liquid food coloring is recommended over gel coloring because it disperses more easily and doesn’t add as much concentrated pigment, allowing for a softer, more natural-looking blue hue. The goal is a soft, inviting color, not an artificial one.
Mix these wet ingredients together until they are just combined. Avoid overmixing at this stage. You want everything to be incorporated into a cohesive, smooth, and beautifully colored mixture. The combination of the creamy butter, sweet sugar, tart blueberry sauce, milk, egg, and optional food coloring creates a rich base for your cookies.
The consistency of the mixture should be relatively thick but smooth. You’ll notice the color becoming more pronounced with the addition of the food coloring, creating an appealing visual before the dry ingredients are even added. This mixture is now ready to receive the dry ingredients to form the complete cookie dough.
Step 5: Combining Wet and Dry Ingredients and Chilling the Dough
Now it’s time to bring together the wet and dry components to form the cookie dough. Take the bowl containing your whisked dry ingredients (flour, cornstarch, baking powder, salt) and gradually add it to the large bowl holding your wet ingredients (creamed butter and sugar mixture with blueberry sauce, milk, egg, and food coloring). Do this in two or three additions, mixing on a low speed after each addition until just combined.
It is crucial not to overmix the dough once the flour is added. Overmixing develops the gluten in the flour, which can result in tough, dense, or flat cookies instead of the soft and chewy texture we are aiming for. Mix only until you no longer see any streaks of dry flour. A few small streaks of flour are better than overmixing.
Use a spatula or wooden spoon to finish incorporating any remaining dry bits by hand. The dough will be soft and slightly sticky at this stage, with a beautiful speckled appearance from the blueberries. It should hold together when squeezed but still feel pliable.
Once the dough is just combined, cover the bowl tightly with plastic wrap or a lid. Transfer the covered bowl to the refrigerator for chilling. This chilling period is non-negotiable and absolutely critical for achieving the best results. It allows the flour to hydrate fully, the gluten to relax, and the flavors to meld.
More importantly, chilling the dough solidifies the fat (butter), which prevents the cookies from spreading excessively when they bake. This ensures you get thicker, chewier cookies rather than thin, crispy ones. The recommended chilling time is a minimum of 3 hours, but chilling it overnight or for up to 48 hours can further enhance the flavor and texture.
While the dough is chilling, you can prepare your baking sheets and preheat your oven. Preheat your oven to 325°F (160°C). Lining your baking sheets with parchment paper or a silicone baking mat (Silpat) will prevent the cookies from sticking and ensure even baking. This is also a good time to place the remaining quarter cup of granulated sugar in a shallow plate or bowl, ready for rolling the cookies.
The chill time is a crucial waiting period, but it is well worth the patience. The transformation of the soft, sticky dough into a firmer, more manageable mass is remarkable and sets the stage for perfect blueberry cookies.
Step 6: Shaping, Rolling, and Baking the Cookies
Once the cookie dough has chilled for at least 3 hours, it’s time to shape the cookies. Take the chilled dough out of the refrigerator. Using a cookie scoop that holds about one heaping tablespoon of dough, portion out the dough. This ensures that all your cookies will be roughly the same size, leading to even baking.
Roll each portion of dough into a smooth ball between the palms of your hands. The dough should be firm enough to handle without becoming too soft or sticky. If the dough feels too soft to handle, return it to the refrigerator for another 15-30 minutes to firm up further.
Prepare your shallow plate of granulated sugar. Carefully place each rolled cookie dough ball into the sugar and gently roll it around to coat all sides evenly. This sugar coating will create a beautiful, slightly crisp crust on the outside of the cookie once baked, offering a lovely textural contrast to the soft interior.
Place the sugar-coated cookie dough balls onto your prepared baking sheet, leaving ample space between each cookie. Allow about 2 inches of space between them, as the cookies will spread slightly during baking. You should be able to fit approximately 6 cookies on a standard-sized baking sheet. Avoid overcrowding the baking sheet, as this can lead to uneven cooking.
If you are baking the cookies in batches, ensure that the remaining cookie dough stays chilled in the refrigerator until you are ready to shape and bake the next batch. Do not leave the dough out at room temperature for extended periods, as it will soften too much and lead to excessive spreading. If you have two baking sheets, you can begin shaping the next batch while the first one bakes.
Once your baking sheet is ready with the shaped and sugared cookies, carefully place it into the preheated oven at 325°F (160°C). Bake for approximately 15 minutes. The cookies are done when the edges are set and just beginning to crack, but the centers still look slightly soft and underbaked. They will continue to cook and set on the baking sheet after they are removed from the oven.
Watch the cookies closely during the last few minutes of baking. Overbaking can dry them out, so it’s better to err on the side of slightly underbaked. The signature crackling on the surface is a good indicator that they are ready. After baking, remove the baking sheet from the oven and let the cookies cool on the sheet for about 10 minutes.
This resting period is crucial because the cookies are very soft and fragile when they first come out of the oven. Allowing them to cool on the baking sheet helps them to set and firm up enough to be moved without breaking. After 10 minutes, carefully transfer the cookies to a wire rack to cool completely. The aroma of these freshly baked blueberry cookies will be absolutely irresistible!
Pro Tips for Blueberry Cookies
Don’t Overmix the Dough: This is arguably the most critical tip for achieving that perfect soft and chewy texture. As soon as you incorporate the dry ingredients, mix only until they are just combined. Overmixing develops gluten, leading to tough cookies rather than tender ones.
Chill the Dough Adequately: The 3-hour chilling period is essential. It solidifies the butter, preventing excessive spreading and resulting in thicker, chewier cookies. If you have the time, chilling it overnight yields even better flavor and texture.
Use Room Temperature Ingredients: Ensure your butter and egg are at room temperature. This allows them to emulsify properly, creating a smoother dough and better incorporation of air during the creaming process, which is vital for texture.
Measure Flour Correctly: Spoon your flour into the measuring cup and level it off rather than scooping directly from the bag. This prevents you from adding too much flour, which can make the cookies dry and dense.
Watch Baking Time Closely: Pull the cookies out when the edges are set and just starting to crack, but the centers still look slightly soft. They will continue to bake and firm up on the hot baking sheet. Overbaking is the quickest way to dry out these delightful treats.
Embrace the Blueberry Sauce: The homemade blueberry sauce is what gives these cookies their signature intense flavor. Don’t skip this step if you want authentic, delicious blueberry cookies that taste like they’re bursting with fruit.
Room Temperature for Storage is Key: For the best texture and flavor retention, store these cookies at room temperature in an airtight container. The cornstarch helps maintain their softness for several days.
Don’t Skip the Sugar Roll: While optional, rolling the cookie dough balls in granulated sugar before baking adds a delightful crunchy exterior that contrasts beautifully with the chewy interior. It also adds a touch of sparkle.
Consider the Color: The liquid food coloring is optional, but it enhances the visual appeal, making the cookies look as vibrant as they taste. A little goes a long way to achieve a soft, appealing hue.
Cooling on the Sheet Matters: Resist the urge to move the cookies immediately after baking. Let them rest on the hot baking sheet for at least 10 minutes. This is crucial for them to set properly and avoid crumbling when transferred.
Serving Suggestions for Blueberry Cookies
Decoration
These blueberry cookies are delightful in their simplicity, but a few decorative touches can elevate them further. A light dusting of powdered sugar after they’ve cooled can give them a snowy, elegant appearance, especially fitting for a winter bake or a special occasion. For a more vibrant look, a simple glaze made with powdered sugar and a splash of milk or lemon juice can be drizzled over the tops. A touch of edible glitter or sanding sugar can add a festive sparkle, making them perfect for celebrations.
Side Dishes
When serving these delectable cookies, consider pairing them with beverages that complement their fruity sweetness. A warm cup of coffee, especially a latte or cappuccino, is a classic choice that provides a rich contrast to the cookie’s flavor. For a non-caffeinated option, a glass of cold milk is always a winner, reminiscent of childhood treats. A herbal tea, such as chamomile or mint, can offer a refreshing and soothing accompaniment.
If you’re looking for more substantial accompaniments, these cookies can be part of a larger dessert spread. They pair wonderfully with a scoop of vanilla bean ice cream or, even better, blueberry ice cream for an ultimate blueberry experience. A light fruit salad featuring berries and melon can also provide a refreshing contrast to the richness of the cookies. For a brunch setting, they could accompany a stack of fluffy pancakes or waffles.
Creative Serving Ideas
Transform these blueberry cookies into mini ice cream sandwiches by placing a generous scoop of your favorite ice cream (vanilla, lemon, or even more blueberry!) between two cooled cookies. This creates an indulgent dessert that is sure to impress. For a delightful afternoon tea, serve them alongside delicate finger sandwiches and other small pastries.
Consider using them as a base for a deconstructed dessert. Crumble a cookie and layer it with fresh whipped cream and extra blueberries in a small glass for a parfait. They can also be a charming addition to a cookie gift box, perhaps alongside other favorites like funfetti cookies or lemon shortbread.
For a fun family activity, let everyone decorate their own cookie with frosting, sprinkles, or even a few extra blueberries. This makes them a fantastic centerpiece for parties or a weekend baking project with children. The possibilities are as endless as the joy these cookies bring.
Imagine presenting these cookies on a rustic wooden board with a small bowl of berry compote for dipping, encouraging a communal and interactive dessert experience. They can also be crumbled and used as a topping for yogurt parfaits or even a fruit crumble, adding a delightful crunch and burst of blueberry flavor to other dishes.
Think about incorporating them into a dessert charcuterie board. Arrange them alongside cheeses, fruits, nuts, and chocolates for a sophisticated and customizable dessert experience that guests can graze on at their leisure.
For a truly impressive presentation, consider a cookie tower. Stack several cookies, using a bit of frosting or ganache between them as ‘glue,’ to create a stunning centerpiece for a dessert table or special celebration.
Preparation & Storage
Storing Leftovers
Proper storage is key to maintaining the delightful softness and chewiness of these blueberry cookies. Once the cookies have cooled completely on a wire rack, transfer them to an airtight container. Avoid placing warm cookies in a container, as the trapped moisture can make them soggy.
Store the container at room temperature. These cookies are designed to stay soft for several days, typically 3 to 4 days, thanks to the cornstarch and the tender dough composition. Ensure the container is well-sealed to prevent air from drying out the cookies. Adding a slice of bread to the container can also help maintain moisture, though it’s usually not necessary with this recipe.
Freezing
If you’ve baked more cookies than you can enjoy within a few days, or if you want to have some on hand for future cravings, freezing is an excellent option. You can freeze the baked and fully cooled cookies. Place them in a single layer on a baking sheet and freeze until solid, which usually takes about 1-2 hours. This prevents them from sticking together in the freezer bag.
Once frozen solid, transfer the cookies to a heavy-duty freezer bag or an airtight freezer-safe container. Remove as much air as possible from the bag before sealing to prevent freezer burn. Properly stored, these blueberry cookies can be kept frozen for up to 1 month. They retain their flavor and texture remarkably well when frozen.
Reheating
To enjoy your frozen blueberry cookies, simply thaw them at room temperature. This usually takes about 30-60 minutes, depending on the ambient temperature. Once thawed, they should be as soft and delicious as when they were first baked. If you prefer them slightly warm, you can gently reheat them.
For a slightly warm cookie, place them on a baking sheet and warm them in a preheated oven at a low temperature, around 250°F (120°C), for 5-10 minutes, or until they are just warmed through. Be very careful not to over-reheat them, as this can dry them out. Alternatively, a few seconds in the microwave on a low power setting can also work, but watch them closely to avoid making them tough or rubbery.
If you are reheating frozen cookies that have been thawed, a brief warming period can bring back that fresh-from-the-oven sensation. Even unfrozen cookies can be gently warmed for a delightful, melt-in-your-mouth experience.
The key to reheating any cookie is to do so gently and briefly. The goal is to warm them through without cooking them further or drying them out. For cookies that have been stored at room temperature, a few seconds in the microwave or a minute in a toaster oven can revive their texture and flavor.
When reheating, consider the type of cookie. These blueberry cookies, being soft and chewy, benefit from gentle warmth. Avoid high heat or prolonged baking, which can compromise their delicate texture. The best reheating method often depends on how you plan to serve them – slightly warm cookies are perfect on their own or alongside a warm beverage.
Frequently Asked Questions
-
Can I use frozen blueberries instead of fresh ones for the sauce?
Yes, you can absolutely use frozen blueberries to make the sauce. If using frozen berries, you will likely need to simmer them for a slightly longer period to allow them to break down and for the excess moisture to evaporate, achieving a thick sauce consistency. Ensure you stir them frequently and monitor the thickness. It’s best to cook them from frozen rather than thawing them first, as thawing can release a lot of excess liquid that might make the sauce too thin.
-
Why are my cookies spreading too much in the oven?
Excessive spreading in cookies is often caused by a few common issues. If your butter was too soft or melted when you creamed it with the sugar, it can cause the cookies to spread rapidly. Overmixing the dough after adding the flour can also contribute to spreading by developing too much gluten. Crucially, not chilling the dough adequately is a primary reason for cookies spreading too much, as the solidified fat needs time to firm up. Ensure your oven temperature is accurate as well; an oven that runs too hot can cause the fats to melt too quickly.
-
How can I make these cookies without purple food coloring?
The purple food coloring is entirely optional and is used purely for aesthetic enhancement to give the cookies a more pronounced blueberry hue. If you prefer to avoid food coloring, you can simply omit it. The cookies will still be delicious, with the natural speckles of blueberry visible throughout. You might also consider using a small amount of blue butterfly pea powder, which is a natural food coloring derived from flowers, to achieve a beautiful blue tint without artificial dyes. Just a teaspoon of the powder typically yields a lovely color.