Irresistibly Soft Banana Pudding Cookies for a Sweet Twist
Just the other day, I found myself daydreaming about those sunny afternoons filled with sweet banana pudding on my grandmother’s porch. That nostalgia inspired me to create these delightful Banana Pudding Cookies, blending the creamy charm of classic banana pudding into a soft, chewy treat.
With an irresistible crunch from crushed vanilla wafers, these cookies are an easy way to bring joy to any gathering or just to enjoy with a cup of coffee at home. They not only bring a comforting flavor that everyone will love but also evoke a sense of warm, cherished memories.
Why You Will Love This Recipe
- Nostalgic Flavors: Infused with the beloved taste of classic banana pudding, these cookies transport you back to sunny afternoons and cherished moments.
- Easy to Make: With just a few simple steps and readily available ingredients, you’ll have a batch of warm, soft cookies ready to impress family and friends in no time.
- Unique Texture: The delightful combination of chewy cookie goodness and a crispy vanilla wafer crunch creates a truly satisfying and memorable bite with every cookie.
- Perfect for Any Occasion: Whether it’s a casual family gathering, a potluck contribution, or simply an afternoon treat with your favorite beverage, these cookies fit any setting seamlessly.
- Great for Meal Prep: Make a batch ahead of time and store them for up to a week or freeze them for even longer—they are perfect for busy days when you need a quick sweet fix.
Ingredients You Need
Crafting these Banana Pudding Cookies starts with selecting high-quality ingredients that will bring out the best flavors and textures. Using fresh, good-quality components is the cornerstone of any fantastic baked good, and these cookies are no exception. The combination of familiar pantry staples and a few special additions will create a cookie that truly stands out.
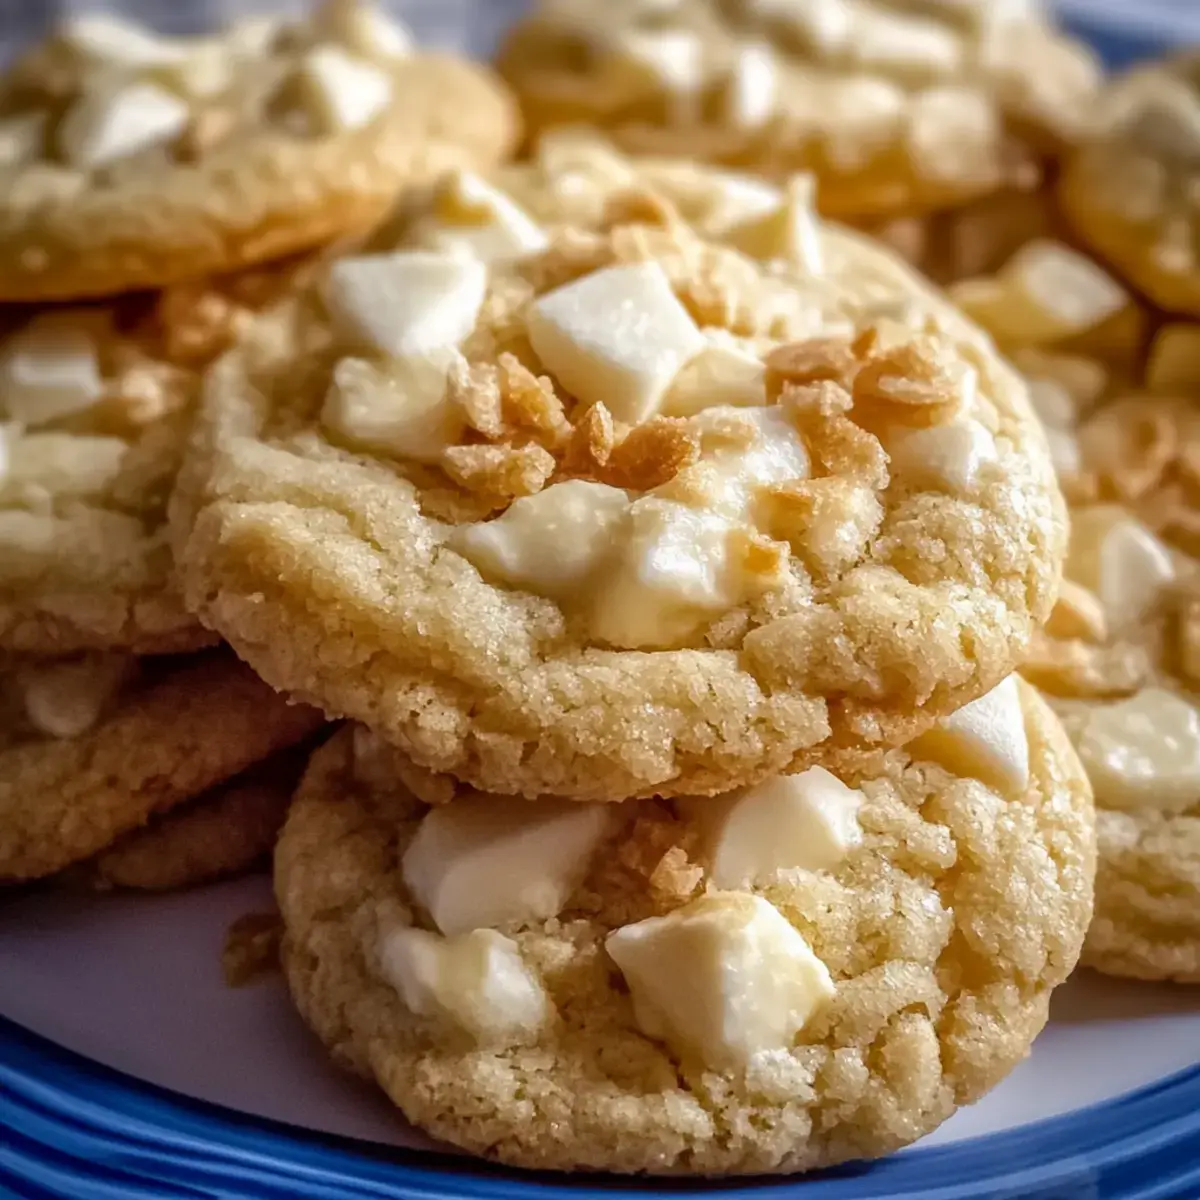
Banana Pudding Cookies

Delightful Banana Pudding Cookies blend nostalgic flavors of classic banana pudding into soft, chewy treats, perfect for any gathering.
- 1 cup Unsalted Butter (softened)
- 1 cup Brown Sugar (packed)
- 1/2 cup Granulated Sugar
- 2 large Large Eggs (at room temperature)
- 1 teaspoon Vanilla Extract (or almond extract)
- 1 package Instant Banana Cream Pudding Mix (dry mix only)
- 2 cups All-Purpose Flour (gluten-free optional)
- 1 teaspoon Baking Soda (ensure it's fresh)
- 1/2 teaspoon Salt
- 1 cup White Chocolate Chips (dark chocolate optional)
- 1 cup Crushed Vanilla Wafers
- 1Preheat your oven to 350°F (175°C) and line two baking sheets with parchment paper.
- 2In a large mixing bowl, cream together the softened butter, brown sugar, and granulated sugar until light and fluffy, about 3-4 minutes.
- 3Beat in the eggs one at a time, followed by the vanilla extract, until fully combined.
- 4Add the dry instant banana cream pudding mix and mix on low speed until combined.
- 5In a separate bowl, whisk together flour, baking soda, and salt. Gradually combine with the wet ingredients until a soft dough forms.
- 6Fold in white chocolate chips and crushed vanilla wafers until evenly distributed.
- 7Scoop rounded portions of dough onto prepared baking sheets, spacing them about 2 inches apart.
- 8Bake for 9 to 11 minutes until edges are lightly golden and centers are just set.
- 9Allow cookies to cool on sheets for 5 minutes before transferring to a wire rack to cool completely.
Keywords: banana pudding, cookies, dessert, baking, sweet, nostalgic
These ingredients come together to create a delightful cookie that captures the essence of banana pudding, with quantities detailed in the accompanying recipe card for your convenience.
Variations
To elevate your Banana Pudding Cookies even further, consider these creative variations that cater to different preferences and dietary needs. These simple swaps can transform the cookie into something uniquely yours, offering exciting new flavor profiles and textures.
For those seeking a vegan option, you can achieve similar deliciousness by substituting the butter with a high-quality vegan butter alternative or coconut oil. Ensure your brown sugar is also vegan, as some sugar is processed with bone char.
A fantastic low-carb twist can be made by replacing the all-purpose flour with a blend of almond flour and coconut flour. You might also experiment with a sugar substitute like erythritol or stevia, adjusting the sweetness to your liking for a guilt-free indulgence.
If you’re a fan of chocolate, consider swapping the white chocolate chips for dark or semi-sweet chocolate chips. For an added depth of flavor, you could even sprinkle a few mini chocolate chips into the dough before baking for a decadent surprise.
How to Prepare Banana Pudding Cookies
Step 1: Prepare the Baking Environment
Begin by preheating your oven to the optimal baking temperature of 350°F (175°C). This ensures that your cookies will bake evenly and achieve that perfect golden-brown hue without overcooking. Preheating is a fundamental step in baking that guarantees consistent results every single time.
While the oven is heating, prepare your baking sheets by lining them with parchment paper or silicone baking mats. This crucial step prevents the cookies from sticking to the pan, making for a much cleaner release and simplifying the cleanup process significantly. It also contributes to more uniform baking by creating a buffer between the cookie and the hot metal of the baking sheet.
Having your baking sheets ready in advance allows you to move quickly once the dough is prepared, minimizing the time the dough sits at room temperature, which can affect its consistency and spread during baking. This organized approach sets the stage for a smooth and successful baking experience.
Step 2: Creaming the Foundation
In a large mixing bowl, combine the softened unsalted butter, packed brown sugar, and granulated sugar. The butter should be softened to room temperature, meaning it yields to gentle pressure but isn’t melted or greasy. This consistency is vital for achieving a light and airy texture in the cookie dough.
Using an electric mixer, whether a stand mixer with a paddle attachment or a handheld mixer, cream these ingredients together on medium speed. Continue this process for approximately 3 to 4 minutes, until the mixture becomes noticeably light, fluffy, and pale in color. This creaming stage is where essential air is incorporated into the dough, which is key to the cookies’ tender and chewy structure.
The resulting creamy mixture forms the rich, sweet foundation for your Banana Pudding Cookies, ensuring that each bite is packed with delightful flavor and has a wonderfully tender crumb. This step is non-negotiable for achieving that signature cookie texture.
Step 3: Integrating the Wet Ingredients
Once your butter and sugar mixture is perfectly creamed, it’s time to incorporate the eggs. Add the large eggs one at a time, ensuring that each egg is fully beaten into the mixture before adding the next. This gradual incorporation helps to emulsify the fats and liquids, creating a stable and smooth dough base.
Following the eggs, pour in the vanilla extract. Vanilla extract is crucial for enhancing the overall flavor profile of the cookies, adding warmth and depth that complements the banana and pudding notes beautifully. Continue to beat the mixture until all the ingredients are well combined, resulting in a glossy and homogenous dough.
This stage is critical for binding the ingredients together and contributing to the moisture and richness of your final Banana Pudding Cookies, setting them up for delicious success. The smooth, cohesive texture achieved here is a good indicator that the dough is on its way to becoming perfect cookies.
Step 4: The Banana Pudding Infusion
Now comes the star of the show: the instant banana cream pudding mix. Add the entire package of dry pudding mix directly to your wet ingredients in the mixing bowl. It is essential to use only the dry mix and not prepare it according to package directions, as it will cook and set within the cookie dough itself.
Mix these ingredients on a low speed using your electric mixer. Continue mixing just until everything is smoothly combined and the pudding mix is fully incorporated into the dough. You’ll notice the dough starting to thicken and take on a beautiful pale yellow hue, characteristic of banana pudding.
This step is what truly gives these cookies their signature banana pudding flavor and a wonderfully creamy texture that sets them apart from ordinary cookies. It’s a clever shortcut to achieving a complex flavor in a simple cookie. The pudding mix also contributes to the cookie’s delightful chewiness.
Step 5: Building the Dry Structure
In a separate medium-sized bowl, thoroughly whisk together the all-purpose flour, baking soda, and salt. Whisking these dry ingredients together before adding them to the wet mixture ensures they are evenly distributed, preventing pockets of leavening or salt in your final cookies. Baking soda is the leavening agent that helps your cookies rise and spread, while salt balances the sweetness and enhances all the other flavors.
Gradually add this combined dry mixture to the wet ingredients in your main mixing bowl. Mix on a low speed with your electric mixer, or gently by hand with a spatula, just until a soft cookie dough begins to form. It is important not to overmix the dough at this stage. Overmixing can develop the gluten in the flour too much, leading to tough or dense cookies, which is the opposite of the soft, chewy texture we are aiming for.
The goal here is to bring the dough together until it’s just combined, maintaining a tender structure. You should still see a few streaks of flour, as they will fully incorporate when you add the mix-ins. This careful approach ensures your Banana Pudding Cookies will have the perfect texture.
Step 6: Adding the Delightful Mix-Ins
With the main dough coming together, it’s time to fold in the elements that add texture and complementary flavors. Gently fold in the white chocolate chips and the crushed vanilla wafers using a sturdy spatula or a wooden spoon. Ensure that these mix-ins are distributed as evenly as possible throughout the cookie dough.
The white chocolate chips will melt slightly during baking, providing pockets of creamy sweetness that contrast beautifully with the cookie base. The crushed vanilla wafers are absolutely essential; they are what truly evoke the classic banana pudding flavor and add a delightful crunch that mimics the wafer crust of the dessert.
Take care not to overwork the dough when adding the mix-ins. You want them to be incorporated without further developing the gluten. This step transforms the simple cookie dough into the signature Banana Pudding Cookie, packed with characteristic textures and tastes.
Step 7: Portioning the Dough
Once your dough is perfectly mixed with all the delicious add-ins, it’s time to portion it for baking. Using a cookie scoop (a medium-sized one, typically around 1.5 tablespoons, works well) or two tablespoons, drop rounded portions of dough onto your prepared baking sheets. Consistency in portion size is key for even baking.
Space the cookie dough balls about 2 inches apart on the baking sheets. This spacing is crucial because the cookies will spread as they bake, and giving them enough room prevents them from merging into one giant cookie. Adequate space ensures that each Banana Pudding Cookie bakes into its own perfect, individual shape.
This simple step of portioning and spacing properly sets you up for beautifully formed cookies that are a joy to behold and to eat. It’s about giving each cookie the space it needs to reach its full delicious potential.
Step 8: The Baking Transformation
Carefully place the prepared baking sheets into your preheated oven. Bake for approximately 9 to 11 minutes. The exact baking time can vary slightly depending on your oven, so it’s important to watch the cookies closely towards the end of the baking period.
You’re looking for cookies that have lightly golden brown edges, while the centers should appear soft and still look slightly underbaked. This is the secret to achieving that wonderfully soft and chewy texture that Banana Pudding Cookies are known for. Overbaking will result in a crispier cookie, which might not be the desired outcome for this particular recipe.
Trust your eyes and the look of the cookies; they will continue to set and firm up as they cool on the baking sheet. Removing them at this stage ensures they remain tender and delightfully gooey in the center, capturing the perfect essence of banana pudding in cookie form.
Step 9: Cooling and Savoring
Once the cookies have reached that perfect point of readiness, remove the baking sheets from the oven. Allow the cookies to cool directly on the hot baking sheets for about 5 minutes. During this time, the cookies will continue to bake gently from the residual heat of the pan and will firm up enough to be moved without falling apart.
After this initial cooling period on the baking sheets, carefully transfer the cookies to a wire cooling rack. A wire rack allows air to circulate all around the cookies, ensuring they cool evenly and completely. This step is important for achieving the desired final texture and preventing the bottoms from becoming soggy.
Let your Banana Pudding Cookies cool completely before indulging. As they cool, the flavors will meld together, and the textures will set perfectly, resulting in a truly irresistible treat that perfectly captures the beloved essence of classic banana pudding.
Pro Tips for Banana Pudding Cookies
Room Temperature Ingredients: For optimal dough consistency and even baking, ensure your butter and eggs are at room temperature. This allows them to incorporate more smoothly, creating a uniform dough and contributing to a tender crumb.
Avoid Overmixing: When combining the wet and dry ingredients, mix only until just incorporated. Overmixing can develop the gluten in the flour, leading to tough cookies rather than the desired soft and chewy texture.
Proper Baking Time: Aim for slightly underbaking the cookies. They should appear lightly golden at the edges with centers that are still soft and slightly underdone. They will continue to set as they cool on the baking sheet, achieving that perfect chewy consistency.
Use Fresh Ingredients: Ensure your baking soda is fresh by checking the expiration date. Old baking soda can compromise the rise and texture of your cookies, leading to a flatter, denser result. Freshness is key for optimal leavening.
Storage is Key: Keep your cooled cookies in an airtight container at room temperature to preserve their delightful softness and prevent them from drying out. Proper storage ensures you can enjoy them at their best for several days.
Experiment with Flavor: Don’t hesitate to get creative! You can add a touch of almond extract along with vanilla for a more complex flavor, or even fold in some sliced bananas (drained well) for an intensified banana taste. Another idea is to use different flavored pudding mixes like butterscotch for a fun twist.
Serving Suggestions for Banana Pudding Cookies
Decoration
These cookies are wonderfully inviting on their own, but a little extra flair can make them truly spectacular. A light dusting of powdered sugar can give them a whimsical, snowy appearance, especially fitting for a cozy autumn day. Alternatively, a delicate drizzle of melted white chocolate or even a thin swirl of caramel sauce can add an elegant touch, complementing the banana and pudding flavors beautifully.
For a touch of color and freshness, consider garnishing each cookie with a tiny dollop of whipped cream and a single, thin slice of fresh banana right before serving. You could also sprinkle a few extra crushed vanilla wafers on top of the wet chocolate drizzle for added texture and visual appeal. These simple decorative touches enhance the presentation without overpowering the cookie’s inherent charm.
Side Dishes
While these cookies are a fantastic treat on their own, they also pair exceptionally well with a variety of accompaniments. A tall, cold glass of milk is a timeless classic that perfectly balances the sweetness of the cookies and cleanses the palate. For something a little richer, a scoop of creamy vanilla bean ice cream served alongside makes for a truly indulgent dessert experience, echoing the classic banana pudding vibe.
A warm cup of coffee or a soothing herbal tea also makes an excellent companion, allowing the nuanced flavors of the cookie to be fully appreciated. For a more elaborate dessert presentation, consider serving them with a light fruit salad featuring berries or melon, providing a refreshing counterpoint to the cookie’s sweetness. Even a small bowl of whipped cream for dipping can add an extra layer of indulgence.
Creative Serving Ideas
Transform your Banana Pudding Cookies into a show-stopping dessert by layering them into a trifle. Alternate crushed cookies with layers of banana pudding, sliced bananas, and whipped cream in a clear serving dish for a visually stunning and delicious treat. This method takes the familiar flavors to an entirely new level of presentation and enjoyment.
You could also create mini banana pudding parfaits by crumbling cookies into the bottom of small glasses, topping with pudding and banana slices, and repeating layers. Another fun idea is to serve them warm from the oven with a small ramekin of warm caramel sauce or a chocolate ganache for dipping, offering a customizable and interactive dessert experience for your guests.
For a delightful afternoon tea spread, arrange them on a tiered stand alongside scones and finger sandwiches. They also make wonderful additions to cookie platters for parties, or can be presented in cellophane bags tied with a ribbon as charming homemade gifts. Their versatility ensures they are always a welcome addition to any occasion.
Preparation & Storage
Storing Leftovers
To keep your delicious Banana Pudding Cookies soft and fresh, it’s best to store them in an airtight container at room temperature. Ensure the container is well-sealed to prevent air from getting in, which can cause the cookies to dry out or lose their chewiness. They will maintain their delightful texture for up to one week when stored properly.
If you find yourself with a larger batch or want to ensure they stay moist for longer, refrigerating them in an airtight container is another option. This can extend their shelf life to about two weeks. However, remember to allow them to come back to room temperature before serving for the best texture and flavor.
Avoid stacking too many cookies directly on top of each other in the container if they are still slightly warm, as this can lead to sticking and breakage. It’s also a good idea to place a piece of parchment paper between layers if you are concerned about them sticking together.
Freezing
Banana Pudding Cookies freeze exceptionally well, making them a perfect candidate for make-ahead treats. For the best results, allow the cookies to cool completely before freezing. Once cooled, you can freeze them in a single layer on a baking sheet for about an hour until firm, then transfer them to a freezer-safe airtight container or a heavy-duty freezer bag.
To prevent the cookies from sticking together, you can place a layer of parchment paper or wax paper between each cookie before placing them in the container. Properly stored, these cookies can be kept in the freezer for up to three months, retaining their delicious flavor and delightful texture.
When you’re ready to enjoy them, simply remove the desired amount from the freezer and let them thaw at room temperature for about 15-30 minutes. The texture should be nearly as fresh as when they were first baked. Freezing is an excellent strategy for having homemade cookies ready for unexpected guests or cravings.
Reheating
Reheating your Banana Pudding Cookies can bring back that freshly baked warmth and slightly gooey texture. The simplest way is to place a cookie or two on a microwave-safe plate and heat them in the microwave for about 10-15 seconds. Be careful not to overheat, as this can quickly make them tough.
For a more even reheating, especially if you’re warming several cookies, you can use a toaster oven. Place them on a baking sheet and heat at a low temperature (around 250-300°F or 120-150°C) for 3-5 minutes, or until they are just warmed through. This method helps to maintain their soft texture without making them hard.
If you’ve thawed frozen cookies and they seem a bit dry, a quick 10-second zap in the microwave can often revive them to their former chewy glory. Enjoying them warm, perhaps with a glass of milk, truly enhances the comforting banana pudding experience.
Frequently Asked Questions
-
How do I choose ripe bananas for this recipe?
Absolutely! For the best flavor in your Banana Pudding Cookies, choose bananas that are spotty and have some dark spots on the peel. This indicates that the sugars are developing, providing a sweeter and more intense banana flavor that will infuse beautifully into your cookies. Avoid overly green bananas, as they won’t yield the rich, sweet banana flavor that is integral to this recipe’s success.
-
What is the best way to store the cookies?
I often recommend storing your Banana Pudding Cookies in an airtight container at room temperature, where they’ll stay fresh and soft for up to 1 week. If you want to keep them longer, placing the container in the fridge can extend their life for about 2 weeks—just remember to keep it airtight to prevent them from drying out and becoming stale. Allowing them to return to room temperature before serving is key for optimal texture.
-
Can I freeze these cookies?
Yes, absolutely! To freeze your Banana Pudding Cookies, start by placing them in a single layer on a baking sheet to freeze individually for about 1 hour until firm. Once frozen, transfer the cookies to a freezer-safe bag or container, layering with parchment paper to prevent sticking. They can be frozen for up to 3 months and will retain their flavor and texture remarkably well. When you’re ready to enjoy them, simply thaw them at room temperature or microwave for 10-15 seconds for a wonderfully warm treat!