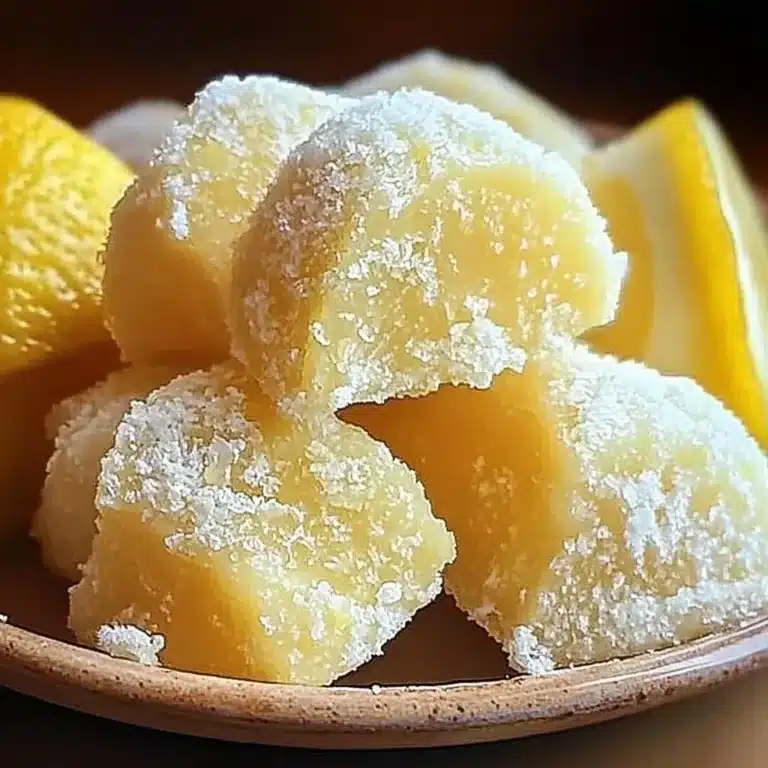
The Ultimate Red Velvet Edible Cookie Dough

Who can resist the allure of a sweet treat? If you’re looking for a delightful and indulgent dessert, look no further than this Red Velvet Edible Cookie Dough. Combining the rich, red hue of traditional red velvet cake with the deliciousness of cookie dough, this treat is perfect for anyone who loves a touch of whimsy in their snacks.
The beauty of this recipe lies in its simplicity and the heartwarming memories it conjures. Imagine gathering your family on a cozy evening, with the aroma of sweet ingredients filling your kitchen, as you whip up a batch of this deliciousness. Is there anything better than creating something truly special from scratch?
Why You Will Love This Recipe
- Decadent Flavor: With its creamy texture and rich taste, every bite of Red Velvet Edible Cookie Dough is a delight to the senses. It offers a sophisticated yet comforting sweetness.
- Unmatched Simplicity: This recipe requires minimal ingredients and straightforward steps, making it a quick and fun way to satisfy your sweet tooth. You don’t need to be a master baker to succeed.
- Incredibly Versatile: Perfect for any occasion, whether it’s a quiet night at home, a festive birthday party, or a casual gathering with friends. It brings joy to any event.
- Broad Family Appeal: Kids and adults alike will fall in love with this cookie dough, making it a guaranteed hit for family-friendly fun. It’s a treat everyone can enjoy.
- Fully Customizable: You can easily adjust the mix-ins or flavors, allowing you to add your unique personal twist and tailor it to specific tastes or dietary needs.
What makes this treat even more special is that you don’t have to worry about the risks associated with raw dough, since this edible cookie dough is crafted specifically for snacking. Every scoop is a delightful blend of softened butter, sugars, and just the right amount of cocoa powder, culminating in something simply irresistible and perfectly safe to consume. Whether enjoyed straight from the bowl or shared with loved ones, Red Velvet Edible Cookie Dough can become a staple recipe in your household, bringing joy to special occasions or casual nights in with ease.
As you embark on the journey of creating this delightful dish, you’ll discover how incredibly easy it is to put together. With just a few pantry staples and minimal effort, you can create a dessert that dazzles both the eyes and the palate. Are you ready to learn how you can transform your snacking experience with this truly wonderful Red Velvet Edible Cookie Dough? Let’s get started on this culinary adventure!
Ingredients You Need
To create your Red Velvet Edible Cookie Dough, you’ll need a selection of high-quality ingredients that come together harmoniously. Choosing fresh, good-quality components will ensure the best possible flavor and texture for your final creation. Think of these ingredients as the building blocks for pure dessert happiness.
Red Velvet Edible Cookie Dough

A delightful and indulgent cookie dough inspired by the rich flavors of red velvet cake, perfect for snacking without the risks of raw dough.
- 1 cup all-purpose flour
- 1/2 cup unsalted butter, softened
- 1/2 cup brown sugar
- 1/4 cup granulated sugar
- 1 teaspoon vanilla extract
- 1 tablespoon cocoa powder
- 2 tablespoons milk
- 1/2 teaspoon red food coloring
- 1/2 cup mini chocolate chips
- 1Gather all your ingredients.
- 2In a mixing bowl, combine the softened butter, brown sugar, and granulated sugar. Cream them together until smooth and the mixture lightens slightly in color.
- 3Add the vanilla extract, red food coloring, and cocoa powder. Mix until all ingredients are well blended.
- 4Gradually incorporate the flour into the mixture, stirring gently. Do not overmix.
- 5If the dough feels too thick, add milk one tablespoon at a time until you reach the desired creamy consistency.
- 6Fold in the mini chocolate chips, ensuring they’re evenly distributed.
- 7Taste the dough, and adjust sweetness or chocolate flavor as desired.
- 8Chill the dough in the refrigerator for about 30 minutes for a firmer texture, if preferred.
- 9Scoop out portions and enjoy directly or serve in small bowls.
Keywords: Cookie Dough, Dessert Recipe, Edible Treat, No-Bake Recipe, Red Velvet
- all-purpose flour: The foundation of our delightful cookie dough, providing the necessary structure.
- unsalted butter, softened: This essential ingredient brings richness and a wonderfully creamy texture to the dough.
- brown sugar: Contributes a deep, caramel-like sweetness and a lovely moistness.
- granulated sugar: Adds that classic sweetness that balances the other flavors beautifully.
- vanilla extract: This aromatic essence infuses the dough with warm, comforting, and sweet notes that are unmistakably delightful.
- cocoa powder: A touch of cocoa powder provides a subtle chocolate undertone, complementing the red velvet essence.
- milk: Used sparingly to help achieve the perfect, scoopable dough consistency.
- red food coloring: The key ingredient to achieve that signature vibrant and festive red velvet hue.
- mini chocolate chips: These little bursts of chocolate add delightful texture and an extra layer of sweetness throughout the dough.
You’ll find the precise quantities for each ingredient within the detailed recipe card, ensuring perfect results every time you bake.
Variations
This Red Velvet Edible Cookie Dough is a fantastic base for numerous creative variations, allowing you to tailor it to your specific cravings and dietary needs. Imagine transforming this already delicious treat into something uniquely yours with just a few simple adjustments.
For those seeking a decadent and slightly tangy twist, consider incorporating a swirl of cream cheese frosting. Gently fold a few tablespoons of slightly softened cream cheese frosting into the prepared cookie dough just before serving. This adds a luxurious, complementary flavor profile that perfectly balances the sweetness of the red velvet and cocoa, elevating the entire experience to new heights of indulgence.
If you adore the satisfying crunch and nutty undertones, adding toasted nuts is an excellent option. Finely chopped walnuts or pecans can be folded in along with the chocolate chips. Toasting them beforehand intensifies their flavor and adds a wonderful textural contrast to the smooth cookie dough, making each bite more exciting and complex. This variation is particularly delightful for those who enjoy a more robust flavor profile.
Another exciting variation involves transforming the cookie dough into a rich red velvet brownie. To achieve this, you would typically add eggs and slightly adjust the flour and sugar ratios, then bake the mixture. This transforms the edible dough into a fudgy, baked treat that still carries the beloved red velvet essence, offering a different yet equally delicious way to enjoy these iconic flavors.
For those with dietary restrictions, several modifications can be made to keep this treat accessible. A vegan version can be created by substituting the butter with a high-quality plant-based butter and using a flax egg or a commercial egg replacer. Similarly, for a gluten-free rendition, simply swap out the all-purpose flour for a reliable gluten-free flour blend. These adjustments ensure that everyone can partake in the joy of Red Velvet Edible Cookie Dough.
Furthermore, you can experiment with different types of mix-ins beyond chocolate chips. Consider adding white chocolate chips for a contrasting flavor and color, or perhaps some mini marshmallows for a gooey texture. Dried cranberries or cherries could offer a tart counterpoint, while sprinkles could add an extra festive touch for celebrations. The possibilities truly are endless when it comes to personalizing this delightful base.
How to Prepare red velvet edible cookie dough
The process of creating this delightful red velvet edible cookie dough is designed to be straightforward and enjoyable, ensuring you can whip up a batch of pure joy with minimal fuss. Every step is crafted to guide you toward that perfect, scoopable, and utterly delicious result.
Step 1: Gather and Prepare Your Ingredients
The foundation of any successful recipe lies in meticulous preparation, and this cookie dough is no exception. Begin by carefully gathering all the necessary ingredients as listed. Ensure your unsalted butter is truly softened to room temperature; it should yield slightly to gentle pressure but not be melted. This is crucial for achieving a smooth, creamy base when creaming with the sugars.
Having all your components measured out and ready to go before you start mixing will significantly streamline the process. This “mise en place” approach minimizes the chances of errors and ensures that you can move seamlessly from one step to the next. It also helps prevent ingredients from sitting out too long and changing temperature unexpectedly, which can impact the final texture of your dough.
For instance, having your flour sifted can lead to a lighter, airier dough, although it’s not strictly necessary for this edible version. Similarly, ensure your cocoa powder is free from clumps by giving it a quick whisk. These small preparatory steps contribute to an overall smoother and more enjoyable baking experience, leading to a superior final product.
Step 2: Cream the Butter and Sugars
In a medium to large mixing bowl, combine the softened unsalted butter with both the brown sugar and granulated sugar. This is a critical step where the foundation of your cookie dough’s texture and sweetness is built. Use an electric mixer, either a hand mixer or a stand mixer with the paddle attachment, to cream these ingredients together.
You want to beat them until the mixture is light, fluffy, and pale in color, which typically takes about 2-3 minutes of consistent mixing. This process incorporates air into the butter and sugar, which is essential for creating that characteristic tender and slightly crumbly texture in the final cookie dough. Scrape down the sides and bottom of the bowl occasionally to ensure everything is evenly incorporated and that no pockets of unmixed butter or sugar remain.
The visual cue to look for is a noticeable lightening of the mixture, and it should appear significantly less granular than when you started. This aeration is key to the deliciousness of the final product, making it feel light and luxurious on the palate. Proper creaming ensures that the sugars are well dissolved into the fat, contributing to both flavor and texture. This stage sets the stage for all the other wonderful flavors and components to come.
Step 3: Incorporate Wet Ingredients and Flavorings
Once you have achieved that beautifully creamed butter and sugar mixture, it’s time to introduce the liquids and flavorings that will define the red velvet character of your dough. Add the vanilla extract, which provides a warm, sweet aroma and taste that is a hallmark of baked goods. Follow this with the red food coloring; start with the recommended amount and add more if you desire a more intense, vibrant hue.
Next, add the cocoa powder. This ingredient adds a subtle chocolate depth that complements the red velvet profile without overpowering it. Mix these ingredients in thoroughly with your electric mixer on a low speed, or switch to a spatula if you prefer. Continue mixing until all the added ingredients are fully incorporated into the creamy base, and you achieve a uniform, luscious red color throughout the mixture.
This stage is where the magic truly begins to happen visually. The transformation from a pale creamy mixture to a rich, vibrant red is quite striking. Ensure you scrape the bowl thoroughly to distribute the color evenly; sometimes the food coloring can cling to the sides. The scent of vanilla and cocoa starting to mingle is also a delightful preview of the deliciousness to come, creating an inviting aromatic atmosphere in your kitchen.
Step 4: Gradually Add the Flour
Now, it’s time to add the dry ingredients to bring everything together into a cohesive dough. Gradually incorporate the all-purpose flour into the wet mixture. It’s best to add the flour in two or three additions, mixing on a low speed or gently folding with a spatula after each addition. This gradual incorporation helps prevent the flour from flying out of the bowl and ensures it’s evenly distributed without overdeveloping the gluten.
You want to mix just until the flour is incorporated and no dry streaks remain. Overmixing at this stage can lead to a tough or gummy texture in your edible cookie dough, which is something we want to avoid. The goal is a tender, slightly crumbly yet cohesive dough that holds its shape when scooped. Stop mixing as soon as the last traces of flour disappear into the mixture.
The dough might still look a little crumbly at this point, and that’s perfectly fine. The addition of milk in the next step will help to bring it all together into the desired consistency. Pay attention to the texture; it should feel cohesive but not overly stiff or dense. This careful addition of flour is key to achieving the perfect edible cookie dough texture.
Step 5: Adjust Consistency with Milk
If your cookie dough mixture appears too thick or dry after adding the flour, this is the stage to adjust its consistency. Add the milk, one tablespoon at a time, mixing gently after each addition until the dough reaches your desired texture. You’re looking for a dough that is moist enough to hold together when pressed, but not sticky or wet.
The amount of milk needed can vary slightly depending on the humidity in your kitchen and the exact measurement of your flour. The objective is to create a dough that is easily scoopable and has a smooth, pleasing texture, similar to traditional cookie dough that hasn’t been baked. It should feel rich and pliable, ready to be enjoyed.
This step is about achieving that perfect balance—not too dry that it crumbles apart, and not too wet that it becomes unmanageable or sticky. Gently incorporate the milk, ensuring it’s fully blended without overworking the dough. A slightly stiffer dough is generally preferred for edible cookie dough as it makes it easier to handle and scoop into perfect portions for serving.
Step 6: Fold in the Mini Chocolate Chips
Once you have achieved the perfect dough consistency, it’s time to add the delightful bursts of flavor and texture that will make this cookie dough truly irresistible. Gently fold in the mini chocolate chips using a spatula or a wooden spoon. Ensure they are evenly distributed throughout the red velvet dough.
The key here is to fold them in gently rather than mixing vigorously. This prevents the chocolate chips from breaking down or melting into the dough, maintaining their distinct shape and texture within each bite. You want those satisfying little pockets of chocolate goodness scattered throughout the vibrant red dough.
Take your time with this step to ensure an even distribution. This way, every scoop of cookie dough will contain a delightful amount of chocolatey surprise. The contrast between the smooth dough and the slightly firmer chocolate chips adds a wonderful dimension to the overall eating experience, making the treat even more engaging and enjoyable.
Step 7: Taste and Adjust Flavors
Before you chill or serve your masterpiece, this is your chance to fine-tune the flavor profile to your exact preferences. Take a small sample of the cookie dough and taste it critically. Are you craving a little more sweetness? Add a touch more granulated sugar. Does it need a deeper chocolate punch? A tiny bit more cocoa powder can work wonders.
This tasting and adjustment phase is crucial for ensuring your cookie dough is absolutely perfect for your palate. Don’t be afraid to make small tweaks; this is where you can truly personalize the recipe. Ensure any added ingredients are thoroughly mixed in to maintain consistency.
Remember that the flavors will meld and slightly intensify as the dough chills, so adjust accordingly. This step allows you to be the ultimate arbiter of taste, guaranteeing that your Red Velvet Edible Cookie Dough is precisely as delicious as you envision it. It’s a small step that makes a big difference in the final outcome.
Step 8: Chill for Optimal Texture (Optional but Recommended)
For an even better texture and a firmer, more scoopable dough, chilling is highly recommended. Cover the bowl tightly with plastic wrap or transfer the dough to an airtight container and place it in the refrigerator for at least 30 minutes. This resting period allows the flavors to meld together beautifully and the dough to firm up.
Chilling also helps the ingredients to bind together more cohesively, resulting in a dough that is easier to handle and scoop. If you plan to serve it immediately and prefer a slightly softer consistency, you can skip this step, but the texture truly is enhanced with a brief chill. It also helps prevent the dough from feeling too soft or sticky when you’re ready to serve it.
If you decide to chill it for longer, say a few hours or overnight, the dough will become quite firm. This is perfectly normal and can even be beneficial for scooping. Just allow it to sit at room temperature for a few minutes before serving if it becomes too hard. This chilling period is a small investment that pays off significantly in the final eating experience.
Step 9: Serve and Enjoy Your Creation
The moment of truth has arrived! Once chilled (or if you’ve decided to serve it immediately), it’s time to scoop out your delicious Red Velvet Edible Cookie Dough. Use a cookie scoop or two spoons to create perfectly portioned servings. You can serve it directly in small bowls, or get creative with your presentation.
This delightful treat is best enjoyed chilled or at room temperature, offering a creamy, rich, and satisfying experience with every spoonful. It’s perfect for a quick indulgence, a fun dessert for kids, or a charming addition to a dessert platter. Share it with friends and family, or savor it all to yourself – you deserve it!
Consider serving it with a dusting of powdered sugar, a drizzle of chocolate sauce, or alongside a scoop of vanilla ice cream for an extra layer of decadence. The versatility of this edible cookie dough means it can be enjoyed in so many delightful ways, making it a truly special treat for any occasion.
Pro Tips for red velvet edible cookie dough
Use High-Quality Ingredients: The flavor of your Red Velvet Edible Cookie Dough is directly influenced by the quality of your ingredients. Opt for good-quality butter, cocoa powder, and vanilla extract for the most delicious results. Premium ingredients truly make a difference in the final taste profile.
Soften Butter Correctly: Ensure your butter is properly softened, not melted or cold. Room temperature butter creams best with sugar, creating the fluffy texture essential for perfect cookie dough. If it’s too cold, it will clump; if it’s melted, the dough will be greasy.
Don’t Overmix the Flour: Once the flour is added, mix only until it’s just combined. Overmixing can develop gluten, leading to a tougher texture, which is undesirable for edible cookie dough. A gentle hand is key here.
Taste and Adjust: Always taste your dough before serving or chilling. This is your chance to perfect the sweetness, the red velvet flavor, and the chocolate intensity. Adjustments made at this stage ensure you achieve your ideal flavor balance.
Chill for Texture: While optional, chilling the dough for at least 30 minutes significantly improves the texture, making it firmer and easier to scoop. It also allows the flavors to meld and deepen, creating a more complex taste.
Experiment with Mix-ins: Don’t limit yourself to just chocolate chips. Consider adding white chocolate chips, sprinkles, chopped nuts, or even a swirl of cream cheese frosting for creative variations. These additions can introduce new textures and flavors.
Proper Storage is Key: Store any leftovers in an airtight container in the refrigerator to maintain freshness and prevent it from drying out. This ensures your cookie dough remains a delightful treat for days.
Serving Suggestions for red velvet edible cookie dough
Decoration
To elevate the visual appeal of your Red Velvet Edible Cookie Dough, consider a few simple yet impactful decorative touches. A light dusting of powdered sugar can add a touch of elegance and a hint of sweetness. For a more decadent presentation, a drizzle of melted white chocolate or dark chocolate over the top creates a beautiful contrast against the vibrant red hue.
You could also sprinkle some extra mini chocolate chips or festive red and white sprinkles on top just before serving. If you’ve added nuts to your dough, a few whole toasted nuts strategically placed can enhance the visual appeal and hint at the delicious crunch within. Even a simple dollop of whipped cream or a small swirl of cream cheese frosting can add a luxurious finish.
Think about the occasion when decorating. For holidays, red and green sprinkles are a festive choice. For birthdays, edible glitter or star-shaped sprinkles can add a celebratory flair. The key is to add decorative elements that complement the red velvet theme and enhance the overall presentation without overwhelming the delicious cookie dough itself.
Side Dishes
While Red Velvet Edible Cookie Dough is a standalone delight, pairing it with certain accompaniments can create an even more memorable dessert experience. A classic pairing is a scoop of high-quality vanilla bean ice cream; the cold, creamy ice cream provides a delightful contrast to the rich, slightly firm cookie dough.
Another excellent option is fresh berries, such as strawberries, raspberries, or blueberries. Their tartness and freshness cut through the sweetness of the cookie dough, offering a refreshing balance. A small bowl of mixed berries alongside the cookie dough makes for a beautiful and flavorful combination, appealing to different taste preferences.
Consider serving it with a warm beverage like hot chocolate or a strong cup of coffee. The warmth and comforting flavors of these drinks complement the richness of the cookie dough exceptionally well, creating a cozy and indulgent treat perfect for cooler evenings. A light, fluffy whipped cream is also a fantastic side, adding an extra layer of creamy indulgence.
Creative Serving Ideas
Move beyond the basic bowl and explore fun ways to serve your Red Velvet Edible Cookie Dough. Consider portioning it into small, individual ramekins or mini mason jars for an elegant presentation, perfect for parties or gatherings. This allows each guest to have their own personal serving of delight.
For a playful twist, you could use small cookie cutters to shape the dough into festive forms before serving, especially if you’ve chilled it thoroughly. This adds an element of surprise and whimsy, particularly for children’s parties. Another idea is to serve it in hollowed-out mini red velvet cupcakes or even in edible chocolate cups for an extra decadent experience.
You can also incorporate it into other desserts. Layer it into parfait glasses with whipped cream and crumbled cookies for a no-bake dessert trifle. Or, use it as a filling for homemade chocolates. For a truly unique presentation, try rolling small balls of the dough and arranging them on a platter with other bite-sized desserts, turning it into a sophisticated dessert tasting experience.
Preparation & Storage
Storing Leftovers
Storing any leftover Red Velvet Edible Cookie Dough properly is essential to maintain its delicious texture and flavor. Transfer any uneaten portions into an airtight container. This prevents the dough from drying out or absorbing unwanted odors from the refrigerator.
Ensure the container is sealed tightly before placing it in the refrigerator. This simple step will keep your cookie dough fresh and ready to be enjoyed for up to a week. The firm texture after chilling makes it ideal for storing and enjoying later.
When you’re ready to enjoy it again, simply scoop out the desired amount. The dough will be firmer after refrigeration, so allowing it to sit at room temperature for about 5-10 minutes can make it easier to scoop and more pleasant to eat.
Freezing
Red Velvet Edible Cookie Dough freezes remarkably well, allowing you to enjoy this treat even longer. The best method is to scoop individual portions onto a baking sheet lined with parchment paper. This prevents the portions from sticking together when frozen.
Once the scoops are firm and frozen solid on the baking sheet (this usually takes about 1-2 hours), transfer them to a freezer-safe airtight container or a heavy-duty freezer bag. This double-layer protection ensures maximum freshness and prevents freezer burn.
Frozen cookie dough can be stored for up to 2-3 months. When you’re craving a taste, you can thaw the portions in the refrigerator overnight, or at room temperature for a couple of hours. Enjoying frozen cookie dough straight from the freezer is also an option for a colder, firmer treat.
Reheating
Reheating edible cookie dough isn’t typically necessary as it’s meant to be enjoyed at a chilled or room temperature state. However, if your refrigerated or frozen dough is too firm for your liking, you can gently bring it back to a more pliable consistency.
To do this, simply allow the dough to sit at room temperature for about 10-20 minutes before serving. This brief warming period will soften it enough to scoop easily and reach a pleasant eating temperature. Avoid microwaving, as this can quickly melt the butter and create an undesirable texture.
The goal is simply to take the chill off, making it more enjoyable to eat. If you’ve thawed frozen portions, they should naturally reach a good eating temperature within a couple of hours at room temperature. The key is a gentle, gradual return to a softer state.
Frequently Asked Questions
-
Can I make this Red Velvet Edible Cookie Dough ahead of time?
Absolutely! This recipe is perfect for making ahead. You can prepare the cookie dough up to 24 hours in advance and store it in an airtight container in the refrigerator. This allows the flavors to meld even further, resulting in a more delicious treat. Just remember to let it soften slightly at room temperature for a few minutes before serving if it becomes too firm.
-
Can I freeze this edible cookie dough for later enjoyment?
Yes, freezing is an excellent option for preserving this delightful cookie dough. Scoop individual portions onto a baking sheet, freeze them until solid, and then transfer the frozen scoops into a freezer-safe airtight container or bag. It can be stored in the freezer for up to 2-3 months, providing a convenient sweet treat whenever a craving strikes. Thaw gently before enjoying.
-
How long does the Red Velvet Edible Cookie Dough last when stored in the refrigerator?
When stored properly in an airtight container in the refrigerator, your Red Velvet Edible Cookie Dough will remain fresh and delicious for approximately one week. The ingredients used are safe for consumption without baking, and refrigeration helps to maintain its texture and prevent spoilage. Enjoy it within this timeframe for the best quality and flavor.