Ultimate Zesty Radish Relish: Deliciously Tangy and Easy
As I chopped through a vibrant bunch of red radishes the other day, I couldn’t help but think about how versatile and underrated this crunchy veggie can be. Enter my Zesty Radish Relish—a quick, easy pickle that adds an irresistible tang to everything from sandwiches to grilled meats.
Not only does it help me utilize those extra radishes piling up in the fridge, but it also offers a delicious way to elevate any meal. With just a little prep and a refrigerator wait, you’ll have a condiment that lasts up to three weeks, making it perfect for meal prep or last-minute gatherings. Ready to discover how this fresh delight can transform your dishes? Let’s dive into the recipe and make your taste buds dance!
Why You Will Love This Recipe
- Quick Preparation: This Zesty Radish Relish comes together in under 30 minutes of active prep time, making it ideal for busy cooks seeking a flavorful boost without the fuss. It’s a fantastic way to add excitement to your meals even on a tight schedule.
- Incredible Versatility: Beyond just sandwiches, this relish is a culinary chameleon, perfectly complementing everything from tacos and burgers to grilled chicken and even salads. Its bright, zesty flavor profile can transform ordinary dishes into extraordinary culinary experiences, offering a refreshing contrast to richer foods.
- Long-Lasting Freshness: Once prepared and properly stored, this relish boasts an impressive shelf life of up to three weeks in the refrigerator. This makes it an excellent candidate for batch cooking and meal planning, ensuring you always have a delicious condiment on hand.
- Vibrant Flavor Profile: The unique blend of crisp radishes, sharp red onion, and a hint of jalapeño, all pickled in a tangy vinegar brine, creates a symphony of sweet, sour, and slightly spicy notes. This complex taste experience is guaranteed to awaken your palate and add a delightful zest to any bite.
- Health-Conscious Choice: Packed with the natural goodness of radishes and other fresh vegetables, this relish is a lighter alternative to many store-bought condiments. It’s low in calories and offers a good source of vitamins, making it a guilt-free way to enhance your meals with incredible flavor.
Ingredients You Need
The key to an exceptional Zesty Radish Relish lies in the quality and freshness of its components. Using crisp, vibrant radishes will provide the ideal texture and a clean, peppery bite. Opting for fresh herbs and aromatics further amplifies the relish’s bright, invigorating character, ensuring each spoonful is bursting with flavor. Pay attention to the quality of your vinegar and sugar, as these form the backbone of the pickling liquid, balancing the tang with a touch of sweetness for a truly harmonious taste.
Zesty Radish Relish
Elevate your sandwich game with this quick, easy, and versatile Zesty Radish Relish. It adds an irresistible tang to sandwiches, tacos, grilled meats, and more, lasting up to three weeks in the refrigerator.
- 1 bunch radishes
- 1 medium red onion
- 1 small jalapeño
- 1 cup vinegar
- 1 tablespoon sugar
- 2 cloves garlic
- 1 teaspoon salt
- 1 teaspoon mustard seeds
- 1 teaspoon celery seeds
- 1 tablespoon dill weed
- 1Wash the radishes, red onion, and jalapeño under cold water. Slice thinly, about 1/8 inch.
- 2Transfer the sliced vegetables into a blender or food processor. Pulse until finely chopped but not puréed.
- 3In a stockpot, add the chopped vegetables, vinegar, sugar, garlic, salt, mustard seeds, celery seeds, and dill weed. Stir and bring to a gentle boil over medium heat.
- 4Reduce heat to medium-low, simmering for about 10-12 minutes until it thickens slightly and the radishes become tender but retain a crunch.
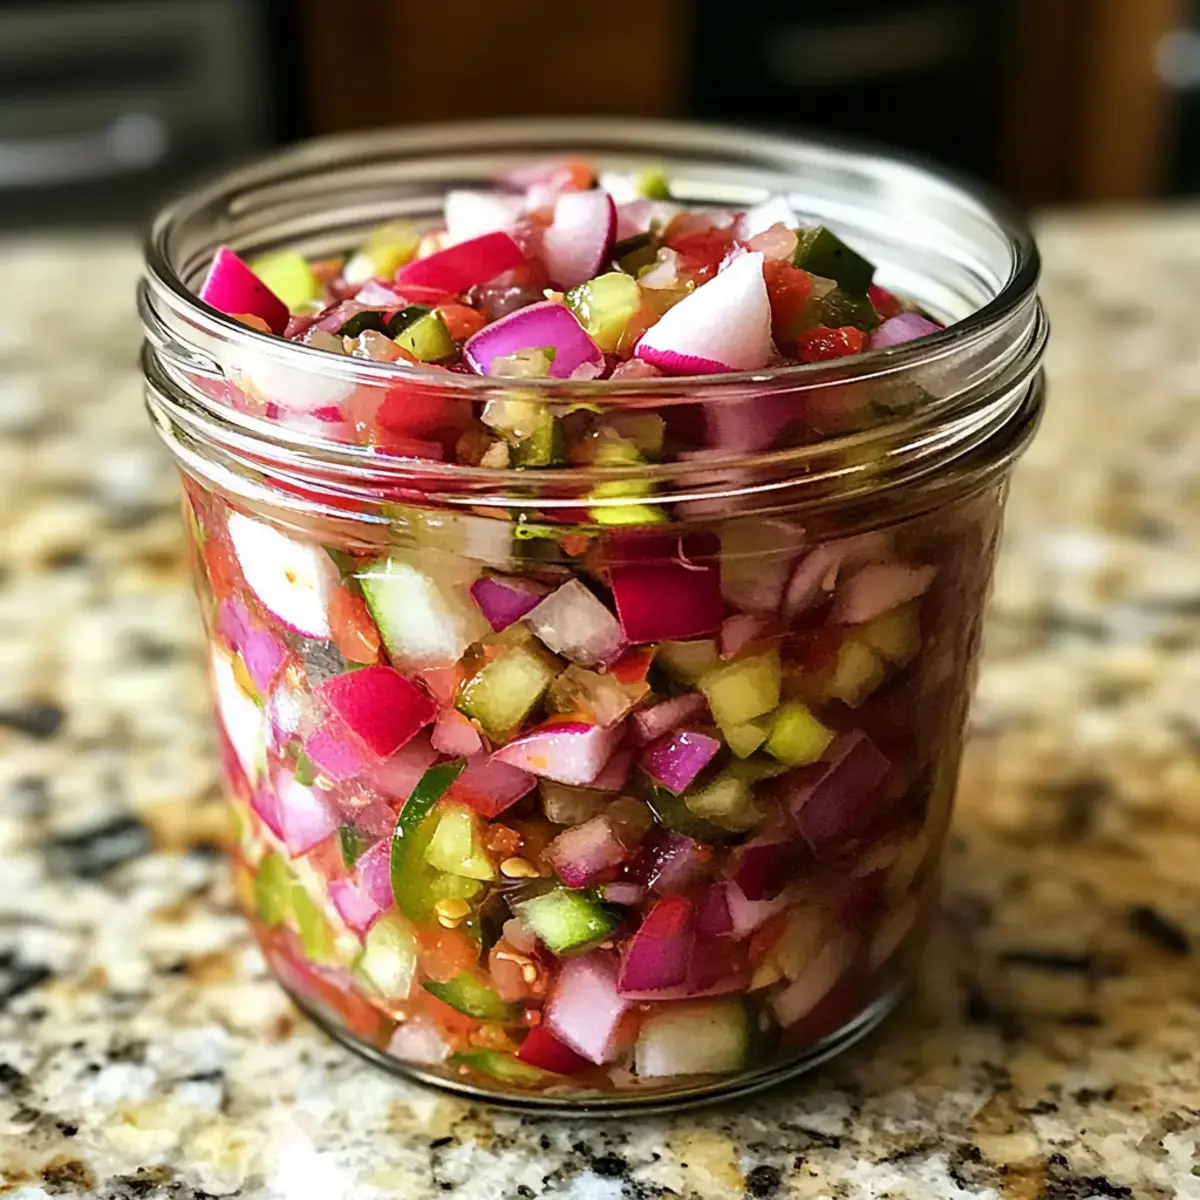
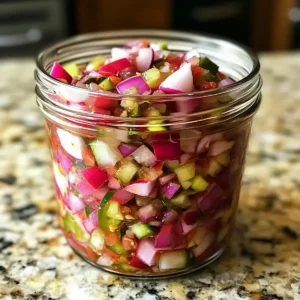
- 5Remove the pot from heat and let the mixture cool for about 5-10 minutes. Carefully transfer it into a clean, airtight jar, ensuring all the delicious liquid is included.
- 6Seal the jar tightly and place it in the refrigerator for at least 24 hours before using to allow flavors to develop.
Keywords: radish, relish, pickle, condiment, sandwich, taco, German, vegetarian, quick, easy, meal prep
- radishes: the star ingredient, providing crunch and a mild peppery flavor.
- red onion: adds a sweet and pungent base note to the relish.
- jalapeño: offers a touch of heat and a subtle fruity undertone.
- vinegar: the essential pickling agent that provides the signature tang.
- sugar: balances the acidity of the vinegar and adds a touch of sweetness.
- garlic: imparts a warm, aromatic depth to the relish.
- salt: enhances all the other flavors and draws out moisture.
- mustard seeds: contribute a subtle warmth and a tiny textural pop.
- celery seeds: offer a unique savory and aromatic note that complements the other spices.
- dill weed: brings a fresh, herbaceous essence that is classic in pickle flavors.
The specific quantities for each ingredient are detailed within the recipe card above, ensuring precise flavor balance.
Variations
Embarking on a culinary adventure with Zesty Radish Relish means exploring its boundless potential for customization. Imagine a vegan rendition where the sugar can be swapped for agave nectar or maple syrup, maintaining that delightful sweetness while adhering to plant-based principles. This simple substitution opens up a world of flavor possibilities, proving that healthy eating doesn’t mean sacrificing taste or enjoyment.
For those embracing a low-carb lifestyle, fear not! The sweetness can be artfully managed by employing a sugar substitute like erythritol or stevia. This approach ensures the relish retains its signature tang and zesty appeal without the carbohydrate load, making it a perfect accompaniment to your low-carb meals. The foundation of radishes and onions remains, providing essential nutrients and satisfying crunch.
Consider infusing your relish with herbs beyond dill, like fresh mint or cilantro, for a refreshing twist that is particularly delightful during warmer months. This variation can transform your relish into a vibrant accompaniment for Mediterranean-inspired dishes or even add a surprising flourish to a summer salad. The possibilities are as endless as your culinary imagination, ensuring each batch offers a unique and exciting flavor experience.
How to Prepare Zesty Radish Relish
Step 1: Prepare the Vegetables
The initial step in crafting your vibrant Zesty Radish Relish begins with the meticulous preparation of its core ingredients: radishes, red onion, and jalapeño. It’s crucial to wash these vegetables thoroughly under cold, running water to remove any soil or debris, ensuring a clean foundation for your relish. Following this, you will slice the radishes and the red onion very thinly, aiming for a uniform thickness of approximately 1/8 inch.
This precise slicing is paramount as it allows the vegetables to optimally absorb the flavorful pickling liquid that will be introduced later in the process. For the jalapeño, the method involves carefully dicing it into small pieces; the size of these pieces can be adjusted based on your personal preference for heat. A finer dice will distribute the heat more evenly, while larger pieces might create pockets of intense spice. Arrange these beautifully colored, prepared vegetables on your cutting board, appreciating their fresh, raw state before they are transformed.
Step 2: Chop the Mixture
Once your vegetables are meticulously prepared, the next phase involves finely chopping them to create the perfect consistency for your relish. Transfer the thinly sliced radishes and red onion, along with the diced jalapeño, into the bowl of a food processor or a high-powered blender. The goal here is to achieve a finely chopped texture, akin to a chunky salsa, rather than a smooth purée. This texture is vital for the relish’s signature crunch and how well it clings to other foods.
You should pulse the mixture in short bursts, checking the consistency frequently to avoid over-processing. Typically, this process takes between 15 to 30 seconds, depending on the power of your appliance. The resulting mixture should be a colorful mosaic of reds, whites, and greens, emanating a fresh, slightly pungent aroma that hints at the delightful flavors to come. This visually appealing blend is the heart of your Zesty Radish Relish, ready for its flavor infusion.
Step 3: Combine Ingredients in Stockpot
With your vegetables perfectly chopped, it’s time to bring them together with the rest of the flavor-building components in a medium-sized stockpot. Add the finely chopped vegetable mixture to the pot, followed by the vinegar, sugar, minced garlic, salt, mustard seeds, celery seeds, and dill weed. These ingredients, working in harmony, will create the zesty, tangy, and slightly sweet profile that defines this relish.
Stir everything together thoroughly, ensuring that all the ingredients are well combined and evenly distributed. This initial mixing is crucial for creating a homogenous blend that will cook evenly. Place the stockpot over medium heat and bring the mixture to a gentle boil. This boiling process helps to slightly soften the vegetables and begin the pickling process, while also ensuring the sugar dissolves completely. This stage should take approximately 2 to 3 minutes.
Step 4: Cook the Mixture
As the mixture reaches a gentle boil, it’s time to reduce the heat to medium-low to allow it to simmer. This simmering phase is critical for developing the flavors and achieving the desired texture. Stir the relish occasionally as it simmers to prevent the bottom from scorching and to ensure even cooking throughout the pot. The aroma that fills your kitchen during this stage is truly intoxicating, a testament to the vibrant flavors melding together beautifully.
Allow the relish to simmer for approximately 10 to 12 minutes. During this time, the vegetables will soften slightly while still retaining a pleasant crunch, a characteristic texture that makes this relish so appealing. The liquid will also begin to thicken as the ingredients meld. Keep a watchful eye on the pot, enjoying the tantalizing aroma as the Zesty Radish Relish transforms into a delicious condiment, ready to be cooled and preserved.
Step 5: Cool and Transfer
Following the simmering process, remove the stockpot from the heat. It is essential to allow the mixture to cool down for about 5 to 10 minutes before proceeding to the next step. This brief cooling period is not just about safety; it plays a crucial role in preserving the crispness of the radishes. Introducing hot ingredients directly into a sealed container can sometimes lead to a softer texture, and we want that delightful crunch to remain.
Once the mixture has cooled to a manageable temperature, carefully transfer it into a clean, sterilized, airtight jar. Ensure that you scoop out all the delicious liquid from the pot as well; this brine is where all the flavor resides and is integral to the relish’s preservation and taste. Use a spoon or a ladle to help guide the relish into the jar, making sure not to overfill it, leaving a little headspace at the top.
Step 6: Refrigerate and Allow Flavors to Develop
The final, and arguably most important, step in creating truly exceptional Zesty Radish Relish is the period of refrigeration. Once the relish is securely in its airtight jar, seal it tightly. This airtight seal is paramount for maintaining freshness and preventing any contamination. Place the sealed jar into your refrigerator immediately after transferring the relish.
It is crucial to allow the relish to rest in the refrigerator for at least 24 hours before you indulge in its flavors. This resting period is not merely a suggestion; it is absolutely vital. During this time, the complex flavors of the radishes, onions, spices, and the tangy vinegar brine will meld, deepen, and intensify. This allows the relish to reach its full flavor potential, transforming from simply chopped vegetables into a truly delightful and zesty condiment. Your patience will be richly rewarded with a relish that is far superior to anything you could buy off the shelf.
Pro Tips for Zesty Radish Relish
Slice Radishes Thinly: For the most effective flavor absorption and a consistent texture throughout your Zesty Radish Relish, ensuring your radishes are sliced very thinly is key. This allows the pickling liquid to penetrate every piece, infusing them with tanginess and spice. Consider using a mandoline slicer for perfectly uniform slices.
Allow Vinegar to Cool Slightly: Before mixing the hot vinegar and spices with your chopped vegetables, let the liquid cool for a few minutes. This small step helps to maintain the crispness of the radishes, ensuring they don’t become overly soft during the cooking process. It’s a subtle technique that makes a significant difference in the final texture of your relish.
Sterilize Jars for Canning: If you plan to can your Zesty Radish Relish for longer-term storage, proper sterilization of your jars is non-negotiable. Boiling the jars and lids beforehand will eliminate any harmful bacteria, preventing spoilage and ensuring your homemade relish remains safe and delicious for up to a year.
Prioritize Fresh Spices: The vibrancy of your Zesty Radish Relish is heavily dependent on the potency of its spices. Always opt for fresh mustard seeds, celery seeds, and dill weed. Older, stale spices can significantly dull the taste, resulting in a relish that lacks the bright, zesty character you’re aiming for.
Taste and Adjust: Don’t be afraid to taste your relish as you prepare it, especially during the simmering stage. Adjust the salt and sugar levels according to your personal preference. This simple act of tasting ensures the perfect balance of flavors for your specific palate, making each batch uniquely yours.
Serving Suggestions for Zesty Radish Relish
Decoration
Elevate the visual appeal of your dishes by using Zesty Radish Relish as a vibrant garnish. A small spoonful strategically placed on top of a burger or alongside grilled fish adds an immediate pop of color and texture. Consider adding a sprig of fresh dill or a tiny radish slice for an extra touch of elegance, transforming a simple meal into a beautifully presented plate.
Side Dishes
This relish is an exceptional partner for a wide array of side dishes, offering a delightful contrast to richer flavors. It pairs wonderfully with creamy potato salads, cutting through their richness with its acidity. Imagine serving it alongside crispy roasted potatoes or even a simple green salad for an added dimension of zest. Its bright flavor profile makes it a versatile accompaniment that enhances rather than overpowers.
Creative Serving Ideas
Unlock the full potential of your Zesty Radish Relish by thinking outside the sandwich box. Consider incorporating a tablespoon or two into your next batch of deviled eggs for a surprising tangy kick. It can also be stirred into plain yogurt or sour cream to create a quick, homemade dipping sauce for vegetables or crackers. For a truly inspired touch, serve it alongside a cheese board, its sharpness beautifully complementing a variety of cheeses.
Preparation & Storage
Storing Leftovers
To keep your Zesty Radish Relish fresh and flavorful, always store it in a clean, airtight container or jar. Refrigerate promptly after serving to maintain its optimal quality and prevent spoilage. Ensure the lid is tightly sealed to prevent air exposure, which can lead to drying out or absorbing other odors from your refrigerator. This simple storage method ensures you can enjoy the relish for its full intended shelf life.
Freezing
While Zesty Radish Relish is best enjoyed fresh or refrigerated, freezing is an option for very long-term storage, though it may slightly alter the texture. Portion the relish into freezer-safe containers or heavy-duty freezer bags, leaving a small amount of headspace as liquids expand when frozen. Properly stored, it can remain palatable for up to three months, offering a taste of summer even in the depths of winter.
Reheating
Zesty Radish Relish is designed to be served cold or at room temperature, so reheating is generally not necessary or recommended. The pickling process and raw ingredients are best preserved at cooler temperatures. If you do happen to thaw it from frozen, allow it to fully defrost in the refrigerator overnight, and then serve as usual without any warming. The flavors will continue to meld beautifully as it thaws.
Frequently Asked Questions
- What type of radishes are best for this relish, and can I use other root vegetables?
For the most authentic and vibrant flavor, fresh red round radishes are highly recommended due to their crisp texture and peppery notes. However, you can certainly experiment with varieties like French Breakfast radishes for a slightly milder, sweeter taste, or Watermelon radishes for an intriguing visual appeal and a more subdued flavor. While radishes are ideal, other root vegetables like thinly sliced turnips or even daikon radish could potentially be used, but they might alter the flavor profile and texture significantly, so proceed with caution and perhaps in smaller, experimental batches. Always ensure your chosen vegetables are firm and fresh for the best results. - How can I adjust the sweetness and tanginess of the relish to my personal preference?
Achieving your perfect balance of sweet and tangy is quite straightforward with this recipe. If you find the relish too tart after the resting period, you can gently stir in an additional teaspoon or two of sugar, honey, or your preferred sweetener until the desired sweetness is reached. Conversely, if it’s not tangy enough, a small splash of additional vinegar (white vinegar or apple cider vinegar work well) can be added. It’s always best to taste and adjust incrementally, allowing the flavors to meld for a few hours after each adjustment before making further changes. Remember, the resting period significantly impacts the final flavor balance. - Can Zesty Radish Relish be made ahead of time for parties or meal prep, and how should it be stored for maximum freshness?
Absolutely! This relish is a fantastic candidate for make-ahead preparations, as its flavors actually improve with a bit of time to meld. You can prepare the relish up to 3 days in advance and store it in an airtight jar in the refrigerator. For longer storage, ensuring it remains at its peak, it can be refrigerated for up to three weeks. Always make sure the jar is tightly sealed after each use to prevent oxidation and moisture loss. For best results, allow it to sit in the refrigerator for at least 24 hours before serving to let the flavors fully develop, which also makes it ideal for planning events or stocking up your weekly meal prep.