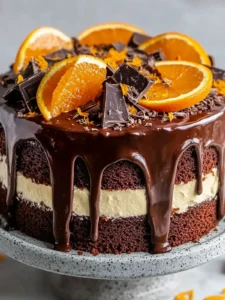
Ultimate Decadent Chocolate Orange Layer Cake – Irresistibly Delicious
The moment the rich aroma of dark cocoa fills my kitchen, I know something magical is about to unfold.
This Ultimate Decadent Chocolate Orange Layer Cake is the kind of dessert that turns any gathering into a celebration, combining the lusciousness of chocolate with the bright zing of fresh oranges. Picture this: three stunning layers of moist chocolate cake, each embraced by a creamy orange-infused filling, all crowned with a glossy ganache that just begs to be devoured. Every bite is a symphony of flavors, an elegant treat that’s surprisingly simple to make. Whether you’re preparing for a special occasion or just want to elevate your weeknight dessert, this cake is your perfect companion. Trust me, your guests will be raving—and asking for seconds! So, let’s dive into the recipe and create something truly unforgettable together.
Why You Will Love This Recipe
- Indulgent Layers: Luscious layers of deep chocolate cake create a treat that tastes like it came straight from a high-end bakery, offering pure chocolate bliss with every mouthful.
- Unexpected Brightness: The vibrant zest and juice of fresh oranges cut through the richness of the chocolate, creating a perfect, refreshing harmony of flavors that awakens the palate.
- Show-Stopping Appearance: With its elegant design and glossy ganache, this cake is a visual masterpiece, making it the ideal centerpiece for any celebration or gathering.
- Easy to Make: You don’t need to be a professional baker to achieve stunning results; this recipe is designed to be approachable for all skill levels, ensuring success and enjoyment.
- Versatile Delight: While perfect on its own, this cake also serves as a fantastic base for creative variations, allowing you to tailor it to specific tastes or dietary needs.
Ingredients You Need
Creating the ultimate decadent chocolate orange layer cake relies on the quality and freshness of your ingredients. Using the best possible components will significantly impact the final taste and texture, ensuring a truly luxurious dessert experience. Opting for high-quality cocoa powder, fresh citrus, and good chocolate is paramount for achieving the balanced, rich flavors this cake is known for.
Ultimate Decadent Chocolate Orange Layer Cake
This Ultimate Decadent Chocolate Orange Layer Cake combines rich chocolate and vibrant oranges for a magical dessert experience, perfect for turning any gathering into a celebration with its luscious layers and bright citrus notes.
- For the Cake: 2 cups All-Purpose Flour, 2 cups Granulated Sugar, 3/4 cup Dark Cocoa Powder (Dutch-Processed), 1 teaspoon Baking Soda, 1 teaspoon Baking Powder, 1 teaspoon Salt, 3 large Eggs, 1 cup Buttermilk, 1/2 cup Vegetable Oil, 1 cup Hot Coffee
- For the Filling: 1 cup Mascarpone Cheese, 1/2 cup Powdered Sugar, 1/4 cup Fresh Orange Juice, 1 tablespoon Fresh Orange Zest
- For the Ganache: 1 cup Heavy Cream, 8 ounces Dark Chocolate (for ganache), 2 tablespoons Light Corn Syrup
- For Garnish: 2 medium Fresh Oranges
- 1Preheat the oven to 350°F (175°C) and prepare three 8-inch round cake pans by greasing them and adding parchment paper.
- 2Whisk together the dry cake ingredients (flour, sugar, cocoa powder, baking soda, baking powder, salt) in a large bowl.
- 3Mix the wet cake ingredients (eggs, buttermilk, oil) in a separate bowl and gently fold them into the dry ingredients.
- 4Gradually add hot coffee and mix until the batter is smooth.
- 5Divide the batter evenly among the prepared pans and bake for 30-35 minutes, or until a toothpick comes out clean.
- 6Cool cakes in pans for 10 minutes, then transfer to wire racks to cool completely.
- 7For the filling, mix mascarpone cheese, powdered sugar, orange juice, and zest. Whip in cold heavy cream until stiff peaks form.
- 8For the ganache, heat heavy cream until simmering, then pour over chopped dark chocolate. Add corn syrup and whisk until smooth and glossy.
- 9Assemble the cake by layering the cake rounds with half of the orange cream filling between the first two layers.
- 10Pour the ganache over the top of the cake, letting it drip down the sides. Garnish with fresh orange slices and zest curls. Let set for 15 minutes.
Keywords: chocolate orange cake, layer cake, decadent dessert, citrus cake, homemade cake, baking, dessert, celebration cake
For the cake, you’ll need all-purpose flour, granulated sugar, dark cocoa powder, baking soda, baking powder, and salt. The filling calls for mascarpone cheese, powdered sugar, fresh orange juice, zest, and cold heavy cream. The decadent ganache requires more heavy cream, dark chocolate, and a touch of light corn syrup. Finally, fresh oranges are perfect for garnishing and adding an extra burst of citrus. These are the core components that contribute to the cake’s delightful flavor profile and satisfying textures, forming the foundation of its richness.
Variations
For a twist on the classic, consider infusing the cake batter with a hint of spice. A small pinch of cayenne pepper or chili powder added to the dry ingredients can create a subtle warmth that beautifully complements the deep chocolate and bright orange notes. This unexpected addition can elevate the cake to a new level of sophisticated flavor, surprising and delighting your guests with its complexity.
If you’re looking for a citrus swap, try substituting the orange with lemon for a tangier, more zesty experience. Lemon zest and juice can offer a brighter, sharper contrast to the rich chocolate, creating a different but equally delightful flavor profile. This variation is perfect for those who prefer a less sweet, more vibrant dessert that still boasts impressive elegance.
Another exciting variation involves incorporating a nutty element. You could experiment with substituting some of the flour with finely ground almonds or hazelnuts, or even adding a tablespoon of your favorite nut butter to the batter. This addition will lend a wonderful depth and a slightly different texture, enhancing the overall richness and appeal of the chocolate orange cake.
For a truly unique dessert, consider infusing the orange elements with another flavor. Perhaps steep the orange peels in a liqueur like Grand Marnier before zesting, or add a few drops of almond extract to the filling. These subtle additions can create layers of complementary aromas and tastes that make the cake even more memorable and sophisticated.
You might also want to experiment with the ganache. Instead of plain dark chocolate, try a high-quality milk chocolate for a sweeter ganache, or even a white chocolate ganache for a dramatic visual and flavor contrast. You could also swirl in some orange liqueur into the ganache just before it sets for an extra boozy and festive touch.
For a lighter, more summery feel, try incorporating fresh berries into the filling or as a garnish. A layer of macerated raspberries between the cake layers or a scattering of fresh blueberries on top can add beautiful color and a delightful tartness that contrasts wonderfully with the chocolate and orange. This can transform the cake into a more fruit-forward celebration of flavors.
How to Prepare Ultimate Decadent Chocolate Orange Layer Cake
Step 1: Preparing the Cake Batter
Begin by preheating your oven to a moderate 350°F (175°C). This ensures an even baking temperature, crucial for achieving perfectly risen cake layers. Prepare three 8-inch round cake pans by generously greasing their insides and lining the bottoms with parchment paper. This step is vital for preventing the delicate cake layers from sticking, ensuring they slide out cleanly after baking.
In a large mixing bowl, meticulously whisk together all the dry ingredients: the all-purpose flour, granulated sugar, dark cocoa powder, baking soda, baking powder, and salt. Whisking them thoroughly combines them and aerates the mixture, which is the first step towards a light and fluffy cake. Make sure there are no lumps, especially from the cocoa powder, as this ensures an even distribution of flavor and leavening agents throughout the batter.
In a separate, medium-sized bowl, combine the wet ingredients: the large eggs, buttermilk, and vegetable oil. Whisk these together until they are well blended and emulsified. This mixture provides the moisture and richness that will make your cake tender and moist. Ensure the eggs are at room temperature for better incorporation into the batter, leading to a smoother consistency.
Now, gently fold the wet ingredients into the dry ingredients. Mix only until the ingredients are just combined; overmixing can develop the gluten in the flour, resulting in a tougher cake. A few streaks of flour remaining are acceptable at this stage, as they will be incorporated with the next addition. The goal here is to keep the batter tender and light, forming the foundation of your moist cake.
The secret to an intensely chocolatey and moist cake lies in the addition of hot coffee. Gradually add the hot coffee to the batter while mixing continuously until the batter becomes smooth and homogenous. This hot liquid blooms the cocoa powder, releasing its full flavor potential and contributing to the cake’s incredible moistness. The batter will likely appear quite thin, but this is exactly what you want for an Ultimate Decadent Chocolate Orange Layer Cake.
Carefully divide the batter evenly among the three prepared cake pans. You can use a kitchen scale for absolute precision, or eyeball it to ensure each layer bakes at a similar rate. Place the pans into the preheated oven and bake for approximately 30 to 35 minutes. The exact baking time can vary slightly depending on your oven, so keep a close eye on them. They are ready when a toothpick inserted into the center of each cake comes out clean or with a few moist crumbs clinging to it, indicating they are perfectly baked through.
Once baked, remove the cakes from the oven and let them cool in their pans on wire racks for about 10 minutes. This brief cooling period allows the cakes to set slightly, making them easier to handle. After 10 minutes, carefully invert the cakes onto the wire racks to cool completely. Ensuring they are entirely cool before frosting is paramount to prevent the frosting from melting and the layers from sliding apart.
Step 2: Crafting the Orange Cream Filling
While the cake layers are cooling, prepare the luscious orange cream filling. In a clean bowl, combine the mascarpone cheese, powdered sugar, fresh orange juice, and finely grated orange zest. Use a whisk or an electric mixer on low speed to blend these ingredients until they are smooth and well incorporated. The mascarpone provides a rich, creamy base, while the orange juice and zest infuse it with a bright, zesty flavor that cuts through the richness.
In a separate, chilled bowl, whip the cold heavy cream until stiff peaks form. The cream must be very cold for it to whip up properly and achieve a stable consistency. Gradually add the whipped cream to the mascarpone mixture. Gently fold the whipped cream into the mascarpone base using a spatula until just combined and the filling is uniform in texture and color. Be careful not to overmix, as this can deflate the whipped cream and make the filling too loose.
The resulting filling should be thick, creamy, and wonderfully fragrant with citrus. Taste and adjust the sweetness or orange flavor if desired by adding a little more powdered sugar or a touch more zest. This filling is the perfect complement to the rich chocolate cake layers, adding a layer of delightful creaminess and a refreshing citrus counterpoint. Chill this filling in the refrigerator while you prepare the ganache and continue with the assembly.
Step 3: Creating the Decadent Chocolate Ganache
The glossy chocolate ganache is the crowning glory of this cake, adding a layer of intense chocolate flavor and a beautiful, professional finish. To begin, finely chop the dark chocolate and place it in a heatproof bowl. Using high-quality dark chocolate, at least 60-70% cacao, will yield the best flavor and texture for the ganache.
In a small saucepan, heat the heavy cream over medium heat until it just begins to simmer around the edges. Do not let it boil vigorously, as this can scald the cream. The goal is to heat the cream enough to melt the chocolate effectively. Once simmering, immediately pour the hot cream over the chopped dark chocolate in the bowl. Let it sit undisturbed for about 5 minutes. This allows the heat from the cream to gently melt the chocolate.
After the resting period, add the light corn syrup to the bowl. Corn syrup helps to create a smooth, glossy texture and prevents the ganache from hardening too much. Whisk the mixture gently, starting from the center and working your way outwards, until the chocolate is completely melted and the ganache is smooth, glossy, and emulsified. If there are any small unmelted chocolate pieces, you can gently warm the bowl over a double boiler or in short bursts in the microwave, stirring constantly, until smooth.
Allow the ganache to cool slightly at room temperature. It should be warm but not hot, with a pourable but not overly runny consistency. The ideal consistency for pouring will allow it to cascade down the sides of the cake beautifully, creating those signature drips. If it becomes too thick, you can gently reheat it very briefly. If it’s too thin, let it sit at room temperature a little longer to thicken.
Step 4: Assembling the Masterpiece
Now comes the exciting part: assembling your Ultimate Decadent Chocolate Orange Layer Cake. Ensure all your cake layers are completely cool and your orange cream filling and ganache are at the right consistency. Place the first cake layer onto your serving plate or cake stand. Some bakers like to place strips of parchment paper under the edges of the cake to keep the plate clean, removing them after the ganache is applied.
Spread half of the prepared orange cream filling evenly over the first cake layer, extending it almost to the edges. This layer of creamy citrus filling provides a delightful contrast to the rich chocolate cake. Don’t be shy with the filling; a generous amount will make each slice even more decadent and moist. Ensure the layer is smooth and even for the best presentation.
Carefully place the second cake layer on top of the filling. Gently press down to ensure it’s stable. Spread the remaining half of the orange cream filling over this second layer, creating another delightful creamy stratum. This builds up the cake’s structure and ensures that every bite contains that wonderful burst of orange flavor.
Finally, place the third cake layer on top of the second layer of filling. Ensure it is centered and level. This is the base for your spectacular ganache topping. Take a moment to admire your work so far; the anticipation of the final touches builds the excitement for this stunning dessert.
Step 5: Glazing and Garnishing
Pour the slightly cooled chocolate ganache over the top of the assembled cake. Start by pouring it in the center, allowing it to naturally flow and spread towards the edges. Use an offset spatula to gently guide the ganache to the sides, encouraging those beautiful drips to form. The key is to work relatively quickly but with a gentle touch to achieve an elegant, cascading effect.
Allow the ganache to set slightly on the cake for about 15 minutes. During this time, the ganache will thicken a bit, holding its shape and creating that appealing glossy finish. As it sets, the chocolatey aroma will become even more pronounced, a testament to the indulgence that awaits.
While the ganache is setting, prepare your garnishes. Thinly slice some fresh oranges, or create elegant zest curls using a channel knife or a vegetable peeler. You can also lightly score the orange slices to make them visually appealing. Place these fresh orange slices artfully around the top edge of the cake or scattered across the surface. The vibrant color of the fresh oranges provides a beautiful contrast to the dark chocolate ganache.
For an extra touch of decadence, you can add chocolate shavings or curls over the top of the ganache. This not only enhances the visual appeal but also adds another layer of chocolate texture. A dusting of cocoa powder or a sprinkle of finely chopped pistachios could also be wonderful additions, depending on your preference. The combination of the glossy ganache, fresh citrus, and optional chocolate elements creates a truly show-stopping dessert.
Step 6: The Final Chill and Presentation
Once the cake is fully assembled and garnished, it’s beneficial to let it chill in the refrigerator for at least 30 minutes to an hour. This allows the ganache to fully set and firm up, making it easier to slice cleanly. It also helps the flavors meld together, ensuring a cohesive and harmonious taste experience with every bite. The chill also ensures the cake layers remain stable as you cut into them.
Before serving, remove the cake from the refrigerator and allow it to sit at room temperature for about 15-20 minutes. This slight warming ensures the cake is not too cold and hard, allowing its moist texture and rich flavors to be fully appreciated. A cake that is too cold can sometimes mute the nuances of its flavors.
When ready to serve, use a sharp, thin knife dipped in hot water and wiped dry between each cut. This technique ensures clean, beautiful slices that showcase the impressive layers and the glossy ganache. The visual appeal of a perfectly sliced piece is almost as satisfying as the first bite itself, revealing the intricate structure and vibrant colors within.
Present each slice with pride, perhaps on elegant dessert plates. The Ultimate Decadent Chocolate Orange Layer Cake is a dessert designed to impress and delight, so take a moment to enjoy the appreciative reactions of your guests. It’s a testament to your effort and a celebration of rich, harmonious flavors that linger delightfully on the palate long after the last crumb is gone.
Pro Tips for Ultimate Decadent Chocolate Orange Layer Cake
Room Temperature is Key: Always ensure your eggs and buttermilk are at room temperature before starting. This fundamental step allows ingredients to emulsify more effectively, leading to a smoother batter and a lighter, more evenly textured cake. Cold ingredients can create a lumpy batter and a denser final product, so don’t skip this prep!
The Power of Coffee: Don’t shy away from the hot coffee! It doesn’t make the cake taste like coffee; instead, it intensifies the chocolate flavor and helps create an incredibly moist crumb. Use freshly brewed hot coffee for the best results and to ensure the cocoa powder blooms properly, releasing its full aromatic potential.
Ganache Consistency is Crucial: For that perfect drip effect, the ganache needs to be just right. It should be warm and pourable, but not too hot or too thin. If it’s too thick, gently warm it for a few seconds. If it’s too thin, let it cool and thicken slightly. Testing a small amount on the side of the bowl first can help you gauge its perfect pouring consistency.
Cooling is Non-Negotiable: Allow your cake layers to cool completely before attempting to frost them. Warm cakes are fragile and will melt the frosting, leading to a messy and potentially collapsed cake. Patience here is rewarded with a stable and beautifully finished dessert. Wire racks are essential for proper air circulation, preventing steam from making the bottoms soggy.
Zest with Care: When zesting your oranges, be sure to only grate the outer colored peel, avoiding the bitter white pith underneath. A microplane or a fine grater is ideal for this, yielding fragrant zest without any bitterness. This ensures the pure, bright essence of the orange shines through in your filling and garnishes.
Serving Suggestions for Ultimate Decadent Chocolate Orange Layer Cake
Decoration
The classic garnish involves artfully arranged fresh orange slices or delicate zest curls atop the glossy chocolate ganache. For an extra layer of elegance, consider dusting the top with a fine cocoa powder or a delicate scattering of edible gold leaf. A few strategically placed fresh mint leaves can also provide a pop of vibrant green color and a subtle aroma that complements the cake.
Side Dishes
To complement the rich flavors, a scoop of high-quality vanilla bean ice cream or a dollop of lightly sweetened whipped cream offers a delightful textural and temperature contrast. A small glass of rich espresso or a dark chocolate liqueur can also be a sophisticated pairing, enhancing the depth of the chocolate notes. Consider serving with a side of fresh berries, like raspberries or strawberries, for a burst of tartness.
Creative Serving Ideas
For a more whimsical presentation, cut the cake into individual mini cakes or cupcakes and top each with a miniature chocolate orange or a single candied orange peel. You could also create an impressive dessert platter by pairing slices of the cake with complementary elements like chocolate-covered orange segments or small bowls of citrus-infused chocolate mousse. Serve alongside a warm, comforting drink such as spiced hot chocolate or an orange-infused tea for a truly cozy experience.
Preparation & Storage
Storing Leftovers
To keep your delicious Ultimate Decadent Chocolate Orange Layer Cake fresh, store any leftovers in an airtight container in the refrigerator. Ensure the container is well-sealed to prevent the cake from drying out or absorbing unwanted odors from other foods. This method will preserve its moisture and flavor for up to 4 days, allowing you to enjoy slices at your leisure.
Freezing
If you anticipate having extra cake, individual slices can be frozen for longer storage. Wrap each slice securely in plastic wrap, followed by a layer of aluminum foil to protect it from freezer burn. Place the wrapped slices in a freezer-safe bag or container. Properly stored, frozen cake slices can maintain their quality for up to 2 months.
Reheating
When you’re ready to enjoy a frozen slice, the best method is to thaw it slowly in the refrigerator overnight. This gradual thawing helps to retain the cake’s delicate texture and rich flavors. If you prefer a slightly warm slice, you can gently reheat it in a microwave for about 15-20 seconds, being careful not to overheat it, which could affect the cake’s structure.
Frequently Asked Questions
- What is the best way to select ripe oranges for this cake?
When selecting oranges, look for ones that feel firm and heavy for their size, indicating juiciness. The skin should be vibrant and smooth, without excessive blemishes or soft spots. A gently squeezed orange that feels slightly yielding to the touch is a good sign of ripeness and juiciness, ensuring you’ll get the most flavor for your zest and juice.
- How should I store the Ultimate Decadent Chocolate Orange Layer Cake?
Store the cake in an airtight container in the refrigerator for optimal freshness. This prevents it from drying out and keeps the flavors vibrant for up to 4 days. Ensure the lid is securely fastened to maintain the cake’s delicate texture and prevent any loss of moisture, keeping it as delicious as when it was first made.
- Can I freeze leftover slices of the cake?
Absolutely! Individual slices can be frozen for up to two months. Wrap each slice tightly in plastic wrap, then in aluminum foil, and store them in a freezer-safe bag. This multi-layer wrapping is crucial for preventing freezer burn and maintaining the cake’s ideal texture and taste upon thawing.
- What if my ganache is too thick? How can I fix it?
If your ganache is too thick for drizzling, you can gently reheat it over low heat on the stovetop or in the microwave in short, 10-second bursts, stirring well between each burst. Continue until it reaches a smooth, pourable consistency, similar to thick syrup. Be cautious not to overheat it, which could cause it to separate.
- Can people with dairy allergies enjoy this cake?
This recipe contains dairy, but it can be adapted for dairy-free needs. Substitute dairy-free cream cheese for mascarpone, use a plant-based milk (like almond or soy) with a splash of vinegar for buttermilk, and ensure your chocolate and heavy cream alternatives are dairy-free. Careful ingredient selection will allow for a delicious dairy-free version.
- How do I know when the cake layers are fully baked?
The cake layers are ready when a toothpick inserted into the center comes out clean or with a few moist crumbs attached. You’ll also notice the edges of the cakes beginning to pull away slightly from the sides of the pans. Ensure they are completely cool on wire racks before assembling to prevent any structural issues with the frosting.