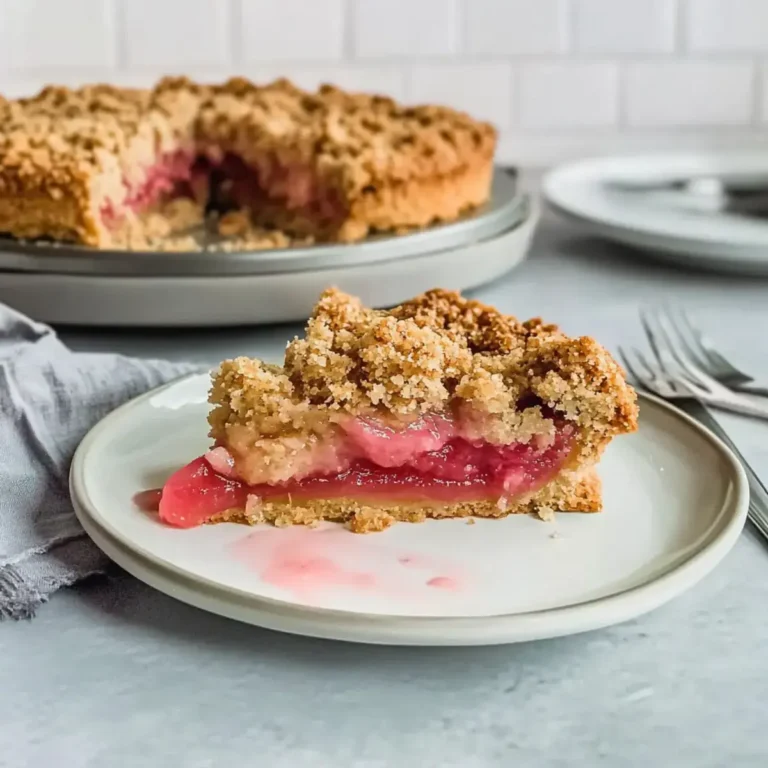
Old-Fashioned Coconut Bundt Cake
There are certain desserts that just exude comfort and nostalgia, and this Rich Old Fashioned Coconut Bundt Cake is undoubtedly one of them. It’s the kind of cake that whispers of Sunday afternoons, family gatherings, and the simple joy of a perfectly baked treat. Its beautiful, intricate shape makes it a showstopper, yet its approachable flavor profile makes it a universally loved classic.
This recipe has been meticulously crafted to deliver on every promise of a truly exceptional coconut Bundt cake. Expect a moist, tender crumb that melts in your mouth, infused with a deep, authentic coconut essence that’s perfectly balanced with a rich, buttery undertone. The delicate sweetness is enhanced by a luscious glaze and a delightful crunch from toasted coconut, making each bite an experience to savor.
Why You Will Love This Recipe
- Irresistible Coconut Flavor: A generous infusion of coconut extract and shredded coconut ensures every bite is a tropical delight, without being overpowering.
- Tender, Moist Crumb: The careful balance of ingredients and the creaming method result in a remarkably soft and tender cake that stays moist for days.
- Elegant Presentation: The classic Bundt shape provides a beautiful canvas for the smooth coconut glaze and toasted coconut topping, making it perfect for any occasion.
- Make-Ahead Convenience: This cake is an excellent candidate for baking in advance, allowing you to stress less on the day of your event and enjoy more time with your guests.
- Classic Comfort: It’s an old-fashioned favorite that appeals to a wide range of palates, bringing a sense of warmth and familiarity to any table.
Ingredients You Need
The success of any baked good hinges on the quality of its ingredients, and this Rich Old Fashioned Coconut Bundt Cake is no exception. Using fresh, high-quality staples will ensure the most vibrant flavors and the most pleasing texture. Be sure to opt for real butter, good vanilla and coconut extracts, and fresh dairy for the best possible outcome.
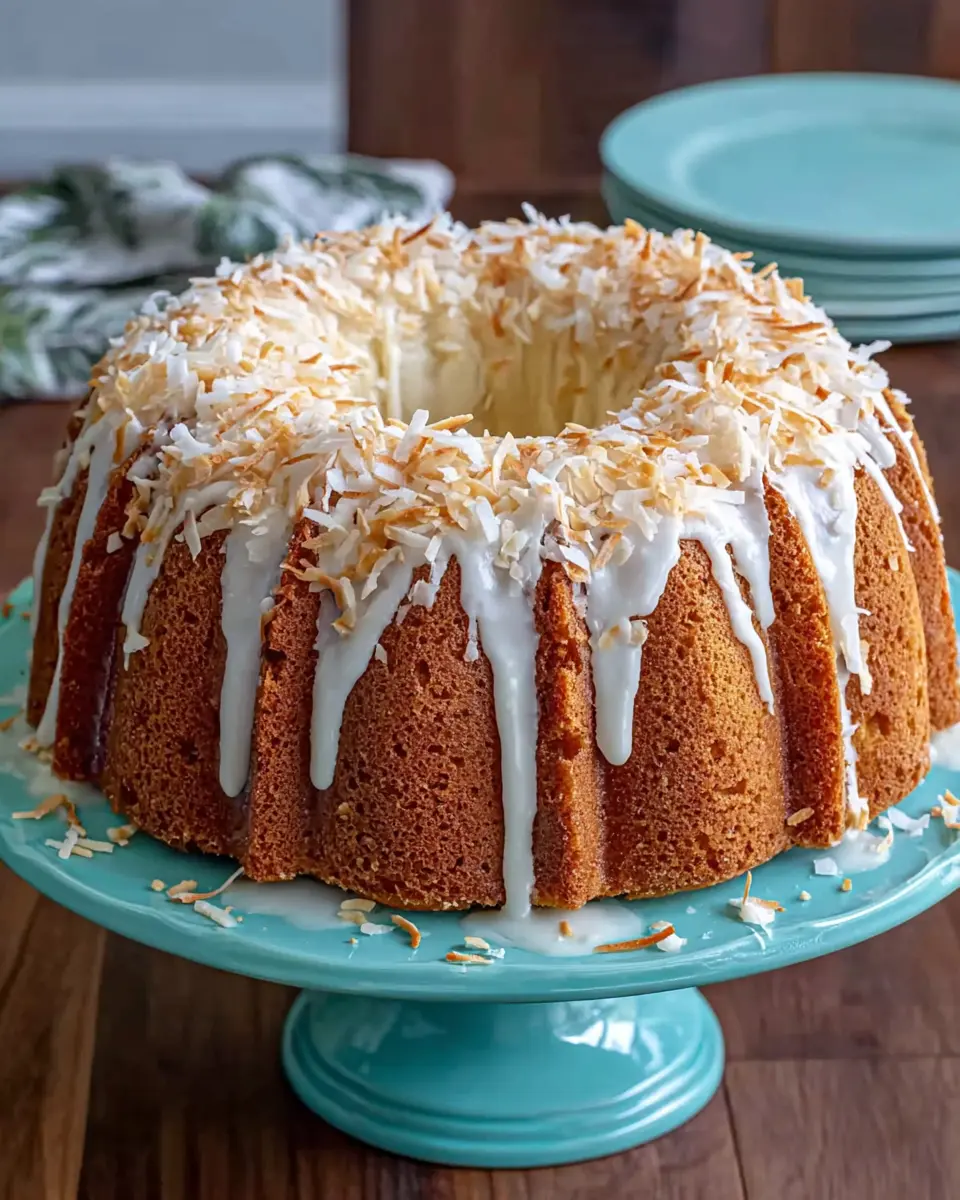
Rich Old Fashioned Coconut Bundt Cake

A classic coconut Bundt cake with a rich, buttery crumb, fragrant coconut flavor, and a smooth coconut glaze. Sweetened shredded coconut is folded into the batter for added texture, while a finishing layer of toasted coconut brings extra character and depth.
- For the cake: 2 1/4 cups all-purpose flour, 1 cup unsalted butter, softened to room temperature, 1 teaspoon vanilla extract, 1/2 teaspoon salt, 4 large eggs, at room temperature, 1 cup sweetened shredded coconut, 2 teaspoons coconut extract, 1 teaspoon baking powder, 1/2 cup whole milk, 2 1/2 cups granulated sugar
- For the glaze: 2 tablespoons unsalted butter, melted, 1 teaspoon coconut extract, 2 tablespoons whole milk, with more as needed for consistency, 1 1/2 cups confectioners’ sugar, sifted
- For the topping: 2/3 cup sweetened shredded coconut, toasted
- 1Preheat oven to 325°F (160°C). Grease and flour two 6-cup Bundt pans.
- 2Whisk together flour, baking powder, and salt in a medium bowl.
- 3In a large bowl, beat butter and sugar until pale and fluffy.
- 4Add eggs, vanilla extract, and coconut extract; beat until smooth.
- 5Mix in milk until just combined.
- 6Add dry ingredients and mix until no streaks remain, then fold in shredded coconut.
- 7Divide batter between pans. Bake for 50-55 minutes, or until a toothpick comes out with moist crumbs.
- 8Cool in pans for 15 minutes, then invert onto a wire rack to cool completely.
- 9For the glaze, whisk together melted butter, confectioners' sugar, milk, and coconut extract until smooth and pourable.
- 10Spoon or drizzle glaze over cooled cakes and sprinkle with toasted coconut.
You’ll find the precise quantities for all these wonderful ingredients detailed within the recipe card, ready for you to gather and prepare for baking.
Variations
While this Rich Old Fashioned Coconut Bundt Cake is divine in its classic form, its versatility opens the door to numerous delightful variations that can cater to different dietary needs or flavor preferences. These modifications are designed to enhance the cake’s appeal without compromising its inherent deliciousness.
For those seeking a vegan adaptation, several key substitutions can be made. Replace the butter with a high-quality vegan butter alternative or coconut oil for the primary fat source. For the eggs, a flax egg (one tablespoon of ground flaxseed mixed with three tablespoons of water, allowed to sit for five minutes) or a commercial egg replacer can work wonders, providing the necessary binding properties. Whole milk can be swapped for unsweetened almond milk, soy milk, or oat milk. Ensure your shredded coconut is dairy-free, and the glaze can be adapted using vegan butter and a plant-based milk. This version still yields a wonderfully moist and flavorful cake, proving that dietary needs don’t mean sacrificing taste.
A low-carb or keto-friendly version requires a bit more creativity with sweeteners and flours. Instead of all-purpose flour, a blend of almond flour and coconut flour is highly recommended for texture and flavor. Granulated sugar should be substituted with a granular keto-friendly sweetener like erythritol or xylitol (be cautious with xylitol if you have pets, as it is toxic to them). The glaze can be made with a keto powdered sweetener, a touch of heavy cream or coconut cream, and coconut extract for that signature flavor. This adaptation offers a guilt-free way to enjoy the essence of coconut Bundt cake while adhering to a stricter carbohydrate intake.
Adding different flavor dimensions can also transform this cake. Consider incorporating finely chopped, candied ginger into the batter for a warm, spicy note that beautifully complements the coconut. Alternatively, a swirl of raspberry or passion fruit coulis baked into the center of the cake can introduce a delightful fruity tang. For an extra layer of sophistication, a hint of cardamom or a touch of finely grated lime zest can elevate the fragrance and complexity of the coconut profile, making each slice a nuanced culinary adventure.
How to Prepare Rich Old Fashioned Coconut Bundt Cake
Step 1: Preparing the Pans and Oven
The initial stage of preparing your Rich Old Fashioned Coconut Bundt Cake is crucial for ensuring a perfect release and even baking. Begin by preheating your oven to the specified temperature, which is typically around 325°F (160°C). This moderate temperature allows the cake to bake through gently, developing its tender crumb without over-browning the exterior.
Next, and perhaps most importantly for a Bundt cake, is the thorough greasing and flouring of your Bundt pans. Use a pastry brush to coat every single crevice and curve of the pan with softened butter or a baking spray that contains flour. Pay extra attention to the intricate details of the mold, as these are the areas most prone to sticking. Once generously greased, lightly dust the entire interior of the pan with all-purpose flour, tapping out any excess.
This meticulous preparation step is the foundation for a Bundt cake that will unmold beautifully, showcasing its elegant shape without any tears or stuck-on bits. A well-prepared pan is your best friend in achieving that professional, bakery-quality finish that makes a Bundt cake so visually appealing before you even take the first bite.
Step 2: Combining the Dry Ingredients
While your oven is preheating and your pans are being meticulously prepared, focus on the dry components of the cake batter. In a medium-sized bowl, gather your all-purpose flour, baking powder, and salt. These are the foundational structural and leavening elements of your cake, and their even distribution is key to a consistent rise and texture.
Using a whisk, gently combine these dry ingredients thoroughly. This process, known as sifting or whisking dry ingredients together, ensures that the baking powder is evenly dispersed throughout the flour and that the salt is distributed without creating pockets of concentrated saltiness. An even distribution of leavening agents means your cake will rise uniformly, resulting in a lighter, more desirable crumb that is free from dense spots.
Set this bowl of whisked dry ingredients aside. It will be incorporated into the wet ingredients in stages, allowing for a controlled development of the gluten structure in the flour, which is vital for a tender cake. This simple step, often overlooked, plays a significant role in the overall success and quality of your Rich Old Fashioned Coconut Bundt Cake.
Step 3: Creating the Creamed Butter and Sugar Base
Now, transition to the wet ingredients, starting with the quintessential creaming method that forms the soul of many classic cakes. In a large mixing bowl, ideally using an electric mixer, combine the softened unsalted butter and granulated sugar. The butter should be at room temperature, soft enough to yield to gentle pressure but not so warm that it has melted.
Beat these two ingredients together on medium speed for a significant amount of time, typically 3 to 5 minutes. What you are aiming for is a mixture that transforms from a dense, yellow mass into a pale, light, and visibly fluffy concoction. This process, known as creaming, is absolutely critical because it incorporates tiny air bubbles into the butter and sugar mixture. These air bubbles will expand during baking, contributing significantly to the cake’s lift and its delicate, tender crumb.
This stage is not just about combining ingredients; it’s about building the cake’s structure and texture from the ground up. A well-creamed butter and sugar base is the secret to that desirable old-fashioned richness and a cake that is delightfully light rather than heavy. Patience here will reward you with a superior end product, so don’t skimp on the beating time.
Step 4: Incorporating Eggs, Extracts, and Milk
With your beautifully creamed butter and sugar mixture as the foundation, it’s time to add the richness and aroma. One at a time, add the large eggs to the bowl, beating well after each addition until each egg is fully incorporated into the batter. This gradual addition prevents the mixture from separating and helps to emulsify the fats and liquids smoothly.
Following the eggs, introduce the fragrant vanilla extract and the distinctive coconut extract. Beat these in until the batter is smooth and the extracts are evenly distributed, infusing the entire mixture with their enticing aromas. The combination of vanilla and coconut is what gives this cake its signature, comforting flavor profile, reminiscent of cherished childhood treats.
Next, in a separate small bowl or measuring cup, have your whole milk ready. With the mixer now on a low speed, gradually pour in the milk. Mix only until the milk is just incorporated into the batter. Overmixing at this stage can develop the gluten in the flour too much, leading to a tougher cake. The goal is to gently combine the wet ingredients, creating a smooth, emulsified base ready for the addition of the dry components.
Step 5: Combining Wet and Dry Ingredients and Adding Coconut
Now, it’s time to bring the wet and dry elements together to form the cohesive cake batter. Begin by gradually adding the whisked dry ingredients (flour, baking powder, and salt) to the wet ingredients in the large mixing bowl. Mix on low speed, or by hand with a spatula, just until you no longer see any dry streaks of flour. It is crucial to avoid overmixing at this point, as this can lead to a tough texture in the finished cake.
Once the flour is nearly incorporated, it’s time to gently fold in the sweetened shredded coconut. Use a rubber spatula or a wooden spoon for this step, carefully folding the coconut into the batter. The act of folding rather than stirring helps to preserve the air bubbles that were incorporated during the creaming process, ensuring a lighter, more tender crumb. This gentle incorporation also distributes the coconut evenly throughout the batter, guaranteeing a delightful texture in every slice.
The batter should be thick but pourable, with the shredded coconut visibly suspended throughout. It’s a beautiful, fragrant mixture that hints at the delicious cake to come. This careful combination of ingredients and mixing techniques is what yields the rich, old-fashioned quality that defines this Bundt cake, making it a truly special dessert.
Step 6: Baking and Cooling the Cake
With the batter prepared and the pans perfectly greased and floured, it’s time to bake your Rich Old Fashioned Coconut Bundt Cake. Carefully divide the batter evenly between the two prepared 6-cup Bundt pans, ensuring an equal amount in each to promote uniform baking. Smooth the tops of the batter gently.
Place the filled pans on a baking sheet (this helps catch any potential drips) and carefully transfer them to the preheated oven. Bake for the specified time, typically around 50 to 55 minutes, or until the tops of the cakes are a beautiful golden brown and a toothpick inserted into the thickest part of the cake comes out with a few moist crumbs attached. A few moist crumbs indicate that the cake is perfectly baked, moist, and not overdone.
Once baked, remove the pans from the oven and let them rest on a wire rack for about 10 to 15 minutes. This brief resting period allows the cakes to firm up slightly, making them easier to unmold. After resting, carefully invert each pan onto a wire rack, tapping the bottom gently if needed to release the cake. Allow the cakes to cool completely on the wire racks before proceeding to the glaze. Glazing a warm cake will cause the glaze to melt and slide off, so patience is key for a beautiful finish. Once completely cool, whisk the glaze until it achieves a smooth, pourable consistency that falls from a spoon in a steady ribbon. Spoon this luscious glaze over the cooled cakes, letting it drip naturally down the sides. Finish by scattering the toasted coconut over the top for that extra touch of texture and visual appeal, creating a truly spectacular dessert.
Pro Tips for Rich Old Fashioned Coconut Bundt Cake
Elevate Your Coconut Flavor: For an even more pronounced and delightful coconut experience, consider toasting the shredded coconut that you fold into the batter and use for topping. Spread it in a single layer on a baking sheet and toast in a 300°F (150°C) oven for about 5-10 minutes, watching it very closely, until it’s lightly golden. This brings out a beautiful nutty aroma and a richer flavor that makes a significant difference.
Room Temperature is Key: Ensure all your ingredients, especially the butter and eggs, are at room temperature before you begin. This is not a suggestion but a critical step for achieving a smooth, emulsified batter. Room temperature ingredients blend together seamlessly, creating a lighter texture and a more even crumb, preventing any possibility of a greasy or separated cake.
Avoid Overmixing the Flour: Once the dry ingredients are added to the wet, mix only until they are just combined and no dry streaks remain. Overmixing flour develops gluten, which can result in a tough, dense cake. Gentle handling at this stage is paramount for preserving that desirable tender crumb characteristic of an old-fashioned cake.
The Importance of Pan Preparation: A Bundt cake’s intricate design means it can be a challenge to release. Invest time in thoroughly greasing and flouring every nook and cranny of your Bundt pan. Using a pastry brush to get into all the detailed areas ensures a clean release, preserving the beautiful shape of your cake and avoiding frustrating breakage.
Don’t Rush the Cooling Process: Allow the cakes to cool completely before attempting to glaze them. A warm cake will cause the glaze to melt and run off prematurely, resulting in a messy finish. Patience during the cooling stage ensures the glaze sets beautifully, creating that smooth, appealing drip down the sides that is so characteristic of a stunning Bundt cake.
Serving Suggestions for Rich Old Fashioned Coconut Bundt Cake
Decoration
The visual appeal of this Rich Old Fashioned Coconut Bundt Cake is already impressive thanks to its elegant shape, but a few thoughtful decorative touches can elevate it further. The provided recipe includes a luscious coconut glaze and toasted shredded coconut for topping, which offers a classic, inviting look that highlights the cake’s flavor profile.
For an extra touch of festivity, consider adding a dusting of powdered sugar over the glazed cake just before serving. This creates a beautiful contrast and a delicate sweetness. You can also adorn the top with a few fresh, edible flowers like violets or pansies for a pop of color, ensuring they are food-safe. Alternatively, a scattering of candied coconut flakes or a few finely chopped toasted macadamia nuts can add both visual interest and complementary textures.
If you are preparing this cake for a special occasion, consider using a simple stencil to dust powdered sugar or cocoa powder onto the top of the cake before glazing. A snowflake stencil for winter holidays or a simple heart for Valentine’s Day can add a personalized and charming touch. The key is to keep the decorations complementary to the cake’s coconut flavor and not to overwhelm its natural beauty.
Side Dishes
While this Rich Old Fashioned Coconut Bundt Cake is a star performer on its own, a few well-chosen accompaniments can transform a simple slice into a more elaborate dessert experience. The cake’s rich, buttery, and subtly sweet profile pairs beautifully with a variety of complementary flavors and textures.
A small scoop of high-quality vanilla bean ice cream or a dollop of lightly sweetened whipped cream offers a delightful temperature and textural contrast to the tender cake. The cool creaminess of ice cream or the airy lightness of whipped cream provides a wonderful counterpoint to the cake’s density. For a fruitier element, a side of fresh berries—such as strawberries, raspberries, or blueberries—adds a touch of tartness and brightness that cuts through the richness of the cake. A simple fruit compote, like a warm apple or peach compote, can also add a lovely seasonal touch.
If serving this cake alongside coffee or tea, consider offering a small plate of delicate shortbread cookies or perhaps some candied citrus peels. These small additions can enhance the overall dessert experience without competing with the main attraction. The goal is to complement, not to overshadow, the star of the show, making each bite a harmonious blend of flavors and textures.
Creative Serving Ideas
Beyond the traditional slice, this Rich Old Fashioned Coconut Bundt Cake lends itself to several creative serving ideas that can make any occasion feel extra special. Its sturdy structure makes it ideal for more adventurous presentations.
Consider transforming a slice into a deconstructed dessert. Crumble a piece of the cake and serve it layered with coconut cream, fresh mango chunks, and a sprinkle of toasted coconut in a pretty glass. This offers a refreshing, tropical take on the cake’s flavors. For an elegant brunch setting, serve individual mini Bundt cakes (if you have smaller pans) glazed and decorated, perhaps alongside a small fruit salad or a yogurt parfait.
Another creative idea is to use the cake as a base for a trifle. Layer chunks of the cake with coconut custard, whipped cream, and fresh pineapple or passion fruit in a large glass bowl. This creates a visually stunning and incredibly delicious layered dessert. For a more playful approach, especially for children’s parties, cut the cake into fun shapes using cookie cutters after it has been glazed, and serve with colorful fruit skewers and a drizzle of chocolate sauce.
Preparation & Storage
Storing Leftovers
One of the many advantages of this Rich Old Fashioned Coconut Bundt Cake is its excellent shelf life, making it a superb option for entertaining or simply for having a delicious treat on hand. To maintain its optimal freshness and texture, it’s important to store it correctly.
For short-term storage, keeping the cake at room temperature is the preferred method. Loosely cover the cake with plastic wrap or place it under a cake dome to protect it from dust and drying out. Ensure the covering is not airtight, as this can trap moisture and potentially make the glaze sticky or the cake itself soggy. Stored this way, the cake will remain moist and flavorful for approximately 3 to 4 days.
If your kitchen tends to be warm, or if you’re concerned about humidity affecting the glaze, refrigerating the cake is an option. However, it is crucial to bring the cake back to room temperature before serving. Cold cake can taste dense and its delicate flavors might be muted. Allow slices to sit out for at least 30 minutes to an hour to regain their intended texture and aromatic qualities.
Freezing
This Rich Old Fashioned Coconut Bundt Cake freezes beautifully, making it an ideal candidate for baking ahead of time for future events or simply to have on hand for unexpected cravings. Freezing allows you to preserve the cake’s delightful texture and flavor for an extended period.
Ensure the cake has cooled completely before you consider freezing it. You can freeze the entire cake or individual slices, depending on your preference and anticipated usage. Wrap the cake tightly in a double layer of plastic wrap, pressing out as much air as possible to prevent freezer burn. Follow this with a layer of heavy-duty aluminum foil or a freezer-safe airtight container for maximum protection.
When freezing the cake with glaze, be aware that the glaze might soften slightly upon thawing. For the neatest finish, you can opt to freeze the unglazed cake and then prepare and apply the glaze once the cake has thawed. Frozen cake can be stored for up to 2 months. Proper wrapping is key to ensuring that when you eventually thaw and enjoy your cake, it tastes as fresh and delicious as the day it was baked.
Reheating
When it comes to reheating this Rich Old Fashioned Coconut Bundt Cake, the general consensus is that it’s often best served at room temperature rather than reheated. The nature of the ingredients and the glazing process means that warming the cake can sometimes compromise its texture and the integrity of the glaze.
If the cake has been refrigerated and you wish to bring it back to a more palatable temperature, allow it to sit at room temperature for at least 30-60 minutes. This slow warming process allows the butter in the cake to soften, restoring its tender crumb and allowing the coconut flavor to fully bloom. Avoid the temptation to microwave it, as this can quickly lead to a rubbery texture and uneven heating, which is particularly problematic for a delicate Bundt cake.
For cakes that have been frozen, thawing them overnight in the refrigerator is the recommended method. Once thawed, again, let them come to room temperature for an hour or so before serving. The goal with this cake is to enjoy its naturally moist and buttery qualities, which are best appreciated at a cool room temperature, where the flavors are most vibrant and the crumb is at its softest and most delightful.
Frequently Asked Questions
-
Can I use a different type of coconut in this recipe?
While the recipe specifies sweetened shredded coconut, you can experiment with other forms, though it may affect texture and sweetness. Unsweetened shredded coconut can be used, but you will need to adjust the sugar in the cake and glaze accordingly. Desiccated coconut, which is finer and drier, will absorb more liquid, potentially requiring a slight increase in milk for the batter; it also provides less chewiness. Flaked coconut, which is larger and often sweetened, can work well but might create larger pockets of texture. Always consider the moisture content and sweetness level when making substitutions to ensure the best results for your Rich Old Fashioned Coconut Bundt Cake.
-
My Bundt cake stuck to the pan. What went wrong, and how can I prevent it next time?
The most common reason for a Bundt cake sticking is insufficient greasing and flouring of the pan. Ensure you are using softened butter or a high-quality baking spray that contains flour, and that it reaches every single crevice and detail of the pan using a pastry brush. Don’t forget the center tube! Another crucial factor is allowing the cake to rest in the pan for the recommended 10-15 minutes after baking before inverting it. This short cooling period allows the cake to contract slightly and firm up, making it easier to release. Impatience here is often the culprit for cakes sticking. Finally, using a well-seasoned or non-stick Bundt pan can significantly reduce the chances of sticking.
-
How can I ensure my glaze has the perfect consistency, and what if it’s too thick or too thin?
Achieving the perfect glaze consistency is key to a beautiful finish. The general guideline for this coconut glaze is that it should be smooth, pourable, and fall from a spoon in a steady ribbon. If your glaze is too thick, meaning it’s clumpy or not flowing easily, gradually add more whole milk or coconut milk, a teaspoon at a time, whisking continuously until you reach the desired consistency. If, however, your glaze is too thin and runny, it won’t coat the cake properly. In this case, gradually whisk in more sifted confectioners’ sugar, a tablespoon at a time, until it thickens to a pourable ribbon consistency. It’s always better to add liquids or solids slowly to avoid overdoing it and having to adjust further.