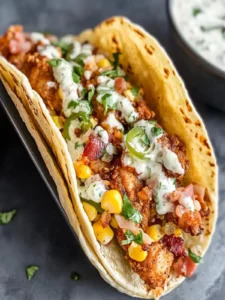
Ultimate Fried Chicken Street Corn Tacos with Bacon
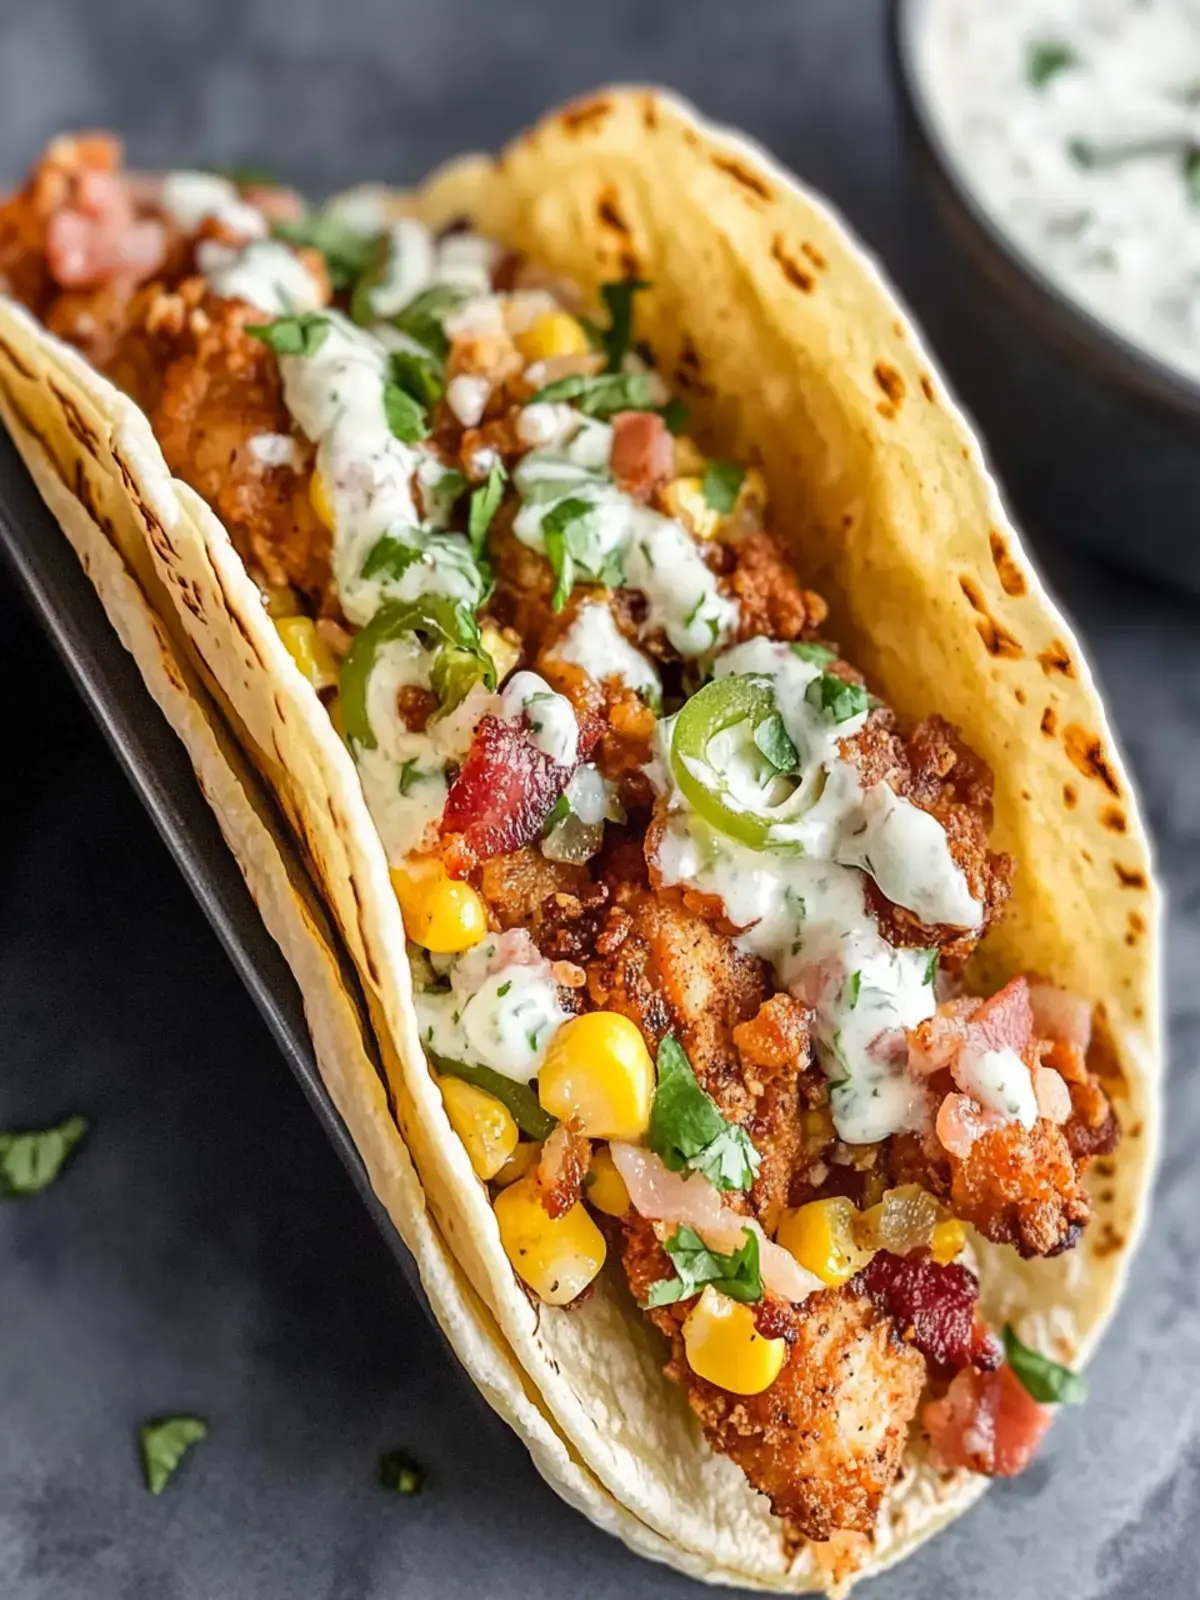
There’s nothing quite like the joyful crunch of a perfectly fried taco, and when you bite into my Fried Chicken Street Corn Tacos with Bacon and Jalapeno Lime Ranch, you’ll understand why. The idea struck me one evening while standing in front of the fridge, staring at some lonely chicken tenders, and I knew I had to bring these flavors together.
Marinating the chicken in a tangy pickle juice and buttermilk blend infuses it with unforgettable flavor, while the crispy bacon adds that smoky, salty kick we all crave. Topped with vibrant street corn salad and a drizzle of creamy jalapeno sauce, this dish promises to turn your weeknight meals from mundane to magical; it’s a true celebration of bold and satisfying tastes.
Why You Will Love This Recipe
- Unforgettable Flavor: The chicken, marinated in a secret blend of pickle juice and buttermilk, becomes incredibly tender and savory, providing a flavor foundation that is simply irresistible and sets these tacos apart from the ordinary.
- Crispy Delight: Each taco delivers a satisfying textural contrast with perfectly fried chicken offering a delightful crunch that complements the other components beautifully.
- Vibrant Toppings: The combination of fresh street corn salad and creamy jalapeno ranch sauce adds bursts of color, texture, and a zesty kick that elevates every single mouthful to a new level of deliciousness.
- Easy Preparation: Despite their gourmet appeal, these tacos are surprisingly simple to make, featuring straightforward steps that make them accessible for busy weeknights or casual weekend gatherings.
- Crowd-Pleasing Appeal: These tacos are designed to be a hit with everyone, from picky eaters to discerning foodies, guaranteeing smiles and empty plates at any table.
Ingredients You Need
Crafting these exceptional Fried Chicken Street Corn Tacos hinges on using fresh, high-quality ingredients that harmonize beautifully. Selecting tender chicken tenders ensures a juicy and flavorful bite, while the quality of your produce for the street corn salad will significantly impact the overall freshness and vibrancy of the dish. Paying attention to these details will make a noticeable difference in the final taste experience.
Fried Chicken Street Corn Tacos with Bacon and Jalapeno Lime Ranch
Enjoy the joyful crunch of Fried Chicken Street Corn Tacos with Bacon and Jalapeno Lime Ranch, a must-try dish that brings together tender marinated chicken, crispy bacon, vibrant street corn salad, and a creamy jalapeno ranch. These tacos are perfect for a weeknight meal or a casual gathering, promising to be a crowd-pleaser.
- 1.5 lbs. chicken tenders
- 1 cup pickle juice
- 1.5 cups buttermilk
- 1.5 cups all-purpose flour
- 1/4 cup cornstarch
- 1 tablespoon garlic powder
- 1 tablespoon paprika
- 2 tsp salt
- 2 tsp onion powder
- 2 tsp black pepper
- 1 tsp cayenne powder
- 2 tablespoons hot sauce
- Peanut oil or vegetable oil for frying
- 8 flour tortillas
- 1 strip bacon, cooked crisp and diced
- 2 cups prepared Street Corn Salad
- 1 cup prepared Chuy's creamy jalapeno sauce
- Lime wedges for serving
- 1Marinate the Chicken: In a medium bowl, mix pickle juice and buttermilk. Submerge the chicken tenders, cover with plastic wrap, and let them marinate in the fridge for at least 2 hours, or overnight for maximum flavor.
- 2Prepare the Coating: In a separate medium bowl, whisk together flour, cornstarch, garlic powder, paprika, salt, onion powder, black pepper, and cayenne powder until well combined.
- 3Make the Buttermilk Mixture: In another medium bowl, combine buttermilk and hot sauce, stirring well. Add a few tablespoons of this mixture into the flour coating to create crumbs that cling nicely to the chicken.
- 4Heat the Oil: Preheat your oil in a cast iron skillet or deep fryer to 350°F (175°C).
- 5Coat the Chicken: Pat the marinated chicken dry. Dredge each tender in the flour mixture, dip into the buttermilk/hot sauce mixture, then back into the flour mixture for a thick, crunchy coating.
- 6Rest the Coated Chicken: Allow the coated chicken to sit for a few minutes.
- 7Fry the Chicken: Carefully add the chicken strips to the hot oil in batches. Fry until golden brown and they reach an internal temperature of 165°F (74°C), turning every few minutes for an even cook.
- 8Cook the Tortillas: In a separate skillet over medium-low heat, add a few tablespoons of neutral oil. Cook each tortilla 1-2 minutes on each side until golden brown but still pliable. Place them on paper towels to absorb any excess oil.
- 9Assemble the Tacos: Load each tortilla with a fried chicken tender, a generous scoop of street corn salad, and a drizzle of creamy jalapeno sauce. Serve with lime wedges on the side.
Keywords: fried chicken tacos, street corn, jalapeno ranch, bacon, Mexican-inspired, dinner, easy recipe
As you can see, the specific quantities and detailed descriptions for each component are provided within the recipe card, ensuring you have all the precise measurements needed for perfect execution of this incredible dish.
Variations
The beauty of these Fried Chicken Street Corn Tacos lies in their inherent adaptability, allowing you to tailor them precisely to your preferences and dietary needs. Don’t hesitate to experiment and make them your own.
For a delightful Vegan Version, you can swap the chicken for firm tofu or tempeh, marinated and then coated and fried just like the chicken. The street corn salad can be made vegan by using vegan mayonnaise or a cashew-based crema, ensuring all the vibrant flavors are maintained.
If you’re leaning towards a Low-Carb Option, swap the flour tortillas for large lettuce cups or low-carb tortillas. You can also experiment with baked chicken tenders instead of fried, significantly reducing the carbohydrate and fat content while still enjoying the delicious taco experience.
For a touch of Southwestern Flair, consider adding a dollop of black bean and corn salsa alongside the street corn salad, or perhaps a sprinkle of crumbled cotija cheese for an authentic Mexican touch. This enhances the robust, savory profile of the tacos.
How to Prepare Fried Chicken Street Corn Tacos
Step 1: Marinate the Chicken
Begin by preparing the chicken tenders for their flavor infusion. In a medium-sized bowl, combine the pickle juice and buttermilk, creating a tangy and rich marinade. Submerge the chicken tenders completely in this mixture, ensuring they are fully coated.
Cover the bowl tightly with plastic wrap to prevent any contamination or spills. Place the bowl in the refrigerator and let the chicken marinate for a minimum of two hours; however, for the most profound flavor penetration and tenderization, overnight marination is highly recommended.
This crucial step tenderizes the chicken from the inside out, ensuring an incredibly moist and succulent texture that will make every bite a delight. The pickle juice adds a unique tanginess that complements the richness of the buttermilk beautifully.
Step 2: Prepare the Coating Mixture
While the chicken is marinating, prepare the savory coating that will give your chicken its signature crispy exterior. In a separate, clean medium bowl, thoroughly whisk together the all-purpose flour, cornstarch, garlic powder, paprika, salt, onion powder, black pepper, and cayenne powder. Ensure all the dry ingredients are completely integrated, creating a uniform blend.
This blend of spices is what gives the fried chicken its distinctive flavor profile and beautiful golden-brown color. The cornstarch is key to achieving that extra level of crispiness, making the coating shatteringly good with every bite.
Take care to mix until there are no visible streaks of any single spice, aiming for a homogenous powder that will adhere evenly to the chicken. This consistent coating is fundamental for achieving that perfect fried texture.
Step 3: Create the Buttermilk Mixture and Incorporate into Coating
In another medium bowl, combine the remaining buttermilk with the hot sauce. Stir this mixture thoroughly until it is well incorporated and uniformly blended. This liquid component is essential for creating a textured coating that adheres wonderfully to the chicken.
Now, carefully add a few tablespoons of this buttermilk and hot sauce mixture into your flour coating blend. Stir this gently to create small, clumpy bits that resemble coarse breadcrumbs. This step is vital for creating a multi-layered, craggy coating that will become exceptionally crispy during frying.
The texture created here is what separates a good coating from a great one, providing plenty of surface area for frying and that satisfying crunch. Don’t overmix; you want distinct clumps to form.
Step 4: Heat the Frying Oil
Ensuring your oil is at the correct temperature is paramount for achieving perfectly crispy, evenly cooked fried chicken. Select a deep, heavy-bottomed skillet, such as a cast iron skillet, or a dedicated deep fryer. Pour in enough peanut oil or vegetable oil to allow the chicken to be submerged adequately for even frying.
Preheat the oil over medium-high heat until it reaches a consistent temperature of 350°F (175°C). Using a kitchen thermometer is highly recommended to monitor and maintain this precise temperature throughout the frying process. Proper oil temperature is crucial for preventing the chicken from becoming greasy or burning.
If the oil is too cool, the chicken will absorb too much oil and become heavy and soggy; if it’s too hot, the outside will burn before the inside is cooked through. Patience during this heating phase will pay off in a superior final product.
Step 5: Coat the Chicken for Frying
Once the oil is preheated and the chicken has finished marinating, it’s time to prepare the chicken for its crispy transformation. Carefully remove the chicken tenders from the marinade, allowing any excess liquid to drip back into the bowl. Gently pat each tender dry with paper towels; this step helps the coating adhere better.
Dredge each dried chicken tender thoroughly in the seasoned flour mixture, ensuring it is fully coated on all sides. Then, dip the floured tender into the buttermilk and hot sauce mixture, allowing any excess to drip off, and immediately return it to the flour mixture for a second coating. Press the flour gently onto the chicken to create a thick, craggy, and well-adhered crust.
Repeat this process for all the chicken tenders, ensuring each one is generously and evenly coated. The double-dipping method is key to achieving a substantial, crispy breading that stands up well to frying and makes the tacos truly spectacular.
Step 6: Fry the Chicken to Golden Perfection
With your chicken tenders beautifully coated and the oil at the perfect 350°F, it’s time to fry. Carefully place the coated chicken strips into the hot oil, working in batches to avoid overcrowding the skillet. Frying in batches ensures the oil temperature remains stable and allows each piece of chicken to fry evenly and crisp up properly.
Fry the chicken for approximately 4-6 minutes per side, turning occasionally with tongs to ensure even browning. The chicken is done when it is a deep golden brown and reaches an internal temperature of 165°F (74°C) on an instant-read thermometer. Ensure the internal temperature is checked to guarantee it is cooked through safely.
Once cooked, remove the fried chicken tenders from the oil and place them on a wire rack set over a baking sheet or on a plate lined with paper towels to drain any excess oil. This resting period helps maintain the crispiness of the coating.
Step 7: Prepare the Tortillas
While the chicken is frying or resting, prepare your tortillas to serve as the perfect vessels for your delicious taco filling. Heat a separate skillet over medium-low heat and add a few tablespoons of neutral oil, just enough to lightly coat the bottom. This will help them achieve a lovely golden hue and a slightly crisped texture without becoming brittle.
Carefully place each flour tortilla into the heated oil, cooking for about 1-2 minutes on each side. You’re looking for them to become golden brown and slightly puffed, but still remain pliable enough to fold into tacos. Overcooking will make them break when you try to assemble.
Once each tortilla is cooked to perfection, remove it from the skillet and place it on a plate lined with paper towels. This simple step absorbs any excess oil, ensuring your tacos aren’t greasy. Keeping them warm in a low oven while you assemble can be a great strategy.
Step 8: Assemble the Tacos
Now comes the most exciting part: assembling your magnificent Fried Chicken Street Corn Tacos! Take a warmed tortilla and place a generous portion of the crispy fried chicken tender onto it. You can leave the tenders whole or slice them into more manageable pieces, depending on your preference.
Next, add a heaping scoop of your vibrant street corn salad over the chicken. The sweet corn, creamy dressing, and fresh elements provide a wonderful contrast to the rich, fried chicken. Follow this with a generous drizzle of the creamy jalapeno lime ranch sauce, its zesty kick tying all the flavors together.
Serve the tacos immediately with fresh lime wedges on the side. A squeeze of fresh lime juice over the assembled tacos will brighten all the flavors and add a final, refreshing flourish that makes these tacos truly unforgettable.
Pro Tips for Fried Chicken Street Corn Tacos
Marination Matters: Allowing the chicken to marinate in the pickle juice and buttermilk for an extended period, ideally overnight, is crucial. This not only deepens the flavor profile but also ensures the chicken remains incredibly juicy and tender throughout the cooking process. Don’t shortcut this vital step for the best results.
Prevent Coating Clumping: When mixing your flour coating, ensure all the dry ingredients are thoroughly whisked together before adding any wet ingredients. This prevents clumps from forming in the final coating, which can lead to uneven frying and a less appealing texture.
Maintain Optimal Oil Temperature: Keep your frying oil consistently at 350°F (175°C). Use a thermometer to monitor it closely. If the oil is too hot, the coating will burn before the chicken is cooked through; if it’s too cool, the chicken will absorb excess oil and become greasy rather than crispy.
Double Dip for Ultimate Crunch: For an extra thick and satisfyingly crunchy breading, dip the chicken in the buttermilk mixture, then the flour, and repeat the process. This creates a more substantial coating that holds up beautifully during frying and provides that desirable shatteringly crisp texture.
Resting Enhances Adhesion: After coating the chicken, let it sit for a few minutes before frying. This resting period allows the coating to adhere more firmly to the chicken, reducing the likelihood of it falling off during the frying process and ensuring a consistently crispy exterior.
Warm Tortillas are Key: Keep your tortillas warm in a low oven while you are frying the chicken and assembling the tacos. This ensures that when you serve your Fried Chicken Street Corn Tacos, every component is at the optimal temperature, making the entire dish more enjoyable and satisfying.
Serving Suggestions for Fried Chicken Street Corn Tacos
Decoration
Garnish these vibrant tacos with fresh, finely chopped cilantro for a burst of herbaceous freshness and color. A few thin slices of pickled red onion can add a delightful tang and visual appeal. You might also consider a sprinkle of smoked paprika or a few extra crumbles of crispy bacon for added visual and flavor dimensions.
Side Dishes
Complement the richness of the fried chicken with light and refreshing sides. A crisp, tangy coleslaw provides a wonderful textural contrast and balances the flavors beautifully. Grilled corn on the cob, echoing the street corn theme, offers a sweet and smoky addition that enhances the overall meal.
Creative Serving Ideas
For a fun, interactive meal, set up a “taco bar” with all the components laid out separately. This allows guests to customize their own tacos to their heart’s content. You could also serve these tacos alongside a pitcher of refreshing agua fresca or a light, citrusy salad for a complete and satisfying dining experience.
Preparation & Storage
Storing Leftovers
To store any leftover Fried Chicken Street Corn Tacos, it’s best to keep the components separate to maintain their optimal texture. Place the fried chicken, street corn salad, and any remaining jalapeno ranch in separate airtight containers and refrigerate them promptly. This method will help preserve the crispiness of the chicken and the freshness of the salad.
Freezing
Freezing these tacos requires a bit of foresight to ensure the best quality upon reheating. You can freeze the fried chicken pieces individually once they have cooled completely, wrapped tightly in plastic wrap and then placed in a freezer-safe bag. The tortillas and the street corn salad are best stored in the refrigerator and used within a few days rather than frozen.
Reheating
When you’re ready to reheat the fried chicken, the best method to restore its crispiness is in a preheated oven at around 375°F (190°C) for about 8-10 minutes, or until heated through and crispy. You can also briefly pan-fry them in a skillet with a little oil over medium heat. Warm the tortillas gently in the oven or on a dry skillet before assembling your tacos.
Frequently Asked Questions
-
How do I ensure my fried chicken coating is extra crispy and doesn’t get soggy?
Achieving maximum crispiness involves several key steps: first, ensure your chicken is thoroughly patted dry after marinating to remove excess moisture, which hinders crisping. Second, use a double-dip method: dredge the chicken in flour, then the wet mixture, and then back into the flour again, pressing gently to create a thick, craggy coating. Third, maintain the correct oil temperature of 350°F (175°C) consistently throughout frying; too low, and the chicken becomes greasy, too high, and it burns before cooking through. Finally, after frying, place the chicken on a wire rack instead of paper towels to allow air circulation, which helps prevent steam buildup and keeps the coating crisp.
-
Can I make the street corn salad and jalapeno ranch sauce ahead of time, and how long will they last?
Yes, absolutely! Both the street corn salad and the jalapeno ranch sauce can be prepared a day or two in advance, which significantly simplifies assembly. Store the street corn salad in an airtight container in the refrigerator, where it will typically stay fresh for up to 3 days. The jalapeno ranch sauce is also best stored in an airtight container in the fridge and can last for up to a week. Preparing these components ahead of time makes the final taco assembly quick and effortless, allowing you to enjoy a delicious meal with minimal last-minute effort.
-
What are the best alternatives if I don’t have peanut oil for frying, or if I want a healthier option for the chicken?
If peanut oil isn’t available, vegetable oil, canola oil, or any high smoke point neutral oil will work perfectly for frying. For a healthier alternative, consider baking the chicken tenders instead of frying. You can achieve a crispy texture by baking them on a wire rack set over a baking sheet at 400°F (200°C) for about 15-20 minutes, flipping halfway through. Alternatively, an air fryer is an excellent tool for achieving a crispy coating with much less oil, typically requiring about 10-12 minutes at 380°F (190°C), shaking the basket periodically.