Beer Can Chicken – Make Juicy Beer Can Chicken in the Oven!
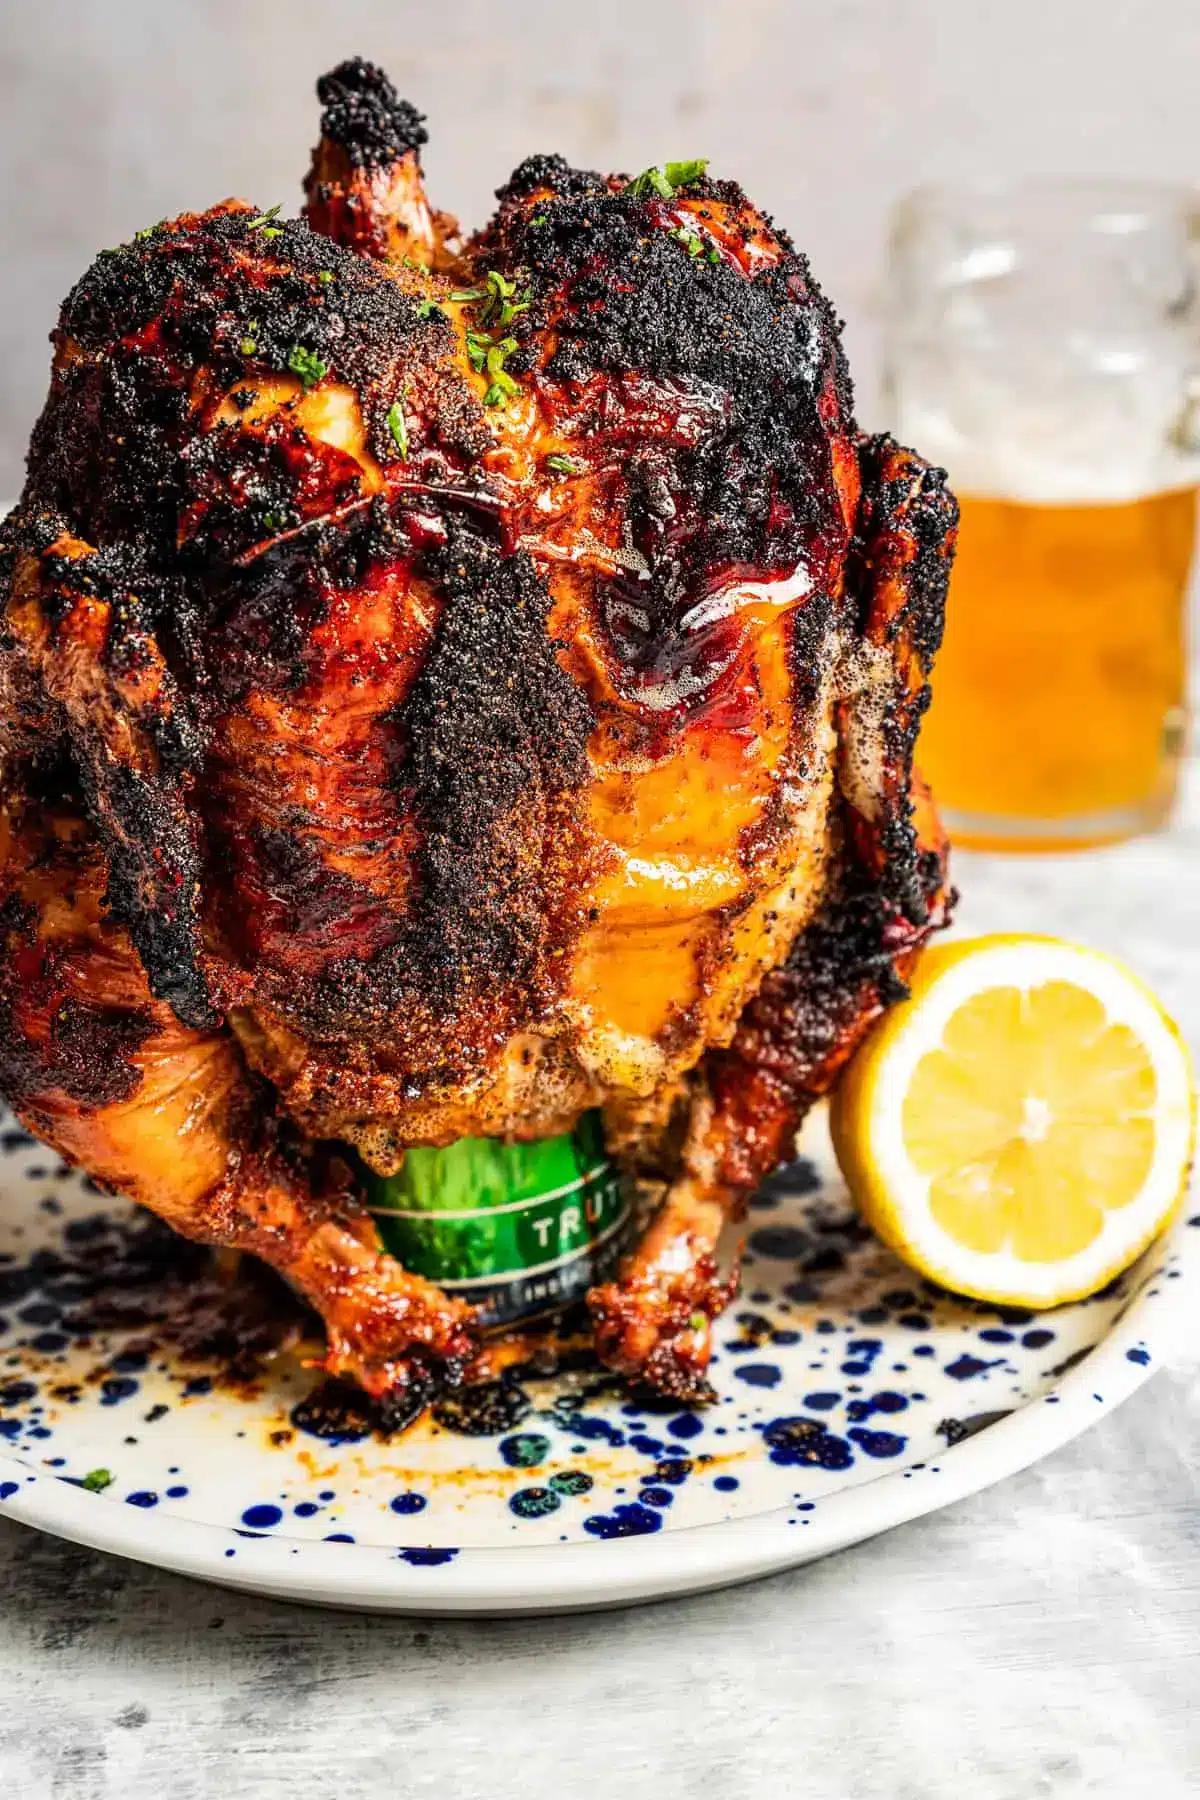
There’s something uniquely satisfying about roasting a whole chicken, and this beer can chicken recipe elevates that classic comfort food to an entirely new level of deliciousness. Imagine a perfectly cooked bird, boasting incredibly tender, fall-off-the-bone meat on the inside and a shatteringly crispy skin on the outside, all infused with subtle, delightful flavors. This method ensures every bite is a juicy revelation.
The magic lies in the simplicity of the technique: a whole chicken perched atop an open can of beer in the oven. As the beer heats and steams, it infuses the chicken from the inside out, creating unparalleled moisture and tenderness that’s hard to achieve with other roasting methods. It’s a culinary marvel that’s as fun to prepare as it is to devour.
Why You Will Love This Recipe
- Unbeatable Juiciness: The steaming beer creates an internal moisture barrier, ensuring the chicken remains incredibly moist and succulent throughout the roasting process.
- Crispy, Golden Skin: High oven temperatures combine with the beer’s infusion to render the fat perfectly, resulting in an exceptionally crispy and flavor-packed skin.
- Effortless Preparation: Beyond a simple spice rub and arranging the chicken, the oven does most of the work, making this an ideal dish for busy weeknights or relaxed entertaining.
- Flavor Infusion: The chosen beer subtly infuses the chicken with its characteristic notes, adding an extra layer of complexity to the savory spice rub.
- Year-Round Enjoyment: Unlike traditional grilled beer can chicken, this oven-baked version allows you to enjoy this delightful dish regardless of the weather or season.
Ingredients You Need
The beauty of this beer can chicken recipe lies in its accessible ingredients, allowing the star of the show—the chicken itself—to shine. We focus on a simple yet effective spice rub that complements the natural flavors of the poultry without overpowering them. Quality ingredients make a noticeable difference, so opt for a fresh, good-quality whole chicken. The beer choice is also key, not just for the infusion but for a pleasant aroma while cooking.
Beer Can Chicken
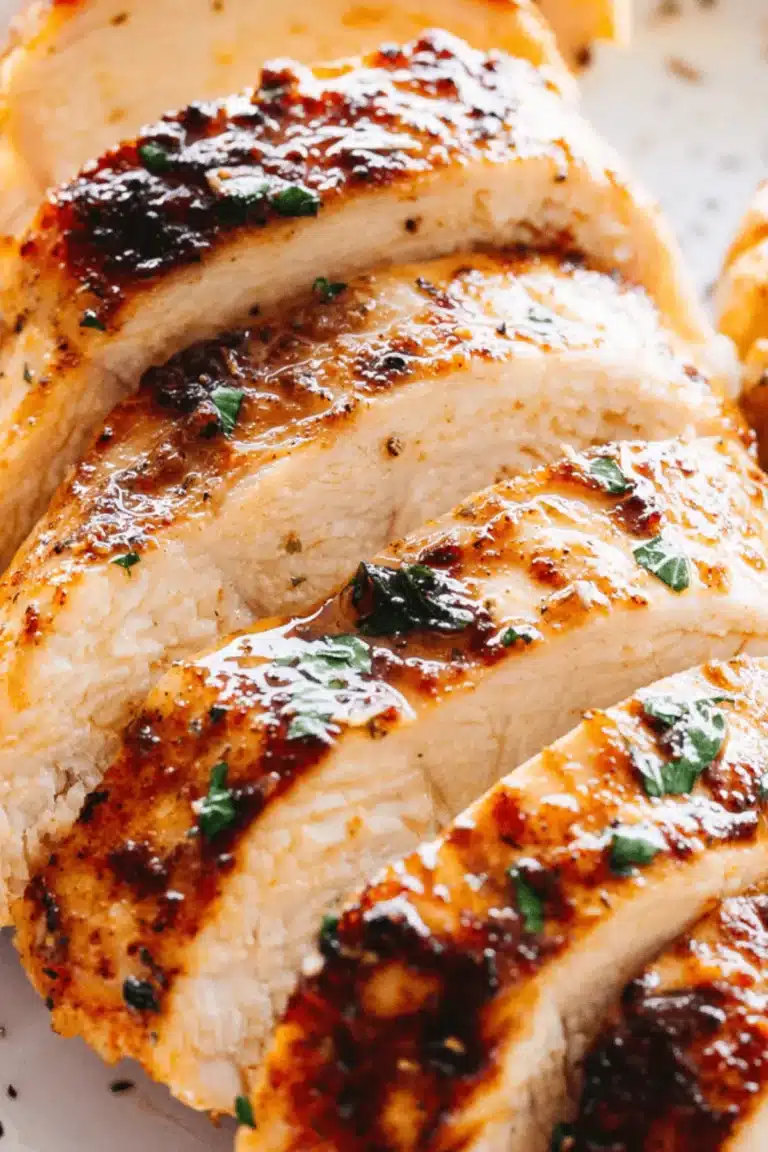
This beer can chicken recipe delivers a whole roasted chicken that's fall-apart tender, extra juicy on the inside, crispy on the outside, and packed with flavor!
- For the rub:
- 2 tablespoons brown sugar
- 2 tablespoons salt
- 1 tablespoon ground black pepper
- 1 tablespoon garlic powder
- 1 tablespoon onion powder
- 1 tablespoon smoked paprika
- For the chicken:
- 5 pound whole chicken, giblets removed
- 3 tablespoons olive oil
- 12 ounce can of beer (you can use whatever you’d like, but I went with an IPA)
- 1Prep: Preheat the oven to 425°F and line a roasting pan with aluminum foil for easier cleanup.
- 2Make the rub: Whisk together the brown sugar, salt, pepper, garlic powder, onion powder, and smoked paprika. Set aside.
- 3Season the chicken: Rub the chicken all over with olive oil and then rub it all over with the spice rub.
- 4Get ready to roast: Pour 1/3 of the beer into the bottom of the roasting pan and place the beer can (with the remaining beer still inside) upright on top. Slide the chicken onto the beer can (it should fit right through the bottom cavity of the bird) so it sits upright on the beer can in the roasting pan.
- 5Roast: Roast the chicken for 1 hour 25 minutes or until the skin is crispy and a meat thermometer inserted between the wing and the thigh reads 165°F.
- 6Rest: Remove the chicken from the oven and let it rest for 10 minutes before slicing and serving.
Keywords: beer can chicken, roasted chicken, whole chicken, oven roasted, juicy chicken, crispy skin, German chicken, dinner recipe, Sunday dinner
The precise quantities for each ingredient are detailed within the recipe card for your convenience.
Variations
While the classic beer can chicken is a triumph on its own, there’s always room to play with flavors and dietary preferences. Consider a zesty citrus twist by using a grapefruit-flavored beer or adding lemon slices inside the chicken cavity before roasting. This can brighten the overall flavor profile, making it particularly refreshing for summer meals.
For those looking for a spicier kick, incorporating chili flakes or cayenne pepper into the spice rub is a straightforward yet impactful modification. Alternatively, explore international flavors by using a teriyaki-glazed beer or adding a dash of soy sauce and ginger to your rub. This opens up a whole new world of taste possibilities.
Vegetarian and vegan friends need not be left out of the fun. While a direct substitute for chicken is challenging, the principles of indirect cooking and flavor infusion can be applied. Try roasting large portobello mushrooms or whole cauliflower heads using a similar technique with vegetable broth or a flavorful non-alcoholic beverage, though this deviates significantly from the core beer can chicken concept.
How to Prepare beer can chicken
Step 1: Oven and Pan Preparation
Begin by preheating your oven to a robust 425°F (220°C). This high initial temperature is crucial for achieving that coveted crispy skin. While the oven heats, prepare your roasting pan. Lining it with aluminum foil is a pro tip that will save you significant cleanup time later. Ensure the foil covers the bottom and extends slightly up the sides of the pan.
This step is fundamental to the overall success of the recipe. A clean pan not only makes post-meal cleanup a breeze but also ensures that any drippings that might otherwise bake onto the pan surface won’t burn and create smoke. The foil creates a non-stick barrier, allowing you to simply discard it once the cooking is done.
Make sure the roasting pan you select is large enough to comfortably accommodate the whole chicken standing upright on the beer can. If your oven has a very shallow top rack, you might need to adjust it to ensure there’s enough vertical clearance for the chicken to sit without touching the oven’s ceiling. This ensures even heat circulation around the entire bird.
Step 2: Crafting the Flavorful Rub
In a medium bowl, whisk together the dry ingredients for your spice rub. This typically includes brown sugar, salt, ground black pepper, garlic powder, onion powder, and smoked paprika. The brown sugar not only adds a hint of sweetness but also aids in caramelization and crisping the skin. Salt is essential for drawing out moisture and seasoning the meat from the outside in, while pepper provides a subtle bite.
The combination of garlic and onion powder offers a foundational savory flavor that is universally appealing and works beautifully with poultry. Smoked paprika is the secret weapon here, lending a beautiful reddish hue to the skin and a deep, smoky aroma that is reminiscent of barbecued chicken, even though it’s oven-baked. Feel free to adjust the proportions of these spices to your personal preference, creating your own signature blend.
Once all the dry ingredients are thoroughly combined, set the bowl aside. This spice blend will be generously applied to the chicken in the next step, forming the flavorful crust that makes this dish so irresistible. Ensure the ingredients are well-distributed for an even coating on the chicken.
Step 3: Seasoning the Chicken
Take your whole chicken, making sure any giblets have been removed from the cavity. Pat the chicken dry thoroughly with paper towels; this is a critical step for achieving crispy skin. Moisture is the enemy of crispiness, so don’t skip this pat-down. Then, generously rub the entire exterior of the chicken with olive oil. The oil acts as a binder for the spice rub and helps the skin to crisp and brown beautifully.
Now, apply the prepared spice rub liberally all over the chicken. Use your hands to ensure an even coating, getting into all the nooks and crannies, including under the wings and legs. Don’t forget to season the cavity as well, although it’s less critical for exterior texture. A thorough seasoning ensures that every piece of the chicken is packed with delicious flavor.
The combination of olive oil and the robust spice blend creates a flavorful coating that will transform into a magnificent crust as the chicken roasts. Ensure that no part of the chicken is left unseasoned. The aroma at this stage alone is a promising sign of the delicious meal to come.
Step 4: Getting Ready to Roast
Open your 12-ounce can of beer. Pour about one-third of the beer into the bottom of the prepared roasting pan. This initial beer addition will contribute to the steam that moistens the chicken. You can use any beer you prefer, but lighter lagers or IPAs are often recommended as their flavors are less likely to overpower the chicken.
Carefully place the open beer can, upright, in the center of the roasting pan. The liquid beer inside the can will heat up and release steam during the cooking process. This is the heart of the beer can chicken technique, creating an incredibly moist environment for the chicken from the inside.
Now comes the most distinctive part: carefully slide the prepared and seasoned chicken onto the beer can. The cavity of the chicken should fit snugly over the can, so the chicken is standing upright, supported by the can. Ensure the chicken is stable and centered in the pan. This setup allows hot air to circulate freely around the entire bird.
Step 5: The Roasting Process
Place the roasting pan with the chicken in the preheated 425°F (220°C) oven. Roast for approximately 1 hour and 25 minutes. The exact cooking time will depend on the size of your chicken, so it’s always best to use a meat thermometer for accuracy. You’re looking for an internal temperature of 165°F (74°C) in the thickest part of the thigh, without touching the bone.
During this time, the chicken will slowly transform. The spice rub will caramelize and become a beautiful, crispy crust. The beer inside the can will steam, infusing the meat with moisture and subtle flavor. The high heat ensures that the skin renders its fat and becomes wonderfully golden and crunchy.
Keep an eye on the chicken as it roasts. If the skin starts to brown too quickly before the chicken is cooked through, you can loosely tent the top with aluminum foil. However, this is usually not necessary at this temperature, as the goal is crispiness. The goal is a perfectly cooked, juicy chicken with an irresistible crispy exterior.
Step 6: Resting and Carving
Once the chicken reaches the correct internal temperature, carefully remove the roasting pan from the oven. Resist the urge to carve it immediately! Letting the chicken rest for at least 10-15 minutes is absolutely crucial. This resting period allows the juices, which have been driven to the center of the meat during cooking, to redistribute throughout the entire bird. Skipping this step will result in dry chicken as the juices will run out onto the cutting board.
While the chicken rests, you can prepare your serving platter or carve away from the bone. Carefully lift the chicken off the beer can. This can be done by gently sliding a spatula under the can and lifting, or by grasping the chicken with tongs while a spatula supports the can. Be mindful of the hot can and any residual steam.
After resting, the chicken is ready to be carved. Use a sharp knife to carve the breast meat, thighs, and drumsticks. The meat should be incredibly tender and moist. Serve immediately to enjoy the peak of its flavor and texture.
Pro Tips for beer can chicken
Don’t Overcomplicate the Beer Choice: While many beers work, sticking to lighter lagers, pilsners, or IPAs generally yields the best results. Avoid overly bitter stouts or porters, as their strong flavors can sometimes dominate the chicken.
Ensure Proper Ventilation: Make sure your oven has adequate ventilation, especially if you notice a lot of steam. Opening the oven door briefly to allow steam to escape can sometimes help with crisping the skin.
Meat Thermometer is Your Best Friend: Invest in a good meat thermometer. It’s the most reliable way to ensure your chicken is cooked to a safe and perfect internal temperature of 165°F (74°C), avoiding both undercooked and overcooked results.
Crispy Skin Secret: Patting the chicken extremely dry before applying the oil and rub is paramount for achieving that shatteringly crispy skin. Do not skip this step!
Safety First with the Can: When removing the hot beer can from the cooked chicken, exercise extreme caution. Use sturdy tongs and consider wearing oven mitts to protect your hands from any sudden bursts of steam or accidental contact with the hot metal.
Serving Suggestions for beer can chicken
Decoration
A beautifully roasted beer can chicken is a centerpiece in itself. You can elevate its presentation by garnishing the platter with fresh herbs like rosemary sprigs or parsley. Lemon wedges are also a classic and visually appealing addition, offering a bright, citrusy aroma that complements the roasted poultry. A sprinkle of flaky sea salt just before serving can add a touch of elegance and a delightful textural contrast.
Side Dishes
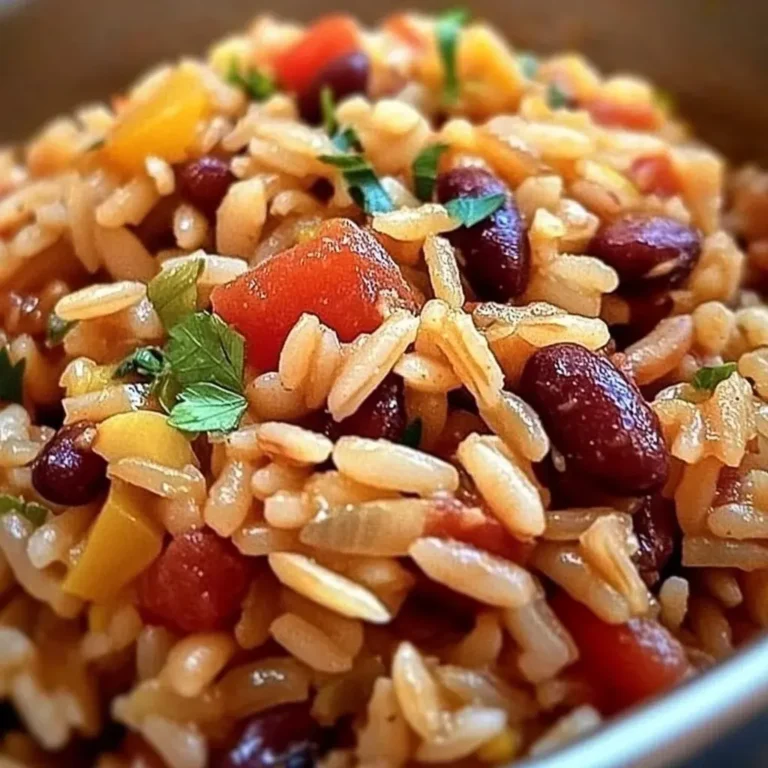
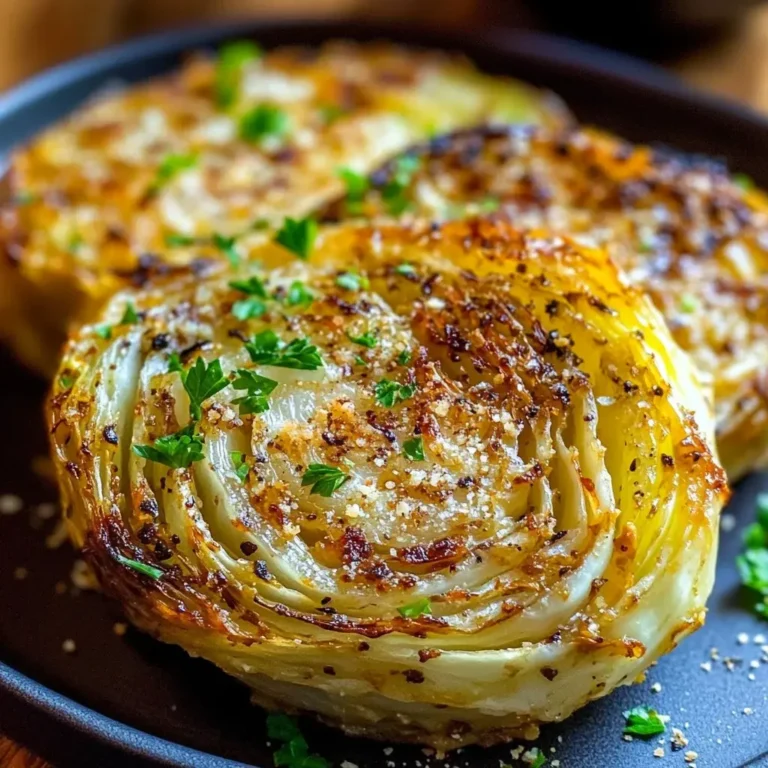
This incredibly juicy chicken pairs wonderfully with a variety of classic comfort food sides. Consider creamy mashed potatoes, a fluffy rice pilaf, or roasted root vegetables like carrots and parsnips for a hearty meal. For lighter options, a fresh green salad with a zesty vinaigrette or a refreshing coleslaw provides a nice balance. Pasta salad or potato salad are also excellent choices, especially for outdoor gatherings or picnics, echoing the casual yet delicious nature of the main dish.
Creative Serving Ideas
Beyond simply carving and serving, think about transforming leftovers into exciting new dishes. Shredded beer can chicken is fantastic in tacos, quesadillas, or as a filling for savory crepes. It can also be diced and added to hearty stews or chilis for an extra protein boost. For a quicker meal, dice it and toss with barbecue sauce for delicious pulled chicken sandwiches. The possibilities are as endless as your culinary imagination.
Preparation & Storage
Storing Leftovers
Once the beer can chicken has been carved and cooled to room temperature, store any remaining portions in an airtight container in the refrigerator. Properly stored, leftover chicken can last for up to 3 to 4 days. Ensure the container is sealed tightly to prevent the chicken from drying out and to maintain its freshness and flavor for subsequent meals.
It’s always a good idea to remove the chicken from the bone before storing, as this generally makes it easier to portion and reheat later. This also helps to keep the meat from drying out too much if it’s submerged in any residual juices within the container. For optimal flavor and safety, consume leftovers within the recommended timeframe.
Leftover chicken is incredibly versatile and can be repurposed into various dishes. From chicken salads and wraps to adding it to pasta dishes or casseroles, its delicious flavor can be enjoyed in multiple ways. This reduces food waste and provides convenient meal options for the days following the initial preparation.
Freezing
If you find yourself with more chicken than you can consume within a few days, freezing is an excellent option. Allow the carved chicken to cool completely before carefully packaging it. For best results, wrap individual portions tightly in plastic wrap, then place them inside a freezer-safe bag or container. This double-layer protection helps to prevent freezer burn.
Label the package with the date to keep track of how long it has been in the freezer. Properly frozen beer can chicken can maintain good quality for up to 3 months. Beyond this period, while it may still be safe to eat, the texture and flavor might begin to degrade.
When you’re ready to use the frozen chicken, the best method for thawing is to transfer it from the freezer to the refrigerator. Allow it to thaw overnight or for at least 24 hours. This slow thawing process helps to preserve the texture of the meat better than quicker methods like thawing at room temperature, which can promote bacterial growth.
Reheating
Reheating leftover beer can chicken is straightforward and can be done using several methods, depending on your preference and the amount of chicken you have. The oven is an excellent choice for reheating larger portions, as it helps to maintain the chicken’s moisture and can even re-crisp the skin slightly. Place the chicken in a baking dish, perhaps with a tablespoon or two of chicken broth or water to add moisture, and heat in a moderate oven (around 325°F or 160°C) until warmed through.
Microwaving is the quickest method for reheating smaller portions. Place the chicken on a microwave-safe plate and cover it loosely with a damp paper towel to help trap steam and prevent drying. Heat in short intervals, checking for doneness to avoid overcooking, which can make the chicken tough. Stirring or turning the pieces halfway through can ensure more even heating.
For a truly exceptional result, especially if you want to revive the crispy skin, you can use an air fryer. Place the reheated chicken pieces in the air fryer basket and cook at a moderate temperature (around 350°F or 175°C) for a few minutes until heated through and the skin is re-crisped. Regardless of the method, ensure the chicken is heated thoroughly to an internal temperature of 165°F (74°C) before serving.
Frequently Asked Questions
-
Is it safe to cook chicken using a beer can, and are there any health concerns regarding the metal?
Yes, it is generally considered safe to cook chicken using a beer can. The aluminum used in most beer cans is food-grade and designed to withstand high temperatures without leaching harmful substances into the food. The heat from the oven will not cause the can to release dangerous chemicals into the chicken. If you are still concerned about direct contact between the chicken and the metal, you can pour the beer into a specialized beer can chicken roaster or a small oven-safe dish placed within the larger roasting pan, and then position the chicken over the steam source. This alternative method still allows the chicken to benefit from the steaming effect without direct contact with the can itself.
-
What types of beer are best for beer can chicken, and how much does the beer flavor influence the final dish?
The type of beer you use can subtly influence the final flavor of the chicken, but it’s not usually an overwhelming flavor profile. Lighter beers like lagers, pilsners, or pale ales are generally recommended because they offer a pleasant, mild aroma and flavor that complements the poultry without overpowering it. IPAs can also be a great choice, adding a bit more complexity. While you can use darker beers like stouts or porters, be aware that their strong, often bitter, flavors might impart a more dominant taste to the chicken, which might not be to everyone’s liking. Ultimately, choose a beer that you enjoy drinking, as its essence will be subtly infused into the chicken through steam.
-
Can I prepare beer can chicken in advance, or does it need to be cooked immediately after seasoning?
While beer can chicken is best cooked relatively soon after seasoning for optimal crispiness and flavor, you can perform some prep work in advance. You can prepare the spice rub mixture several days ahead and store it in an airtight container. You can also wash and pat the chicken dry and even apply the olive oil. However, it’s generally recommended to apply the spice rub just before cooking. If you need to season the chicken further in advance, you can refrigerate the seasoned chicken for up to 24 hours, but be aware that the salt in the rub might start to cure the meat, potentially affecting the final texture. For the best results, apply the rub and cook within a few hours of seasoning.