Irresistible Sweet and Sour Shrimp for Easy Weeknight Dinners

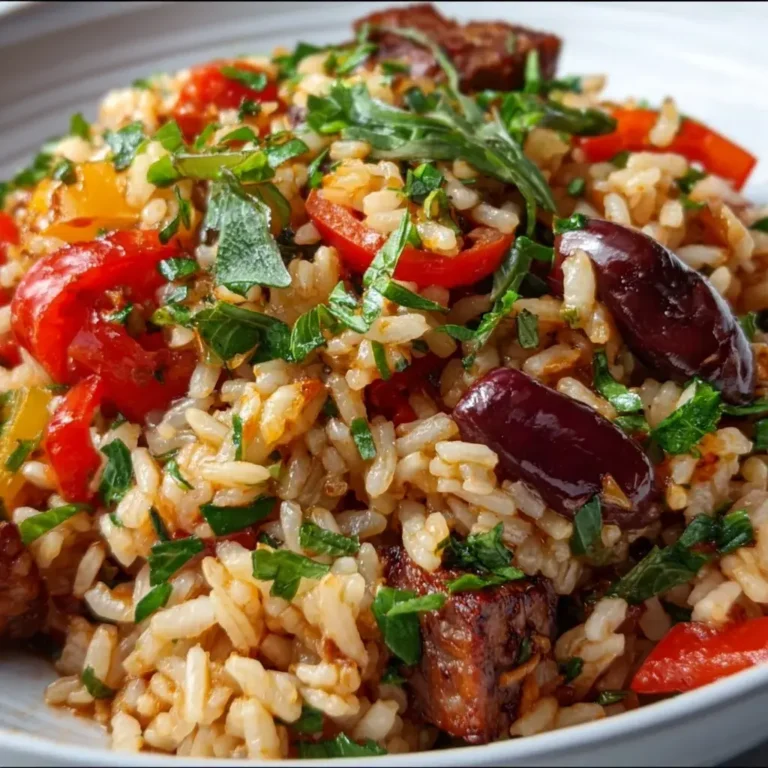
The vibrant colors of a beautifully plated dish can instantly elevate a meal from ordinary to extraordinary. Sweet and sour shrimp offers exactly that kind of visual and gustatory delight, promising a culinary journey that is both exciting and comforting.
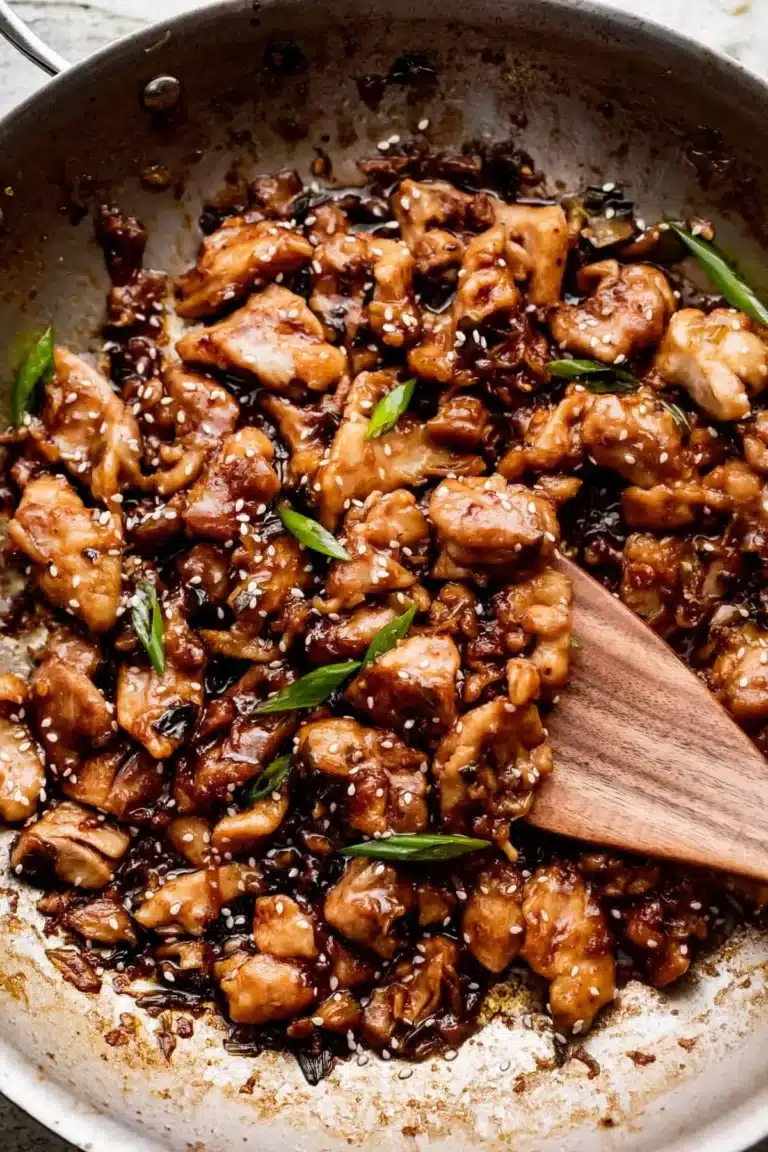
This recipe is a testament to how quickly a delicious, restaurant-quality meal can grace your weeknight table. It masterfully blends succulent, tender shrimp with a medley of crisp vegetables, all enveloped in a glossy, perfectly balanced sweet and sour sauce. It’s an invitation to explore exciting flavors without spending hours in the kitchen, ensuring that deliciousness is always within reach.
Why You Will Love This Recipe
- Flavor Sensation: The harmonious fusion of sweet, tangy, and savory notes creates an explosion of taste that is utterly irresistible.
- Speedy Preparation: Ready from start to finish in approximately 30 minutes, making it an ideal choice for even the busiest evenings.
- Visually Stunning: The bright, cheerful hues of the bell peppers and the glistening sauce make this dish a feast for the eyes.
- Adaptable to Your Taste: Easily customize ingredients by swapping proteins, adding fruits, or adjusting spice levels to suit any preference.
- Nutrient-Rich: A fantastic source of lean protein from the shrimp, complemented by essential vitamins and fiber from fresh vegetables.
Ingredients You Need
The secret to an exceptional sweet and sour shrimp dish lies in the quality and freshness of its components. Selecting vibrant bell peppers, a sweet onion, and plump, succulent shrimp will lay the foundation for a truly memorable meal. The sauce, a symphony of classic pantry staples, comes together effortlessly to coat every ingredient in its delightful glaze.
Delicious Sweet and Sour Shrimp
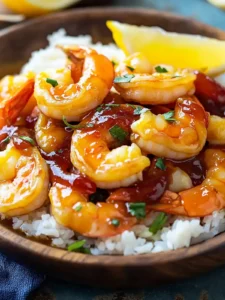
This sweet and sour shrimp recipe is a vibrant dish that combines succulent shrimp with colorful bell peppers and onions in a tangy and sweet sauce. It's perfect for easy weeknight dinners, offering a burst of flavor and a beautiful presentation.
- 1 pound Large Shrimp (cleaned, shelled, and deveined)
- 1 cup Bell Peppers (mixed red, yellow, and green varieties)
- 1 medium Onion (white or yellow)
- 1/2 cup Ketchup
- 1/4 cup Soy Sauce (or tamari for gluten-free)
- 1/4 cup Rice Vinegar (or apple cider vinegar)
- 1/4 cup Brown Sugar (adjust to taste)
- 2 cloves Garlic (minced)
- 1 tablespoon Ginger (fresh, minced)
- 2 tablespoons Vegetable Oil
- 1Wash your vegetables thoroughly. Chop the bell peppers and onions into bite-sized pieces, then rinse and dry the shrimp.
- 2In a bowl, whisk together the ketchup, soy sauce, rice vinegar, and brown sugar until smooth.
- 3Heat oil in a skillet over medium-high heat. Cook the shrimp in batches for about 2-3 minutes per side, or until they turn pink and opaque. Remove shrimp and set aside.
- 4In the same skillet, stir-fry minced garlic and ginger for about one minute until fragrant. Add the onions and bell peppers, cooking until just tender, about 4-5 minutes.
- 5Return the cooked shrimp to the skillet, pour in the sweet and sour sauce, and stir gently. Let it simmer for one minute to meld the flavors.
- 6Serve over steaming rice or noodles, garnished with sesame seeds or chopped green onions.
Keywords: sweet and sour shrimp, shrimp recipe, weeknight dinner, asian recipe, quick dinner, easy recipe
The full list of ingredients and their precise quantities can be found within the accompanying recipe card.
Variations
To truly make this dish your own, consider exploring a few delightful variations that cater to different dietary needs and flavor preferences. These simple tweaks can transform your sweet and sour shrimp into an entirely new experience, proving its incredible versatility.
For those seeking a plant-based option, substituting the shrimp with firm tofu is an excellent choice. Press the tofu to remove excess water, then cube and pan-fry it until golden brown and crispy. The tofu will beautifully absorb the sweet and sour sauce, offering a satisfying texture and protein boost. This dinner becomes wonderfully vegan-friendly with this simple swap.
If you are mindful of carbohydrate intake, this dish can be easily adapted for a low-carb lifestyle. Skip the traditional rice or noodles and serve the sweet and sour shrimp over a bed of cauliflower rice or a mix of steamed broccoli and snap peas. You can also reduce the amount of sugar in the sauce or opt for a sugar substitute to further control carbohydrate content. This ensures you can enjoy the delicious flavors without compromising your dietary goals.
A touch of tropical sweetness can be introduced by adding chunks of fresh or canned pineapple to the stir-fry during the last minute of cooking. The pineapple’s natural sugars caramelize slightly, adding a delightful fruity counterpoint to the savory sauce. This variation is particularly popular with families and adds an extra layer of complexity to the flavor profile.
How to Prepare sweet and sour shrimp
Step 1: Prepare the Foundation
Begin by meticulously preparing all your ingredients, a crucial step for a smooth cooking process. Wash your bell peppers and onion under cool running water, then pat them dry. Carefully chop the bell peppers and onion into uniform, bite-sized pieces; consistency in size ensures even cooking. Simultaneously, ensure your shrimp are properly cleaned, shelled, and deveined; rinsing them under cold water and patting them thoroughly dry will remove any excess moisture.
Having all your components prepped and within easy reach is known as “mise en place,” a fundamental technique in professional kitchens that significantly streamlines home cooking. This organized approach prevents last-minute scrambling and allows you to focus entirely on the cooking process itself, leading to a more enjoyable and successful outcome. Take a moment to arrange your chopped vegetables, prepared shrimp, and pre-measured sauce ingredients near your stovetop.
This initial preparation phase sets the stage for the entire dish. By dedicating a few extra minutes to this step, you not only enhance your efficiency but also ensure that each ingredient is at its peak readiness to contribute its best flavor and texture. The vibrant colors of the bell peppers and onions, alongside the plumpness of the shrimp, are visual indicators of the deliciousness that is about to unfold.
Step 2: Craft the Luscious Sauce
In a medium-sized bowl, combine the ketchup, soy sauce, rice vinegar, and brown sugar. Whisk these ingredients together vigorously until they are thoroughly blended into a smooth, homogenous sauce. The ketchup forms the rich, tomato-based backbone, providing both color and a hint of sweetness. Soy sauce introduces the essential savory depth and umami, while rice vinegar lends that characteristic tangy brightness that defines the “sour” element of the dish.
The brown sugar plays a vital role in balancing the acidity of the vinegar and the saltiness of the soy sauce, creating a harmonious sweet and sour profile. It also contributes to the glossy finish of the final sauce. You can adjust the amount of brown sugar slightly to suit your personal preference for sweetness, starting with the recommended amount and tasting before the final simmer if you are unsure.
This sauce is the heart and soul of the dish, and its simplicity belies its profound impact on the overall flavor. Once mixed, set it aside; it will be added later to coat the shrimp and vegetables, infusing them with its delightful essence. This pre-mixing ensures that when it’s time to combine everything, the sauce is ready to pour and integrate seamlessly, preventing any cooking interruptions.
Step 3: Sear the Shrimp to Perfection
Heat approximately two tablespoons of vegetable oil in a large skillet or wok over medium-high heat until it shimmers. It is crucial that the oil is sufficiently hot to achieve a good sear on the shrimp. Working in batches is highly recommended, especially if you are cooking a larger quantity, to avoid overcrowding the pan. Overcrowding can steam the shrimp rather than sear them, resulting in a less desirable texture.
Carefully add the prepared shrimp to the hot skillet in a single layer. Cook them for about two to three minutes per side, or until they turn a beautiful opaque pink color and curl slightly. The exact cooking time will depend on the size of your shrimp, so keep a close eye on them to prevent overcooking, which can lead to toughness.
Once the shrimp are perfectly cooked, immediately remove them from the skillet and set them aside on a clean plate. This crucial step ensures that the shrimp retain their tender, succulent texture. They will finish cooking gently in the sauce later, but removing them now prevents them from becoming rubbery. The residual heat in the skillet is perfect for continuing with the next stage of cooking.
Step 4: Stir-Fry the Aromatics and Vegetables
Using the same skillet where you cooked the shrimp, add a little more oil if needed, and then add the minced garlic and ginger. Stir-fry these aromatics for about one minute until they become wonderfully fragrant. Be careful not to burn the garlic, as this can impart a bitter flavor to the dish. The intoxicating aroma is a sign that their flavor is being released into the oil.
Next, add the chopped bell peppers and onions to the skillet. Continue to stir-fry them for approximately four to five minutes, or until they are just tender-crisp. You want them to retain a slight bite and vibrant color, rather than becoming mushy. The goal is to achieve a delightful texture that complements the soft shrimp.
This stir-frying process not only cooks the vegetables but also enhances their natural sweetness and develops a slightly charred flavor profile. The vegetables should be vibrant and appealing, adding both visual interest and nutritional value to the dish. The mixture of colors from the peppers creates a beautiful presentation even at this stage.
Step 5: Bring It All Together
Return the perfectly seared shrimp back into the skillet with the stir-fried vegetables. Pour the pre-made sweet and sour sauce evenly over the shrimp and vegetables. Gently stir everything together, ensuring that each piece is beautifully coated in the glossy sauce. The sauce will begin to thicken slightly as it heats up, creating that signature luscious glaze.
Allow the mixture to simmer for approximately one minute. This brief simmering period is essential for all the flavors to meld together harmoniously. The shrimp will finish cooking gently in the sauce, and the vegetables will absorb some of its delicious tanginess. Stirring occasionally will prevent anything from sticking to the bottom of the pan and ensure an even coating.
The transformation is now complete; the vibrant colors, the intoxicating aroma, and the glistening sauce all signify a dish ready to be savored. This is the moment where all your efforts culminate in a truly spectacular plate of sweet and sour shrimp, promising a delightful balance of textures and tastes.
Step 6: Serve and Enjoy
Transfer your beautifully prepared sweet and sour shrimp immediately to serving plates or bowls. For a complete and satisfying meal, serve it piping hot over a bed of steaming white rice, such as Jasmine rice, or alongside a generous portion of your favorite noodles. The rice or noodles act as a perfect canvas, soaking up the delicious sauce and complementing the flavors of the shrimp and vegetables.
To enhance the visual appeal and add a final touch of freshness, garnish the dish with a sprinkle of toasted sesame seeds and some finely chopped fresh green onions. These garnishes not only add a pop of color but also provide a subtle textural contrast and a burst of fresh flavor. The sesame seeds offer a nutty crunch, while the green onions bring a mild, refreshing bite.
This final presentation elevates the dish from a simple home-cooked meal to something truly special, ready to impress. The vibrant colors, the enticing aroma, and the promise of that classic sweet and sour flavor make every bite a delight. It’s the perfect conclusion to an efficient yet incredibly rewarding cooking experience.
Pro Tips for sweet and sour shrimp
Marinate for Depth: For an even more intense flavor, consider marinating the shrimp for about 15-20 minutes in a tablespoon of soy sauce (or tamari for gluten-free) before cooking. This simple step infuses the shrimp with an extra layer of savory goodness that complements the sauce beautifully.
Avoid the Overcook Trap: Shrimp cook incredibly fast. Watch them closely; they should turn pink and opaque, then be removed from the heat. Overcooking is the primary culprit behind rubbery shrimp, so err on the side of caution by removing them slightly before they appear fully done, as they will continue to cook from residual heat.
Embrace Gluten-Free: Making this dish gluten-free is as simple as substituting regular soy sauce with tamari or a certified gluten-free soy sauce. Always check the labels of other ingredients like ketchup if you have strict dietary needs, though most standard versions are naturally gluten-free.
Sweetness is Subjective: The amount of brown sugar can be adjusted to your liking. If you prefer a less sweet sauce, start with a smaller amount and taste as you go. Conversely, if you love a sweeter profile, feel free to add a touch more brown sugar until it hits your perfect balance.
Texture Play: For an added delightful crunch, consider tossing in some sugar snap peas, water chestnuts, or even baby corn along with the bell peppers and onions. These vegetables maintain a satisfying crispness even after stir-frying, providing a wonderful textural contrast to the tender shrimp and sauce.
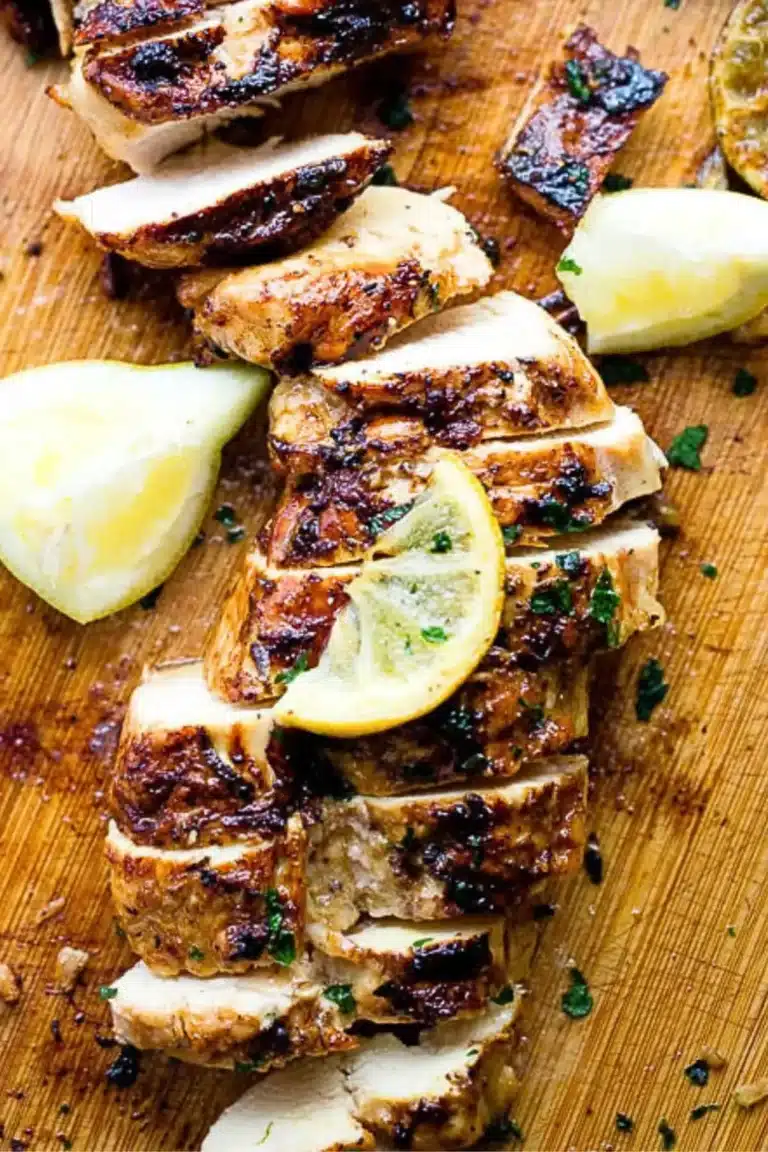
A Splash of Citrus: A small squeeze of fresh lime or lemon juice just before serving can add a bright, zesty finish that cuts through the richness of the sauce and enhances the overall flavor profile. It’s a small addition that makes a significant difference.
Serving Suggestions for sweet and sour shrimp
Decoration
Elevate your sweet and sour shrimp by adorning it with a vibrant garnish. Toasted sesame seeds offer a nutty crunch and visual appeal, while thinly sliced green onions provide a fresh, sharp contrast. For a more exotic touch, consider adding a few sprigs of fresh cilantro, which imparts a bright, citrusy aroma and flavor that pairs wonderfully with the dish.
Side Dishes
The classic accompaniment for sweet and sour shrimp is, of course, steamed rice. Fluffy jasmine rice is ideal as it absorbs the delicious sauce beautifully, creating a harmonious flavor profile. Alternatively, consider serving it with soft, chewy egg noodles, which offer a comforting texture and soak up the sauce just as effectively. For a lighter option, stir-fried bok choy or a fresh, crisp salad can provide a refreshing counterpoint.
Creative Serving Ideas
Transform your sweet and sour shrimp into an appetizer by serving it in small bowls or on individual skewers. You could also incorporate it into lettuce wraps for a lighter, more interactive meal experience. For a fun, family-style presentation, serve the shrimp in a large platter and allow everyone to scoop it over their chosen base, encouraging a communal dining atmosphere. A side of crispy spring rolls or mini dumplings would also make for a delightful addition to a full Asian-inspired spread.
Preparation & Storage
Storing Leftovers
To keep your delicious sweet and sour shrimp fresh, allow it to cool completely before transferring it into an airtight container. Store the container in the refrigerator, where the leftovers will remain at their best for up to three days. Proper cooling before sealing prevents condensation, which can lead to a less desirable texture in the shrimp and vegetables.
Freezing
Sweet and sour shrimp can indeed be frozen for longer storage, extending its enjoyment for up to two months. For optimal results, place the cooled dish into a freezer-safe container or a heavy-duty freezer bag. Ensure you remove as much air as possible before sealing to prevent freezer burn, which can affect the quality and taste of the food over time.
Reheating
When you are ready to enjoy your frozen sweet and sour shrimp, the best method is to thaw it overnight in the refrigerator. Then, gently reheat it in a skillet over medium heat for about five to seven minutes, stirring occasionally. This method helps to preserve the texture of the shrimp and vegetables, ensuring they are not overcooked.
Avoid reheating sweet and sour shrimp in the microwave, as the high heat can cause the shrimp to become tough and rubbery. A gentle, even heat from a skillet is far more effective at bringing the dish back to its delicious, original consistency, maintaining the integrity of the ingredients.
Frequently Asked Questions
-
How do I choose the best shrimp for this recipe?
For optimal taste and texture, select large, succulent shrimp that have been cleaned, shelled, and deveined. Look for shrimp with a firm feel and a mild, fresh sea aroma. Wild-caught shrimp are often preferred for their superior flavor, offering a delightful ocean essence that enhances the overall dish. -
What is the most effective way to store sweet and sour shrimp leftovers?
Store any leftover sweet and sour shrimp in an airtight container in the refrigerator, where it can be kept safely for up to three days. It is crucial to let the dish cool down completely before sealing the container; this prevents excess moisture from building up, which could make the shrimp and vegetables soggy. -
Can I freeze sweet and sour shrimp, and if so, how?
Yes, sweet and sour shrimp freezes remarkably well and can be stored for up to two months. Transfer the cooled dish into a freezer-safe container or a robust freezer bag, ensuring you remove as much air as possible before sealing to guard against freezer burn. When you’re ready to eat it, simply thaw it in the refrigerator overnight and then reheat it gently in a skillet.