Ultimate Toffee Butter Icebox Cookies
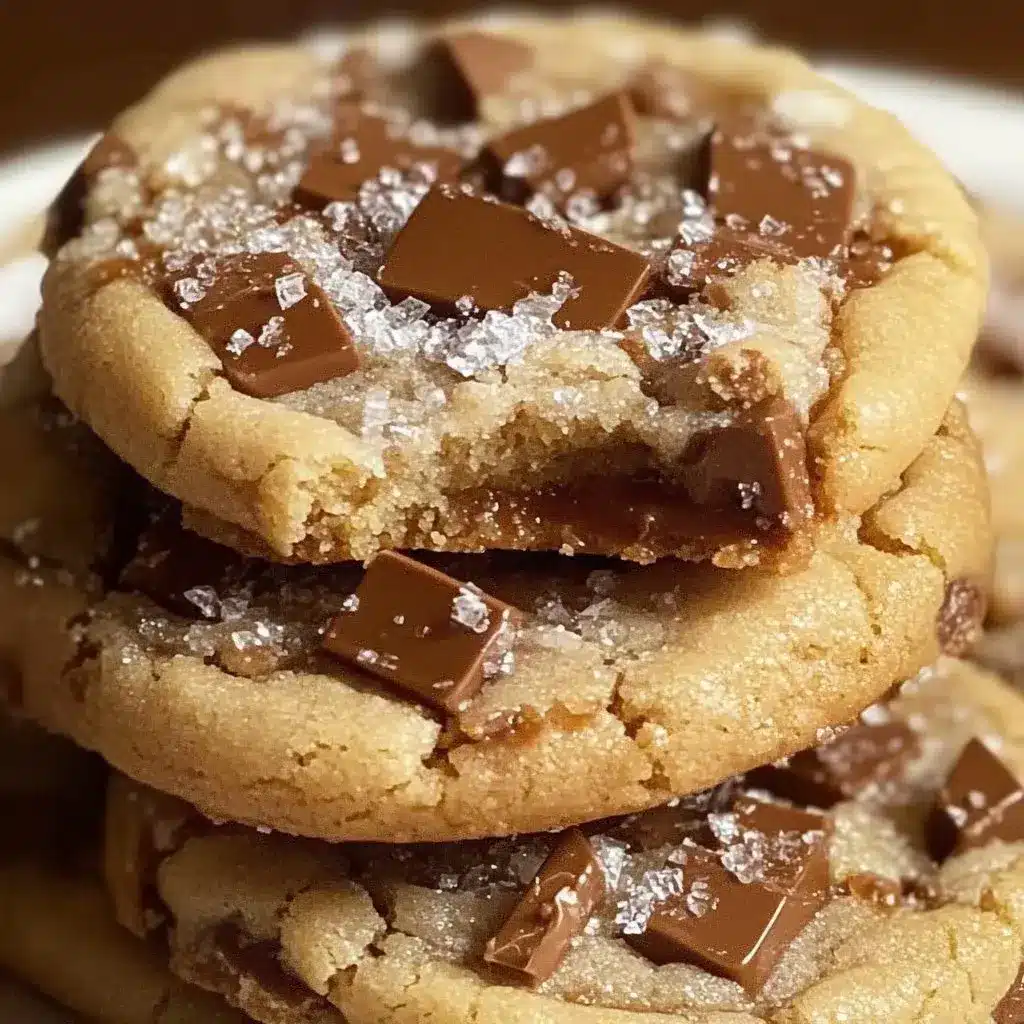
Who doesn’t love the enticing combination of rich toffee and creamy butter? If you’re on the lookout for a cookie recipe that’s not only easy but will also make your kitchen smell heavenly, you’ve come to the right place! Toffee Butter Icebox Cookies are the kind of treat that finds a place in everyone’s heart and tummy. Imagine biting into a soft, melt-in-your-mouth cookie with delightful bursts of toffee bits.
These cookies are perfect for any occasion, be it a cozy family gathering, a festive party, or just a casual day at home. Why do these cookies stand out? Well, they are made from simple ingredients that transform into something wonderfully delicious. Plus, the “icebox” technique allows for flexibility, letting you prepare them ahead of time and bake them when the mood strikes. The joy of sharing freshly baked cookies with friends and family is truly special. Toffee Butter Icebox Cookies offer a delightful balance of flavor and texture that’s sure to impress, making them a cherished addition to your baking repertoire. Easy to make and even easier to enjoy, these cookies are bound to become a staple in your home.
Why You Will Love This Recipe
- Irresistible Flavor: The exquisite marriage of sweet toffee and rich butter creates a flavor profile that is simply divine and universally loved.
- Effortless Preparation: Designed for ease, the steps are straightforward, making this recipe accessible even for novice bakers.
- Make-Ahead Convenience: The signature icebox method allows for the dough to be prepared in advance, offering great flexibility for busy schedules.
- Customizable Delight: This base recipe is a perfect canvas for creativity; easily incorporate nuts, chocolate chips, or a sprinkle of sea salt.
- Perfect Texture: Expect cookies that are wonderfully soft in the center with pleasingly crisp edges, a texture that defines cookie perfection.
- Family Bonding: The simplicity of the steps makes it an ideal activity for involving children, turning baking into a cherished family experience.
Ingredients You Need
Crafting these delightful Toffee Butter Icebox Cookies begins with selecting high-quality ingredients. Using good unsalted butter, for example, is paramount for achieving that rich, creamy foundation and allowing you to control the saltiness precisely. The toffee bits are the stars of the show, providing bursts of caramel-like sweetness and a satisfying crunch, so choose a brand you trust or even consider making your own toffee for an extra special touch. Ensure your baking soda is fresh, as it’s the key leavening agent that gives these cookies their perfect texture.
Toffee Butter Icebox Cookies

Delightful and soft cookies featuring a rich combination of toffee and creamy butter, perfect for any occasion. The "icebox" technique allows for flexibility, letting you prepare them ahead of time and bake them when the mood strikes. These cookies offer a delightful balance of flavor and texture that’s sure to impress.
- 1 cup unsalted butter, softened
- 1/2 cup granulated sugar
- 1/2 cup light brown sugar
- 1 teaspoon vanilla extract
- 2 cups all-purpose flour
- 1 teaspoon baking soda
- 1 cup toffee bits
- 1 cup chopped pecans or walnuts (Optional, for added texture and flavor.)
- 1Gather all your ingredients to ensure a smooth baking process.
- 2In a large bowl, cream together the softened butter, granulated sugar, and light brown sugar until light and fluffy.
- 3Add in the vanilla extract and mix until evenly incorporated.
- 4In a separate bowl, whisk together the flour and baking soda, then gradually add this dry mixture to the butter mixture while mixing on low speed.
- 5Fold in the toffee bits and nuts if using.
- 6Divide the dough into two portions and roll each into logs, approximately 2 inches in diameter.
- 7Wrap the logs in plastic wrap and refrigerate for at least 4 hours or overnight.
- 8Preheat your oven to 350°F (175°C).
- 9Once chilled, unwrap a log and slice it into 1/4 inch thick cookies.
- 10Place the cookies on parchment-lined baking sheets, spacing them about 1 inch apart.
- 11Bake for 10-12 minutes or until the edges are lightly golden and the centers are soft.
- 12Allow the cookies to cool on the baking sheets before transferring them to wire racks.
Keywords: Baking, butter cookies, cookie recipe, Icebox Cookies, Toffee Cookies
- unsalted butter, softened: This forms the creamy base of your cookie dough, providing richness and a tender crumb.
- granulated sugar: Contributes to sweetness and aids in the spread and crispness of the cookies.
- light brown sugar: Adds moisture and a subtle caramel note, enhancing the overall depth of flavor.
- vanilla extract: A classic flavor enhancer that rounds out the sweetness and adds aromatic complexity.
- all-purpose flour: The structural backbone of the cookie, providing the necessary gluten for texture.
- baking soda: The leavening agent that helps the cookies rise and spread, creating their characteristic texture.
- toffee bits: These small pieces of hard toffee are the signature ingredient, delivering delightful bursts of sweet, crunchy caramel flavor.
- chopped pecans or walnuts (optional): For an added layer of texture and a complementary nutty flavor that pairs beautifully with toffee.
The precise measurements for these ingredients are conveniently detailed within the recipe card, ensuring accuracy for the best possible outcome.
Variations
Looking to put a unique spin on your Toffee Butter Icebox Cookies? Consider the “Chocolate Lover’s Dream” variation by adding a generous cup of mini semi-sweet or dark chocolate chips to the dough along with the toffee bits. The rich chocolate will melt slightly during baking, creating decadent pockets of gooiness that perfectly complement the crunchy toffee. This elevates the cookie from a simple treat to a truly indulgent dessert experience that will satisfy even the most discerning chocolate aficionados.
For those seeking a lower-carbohydrate option without sacrificing flavor, a “Keto-Friendly Toffee Twist” is a fantastic choice. Utilize a good quality keto-friendly granulated sweetener blend instead of regular sugar, and opt for sugar-free toffee bits or chopped pecans and macadamia nuts for texture. You might also consider adding a touch of almond extract alongside the vanilla for a more complex flavor profile. This adaptation ensures you can enjoy the delightful taste and texture of toffee butter cookies while adhering to a low-carb lifestyle.
Another exciting avenue is the “Spiced Autumn Delight” variation, perfect for the cooler months. Introduce warm spices like cinnamon, nutmeg, and a hint of ground cloves to the dry ingredients. This fragrant addition, combined with the toffee and butter, creates a comforting and nostalgic flavor reminiscent of freshly baked apple pies or pumpkin bread. These spiced cookies are especially wonderful when served alongside a warm cup of spiced cider or a creamy latte, making them a perfect seasonal treat.
You can also explore a “Nutty Toffee Crunch” variation by significantly increasing the amount of chopped nuts, perhaps using a combination of pecans, walnuts, and even slivered almonds. Ensure the nuts are toasted lightly before adding them to the dough to amplify their flavor and add an extra layer of delightful crunch. This enhances the cookie’s texture and introduces a more robust, earthy flavor that beautifully contrasts with the sweetness of the toffee. This variation is ideal for those who love a cookie with substantial texture and a hearty, satisfying bite.
Finally, for a truly gourmet experience, try a “Salted Caramel Swirl” modification. Before baking, after slicing the cookie logs, gently press a small caramel candy into the center of each cookie slice, allowing it to melt and create a gooey caramel core. A sprinkle of flaky sea salt on top of each cookie just before it goes into the oven will perfectly balance the sweetness and amplify the caramel notes, creating a sophisticated flavor profile reminiscent of artisanal salted caramels.
How to Prepare Toffee Butter Icebox Cookies
Step 1: Gathering and Preparing Your Ingredients
The foundation of any successful baking endeavor is meticulous preparation, and these Toffee Butter Icebox Cookies are no exception. Begin by gathering all the necessary ingredients listed in the recipe. It’s crucial to ensure your unsalted butter is at the perfect point of softness – it should yield to gentle pressure but not be melted or greasy. This consistency is vital for achieving a well-emulsified dough, which directly impacts the final texture of your cookies.
Simultaneously, preheat your oven to the specified temperature of 350°F (175°C). This ensures that as soon as your cookies are ready for baking, the oven will be at the optimal temperature for even cooking. Line your baking sheets with parchment paper; this not only prevents the cookies from sticking but also makes for incredibly easy cleanup, allowing you to focus more on enjoying the baking process itself. Having everything measured, softened, and ready to go streamlines the entire operation.
If you are opting for any add-ins like chopped nuts or chocolate chips, prepare those now as well. Ensure nuts are roughly chopped to your desired size, and if they are raw, consider toasting them lightly in a dry skillet for a few minutes until fragrant. This toasting step significantly enhances their flavor and adds a delightful crunch. Having all these elements prepped and ready will make the subsequent mixing stages smooth and efficient, leading to a more enjoyable baking experience.
Step 2: Creaming the Butter and Sugars
In a generously sized mixing bowl, combine the softened unsalted butter with both the granulated sugar and the light brown sugar. This is where the magic of creating a tender cookie begins. Use an electric mixer, starting on a low speed to incorporate the ingredients, and then gradually increase to medium speed. You’ll want to cream these together for a good 3-5 minutes, until the mixture is visibly lighter in color and possesses a fluffy, airy texture. This process of creaming incorporates air into the dough, which is essential for the cookies’ structure and delicate crumb.
Periodically, pause your mixer and use a rubber spatula to scrape down the sides and bottom of the bowl. This ensures that all the butter and sugar are thoroughly combined, preventing any pockets of unmixed ingredients from remaining. The fluffy consistency you’re aiming for means the sugars have started to dissolve into the butter, creating a stable base for the rest of the ingredients. This step is foundational for the cookie’s melt-in-your-mouth quality and prevents a gritty texture.
The goal here is not just to mix, but to aerate. The air bubbles introduced during this creaming stage will expand in the oven, contributing to the cookie’s rise and creating that characteristic light and tender bite. Over-creaming can sometimes lead to cookies that spread too much, while under-creaming can result in denser, heavier cookies. Aim for a consistency that looks like pale yellow whipped cream – that fluffy, light texture is your indicator that you’ve achieved the perfect emulsification.
Step 3: Incorporating the Wet Ingredients
Once your butter and sugar mixture has achieved that perfect fluffy consistency, it’s time to add the flavor enhancers. Carefully measure out one teaspoon of pure vanilla extract. Vanilla extract is a cornerstone of most cookie recipes, working not just to add its own distinct aroma and taste, but also to subtly amplify and round out the sweetness from the sugars and butter. Add this directly into the creamed butter and sugar mixture.
Continue mixing on medium speed for another minute or so, just until the vanilla extract is fully incorporated into the dough. You’ll notice the aroma intensifying as the vanilla blends in. It’s important not to overmix at this stage; the goal is simply to distribute the vanilla evenly. Overmixing can break down the structure you’ve built during the creaming process, potentially leading to tougher cookies.
At this point, your wet ingredients are beautifully combined, creating a fragrant and smooth base. The mixture should look glossy and homogeneous, with no visible streaks of vanilla extract. This stage sets the stage for incorporating the dry ingredients, and ensuring the wet ingredients are perfectly blended contributes to a cohesive dough that will bake up beautifully.
Step 4: Combining the Dry Ingredients
In a separate, medium-sized bowl, take your measured all-purpose flour and your baking soda. Whisk these two dry ingredients together thoroughly. Using a whisk is essential here, as it not only combines the flour and baking soda but also aerates them. This gentle aeration helps to prevent clumps and ensures that the baking soda is evenly distributed throughout the flour.
Even distribution of the baking soda is critical for consistent leavening. If the baking soda isn’t spread evenly, some parts of the cookie might rise more than others, leading to an uneven texture or even a slightly metallic taste in those concentrated areas. Take a minute or two to whisk until you no longer see distinct streaks of white baking soda against the flour, and the mixture appears uniformly pale.
This simple yet vital step ensures that every bite of your Toffee Butter Icebox Cookie will have the same perfect, tender crumb and ideal rise. Properly combined dry ingredients are key to a balanced dough structure. This preparatory step makes the subsequent addition to the wet ingredients much smoother and more integrated, setting you up for success in the final dough formation.
Step 5: Marrying Wet and Dry Mixtures
Now it’s time to bring your wet and dry ingredients together to form the cookie dough. Add the whisked flour mixture to the creamed butter and sugar mixture in the large mixing bowl. It’s best to add the flour gradually, perhaps in two or three additions, rather than all at once. This helps the dough incorporate more evenly and prevents excessive flour from flying out of the bowl.
Using your electric mixer on the lowest speed, begin mixing the ingredients. Mix just until the flour streaks begin to disappear. You are looking for a dough that is just combined; it should look cohesive, but you don’t want to overwork it. Overmixing at this stage develops the gluten in the flour too much, which can result in tough, dense cookies instead of the tender, melt-in-your-mouth treats you desire.
Stop mixing as soon as you no longer see any dry patches of flour. You might still see a few very small streaks, and that’s perfectly fine. The remaining slight imperfections will be worked out when you fold in the toffee bits. The dough should be thick and slightly shaggy at this point, indicating it’s ready for the final flavorful additions.
Step 6: Folding in the Toffee Bits and Optional Add-ins
With the main dough formed, it’s time to introduce the star ingredient: the toffee bits. Using a sturdy rubber spatula or a wooden spoon, gently fold the toffee bits into the dough. The term “fold” is important here; it means using a scooping motion from the bottom of the bowl up and over the ingredients, rather than vigorous stirring or beating. This preserves the air incorporated during the creaming process and prevents the toffee bits from breaking down.
If you’re including optional chopped nuts, such as pecans or walnuts, this is also the time to fold them in. Distribute them evenly throughout the dough as you fold in the toffee. The goal is to have a good, consistent distribution of these crunchy elements in every cookie. This step adds wonderful texture and flavor complexity to the final cookie, making each bite an exciting experience.
Continue folding just until the toffee bits and nuts are evenly distributed throughout the dough. Be careful not to overmix, as this can make the toffee bits start to melt prematurely or make the dough tough. You want distinct pieces of toffee and nuts suspended within the cookie dough, ready to bake into glorious little jewels of flavor and crunch. The dough should now be quite thick and studded generously with these delicious additions.
Step 7: Shaping the Dough for the Icebox Method
The “icebox” in Toffee Butter Icebox Cookies refers to the method of chilling the dough in a log shape before slicing. This technique makes it incredibly easy to bake uniform cookies whenever you desire. Take the finished cookie dough and divide it into two equal portions. This division helps in creating manageable logs that are easier to shape and chill effectively.
On a clean surface, or directly on a piece of plastic wrap, begin to shape each portion of dough into a log. Aim for a diameter of approximately 2 inches. You can achieve this by gently rolling the dough between your hands or by using the plastic wrap to help form a smooth, even cylinder. The log should be firm and compact, with no large air pockets. Ensuring an even diameter is key for consistent slicing and baking later on.
Once shaped, carefully wrap each dough log tightly in plastic wrap. Ensure there are no gaps or openings, as this will help maintain the dough’s shape and prevent it from drying out or absorbing any odors from the refrigerator. Take your time with this shaping process; a well-formed log will lead to perfectly round, uniform cookies when sliced, contributing to a professional and appealing final presentation.
Step 8: Chilling the Dough to Perfection
This chilling step is absolutely crucial for the success of Toffee Butter Icebox Cookies. Place the tightly wrapped dough logs into the refrigerator. The recommended chilling time is a minimum of 4 hours, but overnight is even better. This extended period in the cold allows the flavors to meld and deepen, resulting in a much more complex and satisfying cookie taste. Furthermore, the chilling solidifies the butter within the dough.
A cold, firm dough is much easier to slice cleanly, preventing the logs from crumbling or smearing. This firmness also controls the spread of the cookies during baking; the solid butter melts more slowly, allowing the cookies to bake up thicker and chewier rather than spreading too thin. Think of this chilling time as an essential part of the flavor development and texture transformation process.
If you’re short on time, you can accelerate the chilling process by placing the wrapped logs in the freezer for about 1 to 1.5 hours, or until they are firm but not frozen solid. However, for the absolute best flavor development, an overnight chill in the refrigerator is highly recommended. This patient approach to chilling truly pays dividends in the final cookie quality.
Step 9: Preparing the Oven for Baking
As you get ready to bake your delicious Toffee Butter Icebox Cookies, the very first step is to ensure your oven is preheated to the correct temperature. Set your oven to 350°F (175°C) and allow it to reach that temperature fully. Using an oven thermometer can be a helpful tool to verify accuracy, as oven thermostats can sometimes be a bit off.
While the oven preheats, take this time to prepare your baking sheets. As mentioned in Step 1, lining them with parchment paper is highly recommended. This not only prevents sticking, which can be a significant problem with butter-heavy cookies, but also ensures even baking and makes for incredibly easy cleanup. If you don’t have parchment paper, you can lightly grease and flour your baking sheets, but parchment paper offers superior results for cookies.
Having the oven preheated and the baking sheets ready before you start slicing the dough ensures a seamless transition from preparation to baking. This timing prevents the sliced dough from sitting out at room temperature for too long, which could cause it to soften and spread excessively during baking. A properly preheated oven is key to achieving that perfect balance of crisp edges and chewy centers that define these delightful cookies.
Step 10: Slicing and Baking the Cookies
Once your dough logs have had ample time to chill and firm up, it’s time to slice them into individual cookies. Unwrap one log of dough at a time, keeping the other log chilled in the refrigerator until you’re ready for it. Using a sharp knife, carefully slice the log into cookies that are approximately 1/4 inch thick. It’s important to use a sharp knife for clean cuts; a dull knife can cause the log to squish and distort the cookie shape.
Arrange the sliced cookies on your prepared baking sheets. Leave about 1 to 2 inches of space between each cookie, as they will spread slightly during baking. This spacing ensures they bake evenly and don’t run into each other. You can gently reshape any cookies that might have become slightly distorted during slicing, aiming for a uniform thickness for consistent baking.
Place the baking sheets into your preheated oven. Bake for approximately 10-12 minutes. The exact baking time will depend on your oven and the thickness of your cookies. You are looking for the edges to be lightly golden brown, while the centers should still appear soft and slightly underbaked. They will continue to cook and firm up as they cool on the baking sheet. Avoid overbaking if you desire chewy centers; they should look just a touch too soft when you remove them from the oven.
Step 11: Cooling and Enjoying Your Cookies
As soon as the baking time is up, carefully remove the baking sheets from the oven. The cookies will be delicate and soft at this stage. Let them cool directly on the hot baking sheets for about 5-10 minutes. This resting period allows the cookies to set up and firm up sufficiently so that they can be moved without breaking. The residual heat from the baking sheet will continue to cook the centers gently, achieving that perfect chewy texture.
After this initial cooling period on the baking sheets, use a thin spatula to carefully transfer the cookies to a wire cooling rack. Placing them on a wire rack allows air to circulate around all sides of the cookies, ensuring they cool evenly and preventing the bottoms from becoming soggy. Continue this process until all your baked cookies have been transferred to the cooling rack.
Once the cookies have cooled completely on the wire rack, they are ready to be enjoyed! The texture will be wonderfully chewy in the center with slightly crisp edges, and the toffee will have softened into delightful caramel pockets. These cookies are best enjoyed fresh, but they also store well for later. Savor the fruits of your labor and enjoy the delicious homemade taste!
Pro Tips for Toffee Butter Icebox Cookies
Ingredient Temperature is Key: Ensure your butter is truly softened to room temperature, not melted. This is critical for proper creaming, which incorporates air for a lighter cookie texture. Similarly, the eggs (if used in other recipes) should also be at room temperature for better emulsification.
Don’t Overmix the Dough: Once you add the flour, mix only until just combined. Overmixing develops gluten, leading to tough cookies. Stop as soon as you no longer see dry flour streaks.
Chill Time is Non-Negotiable: The chilling step for the dough logs is crucial. It allows the flavors to meld and intensifies the toffee flavor, and it firms up the dough, preventing excessive spreading during baking and making slicing much easier. Aim for at least 4 hours, or preferably overnight.
Uniform Slicing Matters: For evenly baked cookies, slice the chilled dough logs into uniform thicknesses. A sharp knife is your best friend here; a dull knife will tear the dough and result in uneven cookies.
Watch Them Closely While Baking: Oven temperatures can vary. Keep a close eye on your cookies during the last few minutes of baking. They are done when the edges are lightly golden and the centers still look soft. They will continue to set as they cool.
Serving Suggestions for Toffee Butter Icebox Cookies
Decoration
For a simple yet elegant touch, consider a light drizzle of melted dark or milk chocolate over the cooled cookies. This adds a visual appeal and an extra layer of decadent flavor. You can also sprinkle a few extra toffee bits or even some flaky sea salt onto the chocolate drizzle before it sets for a sophisticated finish. A dusting of powdered sugar can also give them a festive, snow-kissed appearance, especially during the holiday season.
Side Dishes
These cookies are fantastic on their own, but they pair exceptionally well with a variety of beverages and desserts. A classic pairing is a cold glass of milk, which perfectly balances the sweetness of the toffee. For coffee lovers, a rich, dark roast coffee or a creamy cappuccino complements the buttery notes of the cookies beautifully. A warm cup of hot chocolate is another comforting accompaniment, especially during colder months, creating a truly indulgent experience.
Creative Serving Ideas
Elevate your cookie presentation by serving them alongside a scoop of high-quality vanilla bean ice cream or a rich salted caramel ice cream. The contrast in temperature and texture is divine. You could also create a “cookie charcuterie” board by arranging these cookies alongside other baked goods, fresh fruits like berries, and perhaps some chocolate truffles for a delightful dessert spread. For a more unique presentation, crumble some of the cooled cookies and use them as a topping for a fruit crumble or a trifle, adding a lovely toffee crunch.
Preparation & Storage
Storing Leftovers
To maintain the perfect texture of your Toffee Butter Icebox Cookies, store them in an airtight container at room temperature. Properly stored, they should remain fresh and delicious for up to a week. Ensure the container is truly airtight to prevent the cookies from drying out or becoming stale. Adding a piece of parchment paper between layers can also help prevent sticking.
Freezing
These cookies freeze exceptionally well, making them perfect for baking ahead. Once completely cooled, arrange the cookies in a single layer on a baking sheet and freeze until solid. Then, transfer the frozen cookies to a freezer-safe airtight container or a heavy-duty freezer bag, with parchment paper between layers to prevent sticking. They can be stored in the freezer for up to three months.
Reheating
If you wish to enjoy your stored or frozen cookies warm and soft again, a quick reheat is all you need. For cookies stored at room temperature or in the refrigerator, a brief 10-15 second zap in the microwave can revive their chewy texture. If reheating frozen cookies, allow them to thaw slightly at room temperature first, then microwave for about 15-20 seconds. Be cautious not to overheat, as they can quickly become too soft or even melt.
Frequently Asked Questions
-
Can I prepare the dough for Toffee Butter Icebox Cookies ahead of time, and if so, how long will it last?
Absolutely! The beauty of the icebox cookie method is its make-ahead convenience. You can prepare the dough, shape it into logs, and wrap it tightly in plastic wrap. Refrigerated, the dough will remain fresh and perfectly usable for up to 1 week. This allows you to bake a fresh batch of cookies whenever the craving strikes, without having to mix a new batch each time. Just ensure it’s well-wrapped to prevent drying out.
-
What are the best substitutions for ingredients in this recipe, especially for dietary needs like gluten-free or dairy-free?
For a gluten-free version, you can confidently substitute the all-purpose flour with a good quality gluten-free all-purpose flour blend that contains xanthan gum. Ensure all your other ingredients, including the toffee bits, are certified gluten-free. For a dairy-free adaptation, replace the unsalted butter with a high-quality dairy-free butter alternative or a solid coconut oil. When using coconut oil, be mindful that it can slightly alter the texture and add a subtle coconut flavor, so a good butter alternative is often preferred for a more neutral taste.
-
How do I ensure my Toffee Butter Icebox Cookies have the perfect chewy texture, and what is the secret to preventing them from becoming too hard or cakey?
Achieving the perfect chewy texture is all about managing moisture and baking time. Firstly, don’t overmix the dough after adding the flour; this develops gluten and leads to toughness. Secondly, the chilling step is crucial as it solidifies the butter, controlling spread. Most importantly, watch your cookies closely during baking. They should be removed from the oven when the edges are lightly golden brown, but the centers still look soft and slightly underbaked. They will continue to cook and set on the hot baking sheet for a few minutes after removal, achieving that ideal chewy center with slightly crisp edges. Overbaking is the quickest route to hard, cakey cookies.